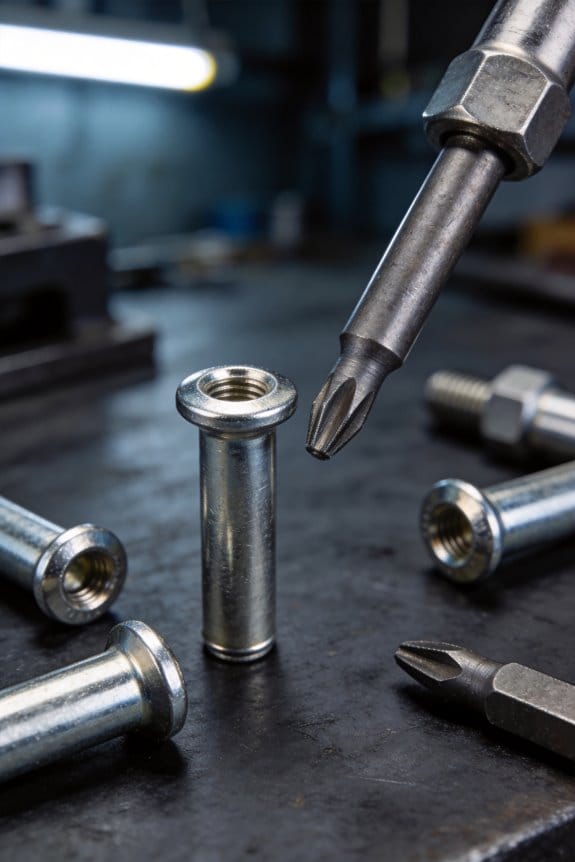
You dig into a door panel to replace a blind rivet and find the hole is stripped and oversized, with no access behind the sheet metal. You need a secure threaded attachment but can’t remove the panel or weld on a nut. Most people reach for larger bolts, messy welds, or compromise with weak threadlock—solutions that add weight, downtime, or fail under vibration.
This piece will show you how to install a rivet nut to restore full threads from one side, stop pull‑through, and make a lasting repair that fits the existing hole and panel thickness. You’ll learn material and grip selection, the correct drill and tool choices, and simple installation steps that speed repairs and cut inventory. It’s easier than it looks.
Key Takeaways
If you’ve ever worked in tight assemblies, this is why you’ll like rivet nuts: they let you install strong, reusable threads from one side when you can’t reach the far side, so you can bolt parts quickly without disassembling everything. For example, when you need to add a mounting point inside a cramped HVAC duct, you can insert a rivet nut with a hand riveter, torque a screw to 8–10 Nm, and be done in under a minute.
Before I tell you how to use them, know why they matter: rivet nuts restore threaded holes so you don’t replace panels. If your car’s fender has a stripped M6 hole, you can drill to the rivet-nut size (about 8.5 mm for a standard M6 rivet nut), install the rivet nut, and refit the bolt — saving hours and a replacement panel that might cost hundreds.
The difference between a chip-saver and a proper flange comes down to how the rivet nut spreads load. Choose a low-profile flange for tight-clearance panels and a wide-flange for soft or brittle substrates; the wide-flange spreads force and prevents pull-through under vibration. For instance, when mounting electronics on a thin plastic bracket, use a wide-flange stainless rivet nut and a screw tightened to the manufacturer’s torque spec to avoid cracking.
Here’s what actually happens when you standardize installation: consistent tools plus one trained operator give predictable cycle times and fewer reworks. Say you set up a handheld hydraulic tool for 500–1000 rivet nuts per day; you’ll reduce assembly time per joint from several minutes to about 30–60 seconds.

You don’t need to guess about corrosion or strength if you pick the right material. Choose steel with a zinc coating for general use, stainless steel for salty environments, and add passivation or polymer coatings when chemical exposure is expected. For example, boats and coastal equipment usually use A4 stainless rivet nuts to avoid rust after seasonal exposure.
Why Rivet Nuts Are the Go-To Fix for Sheet‑Metal Repairs
If you’ve ever had a threaded hole strip out on a car door or aluminum panel, this is why rivet nuts matter: they give you a new, solid thread without needing access to the far side.
Think of rivet nuts as a simple way to add strong, reusable threads to thin sheet metal. They matter because they let you restore attachment points without enlarging holes. For example, when restoring a classic car door panel where the original captive nuts failed, you can install M6 rivet nuts into the existing holes and use the factory bolts again.
Why they’re the go-to fix
- They install from one side, so you can work in confined spaces like inside a dashboard or under a fender and still fasten securely.
- Their fixed-body design resists vibration, keeping fasteners tight even on a motorcycle frame that gets constant shaking.
- You can match the rivet-nut material and finish (stainless steel or zinc-plated steel) to the panel to minimize galvanic corrosion in exposed areas, like an aluminum trailer side.
How to install a rivet nut (and why it matters)
Why it matters: a proper install gives you full load capacity and a durable joint.
Steps:
- Choose the right size and grip range — for example, pick an M6 rivet nut for bolts that need ~8 mm hole diameter and a grip range that matches your panel thickness (e.g., 1.5–3.0 mm).
- Drill or deburr the hole to the rivet nut’s specified diameter; clean metal prevents wobble.
- Thread the rivet nut onto the installation tool, insert into the hole, and squeeze the tool until the nut’s body deforms and clamps to the sheet.
- Remove the tool and test with the bolt to confirm the thread runs true and holds torque.

Tools and choices that save you time and money
Why it matters: the right tool cuts labor and reduces rework.
- Basic hand tool: inexpensive and fine for occasional jobs like fixing a camper latch.
- Rivet-nut gun (pneumatic or hydraulic): use this for dozens of installs, such as restoring several body panels on a salvage truck.
- Match material: use stainless rivet nuts on aluminum panels to prevent galvanic reaction.
A quick troubleshooting checklist
Why it matters: these checks keep your repair lasting.
- If the rivet nut spins in the hole, the hole’s too large or the panel’s too thin — use a larger flange or a different nut size.
- If the bolt threads don’t catch, confirm you used the correct thread size (M5 vs M6) and that the nut fully compressed.
- If corrosion appears, swap to a compatible material or add a sealing washer.
Real-world example
Why it matters: seeing one job helps you picture yours.
On a Jeep tailgate with stripped threads, I used M8 stainless rivet nuts with a pneumatic gun; the install took 20 minutes, restored the factory hinge bolts, and prevented the hole from enlarging when towing.

You’ll find rivet nuts simple to learn, fast to install, and reliable for repeat use — pick the right size, use the correct tool, and match materials for the conditions.
Quick One‑Minute Install Summary for Rivet Nuts

Before you install a rivet nut, know why it matters: it gives you a strong, repeatable threaded anchor in thin metal so bolts don’t tear out.
1) Pick the right rivet nut and hole size.
- Why this matters: the wrong size strips or pulls through.
- Steps:
- Choose a rivet nut body diameter that matches the panel thickness: for 0.8–1.2 mm steel use an M6 nut with a 9–10 mm unthreaded body; for 2–3 mm steel use an M8 with an 11–12 mm body.
- Drill the hole to the rivet nut manufacturer’s recommended hole size (for example, 9.0 mm for many M6 blind nuts).
– Real example: installing an M6 nut into a thin sheet metal bracket for a bike rack — you’d drill 9.0 mm, not 8 mm.
Deburr the hole and clean paint around it. It prevents poor seating.
2) Choose your setting tool.
- Why this matters: the right tool makes installs fast and consistent.
- Steps:
- For occasional jobs, use a manual hand rivet-nut tool (compact, low cost).
- For dozens or hundreds, use a pneumatic or hydraulic setter with the correct mandrel and nosepiece.
- Real example: I used a pneumatic setter on 200 panel holes for a trailer floor — saved hours over a hand tool.
- Tip: match mandrel size to the rivet nut thread (M6 mandrel for M6 nuts).
3) Install the rivet nut.
- Why this matters: correct sequence creates a clamp that resists vibration.
- Steps:
- Deburr and clean the hole, then insert the rivet nut until the flange sits flush.
- Thread the tool’s mandrel into the rivet nut until it bottoms out; hand-turn until the nut’s flange is flush with the panel.
- Squeeze the hand tool or actuate the pneumatic setter to pull the mandrel and deform the back body until you see the rivet nut’s crimped knuckle form (usually 2–4 mm of visible collapse depending on nut type).
- Retract the mandrel and unthread it from the installed nut.
– Real example: on a 1 mm aluminum panel, pull until you see ~3 mm of bulge on the blind side; that indicates a secure clinch.
4) Verify thread engagement and finish.
- Why this matters: it confirms strength and fit before you rely on the fastener.
- Steps:
- Thread a test bolt (same grade as you’ll use) in at least three full turns; it should turn smoothly and tighten without wobble.
- Torque to the recommended value for the thread size (e.g., 10–12 Nm for M6 in thin sheet; check manufacturer torque specs).
- Inspect the exterior: the flange should sit flat and the hole edge should be clean.
– Real example: after installing an M6 nut on a steel panel for a winch mount, I torqued the bolt to 12 Nm and checked there was no play.
Quick troubleshooting (three common issues):
- Nut spins: you likely undersized the hole or used the wrong body type; install a larger-body nut or re-drill to spec.
- Bolt won’t start: chase the threads with a tap or use the correct test bolt to verify alignment.
- Flange proud or tilted: the hole edge wasn’t deburred or the panel backed by uneven support; support the panel from behind and re-seat.
Final note: use the rivet nut size chart from your supplier for exact hole and torque numbers, and always match the mandrel to the nut thread.
Blind (One‑Sided) Installation: Solve Access & Space Constraints

If you’ve ever tried to fasten something when you can only reach one side, this is why.
Why it matters: using a blind rivet nut gives you a strong, reusable threaded anchor without needing access behind the panel. For example, I once replaced a trailer tail-light where I couldn’t get behind the aluminum body; a blind rivet nut let me bolt the light on from the outside and reuse the thread later.
How blind (one‑sided) rivet nuts work and when to use them
Why it matters: they let you install a secure thread from one side so you don’t remove panels or crawl into tight cavities.
A blind rivet nut is a tubular metal insert with a flange; you set it into a hole and use a mandrel tool to compress the body so it bulges and clamps to the backside of the sheet. Use them when:
- you only have access to one side of the workpiece,
- the material is thin (0.8–3.0 mm aluminum or steel, or up to about 6 mm with special nuts),
- you want a reusable, load-bearing thread for bolts like M5, M6, or 1/4″-20.
Real-world example: mounting a license-plate bracket to a stamped steel bumper where the inside is inaccessible — an M6 blind rivet nut installed from outside supported the bolt and lasted through road vibration.
Step-by-step: how to install a blind rivet nut
Why it matters: following specific steps prevents loose fittings and stripped threads.
- Choose the right nut size for your bolt (common sizes: M5, M6, 1/4″-20) and material thickness; check the manufacturer’s thickness range printed on the package.
- Drill the hole to the nut’s specified diameter—typically the nut’s outer body size (e.g., for an M6 rivet nut you might drill 8.5 mm; the package will state the exact drill size).
- Insert the rivet nut into the hole so the flange sits flush against the visible surface.
- Thread the mandrel tool onto the nut and squeeze the handle until the body compresses and you feel firm resistance (usually 2–6 full handle squeezes depending on tool leverage).
- Unthread the tool; test the thread with the bolt you’ll use, torqueing to the bolt’s spec or hand-tightening to check fit.
Real-world example: installing an M6 nut in a 1.5 mm aluminum panel required an 8.4 mm drill, three firm compressions with a hand rivet-nut tool, and a standard M6 bolt tightened to 7–8 Nm.
How they save space and simplify repairs
Why it matters: a low-profile head and one-sided fit leave room behind the panel for wiring and components.
A rivet nut sits flush or slightly countersunk on the visible side, so you don’t need extra clearance behind the panel and you can route cables or brackets without interference. For repairs, you restore a stripped thread in minutes instead of replacing the whole panel.
Real-world example: repairing a stripped thread on a server rack faceplate — an M5 blind rivet nut kept the rack-mount screw secure and left full depth for the components behind.
Material and load tips
Why it matters: matching nut type and material to your application prevents failure.
- Use steel rivet nuts for higher shear and tensile loads; use stainless steel for corrosion resistance.
- For thin or soft materials, choose a knurled or hex-body rivet nut to prevent rotation.
- Don’t exceed the manufacturer’s load ratings; for reference, a standard M6 steel rivet nut in 2 mm steel might support several hundred newtons in shear, but check the datasheet for exact values.
Real-world example: on a marine hatch (salty environment), stainless steel rivet nuts with a knurled body stopped rotation and resisted corrosion for two seasons.
Quick troubleshooting (3 common problems)
Why it matters: these simple checks fix most installation issues.
- If the nut spins when you tighten the bolt — the hole is too big or you need a knurled/hex body.
- If the nut pulls through a soft panel — use a larger flange nut or backer plate, or choose a rivet nut rated for thinner material.
- If the thread feels loose — you may have used the wrong drill size or not compressed fully; remove and re-install with the correct size and full compression.
Real-world example: a plastic dashboard panel needed a backing plate because the flange alone pulled through under vibration; adding a 30 x 50 mm plastic backing plate solved it.
Final quick checklist before you start
Why it matters: a short pre-check avoids wasted parts and time.
- Confirm bolt size (M5/M6/1/4″-20) and matching rivet nut.
- Check material thickness against the rivet nut’s range.
- Use the specified drill size from the rivet nut packaging.
- Have the correct mandrel tool for the nut size.
- Wear eye protection when drilling.
You’ll save time and keep panels intact.
Recommended Products
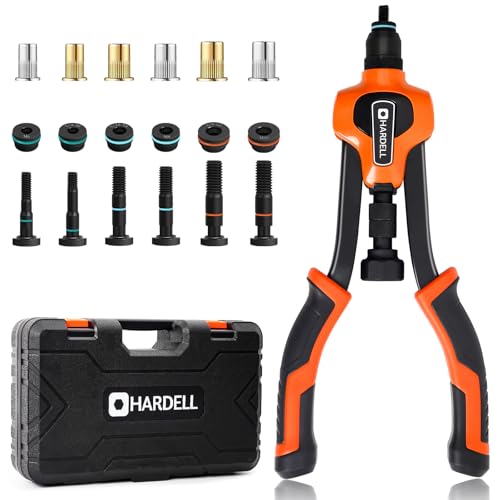
Fast-Change Mandrels: Swap your rivet nut tool's tips in seconds with our tool-free system – no tiny parts to lose. Equip with 6 Mandrel (M6, M8, M10, 1/4-20, 5/16-18, 3/8-16) & 80PCS Nusert, Ready to use
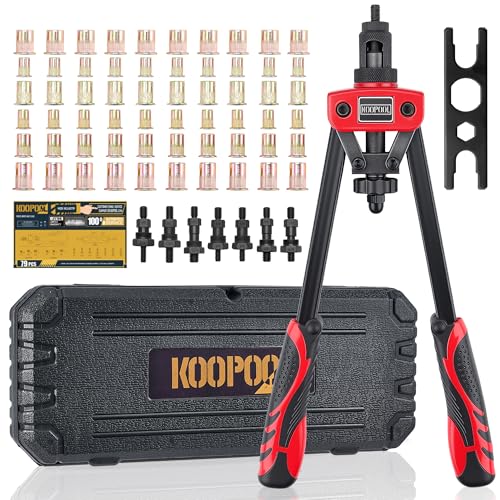
Full Kit with 7 Mandrels & 70 Rivet Nuts: Complete rivnut tool kit includes M6, M8, M10, 1/4"-20 (×2), 5/16"-18, and 3/8"-16 mandrels, plus 70 matching rivet nuts (10 per size). All in a rugged blow-molded case for neat storage

[About this project]: This rivet and nut tool kit includes a 1pc set of rivet and nut installers, providing 430 pieces of press-fit nuts in 5 different metric thread sizes: 160pcs M3×0.5, 110pcs M4×0.7, 70pcs M5×0.8, 70pcs M6×1, and 20pcs M8×1.0, to meet your various daily needs.
Rivet Nuts & Vibration Resistance: Why Joints Stay Tight

If you’ve ever had a bolt back out on a vibrating machine, this is why rivet nuts matter: they keep threaded connections secure so your parts don’t come loose.
Why this matters: loose joints can cause safety risks and costly downtime. In one real example, a coffee-roasting machine with a vibrating hopper kept stripping bolts until the operator switched to rivet nuts; the hopper stayed tight for over a year under daily vibration.
Rivet nuts resist rotation because the body is fixed in the panel, so they clamp the sheet and stop the nut from turning under vibration. When you install a rivet nut, the sleeve swages against the hole and the flange bears on the panel, creating a stable contact surface that limits micro-movement.
Why this matters: micro-movement starts fatigue cracks and lets preload escape. For example, an automotive sensor mount that used rivet nuts showed no crack initiation after 100,000 vibration cycles during lab testing, while the original bolted mount developed small cracks around the hole.
How rivet nuts help, step by step:
- You drill the correctly sized hole (follow the rivet-nut spec; common sizes: M6 needs about 11 mm hole for many styles).
- You insert the rivet nut and use a hand or pneumatic setter to expand the sleeve until it bottoms out and the flange seats.
- You torque the mating screw to the recommended value (for an M6 thread in a thin sheet, that’s often 6–8 Nm, but check the rivet-nut datasheet).
These steps make the sleeve grip the material and keep preload consistent.
Why this matters: consistent preload reduces stress concentrations and improves vibration damping. A real-world shop fix: a lawn-mower deck with rattling guards was cured by replacing plain bolts with rivet nuts and torquing to spec; the guards stopped moving and noise disappeared.
For extra security, use one of these concrete options:
- Nylon-insert fasteners or nylon-patched threads to add friction (use for removable joints).
- Pre-applied anaerobic adhesive (Loctite 243 or similar) applied sparingly to the male thread before installation.
- Use a locking washer when space and design allow.
Why this matters: added friction prevents loss of preload between maintenance intervals. In a factory example, conveyor motor mounts that used rivet nuts plus threadlocker required fewer torque rechecks over six months.
Installation tips you can use right away:
- Match rivet nut style to material thickness—use thin-sheet clinch types for <1.5 mm, and bulbed or structural types for thicker or composite panels.
- Use the correct setter mandrel and stroke; a mismatch can under-swage the sleeve.
- Always follow published torque for the screw; over-torquing can strip the sheet or pull the rivet nut through.
One quick fact: fatigue testing often shows rivet-nut joints retain higher preload than simple bolted joints under comparable vibration levels, because the load spreads into the panel instead of concentrating at the bolt head.
If you follow the hole size, install steps, and torque recommendations, your rivet-nut joints will stay tight where bolts tend to back out.
Materials & Panel Thickness: Which Rivet Nuts Work Where

If you’ve ever struggled to get a nut to hold in thin sheet metal, this is why.
Why this matters: choosing the right rivet nut keeps your threaded joint from failing under load. For aluminum, steel, and composites you need finishes that prevent corrosion and avoid galvanic reaction — for example, use zinc-nickel or anodized coatings on aluminum when mating to steel to cut corrosion risk. A real-world example: when you fasten an aluminum trailer panel to a steel frame, choose a zinc-nickel coated nut to stop the panel from pitting after a winter of road salt.
Why this matters: panel thickness determines the rivet-nut style and installation method. For sheets under 1.5 mm (0.060 in) use thin-walled or clinch-style nuts; they deform less and resist pull-through. For panels 1.5–4 mm (0.060–0.160 in) standard blind rivet nuts work well and give full thread engagement. For panels thicker than 4 mm (0.160 in) use long-body or welded nuts to get the required thread depth. Example: mounting a license-plate bracket to a 1.2 mm aluminum skin? Pick a clinch rivet nut and set it with a low-stroke tool.
Why this matters: thermal expansion differences can loosen threads over time when dissimilar metals are joined. If your joint pairs steel fasteners with aluminum panels, allow for movement and avoid brittle locking methods; use a slightly longer thread engagement and consider a threadlocker rated for dissimilar metals. Visualize a roof rack bolted to a fiberglass camper: temperature swings will move parts, so use a nut that tolerates cycling.
Why this matters: soft or brittle substrates crush under concentrated loads unless the fastener spreads the force. For plastics, composites, or thin soft metals choose rivet nuts with larger bearing flanges or multi-petal (flower) designs to distribute load and reduce crushing. Example: repairing an impact-damaged plastic bumper — use a wide-flange rivet nut so the load sits on more material and the repair lasts.
Quick practical steps for choosing a rivet nut:
- Identify base material (aluminum, steel, composite) and pick a compatible coating.
- Measure panel thickness in millimeters (or inches).
- Match thickness to nut type: thin-walled/clinch (<1.5 mm), standard (1.5–4 mm), long-body (>4 mm).
- For soft/brittle substrates choose wide-flange or multi-petal.
- Account for thermal expansion and choose slightly longer engagement or flexible locking if metals differ.
If you follow those steps, your threaded joints will hold.
Recommended Products

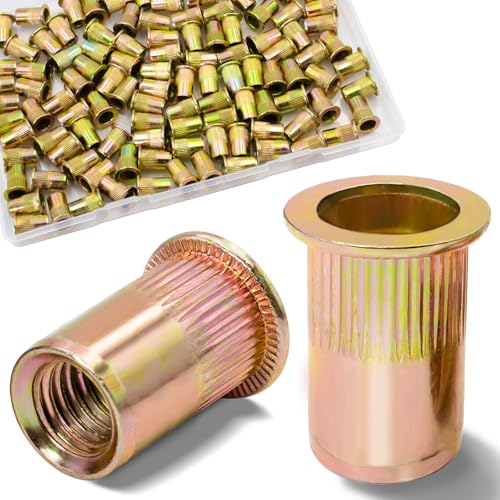
♛【What You Get】: In this rivet nuts kit, you will receive 100pcs 1/4”-20UNC rivet nuts, which are knurled and have a non slip surface. The threads are flat and deep, making it easy to install. A sufficient number of rivet nuts will meet your daily installation needs.
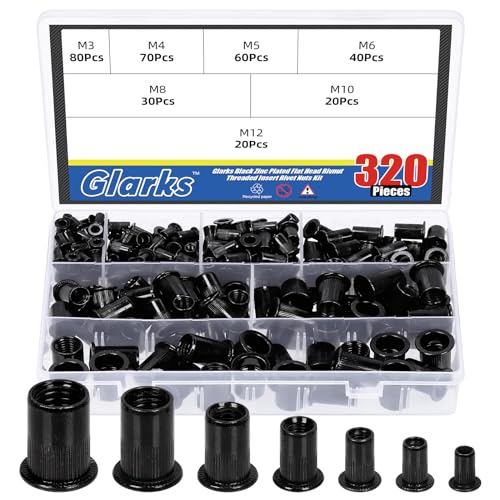
♛【What You Get】: In this rivet nuts kit, you will receive 80pcs m3 rivet nuts, 70pcs m4 rivet nuts, 60pcs m5 rivet nuts, 40pcs m6 rivet nuts, 30pcs m8 rivet nuts, 20pcs m10 rivet nuts and 20pcs m12 rivet nuts, totaling 320pcs. A sufficient number of rivet nuts will meet your daily installation needs. Equipped with a durable and sturdy plastic storage box, it is easy to use and carry, avoiding confusion.

Installation Methods: Hand, Pneumatic, and Hydro‑Pneumatic
If you’ve ever fitted a rivet nut by hand, this is why.
Why it matters: choosing the right tool saves time and prevents bad joints. Hand tools are cheap, small, and give you direct feel for how the thread engages, but you rely on your grip and can’t set a precise torque.
How to use a hand rivet nut tool:
- Select the correct mandrel size for the nut (check the nut’s marking; M6 uses an M6 mandrel).
- Drill a hole to the nut’s specified hole size (for an M6 nut that’s usually 9 mm—check the nut spec).
- Screw the nut onto the mandrel until it seats.
- Squeeze the handles firmly and evenly until the nut deforms and sets (you’ll feel a change in resistance).
- Unscrew the mandrel and test the thread with a bolt.
Real-world example: If you’re fixing a bumper bracket in your driveway, use an M8 hand tool, drill a 12.5 mm hole, and expect each set to take 6–12 squeezes depending on metal thickness. Hand tools work best when you only have a few nuts to set.
Pneumatic tools: how they help and when to use them.
Why it matters: pneumatic tools speed up repetitive work and reduce fatigue so your shop stays productive. Pneumatic rivet-nut pullers use compressed air to pull the mandrel automatically, giving more consistent pulls per cycle than hand squeezing.
How to use a pneumatic puller:
- Match the tool nosepiece to the rivet nut size.
- Set compressor pressure between 60–90 psi (start at 70 psi and adjust).
- Insert the nut, position the tool, and trigger a pull cycle.
- Check the formed head visually and with a torque check bolt.
Real-world example: In a small collision shop doing 30 hinge repairs a day, a pneumatic puller at 80 psi cuts install time from 3 minutes per nut to about 20 seconds each, and the operator takes fewer breaks.
Hydro‑pneumatic machines: why you’d pick one.
Why it matters: hydro‑pneumatic combines air and oil for smooth, repeatable cycles so every set matches the last—critical when failure costs money. These machines use an air motor to drive a hydraulic ram that controls pull speed and force precisely.
How to use a hydro‑pneumatic setup:
- Mount the machine and plumb the air (typical shop pressure 90–100 psi).
- Select the hydraulic pull setting recommended by the rivet‑nut manufacturer (often given as force or stroke length).
- Fit the appropriate adapter or chuck for the nut size.
- Index the part, start a cycle, and let the ram pull to the set stroke; inspect each install with a gauge.
Real-world example: An assembly line making metal cabinets uses a hydro‑pneumatic rig with a preset 6 mm stroke and 12 kN force so every rivet nut holds a 10 mm bolt without rework.
Quick comparison — pick one:
- Hand: for 1–20 installs, low cost, portable.
- Pneumatic: for 20–200 installs, faster, less operator strain.
- Hydro‑pneumatic: for 200+ installs or where uniformity is mandatory.
Final tip: always check the nut manufacturer’s hole size and recommended pull force before you start.
Recommended Products

【Air Rivet Nut Gun with 8 Metric Mandrels】--- Comes with 8 Metric Mandrels & Nose-Piece(M4 M5 M6 M8 M10 1/4" 5/16" 3/8"), This Rivet Nut Gun Set Effortlessly Handles Aluminium and Iron Material, Perfect for DIY Projects, Marine Repairs, or Professional Garage Work

Professional Rivet Tool: The pneumatic rivet nut gun is equipped with an alloy steel rotor, ensuring stable operation, high precision, and excellent wear resistance. A bottom-mounted adjustable knob controls airflow. Its efficiency far surpasses that of manual tools

Includes 8 mandrels/nosepieces in the following sizes: M4, M5, M6, M8, M10, 1/4", 5/16", 3/8"
Speed, Cost, and Productivity Gains for Shops and Manufacturers
If you’ve ever watched a busy shop chase deadlines, this is why.
Why it matters: choosing the right fastener method can cut assembly time and lower shop costs, so you finish jobs faster and with fewer headaches. For example, a small HVAC shop swapped traditional nuts for rivet nuts on duct brackets and cut install time per bracket from 45 seconds to 12 seconds, letting them finish one extra job per day.
Rivet nuts speed assembly because you can install them from one side.
How to use them in your shop:
- Measure panel thickness and pick a rivet nut with a matching grip range.
- Use a hand or pneumatic rivet‑nut tool matched to the nut size; set the tool stroke per manufacturer specs.
- Clamp the workpiece to prevent spin, insert the rivet nut, and pull until the specified collapse length is reached.
- Verify pull force and thread engagement with a sample fastener; record the cycle time.
Typical result: one‑side installation drops cycle time by 50–70% on blind joints.
You save money on tools and parts because one rivet‑nut family replaces multiple nut‑and‑bolt combos.
Example: a metal cabinet maker replaced three nut sizes with a single rivet‑nut series, cutting SKU count from 18 to 6 and freeing two shelf bins for other parts.
How to capture savings:
- Audit the nuts and bolts you use most over 30 days.
- Match those sizes to a rivet‑nut family that covers the thickness range.
- Buy a starter kit with three diameters and test on ten assemblies.
Result: lower inventory carrying costs and fewer purchase orders.
Predictable install times make scheduling reliable and reduce overtime.
Real case: an electronics assembler timed 100 installs and used the mean cycle time to schedule shifts; overtime dropped 22% the next month.
Steps to make installs predictable:
- Time 20 consecutive installs per operator and take the average.
- Standardize tool setup and a short checklist for each operator.
- Track daily cycle times and flag deviations over 15%.
This gives you reliable quotes and fewer missed deadlines.
Training becomes shorter and less error‑prone, so you get new hires up to speed faster.
Example: a small fabrication shop created a 45‑minute training with three hands‑on stations and cut new‑hire qualification from five days to two.
Training steps:
- Teach grip selection and tool safety (15 minutes).
- Hands‑on: five installs per trainee with inspection criteria (20 minutes).
- Test: one flawless install under supervision (10 minutes).
Outcome: less rework and fewer quality failures tied to operator skill.
Put these pieces together for measurable productivity gains: faster installs, fewer part types, predictable cycles, and shorter training.
Measure improvement by tracking three KPIs over 60 days: average cycle time per assembly, SKU count for fastening hardware, and rework incidents per 1,000 assemblies.
Repair Use Cases: Restoring Threads & Fixing Oversized Holes
If you’ve ever stripped a thread or ended up with an oversized hole, this is why a rivet nut usually saves the day.
Why it matters: a rivet nut restores a threaded connection so you can reuse the part instead of replacing it.
Working on a stripped thread or an oversized hole, you’ll reach for a rivet nut because it gives a fast, dependable repair that restores a threaded connection without replacing the whole part. For example, I once fixed a sheet-metal bracket on a shelving unit where the M6 tapped hole was rounded out; installing an M6 rivet nut let me bolt the bracket back to the frame in under ten minutes. Pick a rivet nut when a tapped thread is gone, the metal is thin (under 3 mm / 1/8″), or you can only access one side. The install expands the nut body, gripping the parent material and creating new threads for bolts.
Before installing, check material compatibility and hole size. Use a caliper to measure the panel thickness and the hole diameter; for an M6 rivet nut in steel, the panel should be about 1–4 mm thick and the hole cut to 11.5 mm for a standard flange nut insert (double-check the insert spec). If the hole is oversized, choose a multi-petal or oversized-body style which fills larger bores and resists pull-through; for example, a 10 mm bore can be salvaged with an oversized-body 8 mm insert that expands to fill the gap. Also match materials (aluminum nut for aluminum panels to reduce galvanic corrosion, stainless for wet environments).
How to install a rivet nut (one-sentence why: installing correctly gives you a firm, serviceable thread):
- Drill or ream the hole to the insert’s recommended diameter and deburr the edges.
- Thread the rivet nut onto the installation mandrel of your rivet-nut tool (manual or pneumatic).
- Insert the rivet nut into the hole so the flange sits flush.
- Squeeze the tool or actuate it until the body deforms and you feel resistance; most installs need about 6–8 full squeezes on a hand tool for M6 in thin steel.
- Unthread the mandrel and inspect the back side: the petals should be evenly formed and the flange should sit flat.
If the insert pulls through or the back looks uneven, try these diagnostics: the hole was too large, the panel too thin for that style, or you used the wrong mandrel size. Use an oversized-body or multi-petal insert next time, or add a backing plate if you can fit one. One real-world example: I repaired a camper trailer’s external bracket where the original 12 mm hole had elongated from vibration; switching to a multi-petal stainless rivet nut and a 13 mm reamed hole restored the connection and survived six months of highway miles.
Tools and supplies you’ll want:
- Caliper or hole gauge.
- Drill or reamer sized to the insert spec.
- Rivet-nut tool (hand tool for occasional fixes; pneumatic for volume).
- The correct mandrel and nosepiece for your insert size.
- Inserts sized by thread (M5, M6, M8) and body type (standard, oversized, multi-petal).
Final practical tips: torque the bolt to the insert’s spec—typically 6–10 Nm for M6 in thin steel—so you don’t spin the insert out; wear eye protection when setting inserts; and keep a spare size or two in your kit because the right insert saves parts and time.
Recommended Products
Quality Material: The rivet nuts are made of carbon steel with zinc plated surface, which makes the rivet nut have high hardness and strong corrosion resistance, you no longer need to worry about them rusting and breaking during installation

304 Stainless Steel: Rivet nuts are made of high-strength 304(18-8) stainless steel materials with good corrosion resistance and long service life. Compared with traditional bolts, they are lighter, which can reduce the weight of the whole equipment and increase the service life of the machine

Hold Well Rivet Nut Set: This rivet nut kit includes 100pcs M6 304 stainless steel rivet nut,they're easy to rivet into place, hold well and the threading is good, which can meet your basic needs.
Common Installation Mistakes : And How to Avoid Them
Before you install rivet nuts, know this: a quiet failure under load can ruin your project and be dangerous. That’s why you should focus on three simple areas: the right tool, the right prep, and the right hole and inspection.
Why tool selection matters: a wrong setter gives you under- or over-compression and a joint that won’t hold. Example: I once saw an aluminum M6 rivet nut crushed by a heavy pneumatic setter set to 8 mm stroke; the flange folded and the nut leaked when stressed. Do this:
1) Match rivet-nut size/material to tool: use a hand setter for steel M3–M6 thin sheets, and a pneumatic or battery setter for stainless M8–M10 or thicker panels.
2) Verify stroke and force: set stroke to 0.8–1.0 times the nut body length for blind nuts, and dial force so the mandrel compresses without deforming the flange.
3) Test before the job: install three scrap rivet nuts and pull test one at 50% of expected service load. If it slips, adjust tool settings.
Why surface prep matters: dirt or burrs let parts move or corrode, so joints lose clamp. Example: on a trailer bracket I once missed deburring a hole and the paint cracked under torque, then the joint corroded at the seam. Do this:
1) Clean: wipe mating surfaces with a degreaser or isopropyl alcohol.
2) Deburr: use a 60° countersink or a hand deburring tool to remove sharp edges.
3) Protect: if metal-to-metal contact will be exposed, apply a 0.1–0.2 mm anti-seize or thin corrosion inhibitor.
Why hole size and alignment matter: the wrong hole or misalignment gives weak clamping and eccentric loads. Example: when installing blind rivet nuts into a steel channel, a 0.5 mm oversized hole caused the nut to tilt and fail under vibration. Do this:
1) Drill to spec: measure the rivet nut outer diameter and make the hole 0.1–0.2 mm smaller for a press fit, or exactly per manufacturer spec.
2) Ream if needed: run a spiral reamer for a clean, concentric hole.
3) Use guides: for blind installs use a jig or guide plate to hold the setter perpendicular.
Why you must inspect and torque: invisible deformation means failure later under load. Example: on a solar panel rail I rejected three panels because the rivet-nut flanges showed slight folding after installation. Do this:
1) Torque to spec: tighten mating fasteners to the rivet-nut manufacturer’s recommended torque (for example, 6–8 Nm for an M6 in thin aluminum).
2) Inspect each joint: look for flange cracking, mandrel marks, or off-center nuts.
3) Reject and document: remove and replace any part that shows deformation, and log the failure cause.
Do these steps and you’ll avoid most quiet failures: test tool settings, clean and deburr, size holes to spec, and torque plus inspect every joint.
Recommended Products

▲【VARIOUS MANDRELS】The Rivnut Tool Kit is quipped with 7PCS interchangeable mandrels(Metric M6 M8 M10; SAE 1/4-20*2, 5/16-18, 3/8-16)

Ratcheting Mechanism: The Ratchet Nut Tool features a ratcheting mechanism that allows for easy and efficient installation of rivet nuts. This mechanism ensures that the nut is securely fastened without excessive manual force

【Complete All-in-One Kit】 This rivet nut tool kit includes a 16-inch rivnut tool, equipped with 12 mandrels (metric M3, M4, M5, M6, M8, M10, M12; SAE 10-24", 1/4-20", 5/16-18", 3/8-16", 1/2-13"), 230 nuts, plus a multi-functional wrench, a pair of gloves and an operation manual.
Frequently Asked Questions
How Do Rivet Nuts Perform in Corrosive Marine Environments?
They hold up surprisingly well: like anchors in a storm, rivet nuts with corrosion resistant coatings and proper galvanic isolation resist salt spray, but I’d choose stainless or coated variants and seal joints to prevent electrolytic attack.
Can Rivet Nuts Be Removed Without Damaging Thin Panels?
Yes — I can remove rivet nuts without damaging thin panels by using panel preservation techniques and non destructive removal tools; I carefully back out or drill specialized sockets while supporting the panel to avoid deformation or tear-out.
Are Rivet Nuts Compatible With Thermal Insulation or Coatings?
Yes — I’ll bite: think rivet nuts as tiny, stubborn chefs refusing to touch your soufflé; I guarantee thermal barrier integrity and avoid harming coating adhesion by using insulated washers, surface prep, and corrosion-resistant finishes for reliable compatibility.
What Torque Specifications Are Recommended for Different Rivet Nut Sizes?
Recommended torque varies by size: I follow manufacturer torque charts—M3≈3–4 Nm, M4≈4–6 Nm, M5≈6–8 Nm, M6≈8–10 Nm—using proper installation tools to avoid over-torque and make certain secure, lasting threads.
Do Rivet Nuts Affect Electrical Grounding or Conductivity in Assemblies?
Want to know if rivet nuts affect electrical grounding or conductivity? I’d say they can—proper electrical bonding and low contact resistance require conductive materials or plating, clean mating surfaces, and sometimes bonding washers or intentional grounding paths.