You’re on a vehicle assembly line staring at a panel with no rear access and asking how to add a durable threaded attachment. Or you’re specifying fasteners for a lightweight aluminum façade and can’t figure out how to secure fixtures from one side.
Most people assume through-bolts or welds are the only reliable options and overlook one-sided threaded inserts. This article shows when blind rivet nuts outperform those choices, which industries and parts benefit most, and the exact supply and design steps to start using them.
You’ll be able to pick the right insert and plan implementation. It’s easier than it looks.
Key Takeaways
If you’ve ever tried to speed up assembly on a car or building project, this is why.
Why it matters: you save labor hours and meet weight targets that affect fuel economy and costs.
Concrete example: a mid-size auto plant switching to rivet nuts cut join time from 45 seconds to 18 seconds per panel.

– Rising demand in automotive and construction means blind rivet-nut use grows because manufacturers chase lightweighting and faster assembly cycles.
Before you commit to higher annual targets, know this: markets growing at double-digit CAGRs equal lots more parts to buy and store.
Why it matters: your procurement plan must handle tens or hundreds of thousands more units.
Concrete example: if your product line plans a 20% volume increase, order quantities may jump from 100k to 120k rivet nuts, which needs extra storage space and cash flow.
– Market expansion and higher CAGR translate to bigger unit targets, pushing you to scale rivet-nut production and sourcing.
If you want to avoid production stops, demand forecasting must be tighter.
Why it matters: a missed forecast causes either stockouts that halt lines or overstock that ties up capital.

Concrete example: a construction fastener supplier moved from quarterly to monthly forecasts and cut stockouts by 70% within three months.
Steps:
- Move to monthly demand reviews with suppliers.
- Share sales and BOM changes two weeks earlier than you used to.
- Set a safety stock level equal to four weeks of consumption.
– Increased adoption requires tighter demand forecasting and monthly alignment to avoid stockouts and excess inventory.
The margins you planned on will fluctuate if you ignore supplier and logistics risks.
Why it matters: price swings and delays hit your cost per part and delivery reliability immediately.
Concrete example: a rivet-nut maker lost 8% margin after a shipping delay forced expedited freight for 50k units.
Steps:
- Identify two alternate suppliers for critical rivet-nut sizes.
- Negotiate fixed-price windows or volume discounts for 60–90 day periods.
- Build a small freight contingency budget equal to 2% of monthly fastener spend.

– Margin pressure from price swings and shipping delays makes supplier diversification and hedging more critical for rivet-nut makers.
If you need higher throughput, pick the right tools and verify performance.
Why it matters: the wrong tool or rivet-nut spec leads to failed joints, rework, and warranty claims.
Concrete example: switching to a pneumatic blind rivet tool with the correct nosepiece halved installation rejects on an aluminum subframe.
Steps:
- Check torque retention and pull-out strength against the joint spec—ask suppliers for test data showing values in N or lbf.
- Confirm grip range with a measured stack thickness; order rivet nuts that match the middle of that range.
- Trial the chosen tool on 100 parts, inspect 10% for seating and torque, then scale up.
– Higher throughput needs drive tool selection and specification checks to ensure torque retention, pull-out strength, and correct grip range.
Market Size & CAGR: What Numbers Imply for Future Demand
If you’ve ever tried to guess sales for next year, this is why projection matters: it tells you how much product to make, buy, or store so you don’t lose money.
Projection is about understanding scale and speed, and it tells you what future demand might look like. Use two concrete numbers: a market size (e.g., $500 million) and a CAGR (e.g., 8% per year) to convert broad trends into units. For example, if your product has a 5% share of a $500M market growing at 8% annually, your revenue target jumps from $25M this year to about $27M next year and to roughly $29M the year after. One clear step: calculate target units by dividing revenue goals by your average selling price.
Before you translate projections into actions, know why demand forecasting saves cash and avoids shortages in one sentence: it prevents lost sales and excess inventory simultaneously. Forecasting takes past sales, seasonality, and a few market drivers—price, promotions, and competitor entries—and produces monthly unit projections. Real-world example: a regional snack maker used 24 months of POS data plus a planned 10% price cut to forecast a 15% volume lift for Q3, and they ordered 20% more packaging to avoid a stockout during the promotion.
When growth is steady, it matters because margins can shrink if prices fall or input costs rise. Run this three-step test:
- Calculate current gross margin percentage (gross profit ÷ revenue).
- Model two scenarios: 5% price decline and a 10% raw-material increase.
- See which scenario pushes margin below your target (e.g., from 35% to under 25%).
If margins drop too far, you need to improve efficiency by at least the same percentage points to hold profit. A concrete efficiency goal: cut manufacturing waste by 2–4% within 6 months to offset a 5% price hit.
Inventory optimization matters because holding too much stock ties up capital while too little risks lost sales. Why you should care: working capital is expensive and limits growth. Do these steps:
- Measure current days of inventory (DOI = inventory ÷ COGS × 365).
- Set a target DOI based on lead times and service levels (example: target 30 days if suppliers ship in 7 days).
- Implement a reorder point formula: ROP = (daily demand × lead time) + safety stock.
A real example: an apparel brand cut DOI from 65 to 30 days, freeing $1.2M in cash and reducing markdowns by 6%.
Cost hedging stabilizes budgets by reducing raw-material volatility in one sentence: it locks in input costs so your forecasts aren’t ruined by sudden price spikes. Simple hedging steps:
- Identify 3 key commodities and the percent of COGS they represent.
- Buy forward contracts or fixed-price supply agreements to cover the portion most exposed (start with 25–50% of expected need for 6–12 months).
- Reassess quarterly and adjust coverage.
Example: a bakery hedged 40% of its flour needs at a fixed price and avoided a 30% spot-price spike that month, keeping margins intact.
Overall, turn projections into actionable plans so your teams align production, purchasing, and finance. Do this in four steps:
- Share the forecast and assumptions with ops, purchasing, and finance monthly.
- Convert volume forecasts into production schedules and raw-material buy sheets.
- Set KPIs: DOI, fill rate, and margin by product.
- Review actuals vs. forecast within 30 days and adjust orders or promotions.
A specific outcome to aim for: hit a 95% fill rate while keeping DOI within your target range.
Recommended Products

Rivet Nut Assortment Kit: 2 in 1 Rivet nuts Kit contains 460 metric rivet nuts, 460 SAE rivet nuts, for a total of 920 rivet nuts

This 86pcs hand pull Blind nut rivet gun kit is Perfect for car, trailers, furniture repair, even boat building etcs.

SAE Rivet Nuts: 6 sizes in common use are provided in this kit, 18pcs of 3/8"-16, 18pcs of 5/16"-18, 40pcs of 1/4"-20, 60pcs of #10-24, 60pcs of #8-32 and 20pcs of #6-32, total come to 216pcs of rivet nuts meet your needs.
Why Blind Rivet Nuts Are Growing Fastest in Automotive and Construction

If you’ve ever struggled to fasten something where you can’t get to the back side, this is why.
Why it matters: blind rivet nuts let you make strong, threaded joints from one side so your assembly stays secure.
Blind rivet nuts help cars get lighter and still strong. Automakers use them to replace welded or bulky inserts; that cuts weight by about 2–5 kg per vehicle on typical subassemblies and improves fuel economy a bit. Example: on a car door inner panel, engineers install M6 rivet nuts into 1.2 mm steel so window regulators bolt in firmly without a patch plate.
Why it matters: you save labor and keep parts compact.
In construction, rivet nuts speed up work on thin panels and hollow frames where tapping a thread isn’t possible. Builders fit M8 rivet nuts into 2 mm aluminum curtain wall sections so façade brackets mount with a single torque pass. Example: a crew on a mid-rise uses a handheld rivet-nut tool and installs 300 anchors an hour on average, versus 80–100 if they had to weld plates and grind.
Why it matters: you get predictable torque and less rework.
How they work (step-by-step):
- Drill the specified hole; follow the rivet nut spec — typically hole = nut O.D. minus 0.1–0.2 mm.
- Insert the rivet nut into the hole until the flange seats flat.
- Use a hand or pneumatic rivet-nut gun, set to the recommended stroke and pull force for the nut size.
- Tighten the mating bolt to the recommended torque (for M6 stainless, ~8–10 N·m as a ballpark) and check thread engagement.
Example: installing an M6 steel rivet nut into 1.5 mm sheet — drill a 10.5 mm hole, use a 6 mm mandrel gun, and torque the bolt to 8 N·m.
Why they speed installation: they compress and flare inside the cavity, forming a captive thread in seconds, so you can use both simple hand tools or automated feeders on production lines.
Why it matters: you cut cycle time and tool complexity.
Practical choices you’ll make:
- Material: use steel rivet nuts for high-shear joints, aluminum for corrosion resistance and lighter weight.
- Size: pick the smallest thread that meets your load; M5 or M6 are common for interior brackets, M8 for structural connections.
- Installation method: manual pliers for occasional onsite fixes, battery or pneumatic tools for 200+ installs per day, or automation for millions of cycles.
Example: choose aluminum rivet nuts for exterior trim on an EV to avoid galvanic corrosion where panels meet.
Why they hold torque: the mechanical deformation creates metal-to-metal contact that resists rotation, so your bolt preload stays predictable.
Quick checklist before you specify rivet nuts:
- Measure material thickness and match to the rivet nut grip range.
- Confirm hole diameter from the rivet nut datasheet.
- Decide tool type based on expected throughput (hand, pneumatic, automated).
- Test one assembly for torque retention and pull-out strength.
Example: on a prototype rack, test three rivet-nut sizes and record bolt torque after 1,000 cycles to validate choice.
If you want compact, strong joints you can install from one side, rivet nuts are a practical choice you can specify with clear hole sizes, grip ranges, and tool selections — and you’ll cut installation time while keeping torque and strength predictable.
Recommended Products

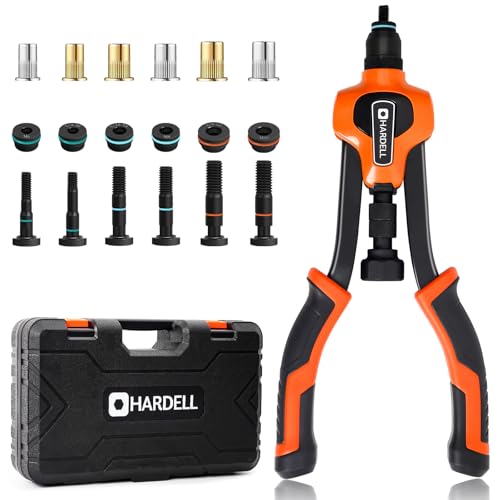
Ratcheting Mechanism: The Ratchet Nut Tool features a ratcheting mechanism that allows for easy and efficient installation of rivet nuts. This mechanism ensures that the nut is securely fastened without excessive manual force

[About this project]: This rivet and nut tool kit includes a 1pc set of rivet and nut installers, providing 430 pieces of press-fit nuts in 5 different metric thread sizes: 160pcs M3×0.5, 110pcs M4×0.7, 70pcs M5×0.8, 70pcs M6×1, and 20pcs M8×1.0, to meet your various daily needs.

▲【VARIOUS MANDRELS】The Rivnut Tool Kit is quipped with 7PCS interchangeable mandrels(Metric M6 M8 M10; SAE 1/4-20*2, 5/16-18, 3/8-16)
Top Industries and Applications Driving Rivet-Nut Adoption

If you’ve ever tried fastening something where you can’t reach the back, this is why rivet nuts matter: they give you strong, reusable threads from one side so you don’t need access behind the panel.
Automotive: Why it matters — you can reduce weight and keep joints strong without welding or heavy nuts. Example: on a car door inner panel, technicians use M6 rivet nuts spaced every 100–150 mm to mount the interior trim quickly during assembly. How to use them:
- Drill a hole sized to the rivet nut spec (typically 9.5 mm for M6).
- Insert the rivet nut and use a setting tool to compress it until the flange sits flat.
- Torque the screw to the manufacturer’s spec (often 8–10 Nm for M6).
Use flanged rivet nuts on thin stamped panels for better load distribution.
Manufacturing and machinery: Why it matters — you get repeatable assembly and easier servicing without welding or tapped holes. Example: a conveyor frame with intermittent maintenance uses rivet nuts so motors can be removed with three bolts in under five minutes. How to use them:
- Pick a rivet nut material compatible with your frame (steel for strength, stainless for corrosion).
- Place rivet nuts at accessible service points every 200–300 mm where vibration is moderate.
- Inspect crimp and torque during routine maintenance.
Choose steel rivet nuts where torque and shear loads are highest.
Aerospace and railways: Why it matters — weight savings and vibration resistance extend life and reduce fuel use. Example: on an aircraft interior panel, using aluminum rivet nuts cuts panel fastener weight while resisting cabin vibration. How to use them:
- Use sealed or closed-end rivet nuts to prevent fluid ingress.
- Follow specific alloy compatibility rules to avoid galvanic corrosion.
- Use inspection intervals defined by the maintenance schedule.
Pick closed-end designs where fluid or pressure sealing is required.
Electrical enclosures: Why it matters — you can mount components without opening cabinets, preserving EMI shielding and grounding. Example: mounting a small PCB inside a server rack door with M4 rivet nuts lets you install boards from outside the cabinet. How to use them:
- Choose conductive rivet nuts if you need grounding continuity.
- Drill and set per the rivet nut size chart; M4 commonly needs a 6.8 mm hole.
- Verify electrical continuity after installation.
Use conductive rivet nuts when grounding paths are required.
Construction and appliances: Why it matters — rivet nuts provide durable, neat fixes that work in the field and tolerate rough handling. Example: installing a dishwasher mounting bracket in a cabinet uses stainless rivet nuts so the bracket survives cycles of use and moisture. How to use them:
- Use corrosion-resistant materials (stainless or plated steel).
- Space fasteners per load — typically every 150–250 mm for shelf loads.
- Confirm flange contact on uneven substrates with a thin backing plate if necessary.
Prefer stainless rivet nuts for humid or corrosive environments.
Recommended Products

THE MOST COMPLETE KIT: Stop wasting time running to the hardware store. YUZES rivnut tool kit offers a true all-in-one solution with 11 interchangeable mandrels (Metric M3 M4 M5 M6 M8 M10; SAE 10-24 1/4-20*2 5/16-18 3/8-16) and 175pcs high-quality rivet nuts. (Note: One 1/4-20 mandrel is pre-installed on the tool). We ensure you have the perfect fit for any project, from delicate DIY to heavy-duty automotive mods.

【COMPLETE ACCESSORIES】The rivet nut tool kit includes an rivet nut gun, 11PCS interchangeable mandrels(Metric: M5, M6, M8, M10, M12; SAE: 8-32, 10-24, 1/4-20, 5/16-18, 3/8-16, 1/2-13), 10 each of 11 specification nuts, and a blow molding storage box.

Dear Customer, we have recently received feedback from some users regarding issues with thread stripping during installation. To prevent any disruption to your work and to save your valuable time, we would like to inform you that this rivet nut is manufactured from 6061 aluminum. Rivet nuts made from 6061 aluminum are characterized by their soft and lightweight nature, making them extremely easy to rivet; you need only apply very slight pressure to complete the riveting process. Applying excessive pressure, however, will result in the threads stripping.
Regional Adoption Trends: Asia Pacific, Europe, and Emerging Markets

Before you choose where to push rivet nut production, you need to know how three regions differ and what that means for your designs and sourcing.
Asia Pacific: How fast factory growth changes your choices
Why this matters: You’ll save assembly time and weight where production volumes spike fast.
In Asia Pacific, manufacturers chase speed and cost per part, so they pick blind rivet nuts that install quickly with handheld tools and fit thin sheet metal without extra prep. Example: a Vietnamese motorcycle plant switched from welded nuts to M6 blind rivet nuts and cut assembly time per unit by 12 seconds, saving thousands of labor hours per month.
Actionable steps:
- Test rivet nut + hand riveter cycles to hit a 3–6 second install target per fastener.
- Specify M4–M8 sizes for typical auto and two‑wheeler panels to match local inventories.
- Approve a secondary supplier in-country to avoid 4–8 week overseas lead times.
Tip: train 10–15 operators on a 2‑hour session and you’ll halve installation defects.
Europe: Why standards and durability guide your specs
Why this matters: You’ll meet homologation and warranty demands by choosing proven parts.
Europe favors high‑quality rivet nuts that pass vibration and corrosion tests, so designers often use stainless or zinc‑plated versions in structural and automotive assemblies. Example: a German HVAC maker standardized on stainless M6 rivet nuts across models to meet cross‑border corrosion standards and reduced warranty claims by 18% over a year.
Actionable steps:
- Require EN or ISO test reports with every batch.
- Specify material (A2/A4 stainless or class 8.8 steel) and coating for expected salt or humidity exposure.
- Maintain lot traceability for three years to satisfy OEM audits.
End note: harmonized regulations mean one certified spec can serve multiple EU countries.
Emerging markets: Where adoption varies and training matters
Why this matters: You’ll capture growth if you match product, training, and supply realities locally.
Adoption depends on investment and skills—places with infrastructure spending or OEM plants adopt fast, while lower‑investment areas lag due to missing training and erratic supply. Example: a regional installer in Kenya adopted rivet nuts for roadside signage after a two‑day hands‑on course and reduced rework by 40%, but neighboring regions without training still prefer bolts.
Actionable steps:
- Map target countries by infrastructure projects and OEM presence.
- Offer one‑day onsite training and a starter kit of 200–500 fasteners to new customers.
- Set up a regional logistics hub to cut delivery times to 7–10 days.
Final detail: pricing sensitivity means offer a low‑volume starter SKU plus scalable options.
Practical recommendations you can act on this quarter
Why this matters: You’ll get faster wins by focusing supply, specs, and training now.
- Pilot in one APAC plant: aim for a 3–6 second install time and keep a local backup supplier.
- Lock a European spec: require test certificates and three‑year lot traceability for critical assemblies.
- Start two-day training programs in one emerging market and ship a 500‑piece starter kit.
If you do those three things, you’ll reduce lead‑time risk and installation errors within months.
Rivet-Nut Design, Materials, and Automation Advances for Better Installation

If you’ve ever struggled to get a threaded fastener to hold in thin metal, this is why.
Why it matters: a reliable threaded point stops stripped holes and repeated repairs. Think of a rivet nut as a tiny engineered anchor that gives you a solid, reusable thread in sheet metal, tubing, or hard‑to‑reach places.
How rivet‑nut designs have changed and what that means for you:
- They now control grip range and pull‑out strength so you get fewer failures.
- Example: on an HVAC duct panel where a 3/8″ bolt used to rip the hole, using a rivet nut rated for 1,000 lbf pull‑out stopped the leaks and rework.
- If you install them, select the size that matches material thickness and the bolt torque you expect.
- Example: a knurled insert in aluminum framing resists spinning during assembly when you torque a bolt.
Materials and finishes you should pick:
Why it matters: the wrong alloy or finish causes corrosion or early failure.
- Choose higher‑strength alloys for load points and stainless grades for corrosion resistance.
- Example: on an outdoor sign frame, switching to 316 stainless rivet nuts prevented rust streaks after six months.
- If your assembly is painted, pick a coating that matches the paint process to avoid adhesion problems.
How automation improves your installs:
Why it matters: consistent force and timing cut labor and defects.
- Use pneumatic or electric installation tools that record set force and cycle time.
- Example: a small automotive sub‑assembly line moved from a handheld riveter to an electric tool with data logging and saw rejects drop from 6% to 0.5%.
Quick practical steps to make installs predictable:
Why it matters: following concrete steps prevents mistakes.
- Measure panel thickness and pick a rivet nut with the matching grip range.
- Choose alloy/coating for your environment (e.g., 316 stainless for marine).
- Select a tool rated for the rivet nut size and expected cycle rate.
- Calibrate tool force and log the first 50 cycles to confirm settings.
- Inspect the first 10 parts for proper flare and thread engagement.
A concrete example to visualize the workflow:
On a production run of 2,000 instrument housings, a team measured panel stacks at .060″–.080″, chose rivet nuts with a .050–.100″ grip range, used an electric tool set to 1,200 lbf pull force, and logged data to the PLC; rejects dropped from 4% to 0.3% within one shift.
Final takeaway: pick the right insert for thickness and environment, use a calibrated tool that logs force, and follow the five installation steps above so your assemblies hold and your rework disappears.
Recommended Products

[About This Product]: This item includes 750 pieces of 304 stainless steel rivet nuts and one rivet nut installation tool set. Since the rivet nuts are made from sturdy 304 stainless steel, the larger sizes (M6) require greater arm strength to complete the riveting process.
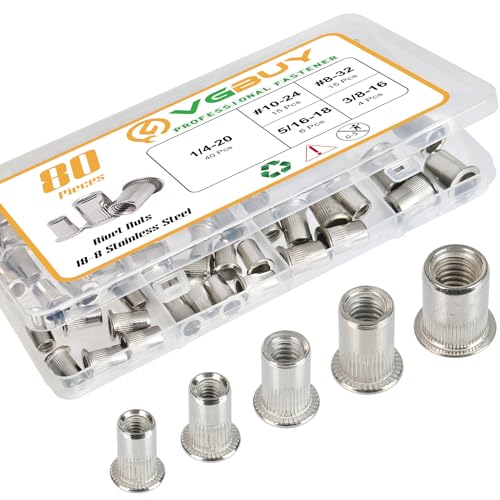
Cost-effective Rivet Nut kit:This rivet nut set includes 80pcs rivet nuts in the most commonly needed SAE sizes: 8-32*15PCS, 10-24*15PCS, 1/4-20*40PCS, 5/16-18*6PCS, 3/8-16*4PCS; 5 different sizes to help you deal with a wide range of fasteners.

SAE Rivet Nut: Sae rivet nuts assortment kit contains 5 size types of rivnut, which are #8-32(60 pcs),#10-24(60 pcs),1/4"-20(70 pcs),5/16"-18(15 pcs),3/8"-16(15 pcs),5 different sizes of rivet nut From furniture DIY to building construction, help you get the job done
Supply-Chain, Raw-Material Cost Risks and How Firms Are Adapting
If you’ve ever had a sudden late shipment, this is why.
Why it matters: price swings and shipping delays squeeze your margins and push out customer deliveries in a matter of days.
Because raw materials and logistics are the backbone of rivet‑nut production, you should focus on three concrete moves to protect your business.
1) Manage inventory smarter
Why it matters: holding the right stock prevents lost sales without locking up cash.
Steps:
- Calculate your reorder point: multiply daily usage by lead time, then add safety stock equal to 20–30% of that number.
- Use a simple spreadsheet or low‑cost ERP to track on‑hand, incoming, and committed quantities daily.
- Review slow movers quarterly and pare SKUs that move under 2 units per month.
Example: A shop that uses 1,000 aluminum rivet‑nuts per month and faces a 30‑day lead time sets reorder point = (1,000/30)*30 = 1,000 plus 250 safety = 1,250 units.
2) Diversify suppliers
Why it matters: one factory strike or mill outage shouldn’t halt your line.
Steps:
- Qualify at least two suppliers per critical material (e.g., aluminum 5052 and steel 1018).
- Keep one domestic supplier for fast turns and one offshore for price leverage.
- Run a quarterly performance scorecard: lead time, quality rejects %, and on‑time %.
Example: A manufacturer added a regional mill 300 miles away as a secondary source and cut emergency air‑freight events from 6/year to 1/year.
3) Use flexible contracts and local options
Why it matters: flexibility lets you shift volumes quickly without big penalties.
Steps:
- Negotiate volume bands with price breaks and a 30% rollover option each quarter.
- Build clauses for expedited production at a capped premium (e.g., up to 20% extra).
- Identify one local distributor who can supply small emergency lots within 48 hours.
Example: A buyer inserted a clause to convert 25% of planned annual tonnage to spot orders; when steel spiked, they switched and avoided a month of outages.
4) Track material flow with simple data systems
Why it matters: visibility tells you where risk is building before it hits production.
Steps:
- Implement barcode scanning at receipt and pick to reduce counting errors to under 1%.
- Dashboards: set alerts for low days‑of‑cover under 14 days.
- Reconcile supplier lead‑time actuals monthly against quoted lead times.
Example: After adding barcode scans, one plant reduced stock discrepancies from 8% to 0.8% and stopped unexpected shortages.
Quick wins you can do this week
- Calculate reorder points for your top five SKUs.
- Call your primary supplier and ask for lead‑time variability for the past 12 months.
- Get quotes from one local distributor for emergency lots.
Practical tradeoffs to expect
Why it matters: every choice affects cost or responsiveness.
- More safety stock costs working capital; target a 20–30% safety buffer to balance risk and cash.
- Multiple suppliers increase admin work; aim for two qualified sources per critical item to limit overhead.
- Local sourcing raises unit cost by 5–20% but cuts emergency freight and lost‑sale risk.
If you want, I can help you build the reorder‑point spreadsheet for your top SKUs or draft supplier scorecard metrics.
Recommended Products

Complete Kit All The Sizes You Need: This Pressure Rivet Nut Tool Kit set includes a wide range of sizes: M3, M4, M5, M6, M8, M10, #6-32, #8-32, #10-24, 3/18-16, 1/4-20, and 5/8-16 550 pieces in total for various projects and replacement needs

Metric Rivet Nut: Metric rivet nuts assortment kit contains 7 size types of rivnut, which are m3(300 pcs), m4(200 pcs), m5(180 pcs), m6(110 pcs), m8(60 pcs), m10(25 pcs), m12(15 pcs),7 different sizes to meet different sizes to meet different scenarios
Fast-Change Mandrels: Swap your rivet nut tool's tips in seconds with our tool-free system – no tiny parts to lose. Equip with 6 Mandrel (M6, M8, M10, 1/4-20, 5/16-18, 3/8-16) & 80PCS Nusert, Ready to use
Frequently Asked Questions
How Do Blind Rivet Nuts Compare Cost-Wise to Welded Studs Over Product Lifecycle?
A stitch in time saves nine: I find blind rivet nuts cheaper lifecycle-wise due to lower material costs and faster installation speed, reduced rework, and maintenance—though welded studs can win where ultimate strength overrides those savings.
Can Blind Rivet Nuts Be Recycled or Made From Fully Recycled Materials?
Yes — I use recycled alloys in some blind rivet nuts, and they’re recyclable, supporting a circular supply; material choice and coating affect recyclability, so I verify specs to guarantee proper recycling and reclaimed-metal content.
What Standards Govern Blind Rivet Nut Strength and Testing Internationally?
Straight off, I’ll say standards like ISO, ASTM and DIN set tensile standards and require fatigue testing; I’ve seen ISO 16047, ASTM F606 and DIN 7337 referenced—they’re the bread-and-butter for fastener strength verification.
Are There Intellectual Property Issues When Customizing Rivet-Nut Designs?
Yes — I advise patent clearance before customizing; I’ll check existing patents to protect design freedom, balance novelty with avoidable infringement, and document inventive steps while considering licensing or redesigns to mitigate IP risks.
How Do Installation Tool Warranties Affect Long-Term Assembly Costs?
Right off the bat, I’ll say warranties slash warranty depreciation and shift risk, and, as they say, don’t count your chickens—good coverage lowers unexpected repairs, supports maintenance scheduling, and cuts long-term assembly costs through predictable budgeting.