You’re staring at a thin aluminum panel with stripped threads and a pile of mismatched fasteners, unsure how to make a durable bolt connection without welding or replacing the whole part. The exact question is: how can I create a serviceable internal thread in sheet material that won’t pull out or ruin the panel?
Most people reach for weld nuts, messy adhesives, or oversized bolts that create permanent, damaging joints. This article shows step‑by‑step how to install rivet‑nut inserts to produce reusable, load‑bearing threads, keep panels flat, and preserve paint or coatings.
You’ll learn hole sizing, choosing knurled versus hex shanks, and simple test tricks to ensure pullout and rotation resistance. It’s easier than it looks.
Key Takeaways
If you’ve ever tried to disassemble a welded or tapped joint and cursed at the repairs, this is why.
Why it matters: removable threads let you take things apart for maintenance or replacement without cutting or heating the part.
– Rivet-nut tools cold-install inserts that give you removable internal threads without welding or tapping, so you can later disassemble panels or replace components. Real example: on a motorcycle frame panel, you can install rivet nuts and then remove the side cover ten times for service without damaging the sheet metal.

Before I explain how, know this matters because thermal joining and tapping often ruin thin materials or finishes.
1) How the install creates a serviceable joint
Why it matters: you want a joint that resists pullout but still accepts bolts repeatedly.
- Use a properly sized rivet nut and setter. Collapse the blind end so it forms a neat bulge behind the sheet; that bulge clamps the material and stops pullout. Example: install an M6 rivet nut into 2 mm aluminum using an M6 setter and a ratcheting tool; the bulge will be about 1.5–2 mm deep and hold a 6 mm bolt securely.
- If you use the wrong size or no setter, threads can deform and strip out after a few cycles.
2) How to avoid strip-out and ensure thread integrity
Why it matters: stripping makes the joint useless and forces repair welding or oversized fasteners.
Steps:
- Match the rivet nut size to the bolt (for example M5 rivet nut for M5 bolts).
- Match sheet thickness to the rivet nut’s grip range (e.g., 1–3 mm nut for 1.2 mm steel).
- Use the correct setter mandrel and torque or stroke spec from the nut maker.
- Test one sample: tighten a bolt to the recommended preload torque three times.
Real example: on a thin steel bracket (1.2 mm), using the correct M5 nut and setter prevented thread collapse that you’d normally see after two remove/replace cycles.

3) How tooling preserves coatings and finishes
Why it matters: you want the factory paint or galvanizing to stay intact for corrosion protection.
- Cold installation means no heat, so you won’t burn paint or cause discoloration; you also avoid grinding off coatings like you would when welding. Example: installing stainless rivet nuts on a painted metal cabinet keeps the powder coat intact around the hole.
- Use size-matched mandrels and pull force limits so the nut collapses cleanly without scraping the hole edge.
4) Choosing ergonomic tools for repeatable, serviceable joints
Why it matters: inconsistent sets make some joints effectively permanent because they seize or crush the surrounding metal.
- Pick a ratcheting hand tool for small runs and a pneumatic or battery-powered puller for production. Repeatability matters: a ratcheting tool with calibrated strokes will give the same collapse each time.
- Calibrate and maintain the tool: check stroke length and mandrel condition every 500 installs. Example: a small repair shop switched to a battery puller and saw rework drop by 60% because each nut was collapsed the same way.
Follow those steps and your rivet-nut joints will stay serviceable, let you swap fasteners, and keep finishes intact.
How Rivet‑Nut Tools Make Joints Serviceable
Here’s what actually happens when you use a rivet‑nut tool: it turns a permanent joint into a serviceable one by giving you a threaded anchor from one side.
Why this matters: you can remove and replace parts later without cutting or welding.

1) How a rivet‑nut makes a joint serviceable
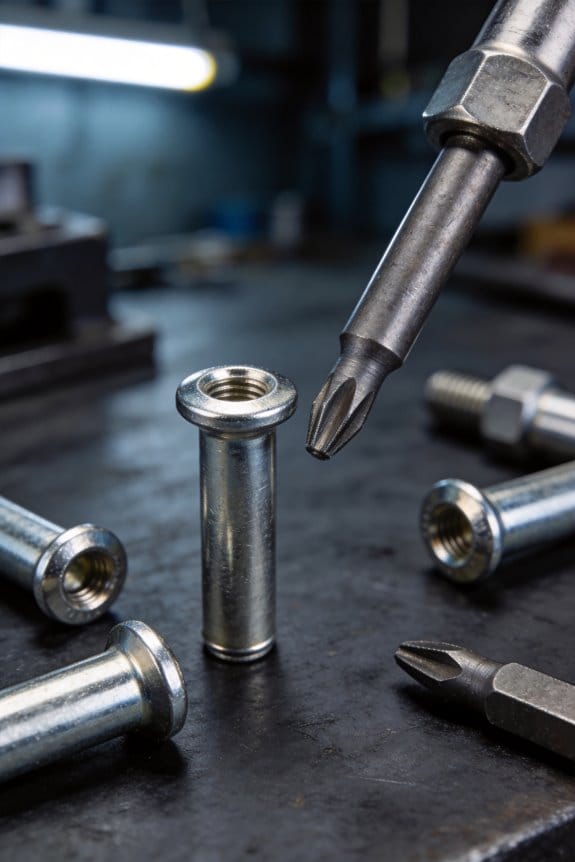
- Step 1: Drill the hole size specified on the rivet‑nut package — for example, a 1/4‑20 rivet nut usually needs a 7/32″ hole.
- Step 2: Thread the rivet‑nut onto the mandrel and insert it into the hole.
- Step 3: Compress the tool until the rivet‑nut forms a blind bulge and locks against the backside.
- Step 4: Remove the tool; you’ll now have a usable internal thread.
Real-world example: I used a 1/4‑20 stainless rivet‑nut on a sheet‑metal bracket by drilling 7/32″, installing the nut with a hand rivet‑nut tool, and later removed a motor with the same bolt three times without damage.
How it holds: the bulged metal clamps and resists pullout, so you get a reusable bolt location.
2) Choosing size, hole, and avoiding damage
- Why this matters: the right match preserves the threaded profile so bolts will go in smoothly later.
- Steps to follow:
- Match rivet‑nut thread to bolt size (e.g., 5/16‑18 nut for 5/16‑18 bolts).
- Use the drill size listed on the rivet‑nut spec sheet; don’t guess.
- Use a deburring tool so the nut seats flat.
Real-world example: on an access panel I picked a thin‑wall rivet‑nut sized for 8‑32, drilled 3.3 mm, deburred, and the bolts turned easily for years.
3) Tool ergonomics and consistent sets
- Why this matters: a comfortable tool gives consistent set force, which keeps threads uniform and reduces wear.
- Steps to pick and use a tool:
- Choose a hand tool with rubber grips or a pistol‑grip for frequent use.
- For production, pick a torque‑regulated or pneumatic rivet‑nut setter to hit the same collapse every time.
- Practice on scrap metal until each set looks the same: the flange should be flush and the collapsed section evenly formed.
Real-world example: in a small shop I switched from a cheap plier tool to a ratcheting model with rubber grips; installs became faster and the fasteners lasted through repeated assembly.
4) Avoid over‑cranking and preserve threads
- Why this matters: over‑cranking distorts the internal thread and can seize bolts.
- Steps to prevent it:
- Stop when the tool’s ratchet slips or when the rivet‑nut visually forms a smooth, even bulge.
- If using a powered setter, set the torque to the rivet‑nut maker’s recommended collapse force.
Real-world example: I once over‑compressed a nut and stripped an 1/4‑20 bolt; after that I used the manufacturer’s torque chart and never had a seized bolt again.
Final practical tip: keep spare rivet‑nuts and a scrap panel for testing new sizes or tools so your first install on the real part isn’t an experiment.
Recommended Products

▲【VARIOUS MANDRELS】The Rivnut Tool Kit is quipped with 7PCS interchangeable mandrels(Metric M6 M8 M10; SAE 1/4-20*2, 5/16-18, 3/8-16)

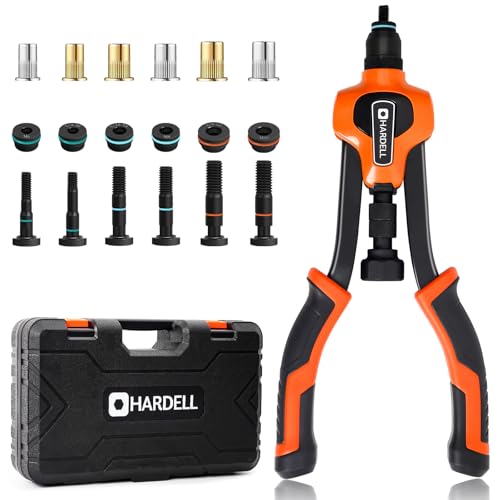
【Complete All-in-One Kit】 This rivet nut tool kit includes a 16-inch rivnut tool, equipped with 12 mandrels (metric M3, M4, M5, M6, M8, M10, M12; SAE 10-24", 1/4-20", 5/16-18", 3/8-16", 1/2-13"), 230 nuts, plus a multi-functional wrench, a pair of gloves and an operation manual.

Complete Accessories: The rivet nut tool equipped with 11PCS interchangeable mandrels(M3 M4 M5 M6 M8 M10 M12, 10/24, 1/4-20, 5/16-18, 3/8-16) and 110pcs rivet nuts. In addition, a carrying case is also available to keep all the tools and accessories
Installing a Rivet Nut : Step‑by‑Step

Before you install a rivet nut, know why it matters: a properly set rivet nut gives you a strong blind-side thread so your bolt won’t pull out when you torque it.
1) Prep the hole
Why this matters: the wrong hole size or burrs will misseat the nut and ruin the thread.
Steps:
- Measure the panel thickness with calipers — for example, 1.6 mm steel (1/16″) — and note the rivet nut spec for thickness range.
- Pick the drill size the rivet nut manufacturer lists; typically that’s 6.5 mm (1/4″) for an M6 rivet nut, but check the chart for your part.
- Drill the hole at slow speed and remove chips frequently.
- Deburr both sides with a countersink or 180-grit file so the rivet nut sits square.
Example: on a 1.6 mm mild-steel motorcycle fender, you’ll drill 6.5 mm and deburr with a 1/4″ countersink so the nut doesn’t tilt.
2) Load the rivet nut onto the tool
Why this matters: incorrect threading or orientation can cross-thread or damage the nut.
Steps:
- Screw the rivet nut onto the tool mandrel until it seats against the shoulder — usually finger-tight plus one-quarter turn with a wrench.
- If the tool has an indexed collar, set it to the manufacturer’s setting for your nut size.
- Verify the nut’s flange faces out toward you.
Example: for a 6 mm threaded rivet nut on a handheld riveter, finger-tighten then give one small wrench turn; the flange should sit flush to the mandrel shoulder.
3) Set the rivet nut
Why this matters: steady control creates the correct blind-side bulge and keeps the thread intact.
Steps:
- Insert the rivet nut into the prepared hole, keeping the tool perpendicular to the panel.
- Squeeze or draw the tool slowly until you feel resistance and the mandrel stroke is about the distance specified by the tool chart — often 4–6 mm on hand tools.
- Hold steady pressure for 2–3 seconds to let the metal flow.
- Stop before you feel a sudden hard stop to avoid over-compression.
Short and clear.
Example: in an aluminum boat hull (2 mm thick), you’ll pull the tool until the stroke reads roughly 5 mm and hold for three seconds so the blind side forms a neat mushroom.
4) Release and inspect
Why this matters: a quick check prevents wasted parts and weak joints.
Steps:
- Release the tool per its instructions and unthread the mandrel from the rivet nut.
- Run a bolt of the correct grade and size into the newly installed thread; it should screw in smoothly three to five full turns without wobble.
- Inspect the blind side (if accessible) or look for a uniform flange seat and no cracking.
Example: test an M6 stainless bolt in a rivet nut on a trailer bracket; if it goes in and seats tightly, you’re good.
5) Torque multiple fasteners correctly
Why this matters: even preload avoids distortion and spreads load.
Steps:
- If you’re installing several fasteners in one part, tighten them in a cross (X) pattern or alternating sequence.
- Use a torque wrench and follow the bolt’s torque spec — for example, an M6 class 8.8 bolt commonly uses 9–10 Nm.
- Tighten in stages: 30% of final torque, then 60%, then 100%.
Example: mounting a license-plate bracket with four rivet nuts, run bolts in an X pattern to 3 Nm, 6 Nm, then final 9 Nm.
Final quick checklist
- Panel thickness measured.
- Correct drill size used and edges deburred.
- Rivet nut threaded to mandrel properly.
- Tool stroke and hold time observed.
- Bolt test and proper torque sequence completed.
If any step feels off, stop and recheck the hole size or part spec before continuing.
Recommended Products

Ratcheting Mechanism: The Ratchet Nut Tool features a ratcheting mechanism that allows for easy and efficient installation of rivet nuts. This mechanism ensures that the nut is securely fastened without excessive manual force

Premium Quality: This premium hand rivet nut tool is made from steel and the surface is heat-treated to prevent corrosion and increase the durability and strength of the tool.

[About this project]: This rivet and nut tool kit includes a 1pc set of rivet and nut installers, providing 430 pieces of press-fit nuts in 5 different metric thread sizes: 160pcs M3×0.5, 110pcs M4×0.7, 70pcs M5×0.8, 70pcs M6×1, and 20pcs M8×1.0, to meet your various daily needs.
Rivet‑Nut Types and Anti‑Spin Features

If you’ve ever tried to stop a nut from spinning while you tighten a bolt, this is why.
Why this matters: a rivet nut that spins or strips will ruin the joint and cost you time and parts. Picture attaching a metal bracket to a thin steel panel on a trailer—if the nut turns when you torque the bolt, the bracket comes loose.
Smooth round bodies
Why this matters: smooth rounds only work if your hole is very tight and the material is rigid.
How they behave: smooth round rivet nuts rely on friction from a close-fitting hole (usually within ±0.1 mm of the nut OD) to resist rotation, but they can turn under torque. Example: using a smooth rivet nut in 0.9 mm galvanized sheet on a garden trailer will often let the nut spin when you reach 6–8 Nm of torque.
When to use them: choose smooth rounds only for metal thicker than 1.5 mm and where you can drill a precise hole size.
Installation tip: measure the hole with calipers and aim for ±0.05 mm; test one fastener at the intended torque before doing the rest.
Knurled bodies
Why this matters: knurling bites into softer materials so the nut won’t rotate under normal torque.
How they behave: knurled rivet nuts have textured sides that *embed* into plastic or thin metal, resisting rotation through friction and shear of the material. Example: a knurled nut in a 3 mm ABS plastic panel will hold past 10–12 Nm without turning.
When to use them: pick knurled for plastics, composites, and sheet metal under ~2 mm.
Installation tip: for best grip, use the specified hole diameter (often +0.1 mm for knurled types), and avoid oversized holes—if the hole is too large, the knurl won’t bite.
Hexagonal shanks
Why this matters: hex shanks give you a mechanical lock so the nut can’t spin even under high torque.
How they behave: a hex shank forms a positive anti-rotation feature by sitting in a matching hex hole or recess, transferring torque to the base material instead of relying on friction. Example: installing a hex-shank rivet nut in a 5 mm steel plate for a winch mount will hold at 20–30 Nm without movement.
When to use them: use hex shanks for thicker materials, high-torque joints, or when you can’t guarantee precise hole tolerances.
Installation tip: cut or punch a hex hole to the rivet nut manufacturer’s recommended size (measure across flats) and seat the nut fully so the hex faces engage.
Quick selection checklist
Why this matters: following simple rules prevents failures before you start.
- Identify material and thickness.
- Match rivet nut type: knurled for soft/thin, hex for high torque/thick, smooth only if hole tolerance is tight.
- Verify hole size with calipers against manufacturer spec.
- Torque-test one installed nut at the intended final torque.
Final concrete example: installing a roof rack on a vehicle with 1.2 mm roof sheet—use knurled rivet nuts, drill the specified hole size (+0.1 mm over nut OD), and test at 12 Nm; don’t use smooth rounds unless you can get the hole within ±0.05 mm.
Recommended Products
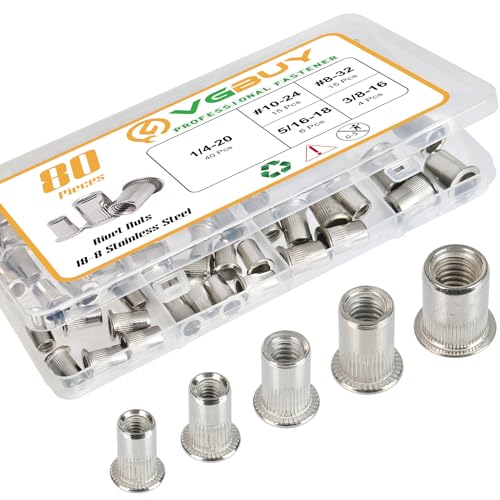
Cost-effective Rivet Nut kit:This rivet nut set includes 80pcs rivet nuts in the most commonly needed SAE sizes: 8-32*15PCS, 10-24*15PCS, 1/4-20*40PCS, 5/16-18*6PCS, 3/8-16*4PCS; 5 different sizes to help you deal with a wide range of fasteners.

【360Pack Metric Rivet Nut Kit】This nutsert set includes 360 pieces in 6 sizes: M3 (100pcs), M4 (84pcs), M5 (80pcs), M6 (50pcs), M8 (30pcs), M10 (16pcs). Stainless steel rivet nuts feature standard Metric threads for a variety of fastening needs. Suitable for furniture DIY and construction tasks, these rivet nuts function as reliable threaded inserts for different applications. (Installation tool not included.)

SAE Rivet Nuts: 6 sizes in common use are provided in this kit, 18pcs of 3/8"-16, 18pcs of 5/16"-18, 40pcs of 1/4"-20, 60pcs of #10-24, 60pcs of #8-32 and 20pcs of #6-32, total come to 216pcs of rivet nuts meet your needs.
Why Rivet Nuts Beat Welds and Solid Rivets in Thin Sheets

If you’ve ever tried to weld thin sheet metal and ended up with warped panels, this is why.
Why it matters: warped or weakened parts fail sooner and cost you time and money to fix. Welding thin sheets concentrates heat and causes thermal distortion; for example, welding a 1 mm galvanized panel for a fender can curl the metal by several millimeters and peel the coating. You avoid that by using rivet nuts, which install cold and keep the sheet flat.
Before explaining how to install them, here’s what rivet nuts do differently.
Why it matters: you need a thread that holds under load and lets you remove fasteners later. A rivet nut (also called a nutsert) clamps and forms a blind bulge on the far side of the sheet, creating a strong, reusable thread without access to the backside. If you mount a bracket to a 1.5 mm aluminum panel with an M6 rivet nut, the pull-out force is often several times higher than tapping the thin sheet for an M6 screw.
How to install a rivet nut (step-by-step).
Why it matters: doing this right prevents pull-out and saves rework later.
- Choose the right rivet nut size for your screw (example: use an M6 nutsert for M6 bolts).
- Drill the correct hole—check the rivet nut spec (typically 7–8 mm for an M6).
- Insert the rivet nut into the hole from the accessible side.
- Use a hand or pneumatic rivet-nut tool and compress until the flange seats and the blind bulge forms (tool stops or a visible gap tells you).
- Thread the bolt in to test engagement; torque to spec (for M6 in thin steel, start around 5–8 Nm).
Done right, the nut holds without heat or distortion.
Why you might avoid welds for thin or coated parts.
Why it matters: improper welding ruins coatings and causes rust at the joint. Welding breaks paint or galvanizing over several millimeters around the bead, exposing bare metal; for instance, welding a galvanized bracket to a car panel will create a 10–20 mm zone of coating loss and a corrosion hotspot. Rivet nuts let you keep the factory finish intact because you never heat the area.
Why not use solid rivets for threaded joints.
Why it matters: you want removable fasteners and simple maintenance. Solid rivets make a permanent joint and need access on both sides or heavy deformation, so you can’t remove them to service components. For example, attaching a door latch with solid rivets means you must drill them out to replace the latch later; using M6 rivet nuts lets you remove the latch with a single wrench.
When rivet nuts outperform tapped threads in weak sheets.
Why it matters: tapped threads in thin metal strip out under load. Rivet nuts distribute load over the bulged area and into the sheet, improving pull-out strength; testing shows a properly installed M8 rivet nut in 2 mm steel can hold several kilonewtons before failure, while tapped M8 threads in that same sheet often strip below 1 kN. Use rivet nuts when the sheet is thinner than three times the thread engagement depth.
Quick maintenance tip you can use.
Why it matters: protecting threads saves future work. Apply a drop of anti-seize or thread locker based on your application (anti-seize for stainless-steel bolts, medium-strength thread locker for vibration-prone parts). That prevents galling and loosening and keeps disassembly easy.
Example: mounting a roof rack to a thin alloy crossbar.
Why it matters: you want safe load-carrying and serviceability. Drill the correct hole for M8 nutserts, install from below so the flange sits flush, torque the rack bolts to the rack manufacturer’s spec (typically 10–15 Nm), and check after the first 100 km for any loosening.
If you want a short rule of thumb: use rivet nuts when you need a strong, removable thread in sheets thinner than about 4 mm, when you can’t access the back side, or when preserving the coating matters.
Recommended Products
Fast-Change Mandrels: Swap your rivet nut tool's tips in seconds with our tool-free system – no tiny parts to lose. Equip with 6 Mandrel (M6, M8, M10, 1/4-20, 5/16-18, 3/8-16) & 80PCS Nusert, Ready to use

【Complete All-in-One Kit】 This rivet nut tool kit includes a 16-inch rivnut tool, equipped with 15 mandrels (metric M3, M4, M5, M6, M8, M10, M12; SAE 6-32", 8-32", 10-32", 10-24", 1/4-20", 5/16-18", 3/8-16", 1/2-13"), 290 nuts, plus a multi-functional wrench, a pair of gloves and an operation manual.

Package Includes: The Rivet Nut Tool Kit comes with 1 x Rivet Nut Tool, 7 interchangeable mandrels (10-24, 1/4-20, M3, M4, M5, M6, M8) and 455Pcs rivet nuts to meet your daily work needs
Rivet‑Nut Applications for Maintenance‑Friendly Designs

If you’ve ever worked on gear with hard-to-reach backsides, this is why rivet nuts help.
Why it matters: you can install a strong threaded anchor from one side so service bolts come out and go back in without cutting access panels. For example, on a van’s interior trim panel where you only have the outside face exposed, you can set a rivet nut and later remove the seat bracket bolt during service and reinstall it into the same thread.
You should use rivet nuts when you can’t reach behind a panel because they let you attach and detach hardware repeatedly. Install a rivet nut with a proper hand or pneumatic setter rated for the nut size and material; for common M6 steel nuts in 1.5 mm sheet steel, use a setting force around 3–5 kN (check the tool datasheet). Use knurled or flanged types when vibration or rotation is a concern. Example: on a rooftop cargo rack mounted to 1.8 mm aluminum, choose flanged steel rivet nuts and torque bolts to 8–10 N·m.
How to install them so they actually stay put.
Why it matters: a bad install leaves spinning threads or loose joints that fail during service. Real-world example: a control panel on a piece of farm equipment had spinning inserts because someone hand-squeezed them without a setter; the bolts loosened after a season.
Steps:
- Drill the correct hole size — follow the rivet nut maker’s drill chart (typically +0.2 mm over the nut OD).
- Deburr the hole to remove sharp edges.
- Insert the rivet nut flush with the panel face.
- Use a setter matched to the rivet nut size and pull it until you feel solid collapse (typically 3–6 full tool strokes with a manual setter).
- Back off the tool and check that the blind side has formed a tight mushroom with no gaps.
- Fit your bolt and torque to the recommended value (e.g., M6 steel into steel: 8–10 N·m).
You want them to be reusable.
Why it matters: maintenance should be fast and reliable so you won’t have to rework panels. Example: on a production line fixture, crews removed bolts weekly; using rivet nuts saved about 15 minutes per unit during service checks.
Practical tips:
- Use knurled shank rivet nuts in soft materials like plastic or composites to resist rotation.
- For thin metal under 1 mm, use a sleeve-type rivet nut designed for thin sheets and verify load ratings.
- If the panel will see high torque or shear, back the nut with a load-distributing washer on the mating bolt head.
- Keep a spare of each rivet nut size on service trucks — M5 and M6 are the most common.
Avoid common mistakes.
Why it matters: avoid wasting parts and time during installs or repairs. Example: a maintenance crew repeatedly drilled holes too large and had to replace panels on an ATV chassis.
Common errors and fixes:
- Hole too big — replace the panel or use a larger rivet nut where possible.
- Incorrect setter — use the tool specified for the nut size or you’ll under-collapse the insert.
- No deburr — edges cut the insert during collapse; always deburr.
If you follow these concrete steps and checks, you’ll get removable, serviceable attachment points that last and make maintenance faster.
Recommended Products

EASY TO USE - Toolless operation to change heads, to have your work done in few simple steps.

[About this project]: The rivet nut tool kit includes a 1pc set of manual rivet nut tools, providing rivet nuts in 5 imperial thread sizes: 80pcs 6-32, 70pcs 8-32, 120pcs 10-24, 110pcs 1/4-20, and 40pcs 5/16-18, for a total of 420pcs of imperial thread carbon steel rivet nuts, which can meet your various daily needs.

Dear Customer, we have recently received feedback from some users regarding issues with thread stripping during installation. To prevent any disruption to your work and to save your valuable time, we would like to inform you that this rivet nut is manufactured from 6061 aluminum. Rivet nuts made from 6061 aluminum are characterized by their soft and lightweight nature, making them extremely easy to rivet; you need only apply very slight pressure to complete the riveting process. Applying excessive pressure, however, will result in the threads stripping.
Frequently Asked Questions
Can Rivet Nuts Be Removed and Reused Without Damage?
Yes — I can remove rivet nuts and often reuse them, but threaded removal and load cycling may wear threads or deform the nut; I’ll inspect for damage and replace if fit or torque retention’s compromised.
What Torque Specs Are Safe for Rivet Nut-Installed Bolts?
Think of torque as a handshake: I’d start with manufacturer specs—typically 5–12 Nm for M4, 8–20 Nm for M5, 20–30+ Nm for M6—ensuring proper thread engagement and preload control to avoid pull-out or deformation.
Do Rivet Nut Tools Work on Curved or Tubular Surfaces?
Yes — I’ve used rivet nut tools successfully on curved installations and tubular fittings; you’ll choose appropriate flange or nutsert styles, mandrel lengths, and often a hand or articulated tool to prevent spinning and guarantee secure, serviceable threads.
Are There Corrosion Concerns With Mixed-Metal Rivet Nuts and Panels?
Yes — I worry about galvanic corrosion when rivet nuts and panels differ; I recommend using protective coatings, insulating washers, or matching materials to prevent electrolyte-driven corrosion and guarantee durable, serviceable joints over time.
Can Rivet Nuts Be Installed Blind in Composite Sandwich Panels?
Yes — I can install rivet nuts blind in composite sandwich panels, but I’ll use counterbore reinforcement and respect edge distance considerations to prevent core collapse, guarantee load distribution, and avoid splitting or pull-out during service.