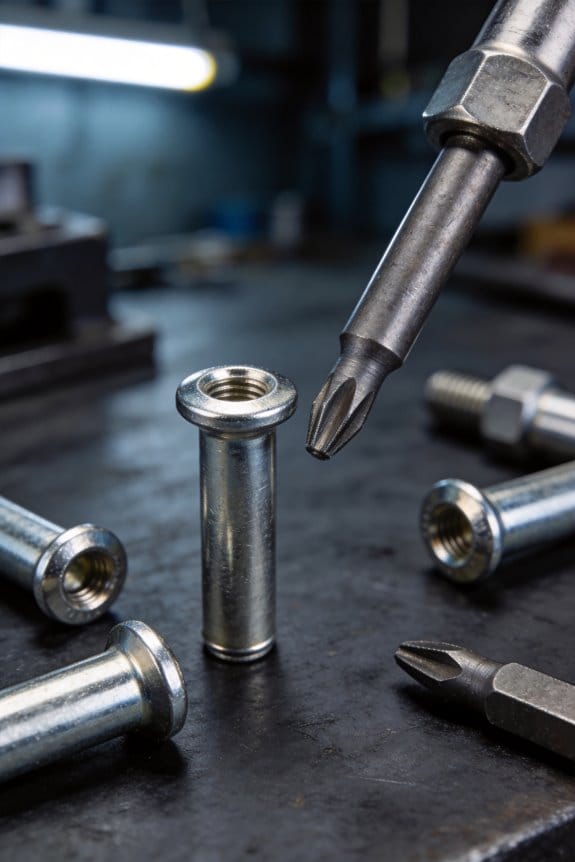
You’re staring at a painted sheet metal panel with one side inaccessible and need a secure threaded fastener, but the welders say studs are stronger. The exact question is: should you use a rivet nut or a welded stud for this part and load case?
Most people assume stronger means welded studssalways win, and they skip testing for fit, surface finish, or installation constraints.
This piece will show you, in plain terms, how rivet nuts and welded studs actually perform on thin or painted panels, blind joints, and high-load or fatigue-critical connections.
You’ll get clear rules of thumb and simple tests to confirm which fastener fits your part and process.
It’s easier than it looks.
Key Takeaways
If you’ve ever worked with thin metal panels, this is why.

Why it matters: you want a fast, damage-free way to add threads to one-sided, painted, or coated sheets. For example, installing threaded anchors on a 1.2 mm painted car interior panel without ruining the finish.
– Increased use of thin, painted, or coated panels makes one-sided, heat-free fastening like rivet nuts more attractive than welding. Use rivet nuts on panels thinner than about 2 mm to avoid burn-through and paint blistering. A common shop practice: drill the specified hole, insert a rivet nut, and set it with a handheld or pneumatic tool in under 10 seconds.
The difference between rivet nuts and welded studs comes down to how they affect finishes and corrosion protection.
Why it matters: you want to keep factory coatings intact so parts don’t need repainting and so corrosion resistance stays intact. Picture fastening a coated aluminum roof panel on a trailer where a weld would require local grinding and repainting.
– Demand for faster, lower-skilled assembly favors rivet nuts because they take seconds and simple tools, while welded studs need a trained operator and tack time. In a mid-volume assembly line, switching to rivet nuts can cut operator time per fastener from 1.5 minutes to about 10–15 seconds.
Think of mixed-material joins like salad dressing mixing metal and metal.
Why it matters: you want to avoid metallurgical problems that cause brittle joints or galvanic corrosion. For instance, joining stainless-steel brackets to aluminum frames with weld studs can create heat-affected zones that corrode later.

– More mixed-material joins and production variability prompt choosing rivet nuts to avoid metallurgical issues and reduce rework risk. Install rivet nuts to isolate the joint electrically and keep working without special filler metals.
Before you compare strengths, you need to know what loads matter.
Why it matters: ultimate tensile strength and fatigue behave differently; your choice should match your load case. Example: a welded stud on a steel subframe may hold a higher static load in a crash test, while a rivet nut in a thin sheet will resist vibration-induced loosening better on a vibrating assembly.
– Engineers compare load and fatigue: welded studs typically give higher ultimate strength, while rivet nuts often perform better on vibration-prone thin sheets because they distribute load across the sheet rather than concentrating heat and stress.
How to decide in practice.
Why it matters: picking the wrong method costs time and money on rework or failures. Example: replacing welded studs with rivet nuts on an electronics enclosure reduced paint repairs by 90% and cut assembly time in half.
Steps:
- Define your primary load: static (crash/pull-out) or dynamic (vibration/fatigue).
- Check panel thickness and coating: if thinner than ~2 mm or painted/coated, favor rivet nuts.
- Identify materials being joined: avoid welding on dissimilar metals without special processes.
- Estimate cycle time and skill level: if you need <15 seconds per fastener and less training, choose rivet nuts.
- Prototype and test: run pull-out and vibration tests on both options to see real numbers.

If you follow those steps, you’ll pick the right fastener for your job.
Which to Choose: Rivet Nuts vs Welded Studs (Quick Guide)
The difference between rivet nuts and welded studs comes down to how you can access the fastener and how permanent you need the join to be.
Why this matters: choosing the wrong type wastes time and can ruin thin or painted panels. Example: when you’re assembling a street-food cart with thin aluminum panels, a wrong weld will warp the side wall.
Rivet nuts — what they are and when to use them
Why this matters: they let you add strong threads from one side of thin material. Example: installing a control box onto the cart above, where you only have access to the outside, you’ll use rivet nuts to hold switches securely.
1) How they work (simple): you insert a rivet nut into a drilled hole, then compress it so the body deforms and clamps to the panel.
2) Typical sizes and strength: common sizes are M4, M5, M6, 1/4-20 and 5/16-18; pull-out loads vary, but expect ~500–1500 N for M6 in 2 mm steel.
3) Installation steps:
- Drill the correct hole size (check the rivet nut spec).
- Insert the rivet nut flush to the panel.
- Use a hand or pneumatic rivet-nut tool to set it.
4) Pros: installable from one side, fast—about 10–20 seconds per nut with a good tool, and works on thin or painted surfaces without heat.
5) Cons: less ultimate strength than welded fusion and not ideal where shear loads are very high.
Welded studs — what they are and when to use them
Why this matters: welding fuses the stud to the base metal so you can reach maximum static strength. Example: mounting a heavy engine bracket where the stud must resist high shear and pull forces, weld studs are the right choice.
1) How they work (simple): you tack or draw-arc weld the stud to the base, creating metallurgical fusion at the joint.
2) Typical sizes and strength: studs commonly range from 1/4″ to 3/4″ diameter; a properly welded M8 or 5/16″ stud can exceed 3000 N tensile strength depending on material.
3) Installation steps:
- Clean paint and rust from the weld area.
- Position the stud and tack it.
- Complete the weld with the recommended current and time per stud spec.
4) Pros: highest permanent strength and excellent fatigue performance when done correctly.
5) Cons: needs skilled welding, heats the material (can warp thin panels or damage coatings), and takes longer per stud—plan for a minute or more each if setup is required.
How to choose for your project
Why this matters: matching access, strength, and finish saves time and money. Example: on a powder-coated trailer side panel where you can only reach the outside, rivet nuts keep the finish intact and avoid burn marks.
Steps to decide:
1) Ask if you can access both sides. If no, choose rivet nuts.
2) Estimate peak loads: if you need maximum tensile or shear and fusion is allowed, choose welded studs.
3) Consider part thickness: under ~3 mm, rivet nuts usually win; over ~5 mm, welded studs often perform better.
4) Check surface finish: if preserving paint or avoiding heat is critical, use rivet nuts.
5) Calculate installed cost: rivet nuts need a simple tool; welded studs need welding equipment and a skilled operator.
Final, practical tip
Why this matters: a small test prevents big mistakes. Example: before doing 50 fasteners on the cart, install three rivet nuts and weld three studs on scrap pieces of the same panel to compare fit, finish, and strength.
Do that test, and you’ll know which method saves you time and headaches.
Recommended Products

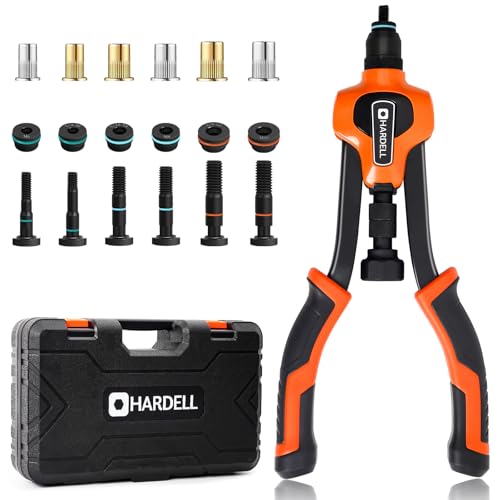
▲【VARIOUS MANDRELS】The Rivnut Tool Kit is quipped with 7PCS interchangeable mandrels(Metric M6 M8 M10; SAE 1/4-20*2, 5/16-18, 3/8-16)

【Complete All-in-One Kit】 This rivet nut tool kit includes a 16-inch rivnut tool, equipped with 12 mandrels (metric M3, M4, M5, M6, M8, M10, M12; SAE 10-24", 1/4-20", 5/16-18", 3/8-16", 1/2-13"), 230 nuts, plus a multi-functional wrench, a pair of gloves and an operation manual.

Complete Accessories: The rivet nut tool equipped with 11PCS interchangeable mandrels(M3 M4 M5 M6 M8 M10 M12, 10/24, 1/4-20, 5/16-18, 3/8-16) and 110pcs rivet nuts. In addition, a carrying case is also available to keep all the tools and accessories
Load Capacity & Vibration: How They Affect the Choice

The difference between rivet nuts and welded studs comes down to how they handle load and vibration.
Why it matters: your connection needs to survive the loads and shaking it will see in service.
Welded studs usually give higher ultimate load capacity because they fuse to the base metal, so use them when maximum strength is required. Example: if you’re mounting a suspension bracket on a steel frame that sees sudden jolts, welded studs will often let you carry heavier loads without the thread stripping. If you choose welded studs, follow these steps:
- Clean the weld area to bare metal with a grinder or wire brush.
- Use the correct weld settings for the base metal (typically 70–120 A for thin sheet steels; check filler/welder specs).
- Inspect the weld for penetration and no cracks.
Do this, and you’ll get near-parent-metal strength.
Rivet nuts and rivet studs still provide good load-bearing threads for most applications, and they often win when vibration could cause weld cracks. Why that matters: vibration causes micro-cracks in welded joints that shorten fatigue life. Example: a rattle-prone HVAC mount on a thin aluminum panel—rivet nuts hold the thread without heat distortion and resist loosening. If you pick rivet nuts for vibration-prone joints, use these steps:
- Select a rivet nut sized to the sheet thickness (e.g., M6 for 1–4 mm steel; M8 for thicker).
- Use a proper rivet-nut setting tool and set to the manufacturer’s squeeze specification.
- Torque the mating fastener to the recommended value and add a thread locker if the environment is high-vibration (Loctite 243 is a common choice).
Doing that gives reliable torque retention.
Fatigue resistance matters for repeated loads because a welded joint can concentrate stress and reduce life if not executed correctly. Example: an engine mount that sees constant cyclic loads can develop fatigue cracks at the weld toe; a properly installed rivet stud spreads load differently and can improve life in thin sections.
Torque retention is critical for any threaded fastener; rivet systems can hold torque reliably after proper installation, while welded studs sometimes loosen under sustained vibration, so factor your real-world vibration spectrum into the choice. For quantifiable guidance: if you expect peak static loads above the parent metal yield or shear limits, prioritize welded studs; if you expect high-cycle vibration (thousands to millions of cycles) on thin panels, favor rivet nuts or rivet studs and use a locking compound or lock washer as needed.
Recommended Products
Fast-Change Mandrels: Swap your rivet nut tool's tips in seconds with our tool-free system – no tiny parts to lose. Equip with 6 Mandrel (M6, M8, M10, 1/4-20, 5/16-18, 3/8-16) & 80PCS Nusert, Ready to use
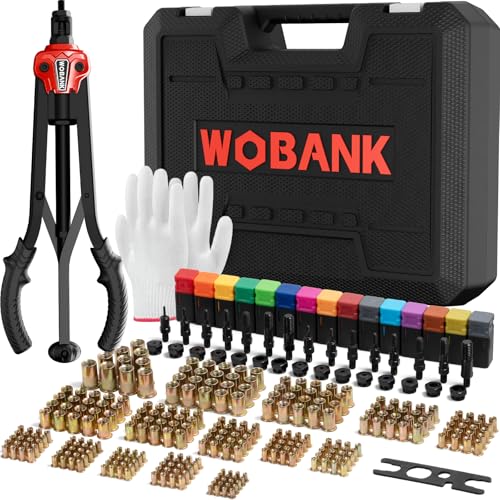
【Complete All-in-One Kit】 This rivet nut tool kit includes a 16-inch rivnut tool, equipped with 15 mandrels (metric M3, M4, M5, M6, M8, M10, M12; SAE 6-32", 8-32", 10-32", 10-24", 1/4-20", 5/16-18", 3/8-16", 1/2-13"), 290 nuts, plus a multi-functional wrench, a pair of gloves and an operation manual.

Package Includes: The Rivet Nut Tool Kit comes with 1 x Rivet Nut Tool, 7 interchangeable mandrels (10-24, 1/4-20, M3, M4, M5, M6, M8) and 455Pcs rivet nuts to meet your daily work needs
Installing on Blind or Painted Parts: Rivets vs Welds

The difference between rivet systems and welding comes down to whether you can reach the back side of the part.
Why that matters: if you can’t, you need a fastener that installs from one side. For example, when you mount a bracket inside a painted steel channel where you can only see one face, a rivet nut lets you add a threaded hole without removing paint.
How rivets work and when to use them
Why this matters: rivets let you add fasteners without heat or access behind the panel.
1) Use rivet nuts or rivet studs when you only have one-side access; they install from the front with a hand or pneumatic tool.
2) Pick material and size to match the base part: for 1.6 mm (0.063″) steel panels use M6 rivet nuts or 1/4″-20 rivet studs; for thin aluminum under 1 mm, use flanged stainless rivet nuts sized one step smaller.
3) Steps to install a rivet nut:
- Drill the hole to the rivet nut manufacturer’s recommended diameter (e.g., 10.5 mm for many M6 flat-head rivet nuts).
- Deburr the hole and clean paint from the contact area for better electrical and corrosion contact.
- Insert the rivet nut and use a setting tool to deform it until snug; torque the mating bolt to the spec the nut manufacturer gives (commonly 6–8 N·m for small nuts).
Real-world example: mounting a license-plate bracket to the inside of a painted bumper — you drill the correct hole, set an M6 rivet nut, and bolt the bracket on without touching the bumper paint.
How welding compares and when it makes sense
Why this matters: welding needs backside access or heavy fixturing and adds heat that can damage finishes.
1) Use welding when joint strength must exceed what a fastener provides or when you can expose and prepare both sides.
2) Expect to grind paint away around the weld area for proper penetration; welds concentrate heat, which can blister paint and compromise zinc or epoxy coatings.
3) Steps for minimizing paint damage when welding:
- Strip paint to bare metal at least 25–50 mm around the weld.
- Clamp or back up with a copper heat sink if possible.
- Use short welds and let the area cool between passes; then treat with a zinc-rich primer or corrosion inhibitor.
Real-world example: repairing a rusted patch on a car quarter panel — you cut out the rust, weld in a shaped patch with tack welds, grind, then re-prime and paint the area.
Protecting coatings and preventing corrosion
Why this matters: both methods can fail long-term without proper prep and sealing.
1) When preserving coatings, prefer cold-installed rivets because they avoid thermal damage; always clean mating surfaces and apply a thin bead of corrosion-inhibiting sealant (e.g., silicone or polyurethane designed for metal) around the hole before setting a rivet.
2) Match metals to avoid galvanic corrosion: use stainless rivets with aluminum only if you also provide a dielectric barrier or coating.
Real-world example: attaching an aluminum plate to stainless hardware on an outdoor sign — you use a polymer washer and sealant under the stainless rivet to prevent galvanic attack and water ingress.
Quick decision checklist (three items)
- Can you access both sides and need ultimate strength? Choose welding.
- Is preserving paint/coating crucial and access is one-sided? Choose rivet nuts or studs.
- Unsure about materials? Match metals and add sealant.
If you want, tell me the material thickness and finish you’re working with and I’ll recommend specific rivet sizes or weld approaches.
Recommended Products

Dear Customer, we have recently received feedback from some users regarding issues with thread stripping during installation. To prevent any disruption to your work and to save your valuable time, we would like to inform you that this rivet nut is manufactured from 6061 aluminum. Rivet nuts made from 6061 aluminum are characterized by their soft and lightweight nature, making them extremely easy to rivet; you need only apply very slight pressure to complete the riveting process. Applying excessive pressure, however, will result in the threads stripping.

THE MOST COMPLETE KIT: Stop wasting time running to the hardware store. YUZES rivnut tool kit offers a true all-in-one solution with 11 interchangeable mandrels (Metric M3 M4 M5 M6 M8 M10; SAE 10-24 1/4-20*2 5/16-18 3/8-16) and 175pcs high-quality rivet nuts. (Note: One 1/4-20 mandrel is pre-installed on the tool). We ensure you have the perfect fit for any project, from delicate DIY to heavy-duty automotive mods.

Includes 8 mandrels/nosepieces in the following sizes: M4, M5, M6, M8, M10, 1/4", 5/16", 3/8"
Cost Comparison: Installed Cost, Labor & Shop Footprint

The difference between rivet solutions and welded studs comes down to what you pay for the fastener versus what you pay for the whole process.
Why it matters: your bottom line depends more on labor and shop costs than the per-piece price of the fastener. Example: a job with 5,000 holes per month where rivet nuts cost $0.35 each versus weld studs at $0.25 — the rivet option can still be cheaper overall if it saves minutes and rework.
How installed cost compares
Why it matters: installed cost = fastener price + labor + rework + consumables.
1) Add up costs using this quick formula: (fastener cost × qty) + (labor minutes × labor rate × qty) + consumables + rework allowance.
2) Plug numbers: if rivet installs take 0.5 minutes at $25/hr and welds take 2 minutes at $35/hr, labor per piece is $0.21 for rivets and $1.17 for welds.
Example: for 5,000 pieces those labor differences mean rivets save ~$4,800/month, before counting less rework and no welding gas or rods.
Labor and staffing
Why it matters: the skill and time you need drive hourly cost and hiring difficulty.
- Welds: need certified, skilled operators and more time per part; expect training, certification renewals, and overtime.
- Rivets: installable by semi-skilled staff; you can train someone in a day and keep labor rates lower.
Example: a shop replacing one 8-hour certified welder ($40/hr fully burdened) with two semi-skilled rivet techs ($22/hr each) still reduces cost while increasing throughput.
Automation and throughput
Why it matters: automating reduces per-piece labor and stabilizes quality.
1) Assess automation ROI: estimate equipment cost, cycle time reduction, and annual output.
2) Compare payback: a rivet robot that cuts install time from 0.5 minutes to 0.1 minutes pays back faster than automating a 2-minute weld.
Example: a $120k rivet cell that increases capacity by 100k parts/year can achieve ROI in 2–3 years if it replaces manual installs at $25/hr.
Shop footprint and overhead
Why it matters: space and utilities affect fixed costs per part.
- Weld cells need floor space, dedicated ventilation, fire suppression reviews, and higher insurance; that can add thousands per month to overhead.
- Riveting stations are compact, often benchtop or small cells, and don’t need ventilation for fumes.
Example: converting one 200 sq ft weld cell (with added HVAC) to a 50 sq ft rivet cell can free 150 sq ft for another revenue-generating operation.
Rework, quality, and consumables
Why it matters: rework rates and consumable spend quickly erode savings on cheap fasteners.
- Welding brings heat distortion, spatter, and consumables like gas and rods; count on a 1–5% rework rate depending on part complexity.
- Rivets avoid heat issues and typically have lower rework for fit-up problems; they use minimal consumables.
Example: on thin-gauge housings, welding caused 3% scrap in one shop, while rivets cut scrap under 0.5%.
What you should do next
Why it matters: a quick cost model tells you which path wins for your parts.
1) Count fastener price and qty.
2) Time installs for rivet vs weld (measure 30–50 parts).
3) Multiply by your fully burdened labor rate and add consumables and expected rework %.
4) Add automation and footprint costs if you plan to scale.
Example: using those numbers on your next 10k-piece run will show whether paying more per rivet still saves dollars overall.
If you want, send me three real numbers — fastener prices, measured install times, and your labor rate — and I’ll calculate a side-by-side installed cost for you.
Material Compatibility: When Rivets Protect Base Metal

If you’ve ever watched a thin aluminum panel warp under a torch, this is why.
Why it matters: heat from welding changes the metal’s grain and can make thin parts bend or crack, which shortens your part’s life.
Rivets protect your base metal because they fasten by cold or mechanical deformation instead of by heat. For example, when you install a rivet nut on a 1.2 mm aluminum sheet, you compress and expand the nut into the hole with a hand tool or pneumatic setter, and the sheet keeps its original grain structure and dimensions. That preserves the original temper and avoids the weak, brittle zones welding creates.
Before explaining how to use rivets, here’s a quick real-world image: picture a painted car door skin that’s 0.9 mm thick — welding near the edge would blister the paint and distort the panel. Using rivet studs, you squeeze the fastener in place without heating the finish or warping the panel.
How rivets keep coatings intact and prevent corrosion:
– Welding can burn paint or plating; rivets don’t. When you set an open-end rivet or a rivet nut, the paint around the hole stays intact because you’re not exposing it to 600–1,500°C. That keeps the corrosion barrier on steel or aluminum.
Real example: on a powder-coated trailer frame, using structural rivets kept the coating continuous around the hole so rust didn’t start after six months outside.
How rivets reduce stress in mixed-material joints:
– Welding dissimilar metals creates a heat-affected zone that concentrates stress and can crack. Rivets join metals mechanically, so you avoid metallurgical reactions between, say, aluminum and steel.
Real example: joining a 0.8 mm aluminum skin to a 2 mm steel bracket with blind rivets eliminated the galvanic discoloration and cracking we saw on welded prototypes.
When to choose rivets over welding — quick steps:
- Check material thickness: if either piece is under ~1.5 mm, favor rivets.
- Check coating: if you need to keep paint or plating intact, use rivets.
- Check materials: if you’re joining dissimilar metals, choose rivets.
- Choose the right fastener: use solid or structural rivets for load-bearing joints, and rivet nuts or studs when you need threaded attachment.
Real example: replacing a riveted tailgate hinge with a welded version on a 1 mm sheet caused distortion; reinstalling with Grade 5 blind rivets restored straight operation.
Practical tip on repairs and post-paint work: rivet studs let you assemble after painting without touch-up. To do it, drill or punch a properly sized hole, install the rivet nut with a hand tool, and torque the mating bolt to the spec — you’ll avoid repainting and reduce rework time by hours.
You’ll get longer service life when you avoid heat-induced grain changes, preserve coatings, and prevent stress concentrations.
Use-Case Roundup: Automotive, Aerospace & Light Industrial
If you’ve ever worked on a car, plane component, or a factory jig, this is why rivet fasteners matter.
Why this matters: using the right fastener saves you time, prevents heat or paint damage, and keeps threads usable after assembly.
Automotive: When should you use rivet nuts?
Why this matters: rivet nuts let you add threaded mounts after paint and avoid heat on thin alloys.
Real-world example: on an EV battery cover made from 1.5 mm aluminum, technicians add mounting points after powder coat.
1) Use rivet nuts when you can’t access the back side or when the panel is thinner than 2–3 mm.
2) Choose steel or stainless rivet nuts sized to your bolt — for M6 use an M6 rivet nut; for M8 use an M8 rivet nut.
3) Install with a hand or pneumatic rivet-nut tool; set the mandrel to the manufacturer’s squeeze spec (typically 4–6 mm collapse for thin sheet).
They let you avoid welding and rework paint.
Aerospace: When are rivet studs the better pick?
Why this matters: rivet studs give you a strong threaded boss from one side without heat.
Real-world example: attaching a sensor mount to a composite wing panel where you only have access to the exterior.
1) Use rivet studs for one-sided assembly and when joining metal to plastic or composite.
2) Pick materials that match galvanic needs — aluminum stud for aluminum panels, stainless for mixed-metal joints.
3) Set them with the correct blind-rivet-stud tool and check thread engagement — aim for at least 1.5× bolt diameter of thread depth.
They keep threads strong without thermal cycles.
Light industrial: When do welded studs make sense?
Why this matters: welded studs give the highest ultimate load for structural joints.
Real-world example: mounting a heavy gearbox to a steel frame where you expect large shear and tensile loads.
1) Use welded studs only where you can control heat and have skilled welders.
2) Specify stud diameter and weld type per load — commonly 1/4″–3/4″ studs for small to mid loads; larger studs for heavy machinery.
3) Inspect coatings and nearby parts after welding; prepare to touch up paint within 24 hours to stop corrosion.
Welded studs handle heavy duty work, but they require skill and can crack nearby coatings.
Light-industrial assemblies: why rivet solutions often win
Why this matters: speed and vibration resistance cut your install time and reduce warranty calls.
Real-world example: assembling a run of 500 control panels on a line using rivet studs, finishing in hours instead of days.
1) Use rivet nuts or studs when you need repeatable, fast installs with lower per-unit labor cost.
2) Choose vibration-resistant blind fasteners (e.g., serrated flange or nylon patch bolts) when machines will vibrate.
3) Track installed-cost: include tool amortization, cycle time per fastener, and rework rates.
They typically save time and money on production lines.
Recommended Products

【390Pack Metric & SAE Rivet Nut Kit】This nutserts set includes 390 pieces in 12 sizes: M3 (80pcs), M4 (60pcs), M5 (40pcs), M6 (30pcs), M8 (12pcs), M10 (10pcs), M12 (6pcs), #8-32 (50pcs), #10-24 (46pcs), 1/4"-20 (30pcs), 5/16"-18 (16pcs), 3/8"-16 (10pcs). Stainless steel rivet nut kit covers both metric (mm) and SAE inch thread sizes for a wide range of fastening needs. (Installation tool not included.)

Rivet Nut Assortment Kit: 2 in 1 Rivet nuts Kit contains 460 metric rivet nuts, 460 SAE rivet nuts, for a total of 920 rivet nuts

【1676-Piece Metric & SAE Kit】Rivet nut kit combination set includes 1676 sets, 419 metric rivet nuts, 419 American-made rivet nuts, 419 flat washers, and 419 spring washers.
Frequently Asked Questions
Do Rivet Nuts Allow Electrical Grounding Continuity Like Welded Studs?
Yes — I can guarantee electrical continuity with rivet nuts if I choose conductive materials and proper installation; maintaining grounding integrity may need metal-to-metal contact, conductive coatings, or additional bonding to match welded studs’ permanent continuity.
Can Rivet Studs Be Automated Into High-Volume Assembly Lines?
Yes — I’ve seen rivet studs automated into high-volume assembly lines; automation feasibility is strong, enabling cycle optimization, consistent placement, reduced labor, and faster throughput while maintaining electrical continuity options when designed into the process.
Are There Dedicated Repair Kits for Failed Rivet Nuts in Field Service?
Yes — right off the bat, there are dedicated repair kits for failed rivet nuts. I keep replacement inserts and specialized tooling on hand, so I can fix stripped or broken nuts in the field without reinventing the wheel.
How Do Corrosion Resistance Options Compare Between Rivet Nuts and Welds?
Rivet nuts offer broader coating compatibility and easier galvanic isolation choices; I prefer them for plated or nonferrous substrates. Welds can be coated but risk heat-affected zone issues and harder galvanic isolation without added barriers.
Can Rivet Nuts Be Used in High-Temperature Applications?
Yes — I can use rivet nuts in high-temperature applications if I choose proper materials and high temp coatings; I’ll also account for thermal cycling effects, selecting stainless or specialty alloys and testing for creep, expansion, and coating stability.