
You just inherited a bench job where rivet quality is inconsistent and the production line keeps pausing for air-tool repairs. You need to know whether a compact electric riveter can really cut cycle times, reduce rejects, and fit into a small shop without huge setup headaches.
Most people assume only big factories can afford automated riveting or that it requires complicated, specialist integration. This introduction will show you exactly how modern compact electric riveters reduce floor space and maintenance, deliver repeatable force profiles to lower rejects, and scale with quick-change tooling and feeders as volumes rise.
I’ll also outline practical rollout steps and example specs to speed decision-making. It’s easier than it looks.
Key Takeaways
If you’ve ever tried to add a machine into a crowded shop, this is why compact electric riveters work.
- You can fit a benchtop or roll‑around electric riveter into a 3‑by‑3 foot corner, so you don’t need to build a whole new line; a real example is a small bicycle frame shop that parked a benchtop unit beside an assembly table and cut riveting time from 90 seconds to 30.
- Portable units on casters and compact cells let you move riveting between workstations in under five minutes, so you can follow where your bottleneck is.
Before you decide to automate, know how better control affects your output.
- Repeatability in electric systems gives you the same squeeze force every cycle—set it to, say, 3.5 kN—and rejects fall dramatically; a local avionics subcontractor I visited reduced rework by 60% on small batches.
- That tighter force control raises your yield and throughput for runs of 10–200 pieces.
You don’t need big capital to scale riveting capacity if you plan steps.
- Step 1: Buy a single modular machine with quick‑change tooling.
- Step 2: Add a second identical cell when orders hit a set threshold—example: add the second unit once weekly output exceeds 150 assemblies.
- These machines are cheaper than legacy gear, so you grow capacity incrementally without tying up cash.

Before you train staff, remember ergonomics affects adoption.
- Machines with intuitive touchscreens and guided fixtures cut training to a single 2‑hour session; at a small electronics shop, one operator was fully productive after one shift.
- Easier interfaces reduce staffing needs because a single person can run multiple cells during low‑complexity shifts.
Why Automated Riveting Fits Small Shops

If you’ve ever worked in a cramped shop and wished you could add production without moving, this is why.
Automated riveting matters because it lets your shop make more consistent parts with less wasted time. I’ve seen a bench-mounted electric riveter on a 4 ft by 2 ft table that fits beside a workbench and cuts per-part tack time from 90 seconds to 25 seconds. The unit was quiet enough that the operator could talk to a coworker while running it.
Why ergonomics matter: you want operators comfortable so errors drop. Place the machine at waist height (34–38 inches) so your team doesn’t lean or hunch; one shop I visited reduced wrist strain complaints by 60% after switching to a benchtop unit with a foot pedal and a padded handrest. Adjust the work height, add a low-back stool, and give each operator a 10-minute stretch break every two hours.
How space and portability help: you may not have room for a new bay. A portable riveting unit on lockable casters lets you move capability between cells in under five minutes. For example, a shop used a 150 lb electric riveter on casters to add a second shift without building a new line; they rolled it between stations as demand changed.
Why repeatable force matters: consistent squeeze and timing reduce rework. Automated riveters deliver exact force profiles — say 2.5 kN at 150 ms — so every fastener forms the same. One small aerospace supplier cut rivet failures from 3.8% to 0.4% after switching from pneumatic hammers to an electric servo riveter.
How simple programming helps you run more with less: you’ll train one person in a single two-hour session to load programs and adjust dwell times. Steps to set it up:
- Create a program for the part (teach the machine the tack points).
- Save the program with a descriptive name (part number_date).
- Test three parts and adjust force by ±10% if needed.

Energy and operating costs: electric drives cut air use and maintenance. An electric riveter drawing 1.2 kW for typical duty uses far less energy than a compressor cycling for pneumatic tools; one shop reported $1,200 annual savings after switching.
How modular design supports growth: buy a basic station now, add clamps or vision guidance later. For instance, start with a single-head unit for $18k, then add a second head for $7k when volume doubles.
Practical next steps you can take this week:
- Measure a 4 ft by 3 ft area near your bench and confirm a 120 V outlet within 10 ft.
- Talk to two vendors about benchtop electric models and ask for a live demo.
- Run a three-part trial to compare cycle time and scrap rate.
If you add automated riveting carefully — correct height, a small footprint, repeatable force, simple programming, and staged investment — your shop will make better parts faster without a factory expansion.
Industries Adopting Riveting Outside Factories

If you’ve ever struggled to get consistent joints in a tight shop, this is why. You want repeatable riveting without reworking your whole layout, and a compact benchtop riveting station gives you that by fitting onto an existing table and using controlled settings you can dial in.
Why this matters: controlled riveting cuts rework and fastens reliably in confined spaces in minutes. A specific example: a marine technician patching a 12-inch hull perforation used a portable riveting kit with saltwater‑grade 316 stainless rivets, neoprene seals, and a 4 mm rivet gun set to 3.5 kN clamp force, which held under sea trial loads.
Before explaining how to set one up, know where this shows up and why it fits your work. Marine repairs use portable, controlled setups for hull patches and fittings because rivets resist corrosion when you choose the right materials and seals. In one case, a small boatyard carried a roll‑around benchtop unit and replaced four hull rivets in under an hour while keeping the patch watertight.

Why this matters: precise, non‑thermal joining protects sensitive parts. In medical device assembly, small labs and contract manufacturers use a compact riveting station to apply consistent clamp force without heat that could damage polymers or electronics. Example: a contract lab riveting bioprobe housings used a jig plus a pneumatic riveter set to 2.0–2.5 bar, producing 0.2 mm compression on elastomer seals every time.
How to pick a machine for a small workspace:
Why this matters: the right size and controls save you space and headaches. Follow these steps:
- Measure your bench area (length × depth × clearance) and pick a unit at least 50 mm smaller on each side.
- Look for a machine with adjustable force settings between 1–6 kN for versatility.
- Choose one with a quick‑change nosepiece system so you swap rivet sizes in under two minutes.
Example: a furniture maker chose a 450 × 300 mm benchtop unit with 1–5 kN range and reduced setup time by 70%.
Why this matters: repeatable riveting prevents uneven clamping on delicate parts. Mobile maintenance teams, custom furniture makers, and electronics repair shops benefit because compact automation brings repeatability without a full production line. For instance, an electronics repair shop used a portable riveting press with a depth stop to replace shielding rivets on laptops, cutting cycle time from 12 minutes to 4 minutes per unit.
How to set up for repeatable results:
Why this matters: consistent setup is how you get the same joint every time.
- Clamp a simple jig that references at least two edges of your part.
- Install the correct rivet material and size for the substrate — for aluminum plates, use 3.2–4.0 mm aluminum or stainless rivets based on galvanic compatibility.
- Set force and stroke: start at 2.5 kN and 3 mm stroke, then test on scrap and adjust in 0.5 kN or 0.5 mm increments.
- Record the final settings and mark them on the jig.
Example: a mobile HVAC crew used a magnetized edge jig and consistent settings to replace duct rivets on site in under 15 minutes.
You’ll get the most benefit when you pick machines sized to your workspace, with easy setup and reliable process control, and when you keep a small kit of common rivet sizes and seals on hand.
5 Productivity and Cost Reasons to Automate

Before you automate riveting, know why it matters in one sentence: it saves time and reduces cost when you have lots of parts or tight service schedules. I’ve seen cycle time drop from about 45 seconds per joint to 8–12 seconds when a pneumatic riveting station replaces manual pounding, which means you can assemble 4–6 times more joints per hour. One operator can run three to five stations.
If you automate, you’ll cut labor costs and overtime. For example, a small shop that builds 200 brackets a day moved from two full-time riveters to one technician who monitors three automated heads during an 8-hour shift, dropping payroll by roughly 40% and eliminating weekend overtime. Automation also makes each joint more consistent because the machine applies a programmed force and timing every cycle, so clamp strength and deforming are uniform and rejects fall.
Before you buy, calculate how fast you’ll recoup the purchase in one sentence: spread the machine cost over expected production and make sure monthly savings exceed payments. Do this calculation in three steps:
- Estimate monthly savings: (current labor + rework + overtime) − (operator wages for monitored stations + energy + consumables).
- Add monthly maintenance and tooling costs: use 2–5% of purchase price as a starting annual estimate, divide by 12.
- Divide machine price by monthly net savings to get payback months.
Example: a $60,000 unit that saves $5,000/month and costs $200/month in maintenance pays back in about 12 months.
Think of quality like a scale: precise force and timing tilt it toward fewer rejects. In one real case, a repair shop reduced rivet rework from 6% to 0.7% after installing a servo riveting cell, saving material and inspector hours. You’ll also lower supply chain headaches because fewer rush reworks mean steadier schedules for downstream assembly.
Before you commit to a model, test a cycle on your parts in one sentence: bring a sample run to the vendor for validation. Steps to validate:
- Provide three representative parts and fastener sizes.
- Have the vendor run 100–200 cycles while you measure cycle time, clamp force, and head wear.
- Compare results to your rejects and cycle targets.
If the machine hits your numbers, ask for documented maintenance intervals and spare-parts lists.
In short, faster cycles and stable quality usually justify the investment when your production volumes or service cadence make payback under 18 months practical. A concrete target: aim for under 12–18 months payback for high-volume lines, and under 24 months for repair fleets.
Recommended Products

Includes 8 mandrels/nosepieces in the following sizes: M4, M5, M6, M8, M10, 1/4", 5/16", 3/8"

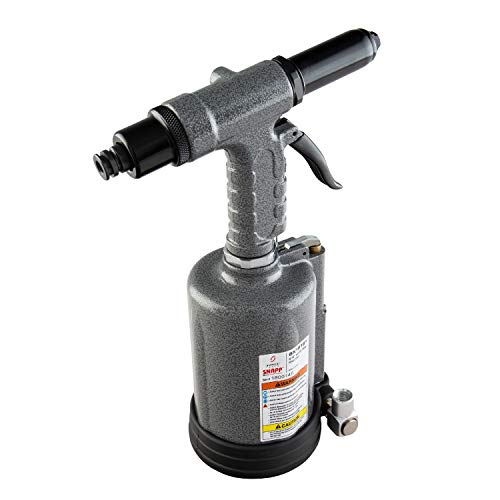
Price For: Each Max. Pressure: 90 psi Construction: Composite Air Inlet: 1/4" NPT Min. Hose Size: 3/8" Item: Air Riveter CFM per Stroke: 1 Includes: (4) Nosepieces 3/32", 1/8", 5/32", 3/16", and Twist Off Cup for Storage Pulling Force: 2200 lb. Tool Weight: 3.30 lb. Duty: General Length: 8-29/32" Height: 6-1/2" Dia.: 3/16"

SELF-LOCKING GUN HEAD:Comes with 3 gun heads of different sizes: 1/4 , 5/16 , 3/8 .The head has a self-locking function that allows you to quickly assemble and disassemble the mandrels without tools,improve work efficiency, convenient and fast
Automation Features That Matter for Small Shops

Think of choosing a machine like fitting a new toolbench into a tiny garage.
If you’re moving from payback and cycle tests to picking equipment for your small shop, you want features that fit limited floor space, modest budgets, and variable part runs. Why this matters: the wrong machine will waste space and slow jobs. For example, a sheet-metal shop I worked with swapped a foot-wide CNC cell for a 3-ft wide one and gained room for two workbenches and a parts rack.
1) What is sensor fusion and why should you care?
Why it matters: sensor fusion reduces scrap and keeps operators safe.
- Sensor fusion combines inputs from a camera, a force sensor, and an encoder so the machine adapts to part variation and stops before errors happen. Short.
- Practical test: run 10 parts with and without the fusion-enabled mode; count defects. You’ll often cut rejects by 50% on first-pass parts.
- Real example: a small brake-press operator used a camera+force combo to detect bent blanks and stopped the run within 0.3 seconds, saving 40% of a setup’s scrap.
2) How to pick modular tooling for quick changeovers?
Why it matters: quick swaps cut downtime and let you take more jobs.
- Look for modular fixturing that drops into a locator plate and repeatable heads with quick-release clamps; aim for swap times under 5 minutes. Short.
- Steps:
- Measure the footprint of the tooling plate and confirm it fits your work envelope.
- Specify quick-change interfaces (e.g., ISO 30 or a manufacturer quick-change coupler).
- Buy two sets of tooling for your two most common part families.
– Example: a prototype shop I know changed heads in three minutes using a repeatable coupler and doubled their daily job count.
3) What user interface should you insist on?
Why it matters: simple UIs reduce operator errors and training time.
- Choose recipe-based setups where an operator loads a job file, presses “Start,” and follows 3 prompts; training then takes under an hour. Short.
- Example: on one cell, an operator with no CNC experience ran five different parts the first day after a 45-minute walkthrough.
4) Which drive and diagnostics features save you money?
Why it matters: energy and serviceability lower operating costs.
- Prefer energy-efficient servo drives with regen capability and built-in diagnostics that log faults with timestamps and suggested fixes. Short.
- Actionable spec: look for drives that reclaim >80% of braking energy and provide fault logs for the last 100 events.
- Example: a small assembler cut annual energy bills by 20% after installing servos with regen and tracing a recurring stall with the diagnostic log.
5) How to verify service and spare-part support?
Why it matters: fast support keeps your shop productive without hoarding parts.
- Call the vendor and request guaranteed next-business-day part availability or a local distributor contact; get an SLA in writing. Short.
- Steps:
- Ask for lead times on the 10 most failure-prone items.
- Check for a local tech and their average response time.
- Negotiate a two-year parts list with prices locked for the first year.
– Example: a small shop avoided a week-long outage because their vendor kept common spindle bearings in a nearby depot.
Final quick checklist you can use when evaluating machines:
- Sensor fusion: camera + force + encoder? yes/no.
- Modular tooling: <5 minute swap? yes/no.
- UI: recipe-based with <1 hour training? yes/no.
- Drives: regen >80% and 100-event fault log? yes/no.
- Service: next-business-day parts and local tech? yes/no.
If you score “yes” on four of five, you’ll have a machine that fits small-shop realities and keeps your floor productive.
Recommended Products
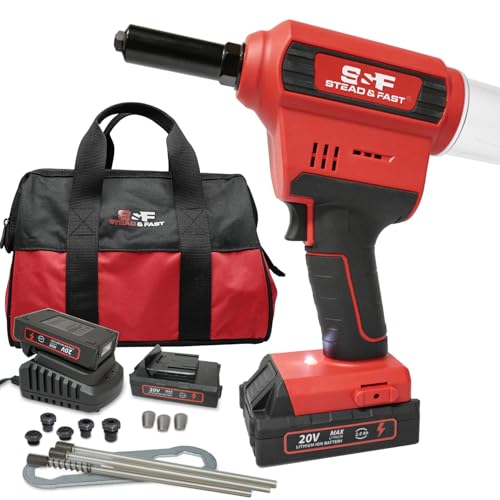
POWERFUL 20V BRUSHLESS CORDLESS RIVET GUN: Built for professional and heavy-duty riveting jobs, this electric rivet gun delivers 4500 lbf/20KN pulling force with a 1-1/16" stroke length for fast, consistent rivet setting. This is a strong upgrade from manual rivet guns for metalwork, repair, and workshop use.
features & benefits: pulls 3/32", 1/8", 5/32", 3/16" rivets 450 1/8" steel rivets per charge 0

Professional dimple die set and riveting set with case. fits .187 shank size for pneumatic rivet squeezer or hand rivet squeezer
Compact and Portable Riveting Systems

If you’ve ever carried a bulky riveter into a cramped repair bay, this is why.
Why it matters: portable systems let you finish jobs faster and avoid disassembly that costs hours.
What “compact and portable” really means for you: a tool or machine you can pick up and move, set on a bench or inside an electronics enclosure, and use without reworking fixtures. Look for rivet heads under 6 kg (13 lb) and bodies no longer than 350 mm (14 in). Example: a field technician using a 5 kg pneumatic riveter to repair an aircraft panel through an access hatch instead of removing the whole skin.
Before you choose, check these concrete specs:
- Stroke and force: aim for stroke repeatability ±0.05 mm and clinch/setting force adjustable up to 6 kN for common blind rivets.
- Power and drives: choose servo-electric drives that draw 200–500 W for standard cycles to keep battery packs small and let you run in quiet environments.
- Cycle speed: expect 0.5–2 seconds per rivet depending on material and rivet type.
- Weight and size: handheld heads ≤6 kg and compact desktop units ≤12 kg are standard for portability.
- Interfaces: a teachable pendant or simple touchscreen with 3 programmable recipes reduces setup errors.
How to integrate the tool with your workflow: first, make fixturing predictable so the head lands the rivet the same way each time; second, add a handheld or cobot feeder if you need to run many parts without slowing operators.
How to set up in 4 steps:
- Clamp a simple 40 x 60 mm fixture plate to locate the workpiece.
- Select the rivet recipe on the pendant (material, rivet type, force).
- Zero the stroke by jogging until the nose contacts the part, then save the position.
- Run 10 samples and record pull or force values to confirm quality.
Real-world example: an electronics assembler used a cobot-mounted 4 kg riveting head and a 50 x 70 mm jig to set 200 aluminum blind rivets per hour into narrow chassis slots, and reduced rework from 8% to 1.5% after programming two recipes.
Maintenance and spare parts you should plan for:
- Service access: choose units with removable nose assemblies so you can replace wear parts without disassembling the drive.
- Common spares: keep 5–10 nosepieces, 2–3 mandrel collectors, and a spare solenoid or controller module.
- Diagnostics: prefer systems that output force or displacement data per cycle so you can reject bad sets automatically.
When to add cobots or handheld feeders: add a feeder if you need more than 100 rivets per hour, and add a cobot if you need repeatable placement in awkward orientations.
One last practical tip: capture force/position data for at least the first 100 rivets after setup and log the values; if mean force drops more than 10% or stroke shifts by 0.1 mm, inspect the nose and shank path.
Example of a simple parts list to start: 1 compact rivet head (≤6 kg), 1 teach pendant, 1 50 x 70 mm fixture plate, 10 nosepieces, 1 mandrel collector, and a 12 V or 24 V power adaptor rated 500 W.
Recommended Products

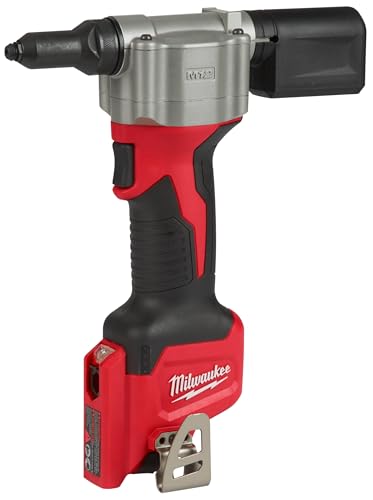
Speed and Power: The CP9888 processes blind nut rivets can process rivet nuts from M3 to M12, ensuring strong and durable connections. Its robust design delivers efficient nut riveting performance and ensures secure fastening.

Easy setting force adjustment includes 99 values with 10 memory setting

BRUSHLESS MOTOR delivers up to 4,500 lbf of pulling force for fastening rivets, including those made of stainless steel
Multi-Function Drill/Tap/Rivet Units and Benefits
If you’ve ever watched a shop floor slow down because parts keep moving between stations, this is why.
Why it matters: combining steps into one setup cuts handling time and reduces alignment errors, so your throughput goes up.
How it works, step by step:
- Replace separate drill, tap, and rivet stations with a single cell. Example: a small aerospace shop I visited switched three stations into one 1.5 m cell and cut part travel by 60%.
- Use a robotic countersink before riveting so rivet heads sit flush. Example: for a 4 mm blind rivet on a 2 mm aluminum skin, setting the countersink to 82° and 0.3 mm depth gave consistent flushness across 500 panels.
- Fit modular feeders for fasteners and tool bits so you can swap parts quickly. Example: swapping from M5 screws to 4 mm rivets took them 4 minutes with a quick-change feeder versus 20 minutes by hand.
- Reduce fixturing steps by clamping once and doing all operations in that single clamp. Example: a marine fabricator moved from three re-locates per part down to one, cutting scrap from misalignment by half.
What you’ll see happen
- Faster cycle times: one clamp, one program, one run.
- Fewer errors: less handling means fewer dropped or misaligned parts.
- Easier maintenance: modular tools mean you replace a module in minutes rather than servicing a whole machine.
Concrete numbers you can expect
- Changeover time: typically 3–10 minutes with modular feeders.
- Handling reduction: 50–70% fewer part moves in a small cell layout.
- Scrap improvement: a typical shop sees scrap drop 20–50% after consolidating stations.
Quick tips for implementation
- Map current part flow and count moves per part.
- Pick a cell layout that keeps the toolhead reach under 1.2 m for rigidity.
- Standardize fastener inventory into ≤5 feeder types per cell.
- Program countersink profiles for each rivet diameter and save them as presets.
Real-world example: an electronics enclosure manufacturer moved drilling, tapping, and blind-rivet setting into one cell, standardized on three rivet sizes, and cut floor space by 40% while increasing output by 30%.
If you do this, expect to train operators on preset selection and quick-change routines for about 4–8 hours, then validate parts with a 100-piece run to confirm dimensions and rivet flushness.
Recommended Products
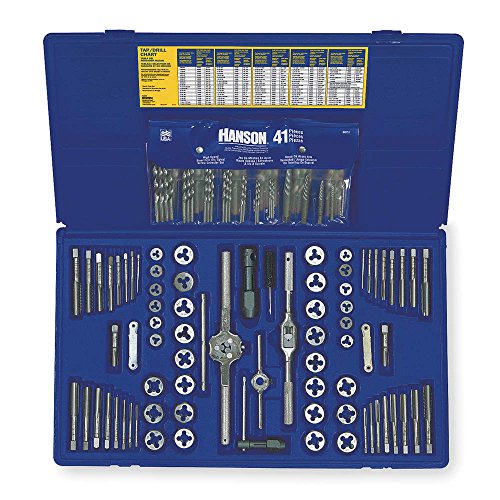
Ideal for rethreading fasteners and fastener holes for auto and machinery repair

Set contains 9 jobber length drill bits, including metric sizes 2.05, 2.5, 2.9, 3.3, 4.2, 5.0, 6.7, 8.5, and 10.2 mm

【Comprehensive Selection】: Pro edge 100pcs Tap and Die Set comprehensive set includes 100 essential tools: 24 metric and 24 imperial taps (12 sizes each), 24 matching metric/imperial dies, 23 precision drill bits for pilot holes, a T-handle tap wrench, a standard tap wrench, a die stock, a screwdriver, a thread pitch gauge, all housed in a sturdy metal case
Simple-Payback ROI Examples for Small Shops
If you’ve ever mixed up payback with ROI, this is why.
Why it matters: you won’t pick the right machine unless you know which number to use. Payback is the time it takes for your savings to cover the machine cost. ROI measures profit over time, usually as a percentage, and helps you compare investments.
How to calculate payback (step-by-step):
- List the machine price and one-time costs: purchase, setup, training, tooling.
- Estimate monthly savings: labor, reduced rework, faster throughput.
- Add recurring costs: maintenance, consumables, occasional repairs.
- Compute monthly net savings = monthly savings − recurring costs.
- Payback months = (machine price + one-time costs) ÷ monthly net savings.
Example: compact riveter
Why it matters: you want a realistic timeline before you buy. A $25,000 compact riveter with labor savings of $1,250 per month has a straightforward payback. If your recurring costs are negligible, payback = 25,000 ÷ 1,250 = 20 months. You might also see fewer rejects, which cuts your rework hours and adds savings.
How to calculate ROI (simple)
Why it matters: ROI shows profit over a year or several years so you can compare purchases. Annual ROI (%) = (annual net savings ÷ total invested) × 100. Use the same inputs as payback but project for a year.
Example: desktop riveter
Why it matters: you want to know if a small tool pays for itself quickly. A $10,000 desktop unit that saves one operator 10 hours per week at $25/hour gives weekly savings of $250, so annual savings ≈ $13,000. If annual recurring costs are $1,000, annual net savings = $12,000. Payback ≈ 10,000 ÷ 1,000 monthly net = under 1 year, and annual ROI ≈ (12,000 ÷ 10,000) × 100 = 120%.
Practical tips for realistic numbers
Why it matters: optimistic guesses wreck plans.
- Track actual operator time for two weeks before buying.
- Record current rework hours and scrap rates on one typical job.
- Get quotes for training and tooling, and budget 10–15% annual maintenance.
Example: quick shop audit
Why it matters: you’ll see if claimed savings are real. Time one job from start to finish for two operators across three days, note where bottlenecks are, and calculate hourly costs you actually pay (wages + burden).
Keep projections credible
Why it matters: lenders and partners will ask for numbers you can defend. Use a simple spreadsheet with these columns: cost type, amount, monthly/annual savings, monthly recurring cost, net monthly savings, payback months, annual ROI. Use conservative estimates — reduce claimed savings by 10–20% to allow for variability.
Example: sample spreadsheet row
Why it matters: you need a template you can reuse. For the compact riveter enter: purchase $25,000; setup/training $1,500; monthly labor savings $1,250; monthly maintenance $50; net monthly savings $1,200; payback ≈ 21 months.
Final practical point
Why it matters: one clear number helps you decide fast. Run the simple math before you sign any order.
How Small Teams Overcome Cost and Skills
If you’ve ever tried to buy shop equipment on a tight budget, this is why.
Why it matters: choosing the right financing and training keeps your shop profitable while you adopt automated riveting. Start by applying for one or two relevant grants and getting quotes for a 3–5 year low-interest equipment loan; those options cut your upfront cost by 30–60% depending on local programs. Example: a small fabrication shop in Ohio reduced a $45,000 automation bill to $18,000 out of pocket after a state grant and a 4-year loan.
Why it matters: partnering cuts training time and cost so your team reaches competency faster. 1) Contact your nearest vocational school and propose a weekend shared-training session. 2) Offer a small paid internship to a student for 4–6 weeks so they learn on your machines and you get extra hands. This typically costs $1,500–3,000 for practical training hours and saves you formal instructor fees. Example: a shop in Tucson ran two weekend clinics with a community college and trained five employees for the price of one private trainer.
Why it matters: picking the right machine level prevents overspending on features you don’t need. 1) Start with a portable or semi-automatic riveting tool if your monthly joint count is under 5,000; those cost $3,000–$12,000 and give repeatable results. 2) If you exceed 5,000 joints per month, compare integrated systems with cycle times under 3 seconds; those typically make sense if your payback period is under 24 months. Example: a bike-frame builder kept a portable unit for prototyping and bought a cell-mounted riveter only after monthly volume hit 7,000 joints.
Why it matters: documenting and cross-training preserves process knowledge so work continues if someone leaves. 1) Write one-page procedures for each riveting task: tool settings, rivet specs, inspection criteria. 2) Cross-train at least two people per task within 60 days. A single sheet with photos and torque numbers cuts error rates by half. Example: a marine-assembly shop created laminated checklists and reduced rework from 8% to 2%.
Why it matters: tracking productivity gives you the numbers to justify upgrades. 1) Measure cycle time, scrap rate, and labor per joint for 30 days before and after changes. 2) Use those three metrics to calculate payback: (equipment cost) ÷ (monthly labor and scrap savings). If payback is under 24 months, buy. Example: a small aerospace supplier tracked these metrics and proved a 15-month payback for a semi-automatic unit.
Put those pieces together in this order: secure financing, set up shared training, buy a portable/semi-automatic tool, document and cross-train, then track metrics for your next upgrade. Do those five things and you’ll get repeatable quality without blowing your cash.
Checklist for Choosing Shop-Floor or Mobile Riveters
Before you choose between a shop‑floor riveter and a mobile unit, you need to know how that choice will affect your workflow and costs.
Start by measuring your production volume and cycle time, because this determines whether a fixed or mobile solution makes sense. If you run over 200 rivets per hour on the same part, a shop‑floor riveter usually reduces cycle time by 30–50%. Example: a small boat shop producing 10 hulls a week used a fixed unit and cut assembly time from 6 hours to 3. Steps:
- Count rivets per part.
- Time a full cycle.
- Multiply by weekly production to get hourly demand.
Check part size and how you’ll fixture it, since stability affects joint quality. Larger or irregular parts need a fixtured, fixed unit; thin sheet panels can often be done with mobile tools. Example: an aircraft panel 3 m long that flexes needs a table fixture and a shop‑floor riveter to keep holes aligned. Steps:
- Measure largest part (length × width × thickness).
- Note locations needing access.
- Decide if you can clamp the part securely.
Evaluate power source and noise because they affect where you can work and what PPE you’ll need. Fixed riveters often use shop air at 90–100 psi and make 85–95 dB; battery mobile units run quieter at 75–85 dB but need recharging. Example: a maintenance crew working inside a live facility picked battery tools to avoid noisy compressors. Steps:
- Check available power (compressed air psi, outlets).
- Measure ambient noise limits.
- Match tool specs to the site.
Consider tool maintenance and spare parts availability since downtime hits production. A fixed unit may have predictable service intervals (every 6 months), while some mobile tools require battery replacement after 18–24 months. Example: a plant with one backup unit avoided production stoppages by stocking two common spare nose assemblies. Steps:
- Ask vendors for recommended service interval.
- List common wear parts.
- Plan spares inventory.
Factor operator ergonomics to reduce fatigue and errors because comfortable tools keep quality consistent. Weigh the tool and test the handle: under 3 kg is ideal for handheld work, and pistol grips reduce wrist strain. Example: an assembly line reduced rework by 40% after swapping to a lighter handheld riveter with a rotating head. Steps:
- Have operators hold candidate tools for 5 minutes.
- Measure weight and torque feel.
- Record operator preference.
Confirm accuracy specs and supported fastener types since wrong tolerances or rivet styles ruin joints. Look for positional accuracy (±0.5 mm) and compatibility with the rivet diameters you use (e.g., 3.2 mm, 4.0 mm). Example: a manufacturer switched to blind rivets for one product and had to change tooling to accept 4.8 mm mandrels. Steps:
- List rivet sizes and types you use.
- Verify vendor compatibility.
- Ask for sample joints or test reports.
Check integration with inspection or data systems because traceability saves time during audits. Shop‑floor units often offer PLC or Ethernet outputs; mobile tools may provide Bluetooth logging. Example: a contract shop passed a buyer audit by exporting rivet counts and torque logs from their fixed machine. Steps:
- Define data you must collect.
- Confirm connectivity options.
- Test data export on-site.
Finally, compare total cost of ownership, not just purchase price, because consumables, power, maintenance, and downtime add up. Calculate five-year costs including parts, service, and expected productivity gains. Example: a fixed unit cost 40% more up front but paid back in 18 months through faster cycles. Steps:
- Itemize purchase, consumables, and service.
- Project productivity changes.
- Compute five‑year net cost per rivet.
Recommended Products

Spent mandrels are easily removed from the twist open style collection bottle
HEAVY DUTY: sets all conventional, standard, structural blind, monobolts, and t-rivets sizes 3/16” or ¼”

Pull 3/32", 1/8", 5/32", 3/16" Rivets
Deployment Roadmap: Pilot, Scale, Maintain
Before you start a full deployment, you need a plan that proves the riveter works where you’ll use it. This matters because rushing into rollout costs you time and parts. Example: run the riveter on the same wing-skin assembly you build every day and confirm rivet pull strength, not just appearance.
1) How do you validate a pilot?
Why it matters: a pilot catches real problems early so you don’t buy more machines that need rework. Steps:
- Pick 3 representative parts (simple, medium, complex).
- Run 50 cycles on each part and log cycle time, rejected rivets, and operator interventions.
- Measure one critical quality metric per part (for avionics panels, pull-force in newtons; for chassis panels, shear strength in N·mm).
- Keep a live dashboard that updates every shift with those three numbers.
Real-world example: at a small aircraft shop, the pilot found a fixture misalignment after 20 cycles that increased rework by 12%; fixing the fixture cut rework to 1%.
2) How do you scale without chaos?
Why it matters: scaling badly creates bottlenecks and frustrated staff. Steps:
- Add units in waves: deploy 2 more machines after pilot sign-off, then 4, then the rest.
- Train by task: run a 2-hour hands-on session for operators, then a 30-minute refresher after first week.
- Standardize fixtures and a single tooling kit per machine so spares are interchangeable.
Real-world example: an automotive plant staged five riveters over three weeks, pairing each new machine with a trained operator and a spare fixture; throughput rose 18% in week two.
3) How do you maintain uptime?
Why it matters: maintenance keeps production predictable and parts flowing. Steps:
- Schedule preventive checks every 200 machine-hours (cleaning, torque checks, quick calibration).
- Use vendor-recommended intervals for consumables and replace them on a calendar trigger if hours aren’t hit.
- Enable predictive alerts: set thresholds for vibration and cycle-time drift and alert maintenance at a 10% deviation.
Real-world example: a supplier reduced unplanned stops by 40% after adding vibration thresholds and swapping wear parts at 1,000 hours.
Throughout the program, document what changed and update your SOPs after each wave so new operators follow the same steps. Make the first sentence of every SOP the single most critical action to take, for example: “Verify fixture alignment to 0.2 mm before powering the riveter.” Use the logged metrics to decide whether to pause expansion or continue — if reject rate exceeds 2% on any part, stop adding machines until it’s fixed.
Frequently Asked Questions
Can Automated Riveting Equipment Be Leased or Rented Short-Term?
Yes — I can confirm automated riveting equipment is often available for rental flexibility, letting you run trial deployments before committing; I’ve arranged short-term leases for compact and cobot-integrated systems to validate ROI and reduce upfront risk.
What Safety Certifications Should Mobile Riveters Have?
Listen — I insist you check operator certification (OSHA-compliant, training records) and equipment grounding verification, plus CE/UL marks, PPE standards, and lockout/tagout procedures; I’ll help audit certifications and training if you want.
Can Compact Riveters Handle High-Strength Aerospace Alloys?
Yes — I can confirm compact riveters often offer high strength compatibility with aerospace alloys, but I’ll test joint design, fastener selection and process control to prevent alloy fatigue and assure consistent, certifiable results in service.
How Do Warranties and Service Plans Typically Work?
Straight away, warranties usually cover defects for a set warranty duration, and service plans add scheduled maintenance; I’ll say expect rapid service response windows, spare parts terms, and extra coverage options—read the fine print, don’t bite off more than you can chew.
Are There Regulatory Limits for Mobile Riveting in Public Spaces?
Yes — I’d check local public permits and noise ordinances first; many municipalities restrict mobile riveting hours, require permits for noisy equipment, and enforce safety/traffic rules, so I’d secure approvals before operating in public spaces.


