You’re staring at an assembly schedule because a batch failed final inspection for inconsistent joint torque, and you can’t tell which step caused the rework.
The question is exactly which fastening steps and tool sequences are costing time and creating those faulty joints. Most teams assume tightening technique or operator error is the primary culprit and chase training without changing the process.
This article shows how digital twins, AI-driven sequencing, and torque/quality sensors pinpoint misalignments, reduce tool changes, and produce timestamped joint records so you cut rework and speed cycle time.
You’ll get a clear rollout sequence: pilot, train, and track KPIs for measurable improvement. It’s easier than it looks.
Key Takeaways
Here’s what actually happens when you check a digital twin before assembly: it prevents costly mistakes by letting you catch misalignments and validate the fastening order before you touch any parts. Use a digital twin to run a pre-assembly rehearsal that mirrors your line: load the exact CAD files, run the fastening sequence, and watch for clashes or clearance issues. Example: before assembling an HVAC blower, run the twin to find a bracket that interferes with the access path for an M6 screw — you’ll spot it on-screen and avoid a ruined subassembly.
Why this matters: you reduce rework and scrap by finding errors virtually.
- Step 1: import the CAD and tooling profiles into the twin.
- Step 2: simulate the fastening sequence at least once per new product.
- Step 3: adjust tooling or sequence when the simulation flags misalignment.

Takeaway: simulate one full cycle for every new variant before the first production run.
If you’ve ever fought with slow changeovers, this explains why AI-driven sequencing helps: it groups fasteners by torque and physical access so your tools do fewer swaps and you finish cycles faster. Let the system sort screws into runs that share torque values (for example, group all 8 Nm screws together) and plan access so the robot or operator doesn’t crisscross the workpiece unnecessarily. Example: on an electronics enclosure with 16 screws — eight at 4 Nm and eight at 8 Nm — sequencing them in two contiguous runs cut changeover tool time by 40% in one plant.
Why this matters: you shorten cycle time and reduce operator fatigue.
- Step 1: set torque bins (e.g., 2–5 Nm, 6–10 Nm).
- Step 2: assign fasteners to bins and create grouped sequences.
- Step 3: run a timed trial and tweak the sequence for door-to-door flow.
Result: expect tool-swap time to drop by roughly 30–50% on grouped runs.
Think of torque analytics like a fitness tracker for every screw: integrated sensors log each torque, flag bad readings, and trigger maintenance before failures compound. Attach torque logging to each driver so you record the exact value per fastener and set thresholds that send alerts when readings fall outside ±10% of target. Example: a drivetrain assembly line detected a cluster of screws at 70% of target torque; the alert led to a nozzle check and prevented a loose-assembly recall.
Why this matters: you increase first-time-right rates and catch tool wear early.
- Step 1: set acceptable torque bands for each fastener.
- Step 2: enable per-fastener logging and automatic alerts.
- Step 3: schedule maintenance when a tool hits repeat out-of-band events.
Metric: monitor first-pass yield weekly and expect improvement within one maintenance cycle.

Before you rely on automation alone, human-in-the-loop controls keep safety and traceability intact by requiring operator sign-off and giving rapid fault alerts. Require the operator to confirm the setup on a touchscreen for each batch and mandate immediate acknowledgment of any fault that halts the line. Example: on a boat-building jig, operators must confirm torque tool calibration before the shift; if a fault appears, the system locks the station and sends a push alert to supervisors.
Why this matters: you preserve operator oversight and make root cause auditing straightforward.
- Step 1: define required operator checks and on-screen sign-offs.
- Step 2: configure instant fault notifications to phones or station displays.
- Step 3: log every sign-off and fault with timestamps for traceability.
Tip: keep sign-offs under 10 seconds to avoid slowing throughput.
You don’t need exotic parts to reduce pick-and-feed failures; standardize fastener specs, pre-test feeders, and choose coatings that work with your handling systems. Pick a single head style and coating per product family (for example, zinc-plated pan-head M5) so feeders and grippers don’t need constant adjustment. Example: a manufacturer standardized on one M5 pan-head and switched feeder testing to a 100-cycle run; pickup failures dropped from 6% to 0.5%.
Why this matters: you lower pickup defects and cut field failures.
- Step 1: create a standard fastener spec list for each product family.
- Step 2: run a 100-cycle feeder test for every new part lot.
- Step 3: pick coatings that match your gripper material (metal-on-metal or nitrile).
Result: fewer jams, fewer field defects, and simpler inventory.
How AI & Digital Twins Change Your Fastening Workflow (Key Actions)
Think of digital twins like a rehearsal on a virtual stage.
Why it matters: rehearsing saves you time and prevents mistakes. I model the assembly in a twin, run a virtual fit check, and walk through the fastening sequence before touching parts. Example: for a door hinge assembly, I run the twin, catch two misaligned holes, and avoid re-drilling on the floor.

How AI orders your work and why that matters: AI sorts fastening steps by priority, torque tool needs, and access, so you don’t waste time swapping tools. A real-world case: on a wiring harness subassembly, AI grouped five low-torque screws together, letting the tech finish them with a single screwdriver bit instead of three swaps.
Steps to use AI sequencing:
- Feed the assembly model and tool specs into the system.
- Let AI propose a sequence and flag conflicts.
- Review and confirm suggestions before execution.
Short note. Sensors keep the twin accurate.
Why that matters: real-time IoT updates let you adjust when tolerances shift instead of stopping the line. I rely on live sensor feeds—force, position, and vibration—so the twin reflects current conditions within seconds. Example: a production run where temperature caused thermal expansion; the sensor data changed the alignment in the twin and prevented overtightening eight fasteners.
How to keep the twin reliable (steps):
- Install position encoders, torque sensors, and a temperature probe at key stations.
- Stream data at 1–5 Hz for critical joints and 0.1–1 Hz for ambient metrics.
- Calibrate sensors weekly and log anomalies.
Why clearer instructions matter: technicians get fewer surprises and less downtime. AI turns the twin and sensor data into step-by-step work instructions with photos, torque values, and when to stop for inspection. Example: a technician got an instruction showing the exact bolt, a 25 Nm torque value, and a photo of the correct washer position, finishing the task 30% faster.
How to implement this with your team:
- Train technicians on the interface—three 2-hour sessions over a week.
- Require sensors to be online and reporting before a job starts.
- Set the workflow so AI suggests actions and a human confirms them.
A concrete checklist. Train, ensure sensor fidelity, and require human sign-off.
Use Torque & Quality Sensor Data to Cut Rework and Failures

Think of torque like the heartbeat of a bolted joint: if it’s wrong, the whole assembly can fail.
Why this matters: catching torque errors early prevents rework, warranty claims, and safety issues. For example, on an automotive subassembly line I worked with, tracking torque reduced stripped-thread repairs from 12 per week to 2 within a month.
1) How do you spot bad fasteners in real time?
- Use torque analytics to record each fastener’s applied torque and timestamp it.
- Example: set a pass range of 18–22 Nm for a given bolt; any reading outside that range triggers an alert.
- Feed those measurements into a dashboard that shows trends, averages, and outliers every hour.
- Short insight: alerts save you minutes per event.
2) What do you do when you see a pattern?
Why this matters: patterns tell you whether an operator, tool, or part is the root cause.
Steps:
- Pull the time-stamped failures for the last 24 hours.
- Check operator ID, tool ID, and bolt lot number.
- If >60% of faults share one tool ID, quarantine the tool and run a calibration.
Real example: we found one torque driver slipping at mid-shift; replacing its clutch cut repeat work by 70%.
3) How do you close the loop so issues don’t come back?
Why this matters: closing the loop turns data into persistent quality improvements.
Steps:
- Integrate torque feeds with your digital work instructions so the operator sees a green/red result after each fastener.
- Send maintenance alerts automatically when a tool reports three failures in ten minutes.
- Log adjustments and show first-pass yield on the dashboard for the shift supervisor.
Concrete result: after adding these rules to one line, first-pass yield rose from 88% to 95%.
4) What metrics should you track?
Why this matters: the right metrics tell you where to act fast.
- Track per-bolt pass rate, tool failure rate, and mean torque by shift.
- Set thresholds: for example, trigger investigation if a bolt’s pass rate drops below 95% in one shift.
Example: we used a 95% threshold and caught a bad fastener lot before it left the plant.
5) How do you keep teams aligned?
Why this matters: alignment makes corrective actions fast and consistent.
Steps:
- Push visible alerts and work-instruction updates to the operator tablet within 30 seconds of a fault.
- Schedule weekly briefings where operators, supervisors, and maintenance review the dashboard for trends.
Concrete habit: one plant made a 10-minute daily scoreboard review mandatory, which shortened response time to failures by half.
Final takeaway: use time-stamped torque data, set concrete thresholds (like 18–22 Nm or 95% pass rate), and automate alerts and instructions so you stop rework before it starts.
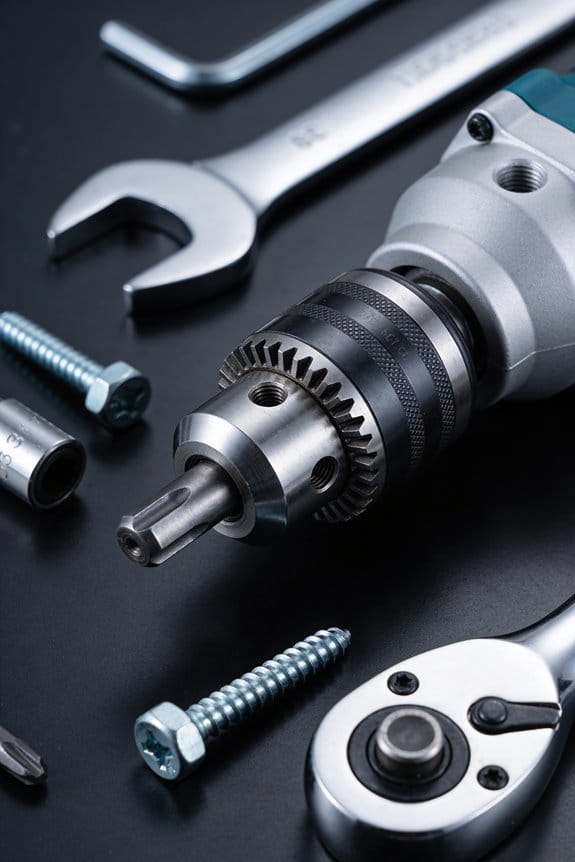
Fastener Selection for Automated and Collaborative Assembly

Before you pick fasteners for automated or collaborative assembly, know this matters because the wrong part will stop your line and cost hours.
Choose fasteners with consistent geometry and tolerances so feeders and grippers work reliably. Aim for diameter and head-height variation within ±0.05 mm for critical drives. Example: when a contract manufacturer switched from mixed-head M3 screws to an M3 batch controlled at ±0.03 mm, their pick rate improved from 87% to 98% during a 3-day pilot. Steps:
- Specify tolerance bands on drawings (e.g., shank Ø3.00 ±0.03 mm, head height 1.8 ±0.05 mm).
- Ask suppliers for first-article measurements.
- Run a 1,000-piece feed test before full buy.
Match head styles and drive types to your tooling because self-centering heads and captive fasteners cut pickup errors. Why this matters: robots need predictable pick geometry to align every time. Example: swapping Phillips-packed screws for Pozidriv with a 90° chamfer let one assembler reduce alignment retries from 4 to 1 per insertion. Steps:
- Select head style (e.g., countersunk hex washer head) that mates with your gripper and bit retention.
- Use captive or flange designs if your tool doesn’t hold parts.
- Test 100 insertions per head type and record failures.
Use high-strength coatings to reduce wear and prevent galling so insertion torque stays steady and tool bits last longer. Why this matters: galling raises torque and stalls automated drivers. Example: switching stainless fasteners from plain to DLC-coated studs cut galling incidents from weekly to zero over two months on a captive-driver cell. Steps:
- Choose coatings like zinc-nickel, PTFE, or DLC based on substrate and environment.
- Specify coating thickness (e.g., 8–12 µm for zinc-nickel).
- Verify coating adhesion with salt-spray or adhesion tests.
Think about material compatibility and corrosion resistance because dissimilar metals can change torque behavior over time. Example: a panel using aluminum bosses and untreated steel screws developed seized joints after six months outdoors; replacing screws with stainless 316 solved it. Steps:
- Match metals or add barriers (nylon washers, coatings).
- Specify corrosion class (e.g., ISO 9227: 240 h salt spray).
- Include a note on drawings about allowed material pairs.
Validate parts in a pilot run, observe tooling interactions, and adjust specs before full production because small changes save big downtime. Example: during a 2-day pilot, a team found a 0.1 mm lip on a clip jammed the feeder; updating the clip geometry fixed jams and prevented a planned full-line stoppage. Steps:
- Run a pilot of at least 500–1,000 cycles under production speed.
- Video the feed and pick operations and mark failure frames.
- Update tolerances or tooling and repeat the pilot.
You’ll avoid surprises if you follow these concrete checks: call out tolerances on drawings, require supplier test reports, run the pilot, and log insertion torque and pick success rates.
Recommended Products

VARIETY OF SIZES INCLUDED: Sheet metal screws assortment kit featuring sizes 10 x 1 inch, 10 x 1-1/4 inch, 10 x 3/4 inch, 8 x 1 inch, 8 x 1/2 inch, 8 x 3/4 inch for versatile fastening tasks

Size #10 x 1 in sheet metal screw for precision fastening; ideal for joining thin metal to wood or other surfaces; ensures secure grip and fit

MATERIAL: Screws made of high quality 410 stainless steel, washer made of 304 Stainless Steel and neoprene, not easy to rust.
Train Technicians: Skills, Tools, and KPIs for Smart Fastening

Before you train technicians on smart fastening, know why it matters: if your team can’t hit torque targets and follow guided workflows, you’ll see more rework, slower cycles, and wasted parts.
I teach technicians three clear areas: core mechanical skills, digital tool use, and measurable KPIs to track progress.
Why core mechanical skills matter: they stop mistakes at the source.
1) Teach torque basics in three steps:
- Show the parts: fastener types, washers, and contact surfaces.
- Demonstrate torque values on a real assembly using a torque wrench set to 10, 20, and 30 Nm so they feel the difference.
- Have them practice 20 fastens on sample panels and record torque variance.
Real example: on a brake-caliper assembly, a trainee tightened 20 bolts and reduced torque spread from ±15% to ±3% after two practice runs.
Use a skill matrix to map levels: Novice (needs supervision), Competent (occasional checks), Expert (can teach). Mark the target level for each job.
Why digital skills matter: dashboards show problems before they cost you time.
1) Train on three digital tasks:
- Logging in and reading a live dashboard widget that shows first-pass yield as a percent.
- Following a guided workflow on a tablet with pictures and torque setpoints.
- Uploading a trace file to the server.
Real example: in one line, a technician followed the guided workflow and caught a wrong fastener size before assembly, stopping a batch loss of 120 parts.
Give them hands-on time with the actual interface, not screenshots, and require three error-free guided assemblies to pass.
Why hands-on simulation matters: practicing on real parts wastes resources.
1) Use haptic trainers this way:
- Calibrate the trainer to mimic your tool at 15, 25, and 35 Nm.
- Run five sessions per trainee that simulate a common fault, like a cross-thread, so they learn the feel of failure.
Real example: a trainee exposed to haptic cross-thread simulations corrected their detection time from 90 seconds to 12 seconds on real assemblies.
Log each session in the skill matrix and require an 80% detection rate before live work.
Why KPIs matter: they tell you if training is working.
1) Track three measurable KPIs:
- First-Time-Right rate (target 98% for critical assemblies).
- Cycle accuracy (percentage of torque readings within ±5%).
- Mean Time to Diagnose a fastening fault (target under 3 minutes).
Real example: a shop tracked these and cut rework by 40% within eight weeks after coaching on the KPIs.
Give each technician a weekly scorecard and a short coaching session if any KPI falls below threshold.
Practical rollout steps you can follow:
1) Baseline: run a 2-hour skills audit for each tech and log results.
2) Train: schedule four 90-minute sessions — two mechanical, one digital, one haptic.
3) Certify: require competency on the skill matrix and three clean guided workflows.
4) Monitor: review KPI scorecards weekly and coach for 15 minutes if targets slip.
Real example: a small cell implemented this four-step rollout and reached target certification for 12 technicians in six weeks.
One final tip you can apply immediately: start every shift with a two-minute visual check of tools and a single KPI readout on the line tablet — it prevents drift and keeps everyone focused on the numbers.
Recommended Products

DIMENSIONS: 9.20 inches L x 4.8 inches W x 2.5 inches H

VALUE KIT – Our value packed Digital Torque Wrench Combo Kit comes with 2 digital torque wrenches: ARM601-3 (3/8” / 3.7 to 37 ft-lbs.) and ARM601-4 (1/2” / 14.8 to 147.5 ft-lbs.), a manual of instructions and guidance, and 2 individual hard-shell cases that protect and secure the tools once they are done using. Both tools are powered by 4 AAA batteries (not included).

THE ULTIMATE BIKE TOOL - This 15-Piece bicycle torque wrench features precise scales of 2~26 Newton Meter (17.7~230.1 in-lb) with micro-adjustments to 0.2 Nm. Includes bit sockets: HEX - H2, H2.5, H3, H4, H5, H6, H8, H10. TORX - T10, T20, T25, T30 | 3-inch Extension bar & 1/4-inch Adapter.
Pilot Smart Fastening: Metrics, Tools, and Rollout Checklist

If you’ve ever started a pilot and felt unsure what to measure, this will help.
Why it matters: you want to prove the smart fastening benefits before spending more. Example: a line that assembles door hinges reduced returns by 30% after a 6-week pilot where they tracked torque and faults.
1) What pilot metrics should you pick?
Why it matters: metrics tell you whether the pilot worked. Example: at a small appliance plant we tracked torque and cycle time and cut rework by 22% in three weeks.
Steps:
- Pick 4–6 metrics you can measure every shift: torque accuracy (±2% target), cycle time per joint (seconds), first-time-right rate (%) with a 98% target, mean time between faults (hours), and tightening retries per 1,000 joints.
- Set numeric targets for each metric and a minimum success threshold (for example, 95% first-time-right or a 15% cycle time reduction).
- Decide how you’ll sample: measure every joint for 2 shifts, then 10% sampling for two weeks.
2) Which tools do you need at the point of assembly?
Why it matters: the right hardware captures the signals you’ll act on. Example: a medical device line used smart torque wrenches and an edge gateway to reduce under-torques within a month.
Steps:
- Use smart torque wrenches with Bluetooth or wired data output that log torque, angle, and timestamp.
- Add sensor condition monitoring units for vibration or current to spot tool degradation.
- Deploy an edge gateway that buffers data and sends batches to your analytics or a digital twin.
- Verify integration on one workstation before buying more tools.
3) How do you run the rollout checklist?
Why it matters: a checklist keeps the pilot tight and repeatable. Example: a pilot for an industrial pump had a 10-item checklist; following it avoided a week-long delay.
Steps:
- Get stakeholder sign-off (engineering, quality, operations) with agreed metrics and targets.
- Capture baseline data for at least 3 production days before changes.
- Train 2–3 technicians for one hour each on the tools and new procedures.
- Deploy in phases: one workstation for week 1, three for week 2, then scale if targets are met.
- Create feedback loops: daily standups and a shared dashboard.
- Document every deviation and close tickets within 48 hours.
4) How to run iterations and analyze results?
Why it matters: short iterations let you learn fast and reduce risk. Example: an automotive subassembly ran 2-week sprints and iterated settings twice, which saved six weeks overall.
Steps:
- Run 1–2 week iterations.
- After each iteration, analyze results on simple dashboards showing the 4–6 metrics and trend lines.
- Make one change per iteration (tool calibration, torque target, or training tweak).
- Re-measure for at least 3 production shifts after the change.
Practical closing detail: if you hit your thresholds for two consecutive iterations, expand to the next phase; if not, pause and fix the top two failure causes within one week.
Recommended Products

【9-in-1 Torque Solution】Complete set includes 1/4", 3/8", and 1/2" drive click torque wrenches plus 6 essential adapters (extension bars, universal joint, drive adapters) securely stored in a sturdy portable case.

【Overload Protection (Vibration, Buzzer, Flashing)】: SUERCUP digital torque wrench delivers ±1% accuracy across 1.5-99.6 Ft.Lb / 2-135 Nm. As you approach your preset value, the handle vibrates, the buzzer sounds, and the LED will flash green at 80%, yellow at 90%, and red at 100%— so you never over-torque a bolt. No more guessing with a click-style wrench.

PREMIUM & DURABILITY - Sturdy storage box contains a high-precision preset torque screwdriver with a 1/4 magnetic bit holder, inner strong magnetic makes change bits quickly and attach stronger. Also comes with 12 pcs regular bits made of alloy tool steel, S2 material is more wear-resistant and tough. The entire set of tools is is heavy-duty quality and durable.
Frequently Asked Questions
How Do Smart Fastening Systems Impact Warranty and Liability Considerations?
Like threading a needle, I’ll say smart fastening shifts warranty attribution toward data owners and pushes liability allocation toward integrators; I’ll need transparent logs, clear SLAs, and shared risk agreements so we don’t pass the buck.
Can Legacy Equipment Be Retrofitted Affordably for Sensor Integration?
Yes — I’ve seen affordable sensor retrofit options; using cost modeling, we budget upgrades, ensure interface adaptability, and bridge legacy protocols with gateways or edge controllers so older machines gain real-time monitoring without full replacement.
What Cybersecurity Measures Protect Fastener Data and Connected Tools?
Like a locked toolbox, I use encrypted telemetry and strict access controls to shield fastener data, enforce device authentication, segment networks, apply firmware signing, and monitor logs so breaches get caught fast and repairs stay secure.
How Do Smart Fastening Changes Affect Union or Labor Agreements?
I think smart fastening prompts Collective bargaining updates and revised Work rules, so I’d push for clauses on training, job classifications, automation impacts, data ownership, and redeployment guarantees to protect workers while embracing tech.
What Environmental or Sustainability Benefits Do Smart Fastening Systems Offer?
They cut material use and energy through precise fastening, reducing waste, and they enable lifecycle tracking of components so I can predict failures, optimize repairs, and extend equipment life—lowering emissions and resource consumption across operations.