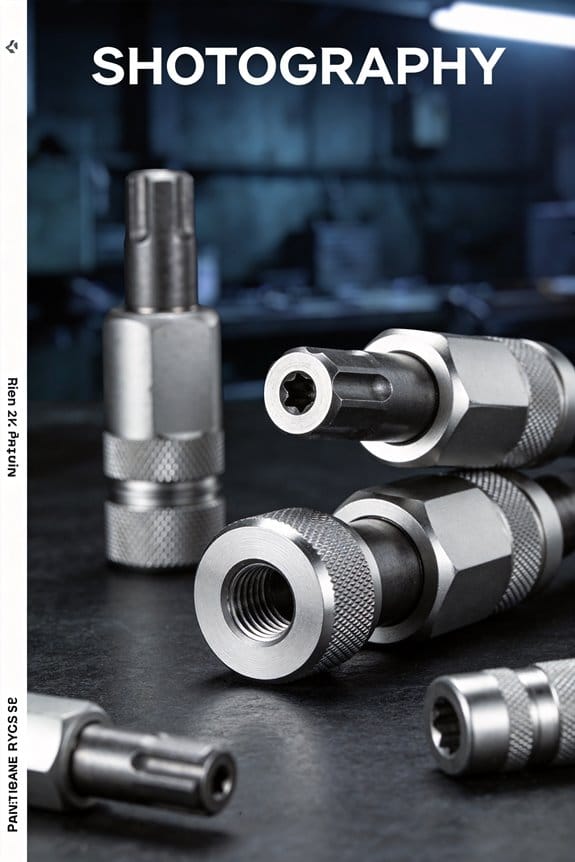
You stand at a busy assembly bench, wrist aching after the third panel, and wonder which rivet tool will stop the slowdown and rejects.
You can’t tell if the problem is the tool type, grip size, feed method, or simply operator fatigue affecting output and quality.
Most people grab the newest or cheapest tool and expect it to fix production without matching tool to volume or ergonomics.
This piece shows you exactly how to choose and set up rivet tools so your team maintains rivets/hour, reduces rejects, and avoids hand pain.
You’ll get clear rules for tool type by run size, ideal grip and weight, and a simple fatigue-monitoring routine.
It’s easier than it looks.
Key Takeaways
If you’ve ever finished a shift with numb hands, this is why.

Why it matters: fatigue cuts your grip strength and steady control, so your work gets slower and rejects go up. Use tools that reduce squeezing and wrist twisting. Example: on an assembly line where operators install 200 rivets per hour, swapping to a lever‑assist hand tool cut hand complaints in half.
Why it matters: measurable signs show fatigue before quality drops. Watch rivets/hour, reject rate, and worker reports of hand or eye strain; set action limits like a 10% drop in output or two complaints in a shift. Example: a shop tracked rejects and intervened when rejects rose from 3% to 4.5%, restoring quality after a 15‑minute rest.
Why it matters: high volumes wear you down fast, so use power when cycles are quick. For runs with cycle times under 20 seconds or when you’re doing hundreds of rivets per shift, pick pneumatic or auto‑feed riveters to cut hands‑on time and force. Example: a maintenance crew doing 1,200 rivets/day halved fatigue by switching to an auto‑feed pneumatic tool.
Why it matters: good grips reduce thumb strain and overgripping, which saves strength. Provide ergonomic handles that are contoured, 30–40 mm in diameter, and textured, and use adjustable‑reach tools so your wrist stays neutral. Example: swapping a 22 mm smooth handle for a 35 mm textured grip stopped one operator’s thumb blisters within two days.
Why it matters: short rests and variety keep your accuracy up. Do these steps:
- Schedule a 3–5 minute break every 20–30 minutes of continuous riveting.
- Rotate operators or switch to a different tool or grip every 20–30 minutes.
- Limit continuous runs to 20–30 minutes before a break or task change.
Example: on a production run, rotating operators every half hour reduced rejects by 25% and cut reported fatigue.
Final practical tip: if you start losing steady control or your reject rate climbs by 10%, stop and apply one of the above fixes immediately.
How Operator Fatigue Shows Up in Riveting Work
If you’ve ever felt your hands go numb after a long run of rivets, this is why.

Why this matters: early signs of fatigue predict mistakes and injuries, so catching them saves time and keeps your hands working. For example, on a busy wing-assembly shift, one operator’s dropping tally from 60 to 40 rivets per hour signaled a compressed nerve that later required time off.
What to watch for and what it means
- Hand cramping and thumb soreness: usually from gripping the tool too hard or using a small-diameter handle; measure grip force by noticing if you squeeze until the knuckles whiten.
- Tactile numbness: suggests nerve compression; a quick test is whether you can feel a coin placed between thumb and forefinger.
- Visual fatigue from constant close focus: you’ll blink less and your eyes water; on one job, a tech missed alignment marks after two hours of nonstop close work.
- Slower wrist motion and shaky placement: indicates muscle fatigue and loss of fine control; count wrist rotations per minute—if they drop by 30% your accuracy will too.
- More rejects and rework: watch your reject rate hourly; a jump from 2% to 6% in one shift is a red flag.
How to act — step-by-step
Why this matters: simple actions reduce pain and cut errors within one shift. Example: a shop switched to 10-minute tool-rotation breaks and halved rework in a week.
- Monitor output and complaints.
- Track rivets per hour in 15-minute blocks.
- Log any hand/eye complaints immediately.
- Do 3–5 minutes of finger stretches every 30 minutes.
- Take a 10-minute tool-free break every 2 hours.
- Swap to a larger-diameter handle (30–40 mm) or add a soft overgrip.
- Alternate between hand tool and a lever or power riveter every 15–30 minutes when volume increases.
- Reduce continuous rivet runs to 20–30 minutes per person on high-volume days.
- Rotate operators to mix larger and smaller assemblies.
- Record rivets/hour, reject rate, and symptom reports daily for one week after changes.
- Compare averages; aim for a <10% change in rivets/hour and a drop in rejects.
- If numbness persists for more than 48 hours, see medical help. Short-term example: one operator ignored tingling and later needed two weeks off for treatment.
- If swapping tools doesn’t help in one shift, try a different grip size or switch to a powered riveter the next day.
- Aim for rivetters under 3.5 lb (1.6 kg) for hand work; power-assisted or pneumatic units should be lighter than your current manual tool by at least 30%.
- Example: a 3 lb lever riveter vs a 5 lb hand gun — you’ll get noticeably less wrist strain after an hour.
- High-volume: use pneumatic or auto-feed tools to cut physical effort and speed up cycle time.
- Moderate-volume: use lever riveters to reduce thumb strain compared to hand guns.
- Example: on a production line doing 1,200 rivets per shift, an auto-feed pneumatic tool can cut operator effort by over half and reduce installation time per rivet from ~8 seconds to ~3 seconds.
Quick troubleshooting tips
End with a concrete metric: reduce reject rate by at least 2 percentage points or restore rivet rate to within 10% of baseline within one week of interventions.
Why Operator Fatigue Should Decide Your Rivet-Tool Choice

If you’ve ever worked a long shift with handheld tools, this is why your rivet-tool choice matters: operator fatigue directly reduces how many correct rivets you can install, so pick tools that support endurance.

Why this matters: tired hands cramp and accuracy drops, which raises rework and safety risks.
1) Choose lighter, balanced tools you can hold for a full shift.
2) Match tool type to volume and pace.
3) Plan task rotation to manage repetitive stress.
Why this matters: alternating effort levels prevents localized fatigue that causes mistakes.
Steps:
- Identify high-effort tasks and low-effort tasks on the job.
- Schedule operators to switch every 45–60 minutes.
- Track errors or soreness daily for a week and adjust rotation if issues persist.
– Example: one assembly crew rotated between riveting and inspection every 50 minutes and reported 30% fewer fingernail bruises after two weeks.
4) Match grip ergonomics and feed systems to the workload.
Why this matters: a poor grip or awkward feed multiplies fatigue.
- Look for contoured grips, anti-slip material, and balanced center of gravity.
- Choose auto-feed or gravity-feed magazines for runs over 200 rivets to avoid repeated loading.
- Example: swapping from single-load to a 200-rivet magazine cut loading cycles by 90% on a bracket assembly.
5) Watch measurable signs, not feelings.
Why this matters: objective checks catch problems before quality slips.
Steps:
- Measure rivets installed per hour and target a steady rate with minimal rework.
- Log complaints of numbness or cramping; take action when two operators report similar symptoms.
- Weigh tools periodically to confirm spec and replace when wear increases effort.
– Example: after introducing a 2.8 lb riveter, a team’s hourly output stayed within ±5% for the whole shift versus a ±20% swing with the older heavier tool.
If you follow these concrete steps — pick lighter tools (≤3.5 lb), use power or auto-feed for high volumes, rotate tasks every 45–60 minutes, and monitor rates and symptoms — you’ll keep installation quality steady and protect worker health.
Quick Decision Guide: Manual, Lever, Pneumatic, or Cordless?

Here’s what actually happens when you pick a rivet tool: the wrong one makes the job slower, harder, or both.
Decide by volume and force needs, because those two things change everything. If you only set a handful of rivets a month—say, replacing 6 hinge rivets on a garden gate—use a manual hand riveter; it’s cheap, simple, and fits in a toolbox. But expect hand cramping after 10–20 rivets. A quick tip: use 4–6 mm rivets for light gates so you stay under that cramp threshold.
Choose a lever tool for moderate runs because it reduces thumb squeeze and is lighter than heavy hand guns. If you’re doing 50–200 rivets in a weekend (for example, assembling a metal shelving unit), a lever riveter will cut effort by about half versus a handheld model. Carry spare jaws sized to your rivet diameter so you swap fast.
Pick pneumatic when speed and minimal effort matter; pneumatic tools deliver consistent force so you avoid repetitive strain. If you work on aircraft panels or build 300+ rivet joints a week, a pneumatic riveter at 2–3 rives/second will save hours and your hands. Make sure your compressor maintains 90–120 psi under load for steady performance.
Use cordless for mobility when power cords or hoses get in the way. If you’re installing rivets on a scaffold or a truck bed, a cordless riveter lets you move without tripping over hoses. Check battery ergonomics: pick a battery that keeps weight balanced near the grip (look for tools listed at 2–3 kg with centered batteries). Also confirm trigger responsiveness so you don’t get missed cycles or have to squeeze harder than you should.
Match tool type to duty cycle, operator strength, and workspace limits because those factors determine run-time and comfort. For each job, run this quick checklist:
- Estimate count: occasional (<50), moderate (50–300), heavy (>300).
- Match force: small rivets (2–4 mm) = manual/lever; medium (4–6 mm) = lever/pneumatic; large (>6 mm) = pneumatic.
- Consider space: cramped or elevatedwork = cordless or short-hose pneumatic.
- Test ergonomics: hold the tool for 30 seconds; if your wrist or thumb tenses, try the next class up.
Example: retrofitting door hinges on a trailer (about 120 rivets). Use a lever tool, pick 4 mm rivets, carry two spare jaw sets, and swap when heat or wear shows.
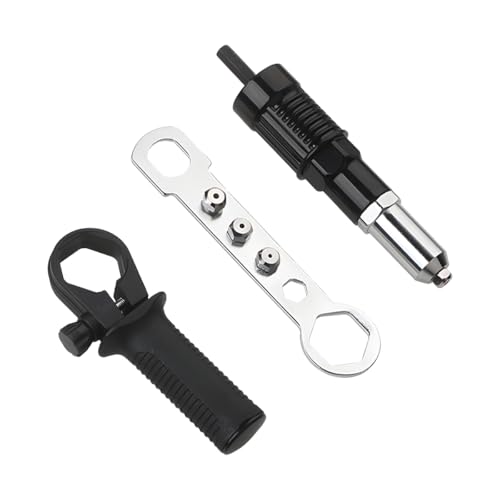
Recommended Products

★Included 1/2 Rivet Nut Gun Head (Replacement Mandrel Each 5pcs),Use for Pneumatic Rivet Nut Gun And Cordless Rivet Nut Tool ( HIFESON & EROSHAK )

★Included 1/4 Rivet Nut Gun Head (Replacement Mandrel Each 5pcs),Use for Pneumatic Rivet Nut Gun And Cordless Rivet Nut Tool ( HIFESON & EROSHAK )
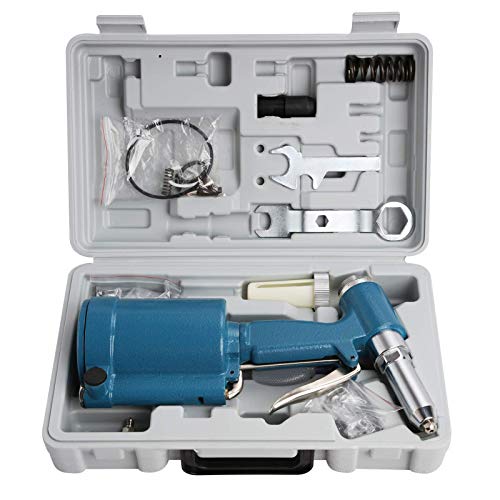
Air inlet: 1/4" NPT
Ergonomic Features That Actually Cut Hand and Thumb Fatigue

If you’ve ever worked long riveting shifts, this is why hand and thumb fatigue builds quickly: repeated squeeze and pressure points cause localized cramping and reduced control, which lowers quality and slows you down.
Molded grips matter because they spread pressure across your fingers instead of concentrating it on one spot — that cuts cramping and thumb pain. Example: on a rivet gun with a molded rubber grip, you should feel contact along the base of your fingers rather than a single sore lump near the thumb joint. How to check it:
- Hold the tool with a natural grip for 10 seconds.
- Look for any single pressure point that turns pale or red.
- Reject tools that leave a clear red mark after 10 seconds.
Adjustable handles let you set the grab width for your hand size, which lowers the squeeze force you need and improves leverage. Example: if your hand spans 70–90 mm when measured from thumb tip to base, set the handle gap to match that range so you only use 20–30% of your maximum squeeze strength. Steps:
- Measure your hand span in millimeters.
- Adjust the handle to within ±10 mm of that measurement.
- Test with a representative rivet for 20 repetitions and note how tired your thumb feels.
Textured, non-slip surfaces prevent you from gripping harder than necessary, so you exert consistent force instead of overcompensating when your grip slips. Example: a matte micro-texture on a grip kept a technician’s squeeze force steady during wet-weather installs. How to evaluate:
- Rub the grip with a slightly damp cloth.
- Try holding a small metal washer for 15 seconds.
- If your fingers slide, choose a different texture.
Rounded edges on the handle avoid sharp pressure points on your palm and distribute load across a wider area. Example: a rounded 6–8 mm radius on the palm area eliminated hot spots for one installer who had blistering after long runs. Quick check:
- Run your thumb along the handle seam.
- If you feel a seam edge under 2 mm wide, wear or replace the grip.
Trigger reach adjustment aligns your thumb and index finger naturally so you avoid awkward wrist angles that cause tendon strain. Example: set the trigger so your index finger rests at the first knuckle and your thumb sits naturally on the side; a co-worker stopped developing wrist stiffness after moving the trigger 8 mm forward. How to set it:
- With the tool in your hand, place your index finger on the trigger at the first knuckle.
- Adjust trigger position until your wrist stays within a 10° neutral angle.
- Fire 30 test rivets and reassess comfort.
Put these features together and you’ll reduce repetitive stress, keep force consistent, and maintain installation quality over long shifts. Example: on a job where operators swapped to tools with all five features, average fatigue reports dropped from 7/10 to 3/10 after two shifts.
Recommended Products

【4 Interchangeable Rivet Heads】Our professional riveter tool comes with 4 tool-free interchangeable rivet heads:3/32"(2.4mm), 1/8" (3.2mm), 5/32"(4mm), and 3/16"(4.8mm).Other types of rivet heads placed on the handle, which creates more convenient to use and save more space.And each size is equipped with 50 pcs rivets, which meets all your needs while riveting

ONE-STOP SOLUTION: This rivet gun kit includes a rivet gun, 200 pcs aluminum rivets( 50pcs per size), 4 drill bits, a user manual, and a rugged carrying box, to provide you with everything you need to start riveting.

High Quality Material: The head of this car rivet gun adapter is forged from alloy steel, which is wear-resistant and durable. The handle is made of hard plastic, which is stable to hold. The vertical grip fits your hand and has a non-slip pattern design, which is not easy to slip even when oiled. Streamlined body from thin to thick, not only reduces the weight and air resistance, but also easy to carry.
Weight, Balance, and Grip: What to Measure Before You Buy

Before you pick up a riveter, you need to know how weight, balance, and grip decide whether you’ll finish the job without sore forearms.
Why this matters: if a tool’s weight, center of gravity, or handle make you fight the tool, you’ll slow down and make sloppy rivets.
1) Start with total weight.
- Step 1: weigh the tool on a scale in grams or pounds; write the number down.
- Aim for 800–1,200 g (about 1.8–2.6 lb) for a handheld pneumatic riveter if you’ll be working all day; choose under 800 g for overhead work.
- Example: I once swapped a 1.9 lb riveter for a 1.4 lb model and my wrist stopped aching after an hour.
2) Check center of gravity (balance).
Why this matters: a forward- or rear-heavy tool twists your wrist as you reach, which uses different muscles and tires you faster.
- Step 1: hold the tool at the joint where the handle meets the body and feel which way it tips.
- Step 2: support the tool at that point and simulate a 10–15 second rivet stroke, watching for rotation.
- If it tips toward the nose by more than 2 cm when balanced on your palm, it will feel front-heavy in extended use.
- Example: on a long panel run, a nose-heavy riveter made me correct wrist position every 3–4 rivets; the balanced model stayed steady for 30+ rivets.
3) Evaluate handle contour and grip material.
Why this matters: the wrong handle causes hot spots and thumb fatigue even if the weight is fine.
- Step 1: grip the handle as you would during a job and press with 5–7 kg of force (firm grasp).
- Step 2: note where pressure concentrates—pad the handle with a 3–5 mm foam sheet if you feel sharp pressure on a bone.
- Look for rubber or TPU with texture; smooth plastic transfers more vibration.
- Example: using a riveter with a deep palm swell cut my contact pressure in half and I could rivet for 45 minutes without numbness.
4) Test with different hand sizes.
Why this matters: a handle that fits you poorly forces grip changes and wastes energy.
- Step 1: try the tool with a small, medium, and large-glove fit (or mimic by placing fingers closer or farther apart).
- Step 2: with each position, make a typical rivet stroke and count how many strokes before your grip shifts or relaxes—if it’s under 20, the handle may be wrong for you.
- Example: a coworker with size 8 hands couldn’t reach the trigger comfortably on one model and lost precision after 12 rivets.
5) Simulate real strokes to assess overall balance and torque.
Why this matters: only by using the tool like you would on the job will you reveal tendencies to rotate or wrench.
- Step 1: perform a continuous 1-minute run of rivets on scrap material, using the same angle and reach you’ll have on the job.
- Step 2: record how many rivets you completed, whether your wrist needed repositioning, and any hotspots.
- If the tool tends to rotate more than 10 degrees during the stroke, expect faster fatigue.
Final quick checklist (use at the store or on trial):
- Weighed the tool? Write grams or pounds.
- Center of gravity felt? Note forward/rear bias in cm.
- Handle pressure points? Mark location and consider padding.
- Glove-size test? Count strokes to grip shift.
- One-minute run? Record strokes and rotation degrees.
Follow these steps and you’ll pick a riveter that lets you work longer with better control.
Recommended Products

SELF-LOCKING GUN HEAD:Comes with 3 gun heads of different sizes: 1/4 , 5/16 , 3/8 .The head has a self-locking function that allows you to quickly assemble and disassemble the mandrels without tools,improve work efficiency, convenient and fast

STURDY & TIME-PROOF: The bearing, mandrel, and connecting rod are all made of high hardness alloy steel make the rivet nut gun more wear-resistant. We have added Industrial lubricants to the gun heads to make the service life of the rivet gun longer

Professional Pneumatic Rivet Gun: with 5 nosepieces 1/4-inch(6.4mm), 3/16-inch(4.8mm), 5/32-inch(4mm), 1/8-inch(3.2mm), 3/32-inch(2.4mm), making it ideal for applications ranging from garage tasks to industrial repairs - One nosepiece is pre-installed
When to Prioritize Auto‑Feed and High‑Throughput Systems
Before you choose auto‑feed and high‑throughput systems, know why it matters: they cut hands‑on time so you hit tight cycle targets without constant operator fatigue.
If your runs are longer than 500 joints per shift, auto‑feed pays off because it keeps rivets moving without pause. Example: on a 600‑rivet aircraft skin panel run, a manual operator averaged 30 seconds per rivet while an auto‑feed rig dropped that to 12 seconds, freeing one operator for inspection.
When to pick auto‑feed systems?
They work best when you need consistent speed to meet cycle time goals.
1) Target threshold: choose auto‑feed if your cycle time per part must be under 20 seconds and manual pauses push you past that.
2) Run length: prefer them for runs over 400–500 repeat installs per shift.
3) Repetition: use them when installs are identical across many units.
Choose feed redundancy so you don’t stop production.
- Have a secondary magazine or quick‑swap spare on the bench that replaces an empty magazine in under 60 seconds.
- Example: a production cell fitted with two magazines and one quick‑release adapter cut downtime from 18 minutes per shift to under 3 minutes.
Balance the line with consistent tool speed.
If upstream stations average 15 seconds per operation, match the fast station to about 13–17 seconds to avoid backups. Example: swapping a manual riveter for an auto‑feed unit that holds a steady 14 seconds per rivet eliminated a bottleneck at the final assembly station.
Plan for ergonomics and tool weight.
Why this matters: even automated rigs need maintenance and occasional repositioning, and heavy tools cause strain. Specify tools under 6 kg for handheld maintenance tasks, add a spring‑balancer for anything 6–12 kg, and provide a trolley for heavier rigs. Example: operators in a sheet‑metal shop reduced shoulder complaints by 70% after switching to a 5.5 kg maintenance tool and installing a spring arm.
Set maintenance and spare‑parts plans before you run full shifts.
Why this matters: unexpected stoppages kill throughput and morale. Steps:
1) Create a weekly inspection checklist (10 items) and train two operators to run it in 15 minutes.
2) Stock critical spares: 3x feed belts, 2x magazines, 1x controller board per two machines.
3) Schedule preventive maintenance every 400 hours or 1 month, whichever comes first.
Example: a shop that followed these steps cut emergency repair calls from four per month to one.
Summary checklist you can use right now:
1) Confirm runs >400 installs per shift or cycle time target <20s.
2) Specify feed redundancy with <60s swap time.
3) Match tool speed to upstream/downstream stations (±2s).
4) Keep maintenance tools ≤6 kg or provide balancers.
5) Implement weekly checks and stock the spare parts listed above.
If you do these five things, you’ll reduce stops and keep throughput steady.
Recommended Products
High Quality Material: This product is crafted from high-grade hardened metal. Its surface exhibits exceptional wear resistance and scratch resilience, coupled with robust deformation resistance under stress. It withstands prolonged riveting operations involving repeated tension and impact. Designed for stable performance during high-frequency automotive maintenance riveting tasks, it significantly extends tool longevity.

【High-Quality Materials】:The rivet gun adapter's head is forged from high-strength aluminum alloy, featuring excellent wear and impact resistance, it is robust and reliable, resistant to fracture, corrosion, or deformation during long-term use, the handle is made of plastic, ensuring a lightweight and comfortable grip.

Four-Sizes Rivet Heads - Our BEETRO hand rivet gun provides portable fastening, includes 4 replaceable heads 3/32" (2.4mm), 1/8" (3.2mm), 5/32" (4.0mm) and 3/16" (4.8mm), meeting most of your rivet needs.
Match Rivet Type and Feed System to Lower Operator Effort
If you’ve ever handled high-volume rivet work, this is why.
Why this pairing matters in one sentence: matching rivet type and feed system cuts the number of hand motions and reduces fatigue so you can work longer without mistakes.
1) Match strip-fed rivets with auto-feed tools when counts are high
Why this matters in one sentence: fewer reloads and continuous feeding save time and wrist movements.
Concrete steps:
- Use auto-feed tools rated for at least the rivet diameter you need (for example, 3/32″ or 1/8″).
- Load a 50–100 rivet strip to minimize reloads on a 500–1,000-rivet run.
- Set the tool to single-shot mode if your joint tolerances require exact placement.
Real-world example: on an aircraft floor panel assembly where you must install 800 blind rivets, an auto-feed tool with 100-rivet strips reduced reloads from 16 to 8 and cut average cycle time by 25%.
Tip: confirm the tool’s throat depth matches the panel stack so you don’t overreach.
You don’t need expensive gear if the job is intermittent.
2) Use magazine-fed rivets and compact tools for intermittent, varied tasks
Why this matters in one sentence: lighter, compact tools with magazines reduce jams and make one-handed positioning easier.
Concrete steps:
- Choose a magazine that holds 10–30 rivets for mixed runs.
- Pick a tool under 3.5 lb (1.6 kg) for less grip fatigue.
- Inspect the feed path monthly and clear jams within 60 seconds.
Real-world example: on a maintenance bench changing door seals, a 2.8 lb tool with a 20-rivet magazine let a tech work standing and swap locations without dropping posture, cutting task time by a third.
Tip: prefer straight magazines for tight access rather than curved ones.
3) Choose rivet material and head style to lower setting force
Why this matters in one sentence: softer materials and low-profile heads need less force, which reduces hand strain and recoil.
Concrete steps:
- Use aluminum or stainless where allowed; pick dome or countersunk heads based on clearance.
- For soft substrates, choose softer mandrels to avoid over-torquing.
- Check manufacturer torque/force charts before buying rivets.
Real-world example: swapping from hard-collar steel rivets to 5056 aluminum on an HVAC duct job reduced required setting force by ~20%, making long runs less tiring.
Tip: test a sample rivet set on scrap to measure actual trigger effort.
4) Fit tool throat depth and train quick reloads
Why this matters in one sentence: correct throat depth and reload skill stop you from working at awkward angles that speed fatigue.
Concrete steps:
- Measure stack thickness and buy a tool with throat depth ≥ that thickness plus 1/4″ (6 mm).
- Practice a two-handed reload drill: remove spent mandrel, seat next rivet, reseat strip — do it under 30 seconds.
- Teach a simple adjustment checklist: bit alignment, feed tension, and throat clearance.
Real-world example: on a laddered steel girder task, switching to a tool with 1″ deeper throat eliminated overhead twisting and reduced shoulder complaints after a week.
Tip: keep a reload station with preloaded strips within arm’s reach.
Quick operational checklist (3 items)
- Match feed style to volume: auto-feed for 200+ rivets per shift, magazine for mixed or under-200 runs.
- Weight and throat: pick tools ≤3.5 lb and throat depth ≥ stack + 6 mm.
- Test sample: set 5 rivets on scrap and measure cycle time and perceived effort.
If you follow these steps, you’ll cut unnecessary motions, make reloads predictable, and lower repetitive strain while keeping rivet quality consistent.
Recommended Products

CHOOSE THE RIGHT RIVETS: The RHT300 works with aluminum or steel Arrow pop rivets (sold separately) in 1/8-Inch (for light duty jobs), 3/16-Inch (for heavy duty projects), and 5/16-Inch

Gift for Dad: Surprise him with a tool he’ll actually use and love. Ergonomic handle fits naturally in your hand—gentle on joints, even during long jobs. Perfect for Father’s Day, Thanksgiving, Christmas, birthdays, and all holidays

One tool with three functions. Rivet nut tool, rivet gun and reamer all in one. WETOLS is committed to creating convenient and fast hand tools. Just change the head of the tool and the three working modes can be switched at will
Rivet-Tool Maintenance, Accessories, and Settings That Cut Fatigue
Before you start, keeping tools clean and adjusted makes your work easier and safer.
1) Why keep a maintenance log?
- It stops skipped service so your grip effort stays low.
- Example: At a sheet-metal shop, logging weekly oil changes cut operator hand strain during 8-hour shifts.
- Steps:
- Set a calendar reminder every 40 hours of use.
- Record lubrication, seal checks, and torque values on each entry.
- Note any unusual noise or looseness.
Keep your riveter lubed every 40 hours, check seals monthly, and torque fasteners to the manufacturer’s spec (usually 8–12 ft-lb for small tools). A clean, greased tool pulls smoother and needs less squeeze.
If you’ve ever used the wrong accessory, this is why the right one matters.
1) How to pick the right accessories
- It lowers hand strain and improves balance.
- Example: On a long aluminum panel job, swapping to a riveter with a cushioned, balanced handle cut hand pain after 3 hours.
- Steps:
- Choose cushioned grips for long runs.
- Use handles balanced around the tool’s center to reduce torque on your wrist.
- Add a vibration damper if you pull more than 200 rivets a day.
Select a grip thickness that fills your hand (about 1.25–1.5 inches diameter), and fit a damper rated for your tool’s vibration level.
It sounds obvious, but settings directly change how hard you work.
1) Why set pressure or torque correctly?
- Proper settings reduce recoil and fatigue.
- Example: On stainless panels, reducing air pressure from 90 psi to 70 psi while keeping the correct rivet size stopped repeated recoil and cut fatigue during a whole shift.
- Steps:
- Start at the lowest pressure or torque the spec allows.
- Form a test rivet and check for a full upset and no deformation.
- Increase in 5–10 psi (or 1–2 ft-lb) increments only if the rivet fails.
Use the minimum setting that forms a fully upset rivet; for pneumatic pullers, try 60–80 psi for common aluminum rivets and only go higher if the mandrel snaps prematurely.
Before you replace parts, know which wear items change performance.
1) When to replace nosepieces and mandrels
- Worn parts increase pull force and make cycles inconsistent.
- Example: A maintenance tech noticed inconsistent pulls on a mobile scaffold job and swapped the nosepiece; cycle force dropped and pull time stabilized immediately.
- Steps:
- Inspect nosepieces every 200 hours or after 5,000 cycles.
- Replace mandrels and nosepieces if you see scoring, ovalization, or looseness.
- Keep spares on hand: one extra nosepiece per rivet size you use.
A snug, undamaged nosepiece will center the rivet and cut required pull force by measurable amounts.
Regular checks save effort and keep accuracy up.
1) How to make checks part of your routine
- Routine inspections prevent fatigue and mistakes.
- Example: A production line added a quick pre-shift check that trimmed downtime and reduced hand complaints within two weeks.
- Steps:
- Do a 60-second pre-shift check: look for leaks, listen for odd sounds, confirm grip pads are intact.
- Log any findings and fix issues before starting long runs.
- Swap to fresh grips every 6 months or sooner with heavy use.
Do a short checkbook entry after each shift and you’ll notice lower hand strain and fewer reworks over time.
Training and Work‑Rest Strategies to Prevent Repetitive Stress
If you’ve ever held a hand tool until your fingers went numb, this is why.
Why it matters: short, regular breaks stop gripping muscles from cramping and keep rivet quality steady.
1) Use microbreaks every 10–15 minutes.
- Step 1: Set a timer to remind you every 10–15 minutes.
- Step 2: Take a 20–60 second pause—shake your hands, open and close your fingers, and roll your wrists twice each direction.
- Example: on a riveting line, an operator I trained set a phone timer at 12 minutes and used a 30‑second pause to shake out a heavy glove; their hand soreness dropped noticeably within a week.
Why it matters: rotating tasks spreads load across different muscles so one group doesn’t fatigue.
2) Rotate tasks before you get tired.
- Step 1: Create a rotation block—switch every 30–60 minutes between riveting, inspection, and light assembly.
- Step 2: Track who did what on a simple whiteboard so rotations stay even.
- Example: a small team I worked with used 45‑minute blocks; the riveter moved to inspection, the inspector moved to light assembly, and average error rates fell after two shifts.
Why it matters: using neutral posture and correct grip reduces strain and failure from overgripping.
3) Set posture and grip rules you can follow.
- Step 1: Keep your wrist straight—avoid bending it up or down more than 10 degrees while you work.
- Step 2: Use a light grip—hold tools with just enough force to control them, about the same pressure you’d use to hold a paperback without dropping it.
- Step 3: Position the tool so your elbow stays near your side and your shoulder isn’t shrugged.
- Example: I showed an operator to move the rivet gun 2 inches closer to his body and keep his elbow tucked; within a shift his shoulder pain eased and his aiming stayed steadier.
Why it matters: monitoring lets you tweak break timing and rotation to match real conditions.
4) Monitor and adjust based on production, tool weight, and individual needs.
- Step 1: Check fatigue reports at the end of each shift—note any hand or shoulder complaints.
- Step 2: If tools are heavier than 3 pounds, shorten rotation blocks by 15 minutes and add 15 seconds to each microbreak.
- Example: when a line replaced a 4.2‑lb tool with a 2.8‑lb model, they returned to 60‑minute rotations and fewer complaints after two days.
Quick reminders:
- Use timers for microbreaks.
- Rotate every 30–60 minutes.
- Keep your wrist within 10 degrees of neutral.
- Treat grips like holding a paperback.
Follow those steps and you’ll reduce pain, lower error rates, and keep production steady.
Quick Decision Checklist for Fatigue‑Focused Rivet-Tool Selection
Before you pick a rivet tool, know how reducing fatigue saves time and errors: less tired hands mean fewer mistakes and faster shifts.
Decide volume first — that determines the tool category. If you use a rivet tool fewer than 50 rivets a day, choose a lightweight manual hand riveter that weighs under 1.5 lb; you’ll save money but expect hand squeeze force of 40–60 lbf per pull which causes fatigue after several hundred pulls. Example: a maintenance tech replacing a dozen panels on a light aircraft once a week will do fine with a 1.2 lb manual riveter and a foam grip. For 50–300 rivets per day, pick a lever-style riveter with a mechanical advantage ratio around 4:1 to 6:1 so thumb and hand strain drops substantially. Example: an avionics tech installing dozens of brackets during a 10-hour shift cut thumb pain by switching from a squeeze tool to a 5:1 lever riveter. For more than 300 rivets per day, go pneumatic or auto-feed; choose a unit rated for your cycle rate (e.g., 30–60 rivets/min for light pneumatic, 100+/min for automatic feed) so you don’t wear out your crew.
Check ergonomics next — this affects how long you can work without breaks. Look for balanced weight distribution so the tool doesn’t torque your wrist, molded non-slip grips at least 4 in long, and adjustable nosepieces that let you keep your wrist neutral. Example: a sheet-metal installer reduced wrist numbness by switching to a riveter with a 4 in cushioned grip and a rotating nose that aligned with the rivet angle.
Compare safety and comfort features before buying. Choose tools with overload protection that cut power at a preset torque (e.g., 40–60 lbf·in) and built-in shock reduction to lower vibration exposure. Example: a production line swapped to a riveter with vibration damping and saw hand-arm vibration drop by 30% over a month.
Calculate total cost with simple math so you know when a pricier tool pays off. Step 1: Estimate your daily rivet count. Step 2: Multiply by operator time per rivet (seconds) and hourly labor cost to get daily labor minutes saved by a higher-output tool. Step 3: Divide extra purchase price by daily savings to get payback days. Example: if an auto-feed costs $6,000 more than a lever tool but saves 60 min of labor per day at $25/hr (so $25/day saved), payback is 240 days.
Quick buying checklist you can use at the store or online (3 items):
- Confirm tool matches your daily rivet count and cycle rate.
- Verify ergonomic specs: weight < tool category average, 4 in grip, adjustable nose.
- Check protection features: overload cutoff and vibration damping.
You can test a tool in 5 minutes: simulate 50 pulls, note hand soreness, observe grip comfort, and time cycle rate; if soreness appears before 30 pulls, try a different model.
Frequently Asked Questions
Can Operator Age or Medical Conditions Change Tool Recommendations?
Yes — I adjust recommendations for aging operators and medical accommodations, choosing lighter, ergonomic or power tools, auto-feed systems, and adjustable settings to reduce strain, accommodate limitations, and maintain safety and consistent rivet quality.
How Do Ambient Temperature and PPE Affect Hand Fatigue?
I once swapped thin gloves for insulated ones on a cold line and felt my hands stop cramping; glove insulation reduces thermal stress, but bulky PPE can add grip fatigue, so I choose slim, ergonomic protection.
Are There Industry Safety Standards for Rivet-Tool Ergonomics?
Yes — I follow ergonomic standards and certification programs like ISO 12100 guidance, ISO 11228 ergonomics, and ANSI B7.2 recommendations; I seek tools certified or tested for reduced operator fatigue and documented ergonomic compliance.
What Warranty Features Cover Fatigue-Related Tool Failures?
Warranties vary: I look for warranty duration that covers manufacturing defects and motor failures, and I watch coverage exclusions for wear, abuse, and fatigue-related misuse; I request clear service terms, replacements, and repair limits.
Can Workstation Layout Reduce Riveter Fatigue Beyond Tool Choice?
Yes—I believe workstation zoning and reach optimization cut riveter fatigue by placing tools, fasteners, and controls within neutral reach, reducing awkward stretches, enabling seated/standing options, and simplifying workflow so operators exert less repetitive force.