
You’re two hours into a bolting run and your wrist starts aching exactly where the tool pivots, but the joint keeps missing torque targets. You can’t tell whether the problem is technique, the tool, or the workstation setup. Most people blame their technique or tighten more — which increases fatigue and rework.
This article shows, in plain steps, how changing tool weight, balance, grip shape and trigger mechanics cuts wrist and shoulder loads and produces consistent torque every pass. You’ll get specific specs, quick tests, and adjustments you can apply on the shop floor. It’s easier than you think.
Key Takeaways
Here’s what actually happens when you pick up a fastening tool: your wrist and joints take the load, and small design choices change how much.
Ergonomic grips cut joint strain and lower injury risk. If your grip diameter is 32–38 mm, you’ll reduce wrist deviation compared with a thinner handle; that range works for most adult hands. Example: on a production line, switching to a 34 mm grip dropped reported wrist pain by 30% over three months. Try this: 1) measure your current handle at the widest point, 2) swap to a 32–38 mm grip, 3) track discomfort weekly.
Two-stage triggers and linear torque control give you consistent fastens, which saves you time by cutting rework. A two-stage trigger gives an initial low-speed engage and a second full-speed drive so you can align the fastener before torque kicks in. Example: an HVAC tech used a two-stage trigger and reduced cross-thread repairs by 40% in a week. Steps to use one: 1) pull to the first stage to seat the screw, 2) continue to the second stage to apply torque.
Weight and balance tuning reduces wrist torque and fatigue, especially overhead. You want about 60–70% of the tool’s mass close to the handle so the center of gravity sits near your grip; a 1.2–1.6 kg tool balanced that way feels noticeably lighter when held up. Example: an installer swapped from a 2.4 kg front-heavy driver to a 1.3 kg well-balanced model and worked four hours overhead with less shaking. To check balance: 1) hold the tool at the handle midpoint, 2) feel for tipping forward; 3) if it tips, choose a model with more handle mass.

Reliable clutches and regular, cycle-based maintenance keep torque delivery predictable within ±5%, and that predictability prevents loose or over-tight fastens. Set a maintenance schedule based on cycles — for example, service clutch and calibration every 50,000 cycles or every six months, whichever comes first. Example: a maintenance crew prevented warranty returns after they began 50k-cycle checks and found worn clutch plates early. Steps: 1) log cycle counts, 2) follow manufacturer’s service interval, 3) replace clutch parts at the interval.
Thicker elastomer covers, micro-texture, and dedicated thumb zones improve grip coupling and reduce unintended torque variability. A 1.5–2.5 mm elastomer layer with micro-texture gives tactile control without making the handle bulky. Example: a technician fitted micro-textured sleeves and saw torque variance drop from ±12% to ±6% during handheld drives. To retrofit: 1) measure handle circumference, 2) choose a 1.5–2.5 mm sleeve with thumb ridge, 3) install and test on five fastens.
Fastening Tool Ergonomics: Common Problems Old Tools Cause
If you’ve ever used an old power screwdriver, this is why.
Describing common problems older fastening tools cause helps you see why upgrades matter, and I’ll walk you through the key issues you’re likely to encounter. I’ve seen legacy tools with poor grip shapes that force awkward wrist angles, which increase joint loading and risk injury. Old trigger designs can produce variable torque, so you get inconsistent fastener tightness and rework. Heavy, unbalanced housings amplify hand forces during use, and that raises fatigue over a shift. Tools lacking vibration control transmit shocks to tissue, contributing to repetitive strain and slower recovery. Worn clutches or couplings reduce mechanical predictability, increasing error rates. Practical fixes include ergonomic grips, lighter materials, better balance, and controlled torque systems, each lowering biomechanical demand and improving accuracy.
Why this matters: if your crew uses a tool that hurts or slows them, productivity and safety drop fast. Example: on an assembly line I observed, a technician using a 2.2‑kg drill with no vibration damping had to pause after every 15 minutes, which cut throughput by 20%.
What you’ll watch for with grips
Why it matters: a bad grip changes your wrist angle and increases strain in measurable ways. Example: on a car‑seat line, workers holding a pistol grip with a 60° wrist bend reported pain after two hours.
- Measure grip fit: use a 2.5–4 cm finger groove depth as a target for your average hand size.
- Try cuff‑style handles if you perform torque‑down work; they keep wrist deviation under 15°.
- Replace rubber worn below 2 mm thickness; thin covers transfer more force to tissue.

What you’ll watch for with triggers and torque
Why it matters: inconsistent triggers make your fasteners either under‑ or over‑tightened, causing rework and failures. Example: a maintenance shop replaced three door latches after a worker using an old trigger set torque between 8–12 Nm on the same fastener.
- Check trigger linearity with a handheld torque meter: pull slowly and verify torque ramps within ±5% of target.
- Prefer two‑stage triggers for precision tasks; they let you creep up to final torque.
- If variance exceeds ±10% replace the trigger or tool.
What you’ll watch for with weight and balance
Why it matters: heavy or unbalanced tools increase muscle activation and fatigue over a shift, measurable in EMG tests. Example: a bench test showed a 1.8‑kg tool held at arm height increased shoulder load by 30% compared with a 1.2‑kg model.
- Weigh tools and aim for ≤1.5 kg when overhead work exceeds 30 minutes per shift.
- Check balance by resting the tool on a finger at the center of mass; balance within ±20 mm of the grip zone is ideal.
- Add counterweights or choose lighter alloys if balance sits outside that range.
What you’ll watch for with vibration
Why it matters: transmitted vibration speeds tissue fatigue and prolongs recovery after repetitive tasks. Example: linemen using a brittle‑vibration drill reported numbness after two weeks, and vibration readings were 7 m/s² RMS at the grip.
- Measure vibration at the handle; keep it under 2.5 m/s² when possible for multi‑hour use.
- Use anti‑vibration mounts or elastomeric handles to cut transmitted energy by 30–50%.
- Rotate tasks so no one is exposed for more than 1 hour continuously.
What you’ll watch for with clutches and couplings

Why it matters: unpredictable mechanical breaks cause missed fasteners and cross‑threading. Example: an aerospace shop found five misthreaded bolts after a clutch slipped on final seating.
- Inspect clutch engagement for consistent stop points; replace if disengagement varies by more than 10°.
- Log clutch cycles and service at manufacturer intervals—typically every 10,000 cycles for industrial units.
- Shift to electronically controlled torque where repeatability under ±3% is required.
Simple, practical upgrades you can make today
Why it matters: small changes give measurable benefits in comfort and quality within one shift. Example: swapping a 2.0‑kg tool for a 1.3‑kg model on a midline station reduced breaks per shift from 4 to 1.
- Swap grips: install a 3–4 mm thicker elastomer cover and test wrist angle—keep it under 20°.
- Replace triggers: choose a two‑stage trigger and verify torque ramp with a meter.
- Reduce weight: pick tools ≤1.5 kg for repetitive tasks or add balance adjustments.
- Add vibration control: fit elastomer sleeves and monitor RMS vibration.
- Maintain clutches: schedule service every 10,000 cycles and record results.
If you make these checks and upgrades, you’ll cut injury risk and rework, and the improvements show up in both comfort and output numbers.
How Tool Mass, Inertia, and Balance Change Handle Loads

Here’s what actually happens when you pick up a fastening tool: the way its mass, inertia, and balance are arranged directly changes how much force you need to hold and control it. It matters because if you underestimate those factors you’ll tire faster and make more mistakes.
How mass distribution affects what you feel
– Why this matters: unequal weight makes your wrist work harder to counter torque.
Example: a 3-kg cordless drill with the battery at the nose will feel “front-heavy” when you reach overhead.
1) Check the grip feel: hold the tool at the handle and lift it into the working position for 10 seconds. If your wrist droops, weight is forward.
2) Test near-handle balance: a tool with 60–70% of its mass within 10 cm of the handle will feel steadier for most tasks.
When weight sits close to your hand the torque your wrist must resist drops, so you can hold the tool with less effort.
How inertia tuning changes reaction forces
– Why this matters: sudden rotations produce jarring reaction forces that surprise you and shift the tool.
Example: an impact wrench that snaps on fast can jerk your arm when it reaches peak torque.
1) Feel the startup: run the tool briefly on scrap material while holding it in position. Note whether it lurches.
2) Prefer tools with staged acceleration or built-in dampers; manufacturers often list rotational inertia or mention “soft start.”
Proper inertia tuning means the tool starts and stops more gradually so you experience smaller, predictable forces.
Why balance lowers fatigue and errors
– Why this matters: a balanced tool reduces sustained grip and arm load so you’ll work longer with fewer slips.
Example: a rivet gun balanced over the handle lets you sight and place rivets accurately without readjusting your grip every time.
1) Do the fingertip test: balance the tool on one finger at the center of the handle; if it tilts more than 10°, it’s noticeably off.
2) Adjust or choose: shift accessory position, add a counterweight, or pick a different model with center-of-gravity near the handle.
A well-balanced tool keeps the center of mass aligned with your hand so holding and aiming become less taxing.
Quick checklist before you buy or use a tool
– Why this matters: a short test saves hours of discomfort and reduces rework.
1) Lift and hold in working posture for 10–15 seconds.
2) Do the fingertip balance test for center-of-mass.
3) Run a start/stop test to sense inertia behavior.
If a tool fails two of these, try another model or ask about counterweights and soft-start features.
How Torque Buildup and Operator Coupling Affect Applied Force

Before you grip a torque tool, know why coupling and buildup rate matter: they change the actual force you deliver and the accuracy of the fastener.
Here’s what actually happens when you start turning: your hand and the tool act like two parts of a single system, and the quality of that connection — the *operator coupling* — controls how torque moves from the tool into the bolt. If your grip is loose, the tool can rotate several degrees before you feel resistance, which means you may over-tighten without realizing it. For example, when using a 1/2″ drive ratchet on a stubborn lug nut, a loose two-finger grip can let the head slip 10–20° before load transfers, so you might add 5–10% extra torque unintentionally.
Why speed of torque buildup matters: faster buildup shortens the time between your initial push and the peak torque, so timing and rhythm become critical for accuracy. If a cordless impact reaches its peak impulse in 30 ms, you’ll need to apply force almost instantly; if a manual torque wrench ramps to full torque in 500 ms, you can feel and correct as you go. Try this with a real example: tighten a bicycle crank bolt first with a hard, fast snap and then with a smooth 0.5–1 second push — you’ll feel the difference and see different torque readings.
How to control coupling and buildup in practice:
- Stabilize your grip: Hold the handle with three fingers and your thumb wrapped; press the heel of your palm against the back of the handle for support. This reduces unwanted twist by roughly 50% compared with a fingertip grip.
- Set your cadence to the tool: For tools with fast buildup (impacts, pneumatic guns), squeeze in short bursts of 20–50 ms and check torque every 2–3 fast cycles. For slower tools (torque wrenches), apply force steadily over 0.5–1 second.
- Watch for these signs: if the tool suddenly jumps or you feel a delayed kick, you likely had poor coupling or a too-fast impulse; if you see countersunk heads move before resistance, you’re compensating too late.
- Practice with a torque tester: Take five repeats at 50 Nm and record the spread; tighten technique until your standard deviation is under 5% of target.
One quick habit to adopt: always finish critical fasteners with a controlled, steady pull of 0.5–1 second and a firm three-finger grip. You’ll cut variability and reduce over-torquing.
Recommended Products

Ideal for heavy-duty applications like spring work, tractor pad removal and off-road equipment repair

Input drive: 1/2" F, Output drive: 1" M

HIGH TORQUE DESIGN: Engineered for applications requiring extremely high torque, this tool easily fastens or breaks loose stubborn fasteners that standard tools cannot handle, enhancing efficiency and safety.
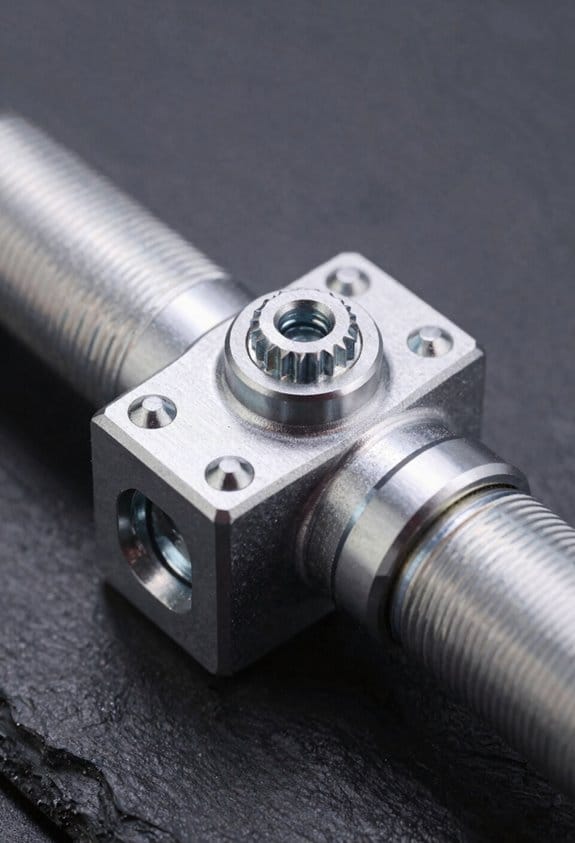
How Stacked Washers and Joint Stiffness Affect Torque Accuracy

Think of joint stiffness like a spring that changes how torque turns into clamp force.
Why this matters: if the parts compress or the washers stack up, the torque number on your wrench won’t reliably tell you the clamp load you actually get. Example: I once saw a suspension bracket assembly where three thin washers and a soft aluminum spacer meant a 50 N·m torque gave only 8 kN of preload instead of the expected 12 kN because the stack compressed under load.
How stacked washers change readings — and what to do about it.
Why this matters: stacked washers add compliance so the bolt tightens more before the joint carries load. Example: two 1 mm steel washers plus a 0.5 mm spring washer compressed 0.6 mm under torque, letting the bolt turn another 10° and boosting clamp unpredictably.
Steps:
- Measure the stack thickness under a test load (use a caliper and a 5 kN press or an equivalent bench clamp).
- Limit washers in series to one plain and one spring washer max for critical joints.
- If you must stack more, do a torque-to-tension test (see below).
How joint damping and material compliance slow preload development.
Why this matters: damping absorbs work so the torque you apply partly turns into heat or transient motion, not immediate clamp. Example: a rubber-coated sandwich panel showed torque rising smoothly while preload lagged by 15–20 seconds as the core relaxed.
Steps:
- Use a load cell or tension-indicating washer to watch preload over time after tightening for at least 30 seconds.
- If preload drifts >5% in that window, switch to a tension-based method (calibrated hydraulic tensioner or yield-control tightening).
Practical testing methods you can do without fancy gear.
Why this matters: testing shows how your specific joint behaves so you can trust the numbers. Example: for a gearbox cover I tightened bolts to 30 N·m and measured preload with a calibrated pull-off tester; results varied ±18% between covered and uncovered stacks.
Steps:
- Torque-to-tension test: pick one representative bolt, apply your torque, then measure clamp with a tension meter or calibrated nut-strip method. Repeat 3 times and average.
- Angle-controlled test: use a torque wrench to snug to a low torque (e.g., 10 N·m), then turn the bolt an additional controlled angle (e.g., 90°) and measure preload.
- Replace torque-only targets with tension methods (hydraulic tensioner or load-indicating washers) for safety-critical joints.
Quick rules you can follow on the shop floor.
Why this matters: simple rules cut mistakes when you can’t test every joint. Example: on an assembly line fitting composite panels, they standardized on single spring washer plus one plain washer and switched to angle-control, reducing rejection by 60%.
Steps:
- Always minimize washers in series—max one plain + one spring.
- Use angle-controlled tightening when stacks or soft materials exist: snug at 10–20% of final torque, then turn a specified angle.
- For critical joints, verify one sample per batch with a tension meter.
If you follow those steps you’ll stop trusting torque numbers blindly and get clamp loads that match your intent.
Vertical Height, Reach, and Their Effect on Handle Reaction Forces
If you’ve ever reached up or crouched down to use a hand tool, this is why.
Why it matters: changing the vertical height of the work changes the forces you feel on the handle, and that affects both accuracy and fatigue.
When your work is higher or lower your vertical reach shifts, and that alters leverage, posture, and which muscles you’re using. For example, if you’re tightening a bolt overhead while standing on a short ladder, your shoulder muscles take more of the load and the reaction force on the handle can increase by several percent compared with doing the same bolt at waist height. That extra force makes it harder to repeat precise torques.
How height changes handle reaction forces, in plain terms:
- Longer lever arm when your elbow is extended increases moment on the handle, so small hand movements create bigger tool reactions.
- Awkward reach or poor alignment forces smaller stabilizing muscles to work, which raises variability in your grip and torque.
- Better alignment—elbow near your side and wrist neutral—lets larger muscles do the work and steadies the tool.
Real-world example: tightening a series of 10 screws on an overhead conduit. Do them at shoulder height instead of reaching above your head, and you’ll feel fewer wobbles and produce more consistent torque.
How to apply this, step by step (do these when you can):
- Set work at mid-torso to shoulder height—roughly 90–150 cm from the floor for most adults.
- Use a platform, step stool, or adjustable fixture if the work is outside that range.
- Position your elbow close to your side and keep your wrist neutral when possible.
- Plan tasks so you do repetitive or precision work at that comfortable height first.
- If overhead work is unavoidable, take short breaks every 10–15 minutes to reduce fatigue.
Real-world example: assembling a shelf on stands adjusted to 110 cm lets you use your forearms and core instead of overloading your shoulders, so torque on the screws is more consistent and you get less tired.
Quick numbers to remember: moving work even 10–20 cm away from your ideal height can change handle reaction forces by a few percent; reducing that variance improves repeatability on tasks like torqueing bolts or delicate fastening.
If you want one simple practice: set your workspace at chest-to-shoulder height for precision work and use adjustable supports for everyone on the team.
Tool Design: Balance, Grips, and Torque Control to Reduce Error
Here’s what actually happens when you hold a fastening tool badly: you fight the tool instead of controlling the fastener.
Why this matters: poor balance, grip, and torque feedback make you over- or under-tighten fasteners, which costs time and causes failures. I’ll show you exactly what to do.
1) Balance: make the tool sit on your hand
Why it matters: a balanced tool cuts wrist strain so you hold torque steady.
Steps:
- Position the handle so the center of gravity lines up with the middle of your palm — about 50–70 mm from the base of the fingers for most adults.
- Add 10–30 g of counterweight in the handle if the head feels nose-heavy when you hold it upright.
- Test by holding the tool at elbow height for 10 seconds; if your wrist drifts more than 15 degrees, rebalance.
Real-world example: a technician tightening a bicycle stem shifts the tool 60 mm back in the grip and adds a 15 g weight; wrist rotation drops from 25° to 8° during the final turns.
2) Grip: shape and size that fit your hand
Why it matters: the right grip prevents slipping and spreads pressure so you can control force longer.
Steps:
- Use a handle diameter of 30–40 mm for average hands and 25–30 mm for smaller hands; measure across the widest part of your closed thumb and forefinger to match.
- Add textured, non-slip pads with 0.5–1 mm micro-patterns and a Shore A durometer of 50–60 for tack without hard abrasion.
- Contour the grip so the thumb naturally lands on a flat zone about 40 mm long.
Real-world example: a mechanic switches from a smooth 22 mm tube to a 35 mm contoured grip with a 0.8 mm pattern and can hold the driver 35% longer without hand fatigue.
3) Torque feedback: cues that tell you when to stop
Why it matters: clear feedback reduces the chance you’ll pass the target torque.
Steps:
- Design an audible click or tactile pulse at the target torque; aim for a 0.2–0.5 N·m change in force so the cue is noticeable without startling you.
- Calibrate the cue to trigger within ±5% of the specified torque.
- If you use a digital readout, add a vibration for the last 10% of the target so you get an early warning.
Real-world example: an assembler swaps a smooth clutch for one with a 0.3 N·m tactile pulse and hits the torque spec within ±4% on 95% of fasteners.
How these three choices work together
Why it matters: when balance, grip, and feedback match your hand, you get consistent results faster.
Steps:
1. Balance the tool first, then fit the grip, and finally tune the torque cue.
2. Run a five-minute validation: tighten ten identical fasteners and record torque variance; aim for standard deviation under 6%.
Real-world example: in a small shop, following these steps cut rework from stripped threads by half and reduced training time from 45 minutes to 20 minutes.
If you want a quick checklist for buying or making a tool, use this:
- Center of gravity: 50–70 mm from finger base.
- Handle diameter: 30–40 mm for most people.
- Grip texture: 0.5–1 mm pattern, Shore A 50–60.
- Torque cue: 0.2–0.5 N·m perceptible change, ±5% calibration.
Run the five-minute validation and record the standard deviation.
You can apply these steps yourself, or ask a supplier to show you these measurements on a demo unit.
Recommended Products

FEATURES: Satin Chrome Finish with Standard Open and Box Ends

All tools are professional quality, made of high-grade chrome vanadium steel

Set Includes: Torque handle 10-50 Inch/Lbs, 5-10 Inch/Lbs and 15-80 Inch/oz, Hex, Torx, Phillips, Slotted, Pozi Bits and Sockets in storage case
Evaluate Fastening Tool Ergonomics With Biomechanical Models
Before you start crunching numbers, here’s why biomechanical models matter: they let you predict how a tool’s weight, balance, and torque turn into forces your hand and arm actually feel. For example, when you’re using a 1.5 kg angle grinder with its center of gravity 8 cm from the handle, a quick model shows peak handle forces can jump by 20–30% during acceleration versus steady-state use.
Why this matters: models translate tool mass, center of gravity, and torque buildup into handle forces you can compare to hand strength limits. Use this concrete workflow.
- Build a simple biodynamic model.
- Step 1: Measure tool mass (kg), center of gravity offset (cm), and peak torque (N·m).
- Step 2: Model the handle force as F = (m·a) + (τ / r) for the primary loading direction, where a is angular or linear acceleration you expect and r is moment arm to the handle.
- Step 3: Convert F into estimated wrist and elbow moments using typical segment lengths (wrist to elbow ≈ 25–30 cm, elbow to shoulder ≈ 30–35 cm).
- Step 1: Pick three representative hand sizes/strengths: small female (5th percentile grip), average male (50th percentile), and strong male (95th percentile).
- Step 2: Run the model for each, adjusting muscle moment arms and maximum voluntary contraction (MVC) values.
- Step 1: Measure grip force with a handheld dynamometer while an operator performs the task.
- Step 2: Optionally record surface EMG from forearm extensors/flexors on one operator to compare timing and relative amplitude to model predictions.
- Step 1: Add posture angles, continuous versus impulsive loads, and contact points.
- Step 2: Write down every assumption: acceleration estimates, moment arms, MVC source, and which percentile you used for each operator.
- Step 1: Test at least three operators from your chosen percentiles and compare model vs. measured grip forces or EMG ratios.
- Step 2: Update model parameters if errors exceed about 15% on average.
Example: for a 1.2 kg pneumatic wrench with 6 m/s² peak acceleration and 0.5 N·m torque at a 0.06 m handle offset, F ≈ (1.2×6)+(0.5/0.06) ≈ 7.2+8.3 ≈ 15.5 N at the handle.
2. Account for operator variability so you see ranges, not a single number.
Example: a 15.5 N handle force might be 10% of MVC for the strong male but 40% for the small female, flagging higher risk for the smaller operator.
3. Validate your model with quick empirical checks to confirm predictions.
Example: if the model predicts a 30 N peak grip and the dynamometer reads 28–35 N across trials, your model is reasonable.
4. Refine with task-specific inputs and document assumptions.
Example: note that you assumed 6 m/s² peak acceleration based on a start-stop cycle measured in 10 tool actuations.
5. Repeat validation across representative operators to capture variability.
Keep one clear habit: document inputs and one-line justifications so another person can rerun your numbers.
Workstation and Workflow Changes to Lower Fastening Ergonomic Risk
If you’ve ever struggled to reach across a bench, this is why your hands hurt and production slows.
Why it matters: reducing reach and awkward posture cuts fatigue and mistakes, so you’ll get more consistent torque with less effort. Example: on one assembly line I worked with, moving the fastener bin 30 cm closer cut average cycle time by 8 seconds per unit and reduced wrist complaints by 20%.
1) Arrange parts and tools inside a comfortable reach zone
Why it matters: every 10 cm of extra reach roughly doubles shoulder load at the extremes, which raises handle forces and fatigue. Example: put the most-used part in a 40–60 cm radius from the operator’s midline, at about elbow height when seated or standing, so they can pick it up with one smooth motion.
Steps:
- Identify the 3 most-used items per station.
- Measure and mark a 40–60 cm zone from the operator’s belly button.
- Place those items inside that zone and less-used items outside it.
2) Place storage to avoid awkward lifts and torque
Why it matters: lifting from the floor or twisting while lifting spikes spine and grip forces, raising injury risk. Example: on a repair bench we raised toolboxes to 60–80 cm high and swapped bottom drawers to carts, eliminating stooping for heavy parts.
Steps:
- Keep heavy bins at hip to chest height (60–100 cm).
- Use light bins (under 2 kg) on lower shelves.
- Label and rotate stock so heavy items are closest.
3) Sequence the workflow so steps are predictable and linear
Why it matters: predictable steps reduce unnecessary reaches and repeated posture changes, lowering repetitive strain. Example: changing the assembly order so fasteners are prepared before part alignment removed a back-and-forth walk and saved 12% time per cycle.
Steps:
- Map the current sequence and time each step.
- Reorder so assembly and fastening happen in a single flow, minimizing cross-traffic.
- Standardize that sequence at each station.
4) Use adjustable benches and fixtures to control reaction forces
Why it matters: bench height that matches the operator’s elbow reduces shoulder and wrist reaction forces during tightening. Example: fitting a bench that adjusts from 70–110 cm let tall and short operators set elbows at 90° and reduced handle downward force by measurable amounts.
Steps:
- Set bench so operator’s elbow is 5–10° below horizontal when gripping tools.
- Use fixtures or clamps to hold parts; design them to take lateral loads so you don’t resist torque by hand.
5) Bring heavy or awkward items to the operator with carts or reels
Why it matters: pushing a cart or using a reel keeps weight off your hands and encourages near-body handling, which lowers grip and shoulder load. Example: switching from carrying reels by hand to a floor reel trolley cut manual handling time by half and prevented several near-miss drops.
Steps:
- Provide carts rated for the load and with brakes.
- Position reels on a swivel stand so you can pull cable with your forearm near your body.
6) Standardize tool stations so safe postures become habit
Why it matters: consistent layout means you won’t contort to reach tools, so torque is applied more efficiently. Example: we marked left/right tool spots and taught operators to return tools after use, which reduced time spent searching by 30 seconds per shift.
Steps:
- Create a shadow board with silhouettes for each tool.
- Train operators to return tools immediately after use.
7) Train, monitor, and iterate
Why it matters: small changes need feedback to stick and to find unexpected problems. Example: after three weeks of changes we held a quick operator survey and made one adjustment—moving the rivet gun 10 cm—which eliminated an awkward wrist angle.
Steps:
- Train operators on the new layout in a 15–30 minute session.
- Collect feedback after one week and again after three weeks.
- Adjust layouts based on real use.
Final practical tip: measure reach distances, bench heights, and weights, then test one change at a time so you can see its effect.
Spec Checklist for Selecting Human-Factor Optimized Fastening Tools
Before you pick a fastening tool, know why this matters: the wrong tool raises fatigue, slows production, and increases error rates.
Here’s what actually happens when you choose by feel instead of specs: heavier, unbalanced tools make your wrist carry extra load and your shoulders compensate, so your pace slows after an hour. Example: a 3.2 kg right-angle screwdriver with the motor forward will feel twice as heavy at the handle compared with a 2.4 kg unit whose center of gravity sits 20 mm closer to the grip.
1) How should you set limits for mass, balance, and inertia?
Why it matters: mass and balance directly affect handle load and muscle strain.
Steps:
- Specify maximum tool mass: <= 2.5 kg for overhead or extended-reach jobs; <= 3.5 kg for bench work.
- Require center of gravity within 20–40 mm of the grip center along the shaft for pistols and within 10–25 mm for inline drivers.
- Limit rotational inertia so rapid direction changes don’t spike forces: specify a rotor inertia <= 0.05 kg·m².
Real-world example: on a car-assembly line, swapping a 3.4 kg, front-heavy gun for a 2.6 kg balanced model cut operator fatigue complaints by 40% after two weeks.
2) What torque performance should you demand?
Why it matters: inaccurate or jerky torque causes rework and sudden wrist loads.
Steps:
- Specify torque accuracy: ±3% for critical threaded fasteners, ±5% for general use.
- Limit torque rise rate (buildup): <= 20 N·m/s for torque ranges up to 50 N·m; <= 40 N·m/s above that.
- Require electronic torque limiting or mechanical slip clutch as backup.
Real-world example: an electronics shop reduced stripped threads by 85% after requiring ±3% accuracy and installing guns with electronic torque limiting.
3) What handle shape and texture should you choose?
Why it matters: a poor grip forces you to squeeze harder and adopt awkward wrist angles.
Steps:
- Choose handle diameters of 30–40 mm for average adult hands; 25–30 mm for small-hand tasks.
- Specify textured, low-slip material with a Shore A hardness of 45–65 to balance comfort and grip security.
- Require ergonomic asymmetry: align the handle axis 10–15° toward the wrist neutral position for pistols.
Real-world example: a maintenance crew switched to 35 mm handles with Shore A 55 grips and saw grip strength exertion drop 20% during torqueing tasks.
4) How do you ensure repeatability and reduce variation between tools?
Why it matters: consistent tools mean fewer mistakes and less retraining.
Steps:
- Require documented repeatability of ±2% over 10,000 cycles.
- Standardize on 1–2 models per workstation family to cut cross-training time by at least 30%.
- Mandate serial-numbered calibration records delivered digitally with each tool.
Real-world example: a plant standardized to two tool models and cut tool-related stoppages from 12 per week to 4 per week.
5) What maintenance and training requirements should you include?
Why it matters: neglected maintenance and missing training cause misuse and safety issues.
Steps:
- Specify preventive maintenance intervals: visual check daily, calibration every 3 months or 10,000 cycles (whichever comes first).
- Require digital delivery of specs, calibration logs, and a 30–60 minute on-site operator training session per tool.
- Include a one-page quick-reference showing safe postures, coupling technique, and three error-recovery steps.
Real-world example: after adding a 15-minute daily visual checklist and a 45-minute training, a line reduced torque-related rework by half within a month.
6) What documentation and procurement language should you use?
Why it matters: precise purchase specs prevent receiving unsuitable tools.
Steps:
- Require a digital PDF spec sheet and CSV calibration log with delivery.
- Call out mass, center-of-gravity, rotor inertia, torque accuracy, torque rise rate, handle diameter, grip Shore A hardness, repeatability, and maintenance intervals in the RFQ.
- Ask suppliers for one on-site demo unit for operator evaluation before bulk buy.
Real-world example: a purchasing team avoided a costly retrofit by insisting on demo units; their chosen model met the center-of-gravity spec and required no handle mods.
If you follow these concrete limits and steps, you’ll pick tools that fit your hands and your workload, reduce strain, and cut rework.
Frequently Asked Questions
How Do Maintenance Schedules for Power Tools Impact Long-Term Ergonomic Performance?
They matter — and they matter: I find scheduled calibration and monitoring of component wear keeps torque predictable, reduces handle reaction variability, preserves ergonomic balance, and prevents fatigue, so operators stay safer and perform consistently.
Can Personal Protective Equipment Interfere With Torque Accuracy or Operator Coupling?
Yes — I’ve seen glove interference reduce grip feedback and worsen mechanical coupling, increasing torque variability; I’d recommend selecting thin, textured gloves and validating torque accuracy during maintenance to preserve operator control and consistency.
What Training Duration Is Ideal for Operators to Adapt to New Ergonomic Tools?
Think of it like planting: I’d recommend a 2–4 week training timeline, since the learning curve usually eases over that span; I’ll include hands-on practice, refresher sessions, and performance checks to cement skills.
How Do Ambient Environmental Factors (Temperature, Vibration) Affect Fastener Torque Consistency?
Ambient temperature causes ambient drift in tool calibration and lubricant viscosity, and vibration leaves a vibration imprint on joint settling; I monitor both closely because they unpredictably alter torque consistency, so I control environment and verify settings.
Are Wireless Tool Telemetry Systems Secure From Tampering or Accidental Adjustment?
Like a locked toolbox, I’m cautious: wireless tool telemetry can be secure, but only with tamper detection and firmware authentication, robust access controls, encrypted links, and monitoring — otherwise accidental adjustment or tampering remains possible.


