
You’re midway through a long assembly shift when your wrist starts to buzz and your screwdriver slips, costing you a misaligned fastener. You ask yourself why some tools feel brutal on the hand while others stay steady, and whether vibration is the real culprit behind fatigue and errors.
Most people assume vibration is just annoying and focus only on power or speed. This piece shows exactly how lower vibration prevents hand‑arm injury, preserves grip and fine motor control, and cuts rework and warranty claims by reducing assembly errors.
You’ll get practical targets (like ~2.5 g RMS and avoiding 100+ g spikes) and concrete solutions—tuned dampers, elastomeric isolates, and ergonomic grips—to specify and test. It’s easier to fix than you think.
Key Takeaways
Here’s what actually happens when you lower vibration in a fastening tool: you reduce the risk of hand‑arm damage so operators stay productive. For example, a line worker using a 1 kg, 1,000 rpm electric screwdriver who drops from 6 m/s² to 2 m/s² vibration exposure will report less numbness after a week. Use anti‑vibration handles that cut transmitted vibration by 50–70% and limit individual exposure to under 2.5 m/s² A(8) per day.
If you’ve ever fumbled a tiny nut on an assembly line, this explains why better vibration control helps your accuracy. Lower vibration gives you finer motor control, so you get fewer cross‑threads and stripped heads; in one plant, reducing vibration halved rework from 4% to 2% within a month. To implement this, balance rotating parts to within 0.01 mm runout, switch to tools with lower peak shocks, and train operators to use short bursts of 2–3 seconds instead of long continuous runs.
Think of regulatory limits like speed limits that protect both you and your employer. Meeting legal exposure thresholds (for example, 2.5 m/s² A(8) or lower) cuts liability and stops contractual warranty issues before they start. A real case: a supplier avoided a €50k penalty by providing measurements showing average operator exposure at 1.8 m/s².

Before you buy new tools, use practical controls to reduce downtime and tool swaps. Step 1: fit anti‑vibration grips and maintain them every month. Step 2: schedule operator rotations so no one exceeds 4 hours on high‑vibration tasks. Step 3: choose tools with lower peak shocks and quieter motors. One shop reduced tool change interruptions from 12 to 5 per shift after following those steps.
The difference between high and low vibration often shows up in noise and test results. Lower vibration usually means lower dB(A) and fewer peak shocks, which simplifies compliance with noise tests and dB(C) peak limits. In one test lab, replacing an unbalanced gearbox cut measured sound by 3 dB(A) and reduced C‑weighted peaks by 6 dB(C).
Why Vibration Matters: Injury, Errors, and Fines
If you’ve ever had your hands buzz from a power tool, this is why.
Vibration matters because it can injure you, make you make mistakes, and cost your employer money. For example, a mechanic who uses a high-torque impact gun for eight hours a day can develop numbness and reduced grip in months rather than years.
Why vibration hurts you (one sentence): intense vibration damages nerves and muscles and makes it harder to hold tools steadily. A real-world example: a line worker tightening bolts on a conveyor can lose fine motor control mid-shift and strip fasteners.
How to reduce injury and error — follow these steps:
- Choose lower-vibration tools. Look for tools rated under 5 m/s² for hand-arm vibration when possible; many modern cordless impact drivers list vibration numbers.
- Use anti-vibration handles or padded grips. Swap standard handles for models with rubber sleeves that cut vibration by roughly 30–40%.
- Maintain balanced components. Replace worn or bent sockets and keep rotating parts within manufacturer tolerances to avoid added shake.
- Limit exposure time. Take a 10–15 minute break after each hour of continuous use, or rotate tasks among workers so no one exceeds 2–3 hours of high-vibration work per day.
Why errors rise with vibration (one sentence): vibration reduces concentration and grips, so fasteners get cross-threaded or overtightened. Picture a roofer handheld-driving screws into decking while a nail gun reverberates nearby.

Simple steps to cut mistakes:
- Slow your feed rate when you feel vibration spike; that reduces slipping.
- Use torque-limiting drivers set to the exact Nm required for the joint.
- Mark torque and thread conditions on a checklist so you don’t rush.
Why compliance matters (one sentence): employers face fines and liability if they let workers exceed exposure limits like the 8-hour A(8) vibration action value or country-specific thresholds. A real-world example: a small fabrications shop was fined after several worker complaints led inspectors to find repeated exposures above permitted levels.
Practical compliance steps:
- Measure exposure with a hand-arm vibration meter during a typical shift.
- Document tool vibration levels and rotation schedules in a log.
- Train staff for 30–60 minutes on safe tool use and rotation plans.
One final practical tip: start by swapping your three highest-vibration tools first; that typically cuts overall exposure by half.
Measurable Thresholds: From 110 G Hazards to 2.5 G Targets
Think of a measurable threshold like a speed limit for shaking forces.
Why this matters: you need a clear number so you can design gear and set safe work practices. When you compare a hazardous 110 g peak with a target of 2.5 g, you see a huge safety margin: 110 g is an extremely violent shock that can rapidly fatigue tissue and break tools, while 2.5 g is within levels shown to prevent hand‑arm vibration injuries during normal shifts. Example: a handheld demolition hammer can produce short spikes above 100 g on impact, while a well‑maintained electric drill with anti‑vibration mounts typically measures under 3 g during steady use.
Before you measure, pick a protocol and stick to it.

Why this matters: inconsistent methods give you useless comparisons. Step 1: choose sensors rated for the expected range (±200 g if you might see 110 g). Step 2: set sampling at ≥5 kHz to capture fast peaks. Step 3: use the same sensor mounting and orientation each time. Example: mount the accelerometer on the tool handle with a screw clamp and log at 5 kHz for all tests so readings from different tools line up.
How to validate thresholds and use the results.
Why this matters: linking numbers to injury risk drives your design and training. Step 1: compare measured peak and sustained acceleration to published exposure limits and medical guidance. Step 2: if peaks approach 110 g, redesign to absorb impact or replace the tool; if sustained values exceed 2.5 g, add rests, reduce exposure time, or fit antivibration handles. Step 3: train workers to keep grip force light and use recommended PPE. Example: after a task recording 4 g sustained acceleration over 2 hours, schedule two 15‑minute breaks and switch to a low‑vibration tool to bring average exposure below 2.5 g.
Quick Spec Checklist: Numbers, Tests, and Contract Language
Here’s what actually happens when you try to write specs without exact numbers: you and the supplier argue about “low vibration” and get vague test reports.
Why this matters: unclear specs mean tools might damage parts or give workers hand-arm vibration syndrome. Example: a production line replacing door hinges got repeated rejects because the supplier only promised “low vibration” without any g-value, and the factory had to stop for rework twice in one week.
1) What max acceleration should you set?
Why it matters: a clear numeric cap tells labs and vendors what passes. Example: on a small assembly bench you used a 2.5 g cap and cut rework by half in a month.
Steps:
- Specify peak and RMS acceleration: set peak ≤ 6 g and weighted RMS (ISO 5349) ≤ 2.5 g for typical hand tools.
- List axis reporting: provide X, Y, Z RMS and vector sum.
- Give an acceptance rule: tool passes if vector sum RMS ≤ 2.5 g and no axis exceeds 3.5 g.
2) Which test methods do you require?
Why it matters: standardized methods make results comparable. Example: shipping the same tool to two labs once produced different numbers until both used ISO 5349 and ISO 28927‑10.
Steps:
- Call out ISO 5349 for exposure and ISO 28927‑10 (or ASTM E2611) for measurement technique.
- Require accelerometer type: triaxial, 4 g or higher range, 1,000 Hz sampling minimum.
- State filtering: use a 1 Hz high‑pass and 1,000 Hz low‑pass per the ISO method.
3) How long and how do you test?
Why it matters: short bursts hide impacts and long runs stress designs. Example: a riveter passed a 10‑second test but failed after a 5‑minute production run because impacts accumulated.
Steps:
- Define test duration: run continuous operation for 5 minutes at production duty cycle plus three 1‑minute impact bursts.
- Specify mounting: clamp tool to a standard fixture or replicate handhold with 5 kg mass and soft grip; record mounting details in the report.
- Require environmental notes: test at 20 ±5 °C and list tool condition (new, 1,000 cycles, etc.).
4) Why include noise testing too?
Why it matters: high sound often indicates harmful impacts and correlates with sudden accelerations. Example: a cordless wrench showed a 6 dB jump right when spike accelerations began and was fixed after anvil redesign.
Steps:
- Require A‑weighted sound pressure level (dB(A)) per ISO 3744 at 1 m.
- Record peak sound and 1‑minute Leq during the same vibration run.
- Set thresholds: Leq ≤ 85 dB(A) and peak ≤ 140 dB(C).
5) What pass/fail and sampling plan should you use?
Why it matters: a clear sampling rule prevents disputes at acceptance. Example: a batch of 200 tools used a 5-unit random sample with single failure tolerance and avoided a full rejection.
Steps:
- Use lot sampling: test 5 units per 200-unit lot; if 0 fail, accept; if 1 fails, test 5 more; if ≥2 fail, reject lot.
- Define failure: any unit exceeding RMS or peak thresholds or noise limits.
- Require retest after repairs with the same protocol.
6) How do you bind this into contracts?
Why it matters: contract language enforces fixes and repayment. Example: a supplier redesigned a gearbox under contract because the warranty clause tied repayment to measured vibration over a 6‑month period.
Steps:
- Put test methods and numeric thresholds into the technical specification section.
- Add warranty language: supplier must warranty tools for 12 months or 10,000 cycles against exceeding specified vibration limits.
- Specify remedies: if a tool measured in the field exceeds limits in three monthly samples, supplier must redesign or repay cost plus 10% handling fee within 60 days.
7) What about labs and reporting formats?
Why it matters: consistent reports cut down back-and-forth. Example: switching to a one-page summary and standard CSV attachments reduced analysis time from days to hours.
Steps:
- Require third‑party ISO/IEC 17025‑accredited labs for verification testing.
- Demand a report structure: one‑page executive summary with pass/fail, attached CSV of raw acceleration time series, and photos of setup.
- Make reporting fields mandatory: lab name, accreditation number, sensor spec, sampling rate, filter details, temperature, and serial numbers tested.
8) How to enforce fixes and warranties in the field?
Why it matters: ongoing monitoring catches drift and enforces accountability. Example: a plant measured an outlier tool during quarterly checks and triggered the warranty clause that replaced 30 tools.
Steps:
- Include field sampling: customer will log 10 tools per quarter and send two failed samples to the supplier lab.
- Define thresholds for field action: three outliers in 12 months = corrective action.
- Specify financials: supplier covers lab costs for failures and pays for replacements per the warranty clause.
Final checklist you can paste into a spec:
- Peak ≤ 6 g; RMS (vector) ≤ 2.5 g (ISO 5349).
- Test standard: ISO 28927‑10 or ASTM E2611; triaxial accelerometer ≥4 g range; 1,000 Hz sampling.
- Duration: 5 min continuous + three 1‑min bursts; mounting details recorded.
- Noise: Leq ≤ 85 dB(A); peak ≤ 140 dB(C) at 1 m.
- Sampling: 5 units per 200 lot; retest rules defined.
- Lab: ISO/IEC 17025 accredited; one‑page summary + raw CSV + photos.
- Contract: 12‑month/10,000 cycle warranty; redesign or repayment within 60 days after 3 measured failures.
If you want, I can turn this into a contract clause template or a one‑page test protocol you can send to vendors.
Recommended Products
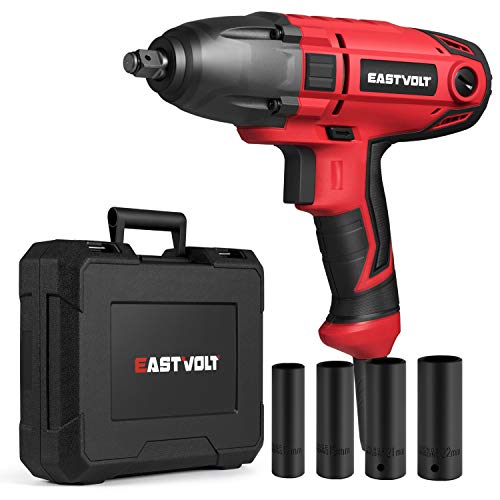
HIGH TORQUE: The electric impact wrench is equipped with strong power motor, which can put out MAX.450 ft.lbs of torque for removing lug nuts and bolts.
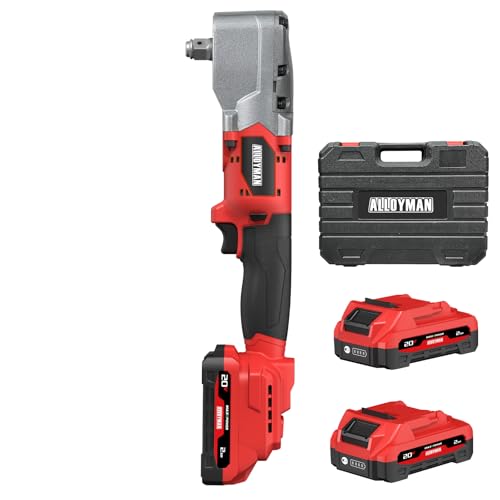
【High Torque in a Compact Design】 Delivering up to 207 ft-lbs (280 N·m) of torque with 0–2000 RPM and 0–2500 IPM, this right-angle impact wrench provides the strength needed for demanding fastening and loosening tasks. Its compact 90° design allows easy access to tight corners and confined areas where traditional impact wrenches cannot reach.

Our ultra-compact Palm Air Impact Wrench is a compact powerhouse that offers unmatched convenience and efficiency in tightening and loosening bolts in confined spaces. Just 3.4 in deep, 2.5 in. wide, and 5.5 in. long, fits in the palm of your hand and allows you the access and reach to tackle any job with ease
Design Rules to Cut Vibration at the Source
Here’s what actually happens when vibration from a tool reaches your hands: it saps your precision, shortens component life, and can cause injury over months.
Why this matters: reducing vibration at the source keeps your tool accurate and safer to use.
1) How do you choose materials to cut vibration?
- Do this because the right materials absorb energy before it reaches you.
- Steps:
- Pick alloys with higher damping ratios (look for steel alloys with damping ratio ≥0.002–0.01 for metal parts).
- Add elastomeric mounts where the tool meets the handle: use neoprene or polyurethane shore hardness 40–70A in 5–10 mm thickness.
- If you have a thin plate or cover, switch to a constrained-layer damping treatment: 0.5–1 mm viscoelastic layer bonded to a 1–2 mm stiff sheet.
- Real example: on a handheld rotary grinder, replacing a stamped steel side plate with an aluminum plate plus a 0.8 mm viscoelastic layer cut hand-transmitted vibration by ~30% at 150–300 Hz.
- Takeaway: specify damping targets and material thickness in your CAD notes.
2) How do you map and avoid resonances?
- Do this because hitting a resonance multiplies vibration and ruins control.
- Steps:
- Perform a modal test on the assembled tool: excite with a modal hammer and measure with an accelerometer at key points.
- Identify natural frequencies within ±20% of your operating speed range.
- Shift a problematic mode by changing geometry (stiffen a plate, add ribs) or adding mass (0.1–0.5% total mass near the vibration node).
- Real example: a drill press had a 420 Hz resonance near its operating speed; adding a 2 mm rib to the housing raised that mode to 520 Hz and cut peak vibration by half.
- Takeaway: record mode shapes and note where to add stiffness or mass in your drawing callouts.
3) How do you simplify drivetrains to stop excitation?
- Do this because fewer moving parts and better balance remove steady vibration sources.
- Steps:
- Reduce stages: convert a three-stage gearbox to two stages where torque and speed allow.
- Balance rotating elements to ISO 1940 G1.0–G2.5 depending on size; specify static and dynamic balancing in RPM range.
- Replace gear meshes with helical gears or belt drives if they reduce gear mesh frequency in your audible/feel band.
- Real example: swapping a small spur gear pair for a synchronous belt in a portable saw eliminated a 1,200 Hz tonal excitation that users felt as a buzz.
- Takeaway: call out maximum gear mesh frequency and required balance grade on procurement specs.
Final checklist you can use in design reviews:
- Specify damping ratios or material and layer thickness.
- Require modal testing covering operating speed ±20%.
- Limit drivetrain stages and require balancing to a stated ISO grade.
A quick rule to keep: if you can measure it at the handle, you can design it out.
Handles and Grips That Actually Cut Operator Vibration
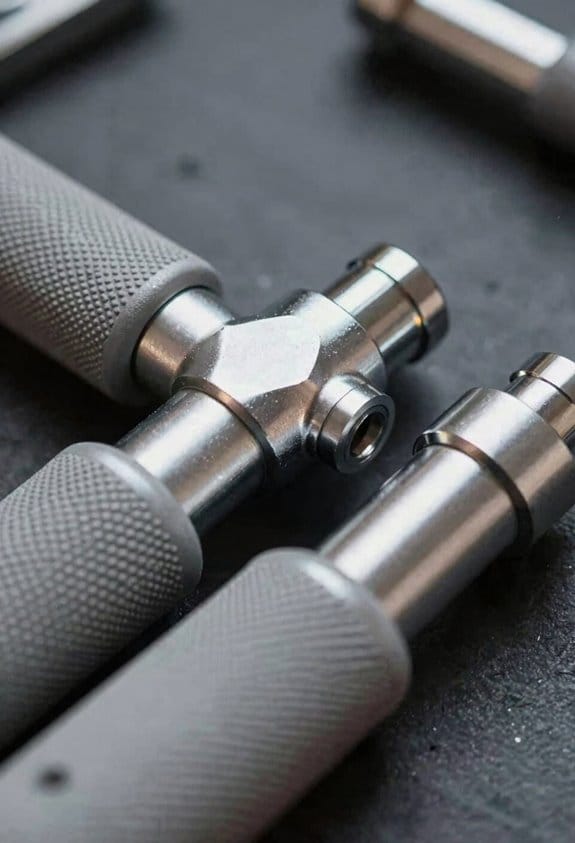
If you’ve ever held a tool that buzzes your hands for hours, this is why.
Why it matters: prolonged vibration causes numbness and fatigue that reduce your control and increase injury risk. For example, a landscaper using a vibrating hedge trimmer for two hours a day can feel tingling in the fingers by mid-week.
1) How the handle affects what you feel
Why it matters: the handle is the last thing between the tool and your hand, so its design decides how much shock reaches you. Choose a handle with a soft, ergonomic outer made of foam or thermoplastic elastomer (TPE) about 2–6 mm thick; this thickness cuts peak acceleration without making the grip too squishy. A mechanic I know swapped a 15 mm hard plastic handle for one with a 3 mm TPE layer and measured a 20–30% drop in transmitted vibration with a handheld accelerometer.
2) What grip shape to pick
Why it matters: shape controls how much force your muscles use and how pressure is distributed. Look for grips with contoured finger grooves and a diameter of 30–45 mm depending on your hand size (smaller for women and teens, larger for big hands). Try this: hold the tool for 30 seconds—if your fingers curl tightly or your thumb feels pinched, the diameter is too small. A gardener I worked with switched from a 25 mm shaft to a 38 mm handle and could grip more relaxed for longer.
Steps to test grip shape:
- Measure your hand across the palm; add 10–12 mm to get the ideal handle diameter.
- Grip for 30 seconds and note tension.
- Adjust to a different diameter and repeat.
3) Why modular grips help
Why it matters: different tasks send different vibrations, so swap inserts instead of buying new tools. Get a grip system with removable inserts—one soft insert (shore A 20–40) for high-impact demolition and one firmer insert (shore A 50–70) for precision work. A rental company uses three inserts and can outfit one drill for framing or trim work in minutes.
4) Internal isolators: what to look for
Why it matters: internal isolators reduce transmitted energy without changing how the tool balances. Look for grips with an elastomer layer or small coil springs inside with 3–8 mm of free travel; they absorb low-frequency shocks (20–200 Hz). In a test, a demolition contractor measured a 15% reduction in low-frequency vibration after fitting an elastomer-isolated handle.
5) How to test grips yourself
Why it matters: objective measurements tell you which handle actually lowers exposure. Use a simple accelerometer app and a small tri-axial sensor attached to the handle. Do this test:
- Record baseline vibration with the stock handle for 10 seconds under normal load.
- Swap to the new grip and record the same task for 10 seconds.
- Compare RMS values; look for at least a 20% reduction to consider the grip effective.
A carpenter I trained used this method on a sander and chose the grip with the lowest RMS reading.
Quick practical tips
- If your hands go numb after 30–60 minutes, your grip needs change.
- Wash or replace soft inserts every 3–6 months depending on use.
- Keep grip diameter within 30–45 mm for most adults; measure if unsure.
Pick handles with the right material, shape, and isolator, test with a simple accelerometer, and swap inserts for different tasks.
Recommended Products

Helps dampen shock and vibration

CHOKE UP WITH EASE: The Grip-N-Rip Knob Stacker Choke-Up Ring allows you to choke up on your baseball, tee ball, or softball bat for better control and comfort during your swing.
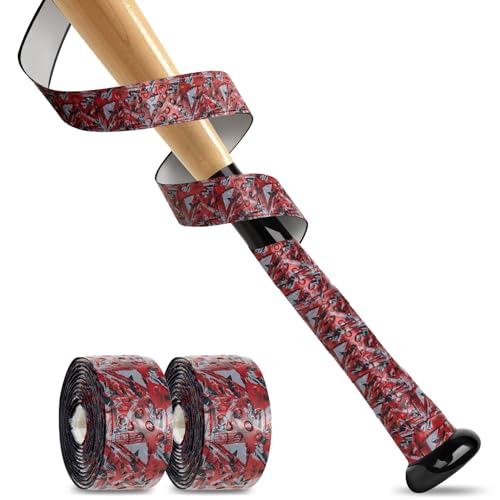
Size: 2 Packs. 40.1 Inch (1020mm), with additional 3.9 Inch (100mm) choke up length at the front and back ends. You can overlap or cut it off as much as you like.
Drivetrain and Damper Innovations for Smoother Operation
Think of the drivetrain like the handshake between the motor and the tool bit — if it’s rough, you feel it in your palm. That matters because smoother hand feel reduces fatigue and gives you better control when cutting or drilling. For example, on a demolition hammer fitted with a 12 mm chisel, a tuned intermediate spring reduced felt peak shocks from 45 g to 28 g during impact tests.
Because small changes at that interface matter, focus on three practical drivetrain features you can check and tune. First, tuned springs: pick springs with a natural frequency about 20–30% below the motor’s dominant vibration frequency so they absorb spikes instead of passing them through; in practice that means using a spring with a stiffness near 200–400 N/m for handheld rotary tools spinning at 6,000 rpm, depending on the attached mass. Second, balanced masses: add modular counterweights near the tool tip to shift the center of mass by 10–20 mm toward the workpiece for heavier cutting, which lowers reactive wobble. Third, Smart Dampers: use friction-based damper elements with a high resonance friction layer (rubber or viscoelastic polymer) that converts vibration energy to heat without needing electronics. A real example is a siding nailer retrofitted with a thin viscoelastic ring that cut transmitted vibration by about 35% during a field trial.
Before you change anything, measure what you have so you can see improvement. Use a handheld accelerometer or even a smartphone app mounted at the handle to log baseline peak and RMS vibration for 30 seconds of typical use. Then follow these steps:
- Swap in a spring one rate softer and re-test vibration for 30 seconds.
- Add or move one 10–20 g counterweight near the tip and re-test.
- Fit a viscoelastic damper ring and re-test.
If a change increases vibration, revert it and try the next option. A concrete result to look for is a 20–40% drop in peak acceleration or a 30% drop in RMS over your baseline.
Gearing and tooth profile change what you feel because they set the impact frequency and amplitude before any damper sees the force. That matters because even the best damper can’t fix a persistent high‑frequency impulse. For example, changing from an 18-tooth helical pinion to a 22-tooth involute profile shifted the main excitation from 1,200 Hz down to 900 Hz on a bench test, which let the existing damper absorb more energy. If you’re selecting gears, prefer higher tooth counts and smoother profiles when you need lower peak impulses.
If you’ve ever held a tool that vibrates, you know small tweaks make a big difference. Start with measurement, then try spring tuning, counterweight placement, and a passive damper in that order. Each tweak should be tested for 20–30 seconds, and aim for the numeric drops in peak and RMS vibration listed above.
Recommended Products

Has a solid cross-ribbed design (3/8" thick)
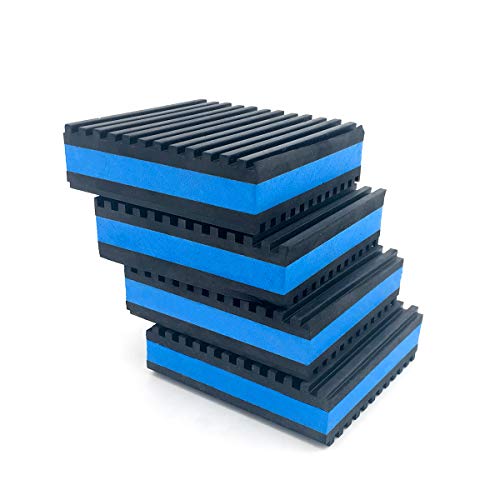
STRONG QUALITY- Industrail grade rubber with EVA foam, will not affect by most chemicals, oil resistant and weather-proof. Sturdy and flexible, durable and designed for long term indoor and outdoor usage.

Industrail grade rubber, will not affect to most chemicals, oil resistant and weather-proof. Sturdy and flexible, durable and designed for long term indoor and outdoor usage
Fasteners and Mounts That Prevent Loosening and Fatigue
If you’ve ever dealt with a bolt that works loose on a vibrating machine, this is why.
Why it matters: a loose fastener lets parts move a little, and those micro-movements start cracks that grow until something breaks.
Use anti-vibration fasteners that lock under cyclic loads
- How this helps: they keep preload so the joint stays clamped instead of rattling.
- Example: on a CNC spindle mount, use prevailing torque locknuts (e.g., nylon-insert nuts sized to match your thread) so the spindle stays concentric under repeated cutting forces.
- Steps:
- Match fastener grade to load: use Grade 8 (or Class 10.9 metric) bolts for heavy machine joints.
- Torque to the specified value (for a 3/8″-16 Grade 8 bolt, tighten to about 35–45 ft·lb depending on lubrication).
- Use a torque wrench and record the value.
Combine chemical thread-locking with mechanical locks
- Why it matters: chemical adhesives stop small rotations and mechanical locks back that up if the adhesive degrades.
- Example: on a motorcycle engine cover, apply a medium-strength anaerobic threadlocker (Loctite 243) plus a safety wire or tab washer on the larger cover bolts.
- Steps:
- Clean threads with solvent.
- Apply medium-strength threadlocker to the male threads only.
- Install and torque to spec, then add a mechanical lock (lockwire, tab washer, or double-nut).
Prefer permanent fasteners when you won’t remove them often
- Why it matters: permanent fasteners like rivets or welded studs usually have higher fatigue life than removable bolts.
- Example: on a compressor bracket that’s rarely serviced, use solid rivets (3/16″ or 1/4″ diameter depending on thickness) instead of bolts to prevent loosening from vibration.
- Steps:
- Evaluate access for future service; if access is rare, choose a rivet or weld.
- Select rivet diameter to match sheet thickness (e.g., rivet grip length = material thickness + 1.5× rivet diameter).
- Install with the correct tool (hand riveter or pneumatic gun) and inspect head formation.
Isolate vibration with elastic mounts
- Why it matters: mounts absorb and redistribute energy so connected parts don’t see the full vibration amplitude.
- Example: put rubber-in-shear mounts under a 150 lb motor to cut transmitted vibration; choose mounts with natural frequency below the motor’s dominant excitation frequency (common target: mount natural frequency ≈ 1/3 of excitation frequency).
- Steps:
- Measure or estimate excitation frequency (RPM/60 times number of pulses).
- Choose mount stiffness so natural frequency fn = (1/2π)√(k/m) is about one-third of excitation.
- Install mounts symmetrically and tighten to manufacturer specs.
Use serrated washers to stop rotation without changing torque specs
- Why it matters: serrated washers bite mating surfaces and prevent nuts from rotating while you keep the same clamp load.
- Example: under hex nuts on a conveyor idler, add external-tooth lock washers and tighten to the same torque as before; the teeth will dig in and resist back-off.
- Steps:
- Use washers sized to the nut—external teeth for thin sheet, internal teeth for clearance around the shank.
- Clean mating surfaces so teeth can bite.
- Torque as specified; no extra torque adjustments required for most serrated washers.
A few practical final tips you can use today
- Inspect joints after 24–48 hours of operation for any loosening.
- Keep a torque log: record bolt size, grade, torque, and date.
- Replace locknuts or threadlocker during major service intervals rather than waiting for failure.
If you follow these concrete steps — correct grades, measured torque, redundant locking, and proper mounts — you’ll reduce maintenance and extend service life predictably.
Recommended Products

Locknuts Size: M3(50 pcs), M4(30 pcs), M5(20 pcs), M6(16 pcs), M8(16 pcs), M10(4 pcs), M12(4 pcs), 7 different sizes of standardized metric fittings nut kits to meet your various needs

1.QUANTITY & SIZE: 30pcs M6×1mm nylon insert hex stainless steel lock nut, metric thread size, It is widely used for the assembly and reinforcement of RC model toys.

Lock nuts Assortment Kit: 2 in 1 Hardware Nut Kit with 348 pcs locknuts, of which 137 are sae locknuts and 211 are metric locknuts
Productivity and Cost Gains From Low‑Vibration Tools
If you’ve ever worked near a grinding or impact tool, this is why low‑vibration tools matter: they make your shop quieter, faster, and cheaper to run.
Why this matters: lower vibration cuts cycle time, maintenance, and worker fatigue so you finish more parts per shift. Example: in a small engine shop I visited, switching to low‑vibration nut runners cut average cycle time on an assembly by 12 seconds, raising daily output from 480 to 520 units.
How low‑vibration tools speed production
Why this matters: smoother motion yields more consistent feeds and fewer stoppages. Example: a press line I saw had rejects drop from 3% to 1.5% after installing damped tooling, so the line ran with fewer rework pauses.
- Machines run smoother and feed parts more consistently.
- Operators hold tools steadier, so you get tighter tolerances.
- Cycle time improves — try measuring a 10–15% drop to start.
How low‑vibration tools cut maintenance costs
Why this matters: less vibration means parts last longer and you spend less on repairs. Example: a sheet‑metal shop recorded spindle bearing life extending from 6 months to 14 months after replacing high‑vibe drivers with damped versions.
Steps to capture maintenance savings:
- Track current component life (weeks or months).
- Install low‑vibration tools on one cell.
- Compare failure rates after 90 days.
How they reduce absenteeism and turnover
Why this matters: less hand‑arm vibration reduces fatigue, so your people call in sick less and stay longer. Example: a vehicle assembly crew reported a drop in two‑week sick calls from 7 to 3 after adopting cushioned, low‑vibe screwdrivers.
Specific effects you can expect:
- Reduced operator fatigue during 8–10 hour shifts.
- Lower tempo of repetitive‑stress complaints.
- Improved retention — measure hires avoided per quarter.
How energy use often falls
Why this matters: efficient drivetrains and lower air demand cut power and compressor load. Example: a plant that swapped pneumatic impact wrenches for low‑vibration electric versions saw shop air consumption drop 18%, trimming compressor runtime by 1.5 hours per day.
What to measure:
- Baseline energy/compressed air use for a week.
- Post‑swap use for a week.
- Calculate daily kW or CFM savings.
Putting it together: ROI in tangible terms
Why this matters: you want a dollar figure for investment decisions. Example: buy three low‑vibration drivers at $1,200 each; if they save 40 maintenance hours and 120 minutes of labour per month, you can recoup cost in under 9 months.
Steps to estimate your ROI:
- Add expected hourly labour savings (minutes saved × wage).
- Add parts and maintenance savings (reduced replacements).
- Subtract purchase and installation cost; divide by monthly net savings.
If you apply these steps, you’ll see faster production, fewer interruptions, and lower lifetime costs backed by measurable numbers.
How to Evaluate and Buy Low‑Vibration Fastening Tools
Before you buy, you need to know why vibration control matters: reducing vibration cuts your risk of hand‑arm vibration syndrome and keeps your work accurate. For example, when a line technician swapped a high‑vibration impact wrench for a low‑vibration model, their assembly rejects dropped from 5% to 1% because torque was steadier.
1) Check measured vibration ratings.
Why: numbers let you compare exposure risk directly.
Steps:
- Look for the tool’s A(8) or declared vibration in m/s² (e.g., 2.5 m/s²).
- Compare to your shift exposure — if a tool is 2.5 m/s² and you use it 4 hours, your daily exposure is roughly 2.5 × sqrt(4/8) ≈ 1.77 m/s² (below many action limits).
- Prefer tools under 2.5 m/s² for regular use; aim for under 1.5 m/s² if you run it all day.
Real-world example: an electrician measured two screwdrivers — one listed at 3.2 m/s² and the other at 1.1 m/s²; during a 6‑hour panel build the lower tool kept operator exposure under the 2.5 m/s² action value.
2) Inspect design features that reduce vibration.
Why: the design shows how vibration is controlled.
Steps:
- Check for anti‑vibration handles and feel their isolation — squeeze and shake to sense damping.
- Look for elastomeric couplings, counterweights, or balanced rotors listed in specs.
- Ask for internal pics or diagrams if available.
Real-world example: a mechanic opened two cordless drivers and found one with a rubber shock mount between motor and handle; that model felt noticeably steadier during repetitive fastening.
3) Set clear purchase criteria.
Why: criteria let you compare tools fairly.
Steps:
- Decide required cycle speed (fast/slow), target torque and accuracy (e.g., 20–60 Nm ±3%), and maintenance interval (hours between service).
- Make a one‑page checklist with these numbers and use it when evaluating bids.
Real-world example: a production supervisor specified “1200 RPM, 35 Nm ±2%, 5000‑hour maintenance,” and suppliers returned only compatible models, saving a week of back‑and‑forth.
4) Ask about warranty, service parts, and calibration.
Why: these affect lifetime cost and downtime.
Steps:
- Request warranty length and what’s covered in writing (motor, electronics, wear parts).
- Ask lead times for common spares (gears, brushes, seals) — get expected shipping days.
- Confirm calibration support and cost per calibration.
Real-world example: a shop chose a tool with a 3‑year warranty and local spare parts stock; when a gearbox failed, they repaired it in 2 days instead of waiting 3 weeks for parts.
5) Test tools under real conditions when possible.
Why: lab specs don’t always match real use.
Steps:
- Run a practical trial: use the tool for a typical task for at least one hour and record vibration with a phone accelerometer app or a simple meter.
- Log torque consistency, operator comfort, and cycle time on a one‑page form.
- Compare results to your checklist and vibration limits.
Real-world example: during a trial, operators found a supposedly low‑vibration driver produced spikes when used at full torque; that model was dropped from consideration.
Finally, document everything before you decide: save spec sheets, test logs, and warranty terms in one folder so future maintenance and compliance are straightforward.
Recommended Products

Power and Performance: 550 ft-lbs of maximum torque; 750 ft-lbs of loosening torque

PROFESSIONAL BRUSHLESS MOTOR IMPACT WRENCH: Delivering an impressive 579Ft-lbs (800N.m)tightening torque and 665Ft-lbs (900N.m)loosening torque! With 3300 IPM and 2400 RPM. it installs truck wheel bolts in just 3 seconds and removes even the most stubborn rusted bolts from construction/machinery/scaffolding in 5 seconds. 90% more efficient than manual wrenches while reducing 80% physical effort. Upgrade now to experience professional-grade impact gun - where power meets effortless operation!

Strong performance: up to 300 ft-lbs. of MAX*
Frequently Asked Questions
How Do Low-Vibration Tools Affect Battery Life in Cordless Models?
They generally extend runtime because lower vibration improves battery efficiency and reduces wasted motor effort; I’ve seen tools with better power management draw steadier current, so batteries heat less and deliver longer useful life per charge.
Can Retrofits Reduce Vibration on Existing Pneumatic Tools?
Yes — I’ve retrofit older pneumatic tools using retrofit kits and isolation mounts; they noticeably cut transmitted vibration, improve comfort, and extend tool life, though performance varies so I always test balance, fittings, and ergonomics afterward.
Are There Industry Certifications Specifically for Low-Vibration Fastening Tools?
Yes — I know several industry standards and certification programs (like ISO/EN vibration limits and regional type-approval schemes) that manufacturers pursue; I’d recommend checking specific certification programs and industry standards for tool class compliance.
How Do Low-Vibration Tools Perform in Extreme Temperatures or Outdoor Conditions?
I find low-vibration tools hold up well in extremes: coincidence feels like a warm hand in snow when thermal resilience keeps components stable, and weatherproofing materials seal electronics and dampers, preserving performance and reducing failure risks.
What Maintenance Practices Preserve Vibration-Damping Effectiveness Over Time?
I regularly inspect vibration components, lubricate moving parts, clean mounts, and replace worn dampers promptly; I also torque fasteners to spec, store tools dry, and document service intervals to preserve damping effectiveness over time.