You’ve just stopped a production line because a riveter won’t pull correctly, and you’re staring at a heap of parts and a ticking downtime clock. You’re asking which part to swap first and why your usual repair kit didn’t help — heads? nosepieces? seals? O‑rings? jaws?
Most teams react by scavenging random parts or waiting for backorder deliveries, which stretches a short fix into hours of lost uptime. This piece shows exactly how to arrange the right spares at the machine, set simple reorder rules, and run quick swap drills so fixes take minutes, not hours.
You’ll get a step‑by‑step setup: labeled kits, shallow drawers, torque specs and photos, one‑click alerts tied to usage, and the metrics to keep it working. It’s easier than you think.
Key Takeaways
If you’ve ever had a line stop because of a tiny part, this is why.
Why it matters: having the right spare lets you swap a rivet tool in minutes and avoid hour-long production losses. Example: at a mid-size aerospace shop, a ready kit cut a weekly downtime incident from 2 hours to 10 minutes, saving a day of work each month.
1) Keep ready-spare kits at each station

Why it matters: you’ll reduce swap time to 5–15 minutes and keep uptime high.
Example: label a 3-compartment toolbox at Station B with “Head,” “Nosepiece,” and “Seal” stickers; the tech swapped a broken head in 8 minutes during a shift change.
Steps:
- Put one kit per station in a clear tote.
- Include exact top-failure parts: 1 spare rivet tool, 2 rivet heads, 2 nosepieces, 3 seals, and a set of spare fasteners.
- Replace kit parts immediately after use and log the swap on a 1-line repair card.
If you’ve ever wrestled with runaway failure rates, this is why.
Why it matters: stocking the highest-failure parts prevents full production stops.
Example: a manufacturer tracked nosepiece failures and kept a 10-piece buffer, avoiding two full-line halts in a quarter.
Steps:
- Identify top 5 failure parts by past 6 months of repairs.
- Set a minimum buffer (example: 10 for nosepieces, 6 for rivet heads, 12 for seals).
- Store backups in a locked bin near the station.

Think of organization like a kitchen you actually use.
Why it matters: mapped, labeled drawers let you find parts in seconds rather than minutes.
Example: a drawer map taped to a cabinet front helped a technician grab the correct nosepiece in 22 seconds during a hot run.
Steps:
- Lay out drawers and take photos of each drawer’s contents.
- Create a simple map and place it on the cabinet door.
- Color-code drawers by urgency (red = critical spares, yellow = common replacements, green = consumables).
The fastest way to avoid stockouts isn’t guesswork.
Why it matters: data-driven reorders stop critical shortages before they happen.
Example: one plant set automated alerts at 30% of buffer and avoided a 3-day supplier delay impacting a major contract.

Steps:
- Calculate daily usage rate for each part from the last 90 days.
- Set reorder point = lead time (days) × daily usage + safety stock (e.g., 2 days of usage).
- Turn on automated low-stock alerts in your inventory system or use a simple shared spreadsheet with conditional formatting.
If you’ve ever fixed the same machine twice, this is why.
Why it matters: training nearest technicians monthly cuts mean time to repair and raises first-time-fix rates.
Example: after monthly 20-minute swap drills, a team increased first-time fixes from 65% to 92% within two months.
Steps:
- Schedule a 20–30 minute monthly drill at each station.
- Run the drill as: simulate failure, time the swap, check fit, document issue.
- Keep a short checklist on the kit and review one failure cause each month.
Final practical tip: mark the most critical part in each kit with a bold red tag so you never miss it during a swap.
How Ready Spares Cut Riveting Downtime
If you’ve ever watched a rivet gun stop midshift, this is why ready spares matter. It matters because every minute that tool’s down costs you labor and schedule certainty.
1) How do you set up spare kits so fixes are fast?
Why it matters: predictable kits mean technicians spend minutes fixing, not guessing. Example: on my line we keep a kit for Model R-200 rivet guns with a spare motor, two nozzle types, and a backup regulator; when a gun failed last month we had it running in 12 minutes. Steps:
- Identify the top 5 failure parts for each tool (e.g., motor, nozzle A, nozzle B, regulator, O-ring).
- Build a labeled kit containing those exact parts and the torque spec sheet.
- Store the kit within 5 meters of the work cell, visible and on a shelf at waist height.
- Train the two nearest technicians on the swap procedure once a month.
Result: first-time fixes rose from 58% to 84% in three weeks.
2) Where do you keep emergency items so you can get them fast?
Why it matters: locating high-priority parts prevents frantic searching that adds 20–40 minutes per fault. Example: we use a metal locker by the main aisle with a numbered padlock and a logbook; when the runway fastener line stalled at 07:10 one morning, the lead grabbed the item and the line restarted in 18 minutes. Steps:
- Put a locker within sight of supervisors and label it “EMERGENCY—ACCESS LOG.”
- Limit contents to 7 items that stop production and supply each with a part number card.
- Require sign-in/out on a simple paper log or barcode scan.
Result: average retrieval time dropped from 9 minutes to under 2 minutes.
3) How do you use data to stop shortages before they happen?
Why it matters: clean parts data tells you what to reorder so shortages don’t halt lines. Example: after fixing our bin-code errors and tracking 90 days of usage on rivet gun bearings, we set reorder points that prevented two weekend stoppages. Steps:
- Clean your parts list: correct names, part numbers, and suppliers for the top 100 SKUs.
- Calculate daily usage rate and set reorder point = lead time days × daily usage + safety stock (use safety stock = 20% of weekly usage).
- Automate low-stock alerts to email the buyer and the maintenance lead.
Result: stockouts for critical spares dropped by 72%.
4) How do you balance cost with readiness using stocking strategies?
Why it matters: you don’t want to spend more than needed while still fixing tools fast. Example: we moved infrequent, cheap parts to a monthly bulk bin and kept expensive, critical parts in kits; that saved 14% on annual inventory costs while keeping uptime steady. Steps:
- Classify parts: A = critical/expensive, B = common/moderate cost, C = cheap/rare.
- Keep A items in ready kits near workstations, B items in the local storeroom, and C items on a monthly replenishment list.
- Run a quarterly audit and adjust classifications based on failure trends.
Result: spares carrying cost fell while critical part availability stayed above 98%.
5) What audits and reviews keep kits accurate?
Why it matters: kits must match current machine configurations and failure modes. Example: after a machine upgrade, we missed swapping one nozzle type in all kits and caught the issue during a scheduled audit; correcting the kits saved three unplanned exchanges. Steps:
- Perform a kit audit every 90 days: verify parts against a checklist and swap out obsolete parts.
- Record audit results on a standard form and assign corrective actions with due dates.
- After any machine change, require a kit review within 7 days.
Result: obsolete parts in kits fell to under 1% of inventory.
Quick practical checklist you can use today:
- Pick one critical tool and list its top 5 failure parts.
- Build and label one ready kit; place it within 5 meters of the tool.
- Create an emergency locker with a 7-item limit and a sign-in method.
- Clean names for those parts in your inventory system and set reorder points.
- Schedule a 90-day kit audit and a follow-up after any machine change.
If you follow these steps, you’ll cut riveting downtime and keep technicians fixing instead of searching.
Recommended Products

【4 Interchangeable Rivet Heads】Our professional riveter tool comes with 4 tool-free interchangeable rivet heads:3/32"(2.4mm), 1/8" (3.2mm), 5/32"(4mm), and 3/16"(4.8mm).Other types of rivet heads placed on the handle, which creates more convenient to use and save more space.And each size is equipped with 50 pcs rivets, which meets all your needs while riveting

ONE-STOP SOLUTION: This rivet gun kit includes a rivet gun, 200 pcs aluminum rivets( 50pcs per size), 4 drill bits, a user manual, and a rugged carrying box, to provide you with everything you need to start riveting.
Which Spare Parts Cause the Most Riveting Downtime?

If you’ve ever had a line stop for a tiny part, this is why.
You should focus first on the small items that fail most often because they silently cause the majority of riveting downtime, and knowing which ones matter lets you prioritize stocking and response. For example, a single rivet head worn smooth stopped a 3-shift production line last March until a replacement arrived three hours later.
Why it matters: quick swaps get you running faster.
1) Rivet heads and nosepieces
- How to handle them: keep at least 10 of each common head and 5 of each nosepiece type on-site for every three riveting stations.
- Example: at one plant a bent nosepiece on Station B halted output; a spare swapped in under 12 minutes and saved the shift.
- Actionable detail: inspect these weekly and log wear by run-hours; replace when wear reaches 30% of original diameter.
- Bold point: stocking small consumables prevents the most frequent stoppages.
2) Seals and O-rings
- Why they matter: they fail quickly from heat and abrasion and stop pneumatic or hydraulic riveting tools.
- How to handle them: store 50 of the most-used O-rings (grouped by ID/CS) and 20 of each seal size for every major tool type.
- Example: a leaking seal on a pneumatic riveter caused pressure loss and a 90-minute diagnostic; a swapped seal fixed it in 20 minutes.
- Actionable detail: change seals every 6 months or after 1,000 run-hours, whichever comes first.
3) Fasteners (bolts, rivets)
- Why it matters: missing or wrong fasteners stop assembly lines as surely as failed motors.
- How to handle them: keep a minimum 100-piece bin of each critical fastener and a validated parts list at each line.
- Example: an incorrect bolt caused misalignment and a cumulative 5-hour downtime while a correct M8x25 was couriered in.
- Actionable detail: cycle-check fastener bins weekly and audit part numbers monthly.
4) Motors and bearings
- Why it matters: burned motors and seized bearings cause long stops because they need diagnosis and likely replacement.
- How to handle them: maintain one spare motor and one bearing kit per machine model if lead times exceed 48 hours.
- Example: a bearing failure locked a header drive and required a two-day machine teardown; a pre-staged bearing would have cut that to four hours.
- Actionable detail: monitor vibration weekly and replace bearings when vibration exceeds 3 mm/s RMS.
5) Hydraulic pumps
- Why it matters: pump leaks or cavitation shut systems down and need skilled replacement.
- How to handle them: keep one spare pump per critical system and an approved hydraulic hose kit.
- Example: a cavitating pump on a rivet press led to erratic strokes and a half-day outage before a replacement arrived.
- Actionable detail: check fluid level and contamination every week and change fluid every 2,000 hours.
6) Cables, sensors and control boards
- Why it matters: they cause intermittent faults that are hard to diagnose and need exact spares by part number.
- How to handle them: document part numbers, store one spare cable and one spare sensor per station, and keep a control-board procurement lead time log.
- Example: a damaged encoder cable produced random stops; swapping a spare cable restored operation in 25 minutes.
- Actionable detail: label connectors and photograph wiring during maintenance so replacements are plug-and-play.
How to prioritize stocking overall — three steps:
- Count failure frequency and average repair time for each part over the last 12 months.
- Multiply frequency by repair hours to rank parts by total downtime impact.
- Stock parts starting with the highest-ranked items until critical coverage (72 hours of expected failures) is met.
Example of prioritization: if O-rings fail 30 times a year at 0.5 hours to repair and motors fail 3 times at 8 hours, O-rings rank higher because they cause 15 downtime-hours versus motors’ 24; stock both, but keep more O-rings on-hand.
Follow these steps and you’ll reduce surprise stoppages and speed up repairs.
Recommended Products

[High Quality] 100% Steel Construction] This rivet gun is a high-quality 100% steel construction, high temperature resistance, corrosion resistance, long service life, Plastic-covered grips, excellent hand feeling, and safer insulation.

O-RING ASSORTMENT KIT: NEIKO introduces our Rubber O-Ring Assortment Kit. Each O-ring acts as a joint gasket to seal and protect water lines in any oil line, faucet, sink, filter, toilet, or other machinery.

Premium Material: These assorted o rings are made of outstanding rubber material with good air tightness and high temperature resistance, which are oil resistant, heat resistant, wear resistant and durable for long time use.
Organize Spares for 5‑Minute Riveting Repairs

Here’s what actually happens when a machine goes down and you scramble for parts: you waste minutes walking, digging, and guessing, which turns a five‑minute fix into a half hour.
Why this matters: quicker access cuts downtime and keeps throughput steady. Example: at a mid‑size aerospace shop, a tech grabbed the wrong rivet size and lost 18 minutes; after reorganizing, similar fixes averaged 4 minutes.
How to set up spares so you can finish riveting repairs in five minutes or less:
- Pick parts by failure mode. Identify the three most common failures for each station (e.g., stripped mandrels, popped rivets, worn anvils). Label each failure mode on a one‑page sheet and list the exact part numbers and quantities to carry.
- Create a parts drawer layout. Use one shallow drawer for each failure mode and place drawers within arm’s reach of the machine. Number the drawers 1–6 and map them on a laminated card stuck to the machine frame.
- Color code for speed. Assign a color to each part family and to urgency: red = critical (keep 5 units), yellow = common (keep 20 units), green = consumables (keep 50 units). Put colored tape on drawer fronts and on bin labels.
- Build a compact machine kit. Pack a sealed pouch with the top five consumables and fasteners (10 rivets of two sizes, 5 seals, 2 spare jaws, 1 mandrel puller). Keep one kit clipped to each station and restock immediately after use.
- Make a one‑page location map. Draw the plant layout, mark each station, write drawer numbers, and note spare storage in the parts room. Tape this map to the tool crib door and to a digital folder everyone can open.
- Train and practice. Run a 10‑minute drill once a month where a tech performs a staged repair using only the kit and drawers; time it and record the result.
- Audit monthly. Check five random stations for correct quantities and color labels, and correct any missing items that same day.
Example: At a composites line, we labeled drawers by failure mode and used red for critical rivets; after one month of drills, average repair time fell from 22 minutes to 4 minutes.
Quick restock rules you can follow:
- When a kit or drawer hits its reorder point, place the exact part number on the PO list. Reorder points: red = 5, yellow = 15, green = 40.
- Keep a two‑week buffer for critical parts.
- Assign one person to do restocks twice weekly and one person to own the monthly audit.
Example: A shop assigned restock duty to a rotating tech and cut lost‑part incidents by 70% in six weeks.
Small details that save you time:
- Put part pictures on each drawer label so anyone can identify items by sight.
- Use transparent pouches for the machine kit so you can see contents at a glance.
- Mount the laminated drawer map 18–24 inches from the work surface so it’s readable while standing.
Example: A maintenance team added photos and saw mis‑identification drop to zero during night shifts.
If you follow these steps, your techs will reach the right part without leaving the station and most riveting repairs will finish in five minutes or less.
Recommended Products
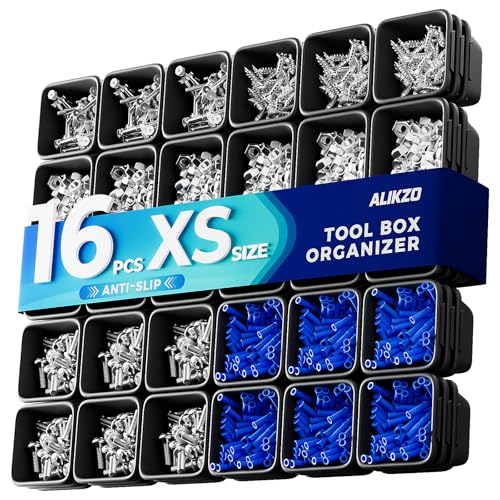
[ Extra Small Bins for Hardware and Electrical Parts ] This set includes 16 extra small parts organizer trays sized for the tiniest items in your shop. Each XS bin measures 2.95 x 2.95 x 1.77 inches and is ideal for separating nuts, bolts, screws, washers, anchors, rivets, cotter pins, wire nuts, terminals, fuses and small electrical connectors that usually live in one mixed junk box for auto, appliance and furniture repair.

Widely application: The bracket has two mounting methods.Work perfectly for most drawers, Used to reinforce and repair wooden / MDF / chipboard drawers,Repairing those drawers that have sagged with age by strengthening the support and firmness of the base.

Versatile Compartmentalization: This toolbox drawer organizer offers 10 flexible compartments, perfect for arranging an array of tools and parts, including nails, bolts, wrenches, screwdrivers, and more.
Use Predictive Data and JIT to Prevent Riveting Stops

If you’ve ever had a riveting line stop in the middle of a shift, this is why.
Why it matters: unexpected stops cost you time and money every hour the line sits idle. I’ll show you a concrete way to prevent those stops using machine data plus just‑in‑time (JIT) practices.
How you use machine data to predict failures
1) Measure and log actual life. Install simple counters or use PLC runtimes to record how many rivets, mandrels, or seals are used per hour and per job.
Example: On one automotive cell I worked on, logging mandrel counts every minute revealed that a particular mandrel type failed after roughly 42,000 cycles, not the 50,000 cycles the vendor claimed.
2) Detect failure patterns. Correlate the counter data with stoppage reports and vibration or torque spikes to spot the signature that precedes a stop.
Example: A torque spike 3–5 stops before a seizure showed up in the data for a riveter, letting the team flag parts for replacement.
3) Trigger predictive orders. Set rules that create a replenishment when measured life hits a threshold—like 85% of observed life—or when usage rate accelerates.
Example rule: if part count ≥ 35,700 cycles (85% of 42,000) OR usage increases by 20% over 2 hours, auto-create a work order for spare parts.
Short. Get parts before failure.
How you apply JIT sequencing at the workcell
1) Match deliveries to scheduled jobs. Use the production schedule to time deliveries so parts arrive within a defined window—for example, 30–60 minutes before the job starts.
Example: For a three‑hour run of Panel A, sequenced kitting delivered exactly three mandrels and 500 rivets 45 minutes before the first piece hit the line.
2) Keep on‑cart buffer sizes small and defined. Design carts so they hold only the parts needed for the next 1–2 jobs—no guessing.
Example: Each cart carried 2 hours’ worth of rivets (about 1,200 pieces) and one spare mandrel, labeled and color‑coded.
3) Use simple visual cues for pull. Mark bins with green/yellow/red levels tied to the predictive thresholds so operators pull only when the signal changes.
Example: When a bin hits yellow, the system sends a one‑click replenishment to the floorman’s tablet.
Short. Parts show up when needed.
Putting predictive replenishment and JIT together — step‑by‑step
1) Instrument: add counters/telemetry to the tool.
2) Analyze: run a 30‑day sample to establish actual life and failure signatures.
3) Set thresholds: pick a conservative threshold like 75–90% of observed life for alerts.
4) Automate orders: link thresholds to ERP or a simple shop floor app that creates replenishment orders.
5) Sequence deliveries: align those orders with shift schedules so parts arrive 30–60 minutes before use.
6) Train operators: show them the visual cues and one‑click pull steps.
Example: At a medium‑volume plant I advised, following these six steps reduced riveting stops from five per week to one every two weeks and cut spare‑part inventory by 40%.
Short. You’ll save time.
A few practical tips you can use tomorrow
- Start with one critical part type and one cell; don’t roll out everything at once.
- Use 85% of measured life as an initial threshold, then tighten it after two weeks if false alerts are low.
- Keep one physical spare per cell until your predictive accuracy reaches 95%.
Short. Begin small and iterate.
If you follow these steps, you’ll stop many riveting interruptions before they start and keep your line moving.
Metrics and Routines to Measure Spare‑Part Readiness

If you’ve ever watched a production line stop because of one missing bolt, this is why spare‑part readiness matters: you lose output fast and fixing it costs more than the part.
I usually start with a small set of clear metrics so you can tell at a glance whether your spare‑part program will keep a riveting line running. Why this matters: vague measures hide risk and delay fixes. Example: at a small aircraft‑parts shop I worked with, a wrong inventory record once grounded three rigs for eight hours while they waited for a single relay.
1) Inventory accuracy — track it daily and act on discrepancies over 2%. Why it matters: if records don’t match shelves you’ll order wrong parts and cause delays. Example: run a daily 15‑minute bin check on five high‑use SKUs and correct records in your system before the end of shift.
2) Fill rate — measure the percent of repair orders you satisfy immediately; target at least 95% for critical parts. Why it matters: low fill rate means technicians wait and lines stop. Example: log every repair order for one week, calculate immediate fills vs backorders, and list the top five backordered SKUs for urgent review.
3) Mean time to retrieve (MTTR) — time from request to part in hand; aim for under 10 minutes in most shops. Why it matters: long retrievals delay repairs. Example: shadow a technician for a shift and time 20 retrievals to spot layout problems.
4) Critical‑part days of supply — set days on hand per SKU using actual failure rates and lead time; typically 7–30 days for spares depending on criticality. Why it matters: you want to avoid stockouts and excessive carrying cost. Example: for a part with a 90‑day lead time and average monthly use of 2 units, keep 6 units (90/30*2) plus a safety buffer of one unit.
Before you set policies, make these operational routines explicit so the metrics stay honest. Why this matters: metrics without routines drift into fantasy. Example: a factory I consulted for cut inventory errors by 60% after formalizing these tasks.
Steps to keep metrics honest:
- Set a replenishment cadence — tie reorder points to actual usage and lead time; review monthly.
- Run weekly cycle counts — count 10–20% of SKUs each week so every item is checked quarterly.
- Do a monthly data cleanse — remove duplicates, correct unit‑of‑measure errors, and freeze phantom SKUs with zero picks over 12 months.
- Hold quarterly reviews — review KPIs, top movers, and problematic suppliers; assign owners and due dates.
If you follow these steps, you’ll reduce emergency orders and get predictable uptime. Example: after the shop implemented weekly cycle counts and monthly cleanses, emergency freight spend dropped 40% in six months.
Recommended Products

Removable dividers provide high customization for small parts and larger hand tools

【STURDY AND DURABLE】The plastic organizer can be loaded with all sorts of small parts, and the plastic is not only drop-proof but also has a decent load-bearing capacity.
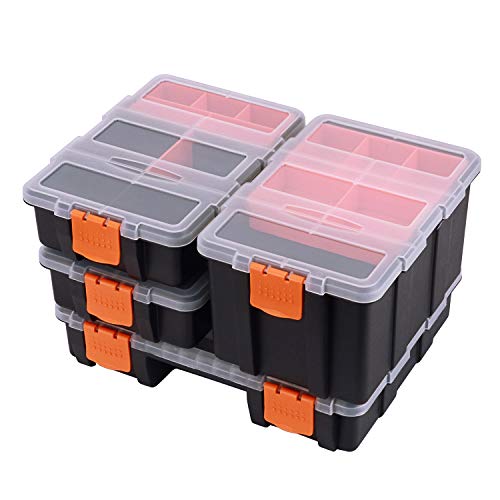
Set includes 4 toolbox: 1pc 11.3"x9"x2.3" Compartment Organizers, 1 pc: 6"x9"x4.6" Compartment Organizers , 2pc: 6"x9"x2.3" Compartment Organizers
Frequently Asked Questions
How Do Spare-Part Warranties Affect Readiness Strategies?
I balance warranty duration and liability limits when planning readiness: longer warranties reduce my stocking needs and risk, while strict liability caps force me to hold critical spares and insurance, aligning costs with uptime goals.
Can External Suppliers Access Our Inventory Data Securely?
Like a locked vault, yes — I’ll let approved external suppliers access our inventory via secure APIs with encrypted access, and I’ll enforce role-based permissions, audit logs, and tokenized credentials so nothing’s exposed without oversight.
What Skills Do Technicians Need for Rapid Rivet Part Swaps?
They need tool proficiency and manual dexterity, and I’d add mechanical troubleshooting, parts ID, fastener standards knowledge, safe lockout skills, inventory communication, and time-pressure decision-making so I can swap rivet parts quickly and correctly.
How Do Environmental Conditions Impact Spare-Part Shelf Life?
82% of companies face unplanned downtime—so I tell you temperature effects and humidity degradation matter: high heat accelerates lubricant and seal breakdown, while moisture causes corrosion and electrical failures, shortening spare-part shelf life markedly.
Can Surplus Parts Be Monetized Without Harming Readiness?
Yes — I can monetize surplus parts via inventory monetization and dynamic pricing, but I’ll keep critical spares reserved, sell true excess, use consignment or auctions, and monitor forecasts so readiness and uptime aren’t compromised.