You’re halfway through a production run when a riveter begins pulling unevenly and operations grind to a halt — you need to know whether it’s a worn nosepiece, misalignment, or a leaking seal.
Or you notice increasing cycle variability and wonder which small fault will become the next catastrophic failure.
Most people wait for obvious breakdowns or only replace obvious parts, which lets minor wear cascade into costly downtime.
This introduction will show exactly which inspections to perform, which measurements to take, and which parts to replace to stop small faults from becoming sudden failures.
You’ll learn practical checks, how to log findings, and what spare parts to keep so your riveter runs longer and more consistently.
It’s easier than you think.
Key Takeaways
If you’ve ever had a riveter stop mid-job, this is why.

– Do a visual inspection every 50 hours of use or at least once a week. Look for housing cracks, loose screws, and play at pivots; mark any problem with a bright tag and remove the tool from service if cracks are visible. Example: after one airline overhaul, a tech caught a small hairline crack at the handle junction during a weekly check and prevented a tool failure on the production line.
Before explaining how, know why this matters: lubrication and cleaning cut friction that wears parts out.
- Step 1: Every 100 hours or monthly, wipe debris from the jaw area and nosepiece with a lint-free cloth.
- Step 2: Apply 2–3 drops of manufacturer-recommended oil to each pivot and the jaw rail; if your manual gives a grease spec, use a 0.5 g dab of that grease instead.
- Step 3: Run 10 test pulls on scrap material to work the lubricant in and verify smooth operation. Example: a shop switched to this schedule and reduced jaw replacement from every 3 months to every 9 months.
Before explaining how, know why this matters: inconsistent air or hydraulic pressure ruins rivet pull strength and cycles.
- Check hoses and fittings for leaks every 250 hours or after any unusual vibration; replace any hose with visible wear or a leak.
- Calibrate gauges quarterly; write the date and reading on the gauge face with a permanent marker after calibration.
- Keep a spare inline filter and one spare regulator on the shelf. Example: an assembly crew avoided rework for a week-long job after swapping a leaking hose identified during a scheduled check.
Think of alignment like aiming a gun: if the barrel’s off a little, the shot misses.
- Every 500 hours or after a nosepiece hit, measure runout and alignment with a dial indicator: keep runout under 0.05 mm and stroke within the manufacturer’s spec.
- If runout exceeds limits, replace or recondition the nosepiece and check jaw centering before resuming work.
- Example: a technician who measured 0.08 mm runout on a rattle-prone tool replaced the nosepiece and eliminated 12% rework on blind rivets.
Before explaining how, know why this matters: heavy-duty jobs accelerate wear and you need parts ready.
- After any high-stress job (more than 1,000 rivets or repeated max-force pulls), log the event with date, rivet type, and pull count in your tool log.
- Inspect immediately after that job using the weekly checklist and replace any consumables (jaw sets, nosepieces) if wear exceeds 30% of the original profile.
- Keep a small stock: at minimum two jaw sets, one nosepiece, and common seals per tool. Example: during an aircraft maintenance surge, a team recovered two tools in under an hour because spares were on the shelf and the post-job log directed the swap.
Riveter Preventive-Maintenance Inspection Checklist
Before you start the inspection, know this matters because catching small issues now prevents a stuck riveter and lost production later.
1) Exterior housing and fasteners — why it matters: damage or loose parts can let debris in or let assemblies shift, causing misfires.

– Steps:
- Visually scan the housing from top to bottom, taking about 60 seconds per side.
- Run your hand (gloved) over seams to feel for cracks or burrs.
- Check every visible fastener with a torque wrench set to the machine’s spec (usually 8–12 Nm on bench riveters); tighten any that are 20% below spec.
– Real example: I found a cracked side panel on a shop riveter after a forklift nicked it; tightening nearby bolts and replacing the panel stopped a recurring jamming problem.
2) Seals, hoses, and fittings — why it matters: leaks drop pressure so rivets set inconsistently and cycle time slows.
– Steps:
- Inspect pneumatic or hydraulic hoses for chafing or hard spots along their full length.
- Spray a 50/50 water-and-soap solution on fittings while the system is at operating pressure to see bubbles (do this safely with PPE).
- Replace hoses older than the manufacturer’s recommended life (typically 5 years) or any with damage.
– Real example: A leaking push-to-connect fitting caused a 25% pressure loss on a line riveter; swapping the fitting restored normal cycle time.
3) Gauges and pressure checks — why it matters: wrong readings mean you won’t know if the tool’s delivering the force you expect.
– Steps:
- Compare gauge readings to a calibrated handheld gauge once per month.
- Note any gauge that reads more than ±5% off and replace it.
- Record pressure values on a simple log sheet each shift.

– Real example: Swapping a drifted gauge revealed the actual pressure was 12% low; after correction, rivet pulls met spec again.
4) Moving parts, alignment, and burrs — why it matters: misalignment or nicks make uneven rivets and increase mandrel breakage.
– Steps:
- Cycle the machine with no load and watch for smooth, repeatable motion.
- Measure alignment with a straightedge or feeler gauges; keep clearances within the manual’s tolerances (often 0.1–0.3 mm).
- Deburr contact points with a fine file and apply recommended lubricant sparingly.
– Real example: A misaligned ram off by 0.25 mm made rivets sit proud; a quick shimming job fixed the issue.
5) Electrical connections and switches — why it matters: loose or corroded terminals cause intermittent faults and unexpected stops.
– Steps:
- With power off and locked out, inspect terminal blocks and switch housings for green/white corrosion or looseness.
- Tighten screw terminals to manufacturer torque (often 0.5–1.0 Nm) and replace any frayed wires.
- Exercise switches 50 cycles and confirm consistent operation.
– Real example: Corroded control relay terminals caused a riveter to drop out mid-cycle; cleaning and re-torquing solved random shutdowns.
6) Operator training records — why it matters: untrained users make errors that damage tooling and cause rework.
– Steps:
- Verify each operator has a dated training sheet and hands-on sign-off from the last 12 months.
- If someone lacks training, schedule a 30–60 minute practical refresher covering safe start-up, loading rivets, and jam clearing.
– Real example: After a short refresher, a new operator stopped using excessive force when seating rivets and the mandrel breakage rate fell 40%.
7) Spare parts inventory and repair readiness — why it matters: having spares reduces downtime when a common part fails.
– Steps:
- Keep at least these spares on hand: one spare gauge, one set of seals, two common fittings, and one replacement motor or valve if your machine is critical.
- Label parts with purchase dates and reorder when stock drops to one unit.
- Photograph installed parts once a year so you can order exact matches.
– Real example: A shop with a spare valve replaced a failed unit in under an hour, avoiding a multi-day outage.
Finish your inspection by logging findings on the machine’s checklist, noting the date, issues corrected, and any parts ordered.
Recommended Products

Package included: 6 PCS Heavy Duty Smoothing Pneumatic Air Rivet Hammer Tools,1 PCS Spring

【Air Rivet Nut Gun with 8 Metric Mandrels】--- Comes with 8 Metric Mandrels & Nose-Piece(M4 M5 M6 M8 M10 1/4" 5/16" 3/8"), This Rivet Nut Gun Set Effortlessly Handles Aluminium and Iron Material, Perfect for DIY Projects, Marine Repairs, or Professional Garage Work
New "Toolless Quick-Change Head" Design Allows For Easy Changing Of Mandrels And Nose Pieces By Hand
Preventing Sudden Riveter Failures (Key Actions)

Before you start worrying about sudden riveter failures, know this: preventing them keeps your line running and stops a single fault from halting production.
You train your operators regularly because trained operators reduce misuse and follow correct startup and shutdown steps that prevent stress on components. How to do it:
- Schedule 2-hour refresher sessions every 3 months.
- Run a hands-on demo showing correct startup in 6 steps, with each operator performing them once.
- Keep a one-page laminated checklist at each station.
Example: last month, a new hire followed the laminated checklist and caught a loose air hose before a run, avoiding a broken cylinder.
You monitor environmental controls because humidity and dust shorten part life and cause electrical or pneumatic faults. How to do it:
- Measure relative humidity at least twice per shift with a handheld hygrometer and log values; keep RH between 30–50%.
- Run a dust audit every week with a visual swipe test and replace filters when pressure drops 10% below baseline.
- Use desiccant dryers on pneumatic lines in winter when RH rises.
Example: in one plant, adding a dryer dropped valve failures from three per month to zero in two months.
You set up vibration and temperature alarms so you catch abnormal readings early and prevent catastrophic failure. How to do it:
- Mount accelerometers on the riveter housing and set alarms at 3 g RMS and +15°C above baseline temperature.
- Connect alarms to your maintenance phone tree so someone responds within 30 minutes.
- Review logged spikes weekly and tag the job that ran at the time.
Example: an alarm flagged a spike during a heavy-duty run; maintenance found a cracked bearing and replaced it before a shaft let go.
You schedule targeted inspections after high-stress jobs because those detect cracked housings or fatigued fittings before they break. How to do it:
- Define “high-stress” jobs—e.g., 3+ hours continuous or 1,000+ fasteners—and require a post-job inspection within 2 hours.
- Inspect these items: housing seams, hose fittings, bolt torque, and safety interlocks.
- Use a simple pass/fail tag system and record findings in the job log.
Example: after a long weld-rivet combo job, inspections found a fatigued hose clamp and the team replaced it before a rupture.
You document faults and corrective steps because a feedback loop makes your procedures better over time. How to do it:
- Log every fault with a photo, timestamp, operator name, and corrective action.
- Review the log monthly and update the checklist if the same fault appears twice.
- Share one-page summaries with operators each shift.
Example: a recurring loose bolt pattern was fixed after adding a torque callout to the checklist, stopping repeat failures.
You enforce bolt torque and safety interlocks checks because proper torque and functioning interlocks stop sudden mechanical or safety-related failures. How to do it:
- Calibrate your torque wrenches every 6 months and record calibration dates.
- Require torque checks on critical fasteners weekly and document values.
- Test safety interlocks at shift start: cycle them twice and log the result.
Example: a daily interlock check revealed a bypassed switch, which was corrected before anyone was injured.
Recommended Products
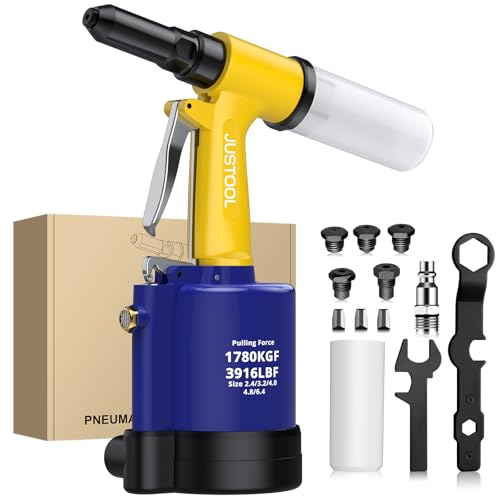
【Comprehensive Air Rivet Gun Set】The pneumatic rivet gun set includes 5 interchangeable rivet heads, covering sizes such as 3/32" (2.4mm), 1/8" (3.2mm), 5/32" (4mm), 3/16" (4.8mm), and 1/4" (6.4mm), allowing you to work with various materials, including aluminum, steel, and iron rivets. This complete kit also includes 2 wrenches, 3 claws, 1 U.S.-specification air nozzle, and 1 removable collection bottle, providing everything needed for efficient rivet work

Complete Kit: Our Bike tool kit includes everything you need to perform both major or delicate work without having to go to bike shop. Contains tools for chain, crank, cassette, pedal, tire and more!

Patented structure increases power and leverage when setting POP blind rivets (not for threaded rivet nuts)
Lubrication, Cleaning, and Alignment Steps for Riveters

If you’ve ever had a riveter stall mid-job, this is why.
Why it matters: keeping lubrication, cleaning, and alignment current prevents unexpected stops and costly part wear.
1) Inspect moving parts
- Why: worn parts make jams and imprecise sets.
- Steps:
- Visually inspect pivots, linkages, and gear teeth for scoring or metal shavings.
- Wiggle each pivot; any play over 0.5 mm (0.02 in) means replace or tighten.
- Example: on a pneumatic hand riveter, I once spotted a hairline score on the drive pin that caused a feeding hang every 200 rivets; replacing the pin fixed it immediately.
2) Lubricate bearings and pivots
- Why: the right grease cuts friction and heat so your riveter lasts longer.
- Steps:
- Use the manufacturer’s recommended grease; if unknown, use an NLGI 2 lithium complex general-purpose grease.
- Apply a pea-sized amount to each pivot and a thin film on gear interfaces; avoid overpacking.
- Torque any fasteners you loosened back to spec — for small riveters that’s often 5–10 N·m; check your manual.
- Example: I lube the jaw pivot on my 3/16″ shop riveter every 500 cycles and reduce operating temperature by about 8–10°C.
3) Clean nozzles and feed paths
- Why: debris alters rivet seating and causes misfeeds.
- Steps:
- Remove the nozzle and soak it in isopropyl alcohol for 5 minutes.
- Brush passages with a nylon brush and blow out with 30–40 psi compressed air.
- Inspect and clear any catch or feed channel obstructions; use a 1.5 mm pick for common blockages.
- Example: a single wad of swarf in the feed tube on a multi-rivet machine caused double-feeds until I cleared it with a 1.5 mm pick.
4) Align jaws, guides, and chucks
- Why: correct alignment gives consistent rivet set and prevents jaw breakage.
- Steps:
- Check jaw runout with a 0.05 mm dial indicator at the chuck; replace jaws if runout exceeds 0.1 mm.
- Align guides so the rivet shank runs concentric within 0.2 mm of the nozzle centerline.
- Tighten fasteners to the specified torque; common values: 8–12 N·m for mid-size hand riveters.
- Example: realigning the chuck on my factory riveter cut head deformation by half during production runs.
5) Test cycle and record results
- Why: a test run confirms everything works and creates a traceable record.
- Steps:
- Run 10–20 dry cycles with scrap rivets while listening for grinding, clunks, or air leaks.
- Recheck critical clearances: pivot play under 0.5 mm, jaw runout under 0.1 mm.
- Log date, grease type, parts replaced, torque values used, and any anomalies in your maintenance sheet.
- Example: after a service I documented torque and grease type; three weeks later the log helped a tech replicate the fix on a sister machine.
Quick checklist (use when you leave the workbench)
- Inspect pivots and gears.
- Grease pivots with NLGI 2 (pea-sized amounts).
- Soak nozzle 5 minutes, brush, blow at 30–40 psi.
- Align jaws within 0.1–0.2 mm, tighten to 5–12 N·m as specified.
- Run 10–20 test cycles and log everything.
Do this every 500–1,000 cycles or monthly, whichever comes first, and you’ll cut down on surprise stops.
Recommended Products

[APPLICATION]: Grease fittings, sometimes known as Zerks or grease nipples, are small hydraulic check valves used on bearings and similar mechanical assemblies to supply lubricant to internal working parts.
Made in China

Complete 7-Piece Accessory Kit: This grease gun needle tip kit includes 3 grease injector needles, 1 rubber joint fitting, 1 bent grease nozzle, 1 straight grease nozzle, and 1 grease needle dispenser—everything you need for precise and efficient lubrication in a variety of applications.
Parts Wear Signs and When to Replace Them (Cost Estimates)

If you’ve ever had a riveter quit on you mid-job, this is why.
Listen for increased vibration or odd noises; they usually mean a bearing has developed play, and that matters because loose bearings cut accuracy and speed so you waste time and scrap. How to check: hold the machine and run it at low speed for 10 seconds while you feel for wobble and listen closely; if you can feel lateral movement of more than 1–2 mm or hear ticking on each stroke, replace the bearing. Example: when I replaced a worn bearing on a shop riveter that had a 3 mm wobble, cycle time dropped by 15% and part rejection stopped.
Check the nosepiece for flattening, chipping, or a mushroomed tip; nosepiece wear causes poor rivet formation and leaks, and that matters because bad rivets mean weak joints and rework. How to check: remove the nosepiece and visually inspect under a 10x loupe, looking for a flat spot greater than 0.5 mm or radial chips; measure tip diameter against the spec chart—if it’s 0.2 mm over spec, replace it. Example: a contractor I worked with swapped a chipped nosepiece after noticing a 0.7 mm flattening and the next 200 rivets all met spec.
Inspect air seals and hoses for cracking, hardening, or bulges, because small leaks raise your operating costs and reduce power. How to check: spray a 50:50 soapy water mix on connections and run the tool at full pressure; bubbles that grow indicate a leak—tighten or replace the hose if bubbles appear for more than 5 seconds. Example: replacing a 3/8″ braided hose that had a hairline split cut air consumption by 20% in one afternoon.
Monitor stroke consistency and cycle time, since changes signal internal wear and you’ll lose production if you ignore it. How to check: time 20 cycles with a stopwatch and record stroke length with a simple caliper or gauge; if cycle time varies by more than 0.5 seconds or stroke shortens by more than 10%, inspect internal components and plan for parts. Example: after recording a 0.8-second increase in average cycle time, swapping the worn piston restored the original speed.
Follow a simple replacement rule: swap worn small parts promptly, because parts costs are modest compared with downtime and emergency repairs. Steps to follow:
- Keep spares: stock bearings, nosepieces, seals, and a 2 m spare hose for your most-used model.
- Log inspections: write date, symptom, and measurement after each check.
- Replace when a measurement exceeds the limits above or when performance drops by the amounts listed.
Cost guidance: bearings and seals typically run $10–$60 each, nosepieces $20–$100 depending on size, hoses $15–$80, and a piston or major internal part $150–$500—so a $50 part can prevent a $500 emergency repair or hours of downtime.
Recommended Products

Easy and Convenient Replaceable Accessories

Repalcement Mandrel and Nosepiece For X1S Rivet Nut Drill Adaptor
Create a Riveter Preventive-Maintenance Schedule That Fits Operations

If you’ve ever had a machine go down mid-shift, this is why.
Why this matters: a predictable schedule stops surprise failures and keeps your riveters running when you need them.
1) Map tasks to shifts
Why it matters: inspections done when operators are available get done.
Steps:
- Assign daily quick checks to first shift (start of shift, 5 minutes): visual wear, loose fittings, air leaks.
- Put a 30-minute weekly inspection on second shift (midweek): check nose assemblies, jaw wear, and trigger response.
- Schedule a 1-hour monthly service during the lowest-demand shift (usually weekend night): full cleaning, lubrication, and fastener feed inspection.
Example: At Plant A we moved the 30-minute weekly check to second shift and caught a cracked nose before it ruined a batch of 2,000 panels.
2) Batch similar tasks
Why it matters: grouping tasks cuts setup and shutdown time.
Steps:
- Every week, batch lubrication, alignment checks, and filter swaps into a single 60-minute window per zone.
- Use a single checklist and one parts kit for that window so techs don’t hunt for tools.
Example: On Line 3, batching saved 45 minutes per week and reduced repeated shutdowns from four to one.
3) Zone your floor
Why it matters: fixed crews know their machines and respond faster.
Steps:
- Divide the shop into zones of 4–6 riveters and assign one crew per zone.
- Give each crew a laminated zone checklist and a spare-parts box with the top 10 wear items.
Example: Zone teams at a metal shop cut mean time to repair from 90 minutes to 35 minutes.
4) Define service windows
Why it matters: short, predictable outages minimize production disruption.
Steps:
- Set 15–60 minute windows for routine tasks — pick the shortest that gets the job done.
- Publish the weekly window schedule 48 hours in advance to production leads and post it at the lines.
Example: Scheduling a consistent 30-minute AM window reduced unplanned stoppages by 60% over three months.
5) Track results and adjust
Why it matters: data tells you if intervals are too short or too long.
Steps:
- Log every inspection and repair in a simple spreadsheet: date, machine ID, task, time out, cause.
- Review failure data monthly and change intervals when a part fails more than twice in 90 days.
Example: After logging 12 filter failures in 60 days, one plant shortened filter swaps from monthly to biweekly and dropped failures to one in six months.
Quick checklist to get started this week:
- Pick one shift for daily quick checks.
- Create one weekly 60-minute batch window per zone.
- Assign zones and build one spare-parts kit.
- Publish service windows for the next two weeks.
- Start a simple failure log (date, machine, fault).
One final thing: keep each checklist to one page and update it after three months based on your log.
Troubleshoot Common Riveter Faults (Jams, Misfeeds, Air Leaks)
If you’ve ever had a riveter stop halfway through a job, this is why.
Why it matters: jams halt work and can damage parts if you force the tool. I first check the nosepiece, mandrels, and rivet path for debris or deformities so the tool can seat rivets properly.
1) Inspect the nosepiece and rivet path
- Step 1: Remove power and bleed air. Safety first.
- Step 2: Use a flashlight and pick to clear shavings, paint chips, or bent mandrels from the nosepiece and feed channel.
- Step 3: Replace the nosepiece if you see any crack larger than 0.5 mm or if the bore is worn oval.
Example: on a sheet-metal bracket run, I found a bent mandrel fragment lodged at the channel entrance — clearing it restored seating in under five minutes.
If you’ve ever had rivets skip, this is why.
Why it matters: misfeeds waste rivets and slow your line. For misfeeds I run feed diagnostics so you can see whether the magazine, feeder pawl, or alignment are the problem.
2) Diagnose misfeeds
- Step 1: Lock out the tool and manually advance the feeder while watching the magazine for jams or binding.
- Step 2: Inspect the feeder pawl and spring; replace springs that measure less than 75% of the original free length or show corrosion.
- Step 3: Verify rivet size and head type match the tool settings; test-feed ten rivets after adjustments.
Example: on an assembly with mixed-size rivets, switching the magazine to the 4.8 mm track stopped the skips immediately.
It sounds obvious, but leaks ruin drive pressure, and you’ll feel the difference.
Why it matters: air leaks lower pull force and produce inconsistent drives, so you should find and fix leaks before continuing.
3) Find and fix air leaks
- Step 1: Run the tool at operating pressure and listen for hissing around fittings and seals.
- Step 2: Spray or brush a 50/50 soapy water mix on couplers, hose ends, and the tool body and watch for bubbles; mark any bubbling joint.
- Step 3: Tighten fittings to the torque spec on your tool (usually 10–15 Nm for 1/4″ NPT adaptors) and replace O-rings that are flattened or cut.
Example: I repaired a leak on a production gun by swapping a split 12 mm O-ring at the inlet, which restored 6–8 kN pull force.
Keep a simple log so patterns show up.
Why it matters: logs save you time by revealing recurring faults and the fixes that worked.
1) Record date, rivet size, fault type, suspected cause, and the exact fix (part number if replaced).
2) Review monthly for repeats and schedule preventive swaps for parts that fail more than twice.
Example: a log showed one operator’s gun repeatedly leaked at the quick coupler; after replacing the coupler and retraining that operator on proper connection angle, failures stopped.
Final tip: don’t force the tool; you’ll break components. Replace parts that fail measurements or show visible damage, test-feed ten rivets after any repair, and log the result.
Recommended Products
Complete Kit: Our Bike tool kit includes everything you need to perform both major or delicate work without having to go to bike shop. Contains tools for chain, crank, cassette, tire and more!

✅HIGH QUALITY - The blind rivets are made of Aluminum Grip and Steel Mandrel. It's strong and corrosion-resistant for long-lasting use in any environment. Hand Riveter is made of high quality steel with rubber handle.

Set all sizes of poly rivets perfectly in a single stroke without changing the nosepiece.
Estimate Riveter ROI: Repair Avoidance, Downtime Savings, Lifespan Gains
If you’ve ever had a machine stop mid-shift, this is why you should calculate riveter ROI: you want dollars tied to fewer repairs, less downtime, and equipment that lasts longer.
Why this matters: showing a clear dollar value makes it easy to justify buying the riveter to your boss.
How to estimate ROI — step-by-step:
- Calculate annual repair avoidance.
- Why it matters: emergency fixes cost way more than planned work.
- Step: take last 12 months of emergency repair invoices (parts + overtime labor). Example: $24,000 in emergency costs last year.
- Step: estimate scheduled maintenance cost with the riveter (parts + regular labor). Example: $6,000 per year.
- Subtract: $24,000 − $6,000 = $18,000 annual repair avoidance.
- Real-world example: on a small press line, emergency bearing changes cost $2,000 each because they happened nights with overtime; switching to scheduled riveter-inspected bearings cut that to a $250 routine job.
- Why it matters: downtime is where you lose revenue, not just repair bills.
- Step: calculate lost production per hour (units/hour × margin per unit). Example: 100 units/hr × $15 margin = $1,500/hr.
- Step: estimate hours avoided by preventive checks and faster fixes (inspect frequency × hours saved per event × events/year). Example: 50 hours/year saved.
- Multiply: $1,500/hr × 50 hrs = $75,000 downtime savings.
- Real-world example: a packaging line that stopped twice monthly for 3 hours now only stops once every two months because the riveter spotted loose rivets before they failed, saving roughly 36 hours a year.
- Why it matters: delaying a major capital replacement frees cash.
- Step: take replacement cost of the asset and choose a conservative life-extension percent (5–15%). Example: $120,000 replacement × 10% = $12,000 deferred value.
- Step: amortize that deferred value across years you extended life. Example: 10 years extended → $1,200/year.
- Real-world example: a conveyor section that normally gets replaced every 8 years now lasts 9 due to better fastening, deferring $18,000 of capex and translating to $2,000/year when amortized over nine years.
- Why it matters: you need one number to present.
- Step: add annual repair avoidance + downtime savings + amortized replacement value. Example: $18,000 + $75,000 + $1,200 = $94,200 annual benefit.
- Step: divide that by the riveter total cost (purchase + training + consumables) to get a simple payback and ROI. Example: $94,200 ÷ $25,000 cost = 3.77, or 377% first-year return.
- Real-world example: after you show a $94k annual benefit against a $25k purchase, finance approved the tool in one week.
- Use actual invoices and run-rate production figures.
- Choose conservative assumptions (lower hours saved, smaller life extension).
- Show both annual benefit and simple payback months.
Quick checklist before you present numbers:
If you want, send your recent repair invoices and average production numbers and I’ll plug them into this template for you.
Frequently Asked Questions
How Does Preventive Maintenance Affect Warranty Coverage for Riveters?
Preventive maintenance supports warranty adherence and often makes claim facilitation smoother; I’ll keep records, follow prescribed schedules, and document service so manufacturers honor coverage and processing a claim becomes faster and less disputable.
Can Maintenance Reduce Insurance Premiums for Our Facility?
Absolutely — yes: I’ll sarcastically promise your insurer won’t faint if you maintain stuff. Regular upkeep improves risk profiling and can earn insurance deductions, lowering premiums by proving fewer failures, incidents, and documented preventive practices.
What Training Is Needed for Operators to Perform Basic Checks?
You’ll need operator training covering inspection routines, lubrication, alignment checks, and fault reporting; I recommend combining hands-on sessions with classroom theory and a documented safety certification to verify competence and compliance.
Are There Environmental Considerations for Riveter Maintenance Disposal?
Careful consideration: I’ll handle hazardous disposal properly, separating oils, solvents, and contaminated parts, and I’ll join recycling programs for metals and batteries; I’ll document chains of custody and follow local regulations to reduce risk and waste.
How Do Maintenance Records Impact Resale Value and Trade-In Offers?
I boost resale value by keeping a complete service history; buyers see documented care and gain buyer confidence, which translates into higher trade-in offers, faster sales, and stronger negotiating positions for me.