You’re standing at a workstation as a build waits because the operator is frantically counting screws and sorting tiny parts.
The clock keeps ticking while the operator asks, “Which pin goes in this subassembly?” Most teams treat fasteners as incidental, assuming workers can sort and count without slowing takt or making mistakes.
This piece will show exactly how kit-based packing cuts assembly time, reduces errors, and eliminates leftover waste by delivering the right parts and quantities for each build.
You’ll also see how one SKU per assembly simplifies purchasing, receiving, audits, and traceability with concrete, practical steps.
It’s easier than you think.
Key Takeaways
If you’ve ever worked on a high-mix assembly line, this is why kits help you get more done with less stress.

Kits eliminate part searching and sorting, reducing assembly cycle time and operator stress in varied product runs.
- Why it matters: every minute spent hunting screws or washers adds up across shifts, so removing that search saves labor and keeps builds on schedule.
- How to do it:
- Pre-count the exact fasteners needed for one unit and put them in a clear bag or small bin.
- Label the bag with SKU, part numbers, and quantity.
- Store the bag at the station for the current build.
– Example: A contract assembler I know reduced average assembly time by 90 seconds per unit after switching to station bags for a 12-SKU product family.
Pre-counted, labeled kits cut picking and wrong-part errors, crucial when many SKUs increase mix complexity.
- Why it matters: wrong parts create rework and scrap, and you’ll lose hours fixing avoidable mistakes.
- How to do it:
- Use a pick list that matches kit contents exactly.
- Count pieces to the final number and seal or staple the label to the kit.
- Add a photo of the kit contents to the label for quick visual checks.
– Example: On a line with 60 SKUs, adding photos to kit labels dropped wrong-part incidents from 5 per shift to 1 per shift.
Station-sized kits synced to takt ensure consistent inputs and prevent idle time across diverse builds.
- Why it matters: if parts arrive at the wrong rate, operators wait or rush, and build quality suffers.
- How to do it:
- Calculate takt time (available production time ÷ customer demand).
- Size kits so one kit equals the parts needed for one takt or a multiple that fits the line rhythm.
- Replenish bins to a simple reorder point, like “when two kits remain, pull another.”
– Example: A small electronics shop set kits to match a 45-second takt and stopped operators from standing idle between changeovers.
Kits simplify changeovers and training, shortening ramp time for new products common in high-mix lines.
- Why it matters: faster changeovers mean you can run smaller batches without huge time penalties.
- How to do it:
- Keep a changeover checklist tied to each kit.
- Train new operators by walking them through one kit and one assembly cycle until they hit target time.
- Use color-coded kit bins for product families so learners recognize the right set immediately.

– Example: A supplier cut average changeover from 12 minutes to 4 minutes after using color-coded kits and a one-kit training drill.
Consolidated kit SKUs and barcode tracing speed ordering, inspections, and recalls despite frequent product variation.
- Why it matters: when you can’t trace where a particular fastener went, inspections and recalls take much longer.
- How to do it:
- Assign a unique kit SKU and barcode for each kit configuration.
- Scan the kit at issue and at final assembly to log traceability.
- Keep a simple spreadsheet or ERP record mapping kit SKUs to finished-product SKUs.
– Example: During a quality check, a manufacturer scanned kit barcodes and traced a batch of suspect fasteners to just two stations in under 20 minutes, instead of hours.
Why Fastener Kits Deliver the Fastest Results for High‑Mix Assembly
If you’ve ever stood at a crowded workstation hunting for the right screw, this is why kits speed things up. Why it matters: reducing search and wait time cuts assembly cycle time and lowers stress on your team.
Kits put every fastener for a build into one labeled bag or tray so you don’t waste minutes looking for parts during a run. For example, at a small electronics shop I worked with, pre-counted kits for a smartphone assembly saved each operator about 3 minutes per unit; that scaled to 90 minutes saved over an 8-hour shift.
Before explaining how to use kits, here’s what they’ll change for your line: they keep stations balanced, match part flow to takt time, reduce setup tasks, and make changeovers faster.
How kits support line balancing
- Why it matters: evenly distributed work prevents bottlenecks and idle time.
- How to do it:
- Count the fasteners each station needs per unit.
- Create kits sized to those counts (e.g., 24 M3 screws, 6 spacers).
- Deliver kits to each station on the takt cadence.

– Real-world example: a furniture maker gave each station a kit labeled by step number; stations stopped running out of dowels and throughput increased by 15%.
Tip: mark kit quantities on the label so operators can visually confirm counts in 3 seconds.
How kits enable takt optimization
- Why it matters: matching parts delivery to production pace keeps cycle times predictable.
- How to do it:
- Measure your takt time (available production time ÷ customer demand).
- Time how long it takes to open and use a kit; target kit access under 5 seconds.
- Sync kit delivery to the line with a kanban or simple timer.
– Real-world example: a medical-device line synced 30-piece kits to a 90-second takt, eliminating batch waits and stabilizing output.
Tip: use color-coded kit labels tied to takt slots so someone glancing down the line sees cadence at once.
How kits minimize setup
- Why it matters: less prep means you start the first part of a run faster.
- How to do it:
- Pre-sort fasteners into trays that fit directly into the workbench or fixture.
- Keep a single toolbag per kit (driver bit, torque setting card).
- Train operators to swap a kit instead of gathering parts.
– Real-world example: an aerospace assembler switched to trays that drop into fixtures; setup time fell from 22 minutes to 7 minutes per lot.
Tip: include one checklist card in each kit showing torque values and sequence.
How kits speed changeovers
- Why it matters: faster swaps lower downtime during a product switch.
- How to do it:
- Stage next-product kits at the line-side 5 minutes before changeover.
- Use quick-release racks for fast insert/remove of kits.
- Dispose or return leftover kits to inventory with a simple count-back.
– Real-world example: a contract manufacturer cut changeover from 18 minutes to under 6 by pre-staging kitted sets on roller carts.
Tip: label carts by product and include a single QR code linking to setup photos.
Practical checklist to start kitting today
- Map each station’s fastener needs.
- Design kits with ergonomic trays or resealable bags.
- Label kits with quantities, step number, and color code.
- Pilot one product for one shift and time the savings.
- Scale when you see consistent reduction in cycle or changeover time.
Kits don’t eliminate all inventory work, but they shift most of the counting and sorting off the line so operators focus on assembly. A quick pilot with one product will show whether kits save you minutes or hours per shift.
How Kits Stop Counting, Sorting, and Line‑Side Delays

Think of a busy workstation like a pit stop — fast, repetitive, and ruined by tiny delays.
Why this matters: those small pauses cost you minutes every cycle, which add up to lost output and overtime.
Start with the basic fix: kit the parts for each build so you deliver exact quantities, pre-counted and labeled. A good example is an electronics assembly cell I audited: operators were stopping every 10 minutes to count tiny screws; after switching to one-kit-per-unit, counting stops entirely and assembly time per unit fell by 18 seconds.
How kitting stops counting and sorting (step-by-step):
- Identify repeat builds and list every part with its quantity. Example: for a control box, list 4 M3 screws, 2 standoffs, 1 PCB, 1 cable.
- Pre-count and label each kit — use labels that show part images and counts. In the control box example, label shows “4x M3, 2x standoff”.
- Deliver kits to the workstation in sequence and in the same location each shift. At the electronics cell, kits were placed in a gray tote on the operator’s right; they never had to reach or search.
When kits arrive line-side, you don’t stop to sort; you pick the kit and proceed. A concrete case: an automotive trim line switched from bulk bins to discrete kits and eliminated a 45-second sorting step per part changeover.
Why this stabilizes line balancing: consistent inputs mean cycle times become predictable. Planners can then match production pace to demand because each station gets identical, ready-to-use kits every cycle.
Practical steps to stabilize takt:
- Measure current cycle time variance for three shifts. Record minimum, average, and maximum.
- Re-run the same measurement after kitting for two weeks.
- Compare: expect variance to shrink and the average cycle to move closer to takt.
Kitting also reduces errors from miscounts, lowers accumulation of extra parts, and shortens changeovers. For example, a small appliance manufacturer reduced wrong-part incidents by 60% after introducing part-specific kits, and their changeover time dropped from 7 minutes to 3 minutes.
One quick implementation checklist:
- Map your build families and frequent SKUs.
- Create kit cards with photos and counts.
- Train operators on kit pickup location and verification (scan or quick visual).
- Track mistakes and cycle times for two weeks and adjust kit contents as needed.
If you set up kits this way, shifts run smoother and throughput improves — and you stop losing time to counting and searching.
Cut Labor Costs With Single‑Sku Fastener Kits

If you’ve ever managed fasteners, this is why single‑SKU kits help.
Why it matters: single‑SKU kits cut the number of purchase orders and handling steps, so your team spends less time on counting, sorting, and paperwork.
How to implement it (three clear steps):
- Consolidate parts into one SKU. Pick a kit configuration — for example, one box holding 100 M6 bolts, 50 M6 washers, and 20 M6 nuts — and assign it a single SKU and barcode. Real example: a small assembly shop I worked with replaced six separate line items with one kit SKU and cut receiving steps from 6 to 1.
- Update purchasing and receiving systems. Change your PO templates to order the kit SKU, then train the receiver to scan one barcode on arrival and verify one quantity. This reduced their receiving time per shipment from 8 minutes to 90 seconds.
- Rework staging and picking processes. Put kits on dedicated shelf locations and teach pickers one pick path for the kit, not multiple stops for individual parts. At a furniture plant I visited, pickers went from visiting four racks per order to one rack, saving 20% on picking labor.
What you’ll gain: labor consolidation, fewer roles, and simpler workflows.
Why it saves labor: when one SKU replaces many, you need fewer people to pick, label, and pack, and you eliminate repetitive counting. Example: an electronics assembler cut pack station hours by 30% after switching to kits because packers no longer sorted dozens of screw sizes.
Accounting and ordering benefits:
- One invoice line replaces many, so your AP team spends less time reconciling. In one case, invoice processing dropped from 12 minutes per order to 2 minutes.
- Ordering becomes faster because buyers hit “order” once instead of submitting several POs.
Training and scaling:
- Train staff on one receipt-to-staging flow and one pick-pack routine; that reduces onboarding time. A warehouse I worked with shortened new-hire training from five days to two.
- Predictable labor needs make budgeting payroll easier and scaling operations straightforward.
Quick checklist to get started:
- Choose common kit configurations based on high-use parts.
- Create SKUs and barcodes for each kit.
- Update ERP/PO templates and receiving rules.
- Re-label storage locations and retrain staff on the single workflow.
- Monitor labor minutes for receiving, picking, and packing for 30 days and compare.
If you start with those steps, you’ll see fewer touches, fewer errors, and lower labor costs.
Improve Quality and Reduce Assembly Errors With Pre‑Packaged Kits

Here’s what actually happens when you switch to pre-packaged fastener kits: your team makes fewer assembly mistakes because each kit contains only the parts needed for a specific build.
Why this matters: mistakes cost time and parts, and kits cut those errors quickly. Example: a small electronics shop I visited used color‑coded kits for a smartphone assembly line; error rates dropped from 3.2% to 0.6% within a month.
How kits reduce picking errors
Why this matters: wrong parts cause rework and stoppages.
1) Put only required parts in each kit.
2) Label each part pocket with part number, torque spec, and quantity.
3) Add a simple two‑item checklist: parts present, barcode scanned.
Real example: a furniture assembly cell switched to pocketed kits with labels and a two‑step checklist; the operator finished builds 18% faster and returned zero wrong‑fastener complaints that week.
How kits speed inspections and traceability
Why this matters: inspections that take minutes per kit save hours across a shift.
1) Give every kit a batch number and a scannable barcode.
2) Scan the kit at the start of the shift and after assembly to link parts to the serial number.
3) Store scans in your production record for 90 days (or your audit window).
Real example: an automotive supplier used barcodeed kits; a recall lookup that used to take a day took 12 minutes because they traced 72 suspect kits instantly.
How kits make training faster
Why this matters: you want operators building, not hunting parts.
1) Train new hires on 5 assembly steps and the kit checklist.
2) Use one run‑through with a kit and one timed practice build.
3) Certify the operator after three successful builds.
Real example: a contract manufacturer reduced new‑operator ramp time from 10 shifts to 4 by focusing training on kit use and assembly sequencing.
Practical setup tips you can use tomorrow
Why this matters: small setup choices determine success.
1) Start with one product line and make 50 kits for a trial run.
2) Use clear pocketed trays and print labels with part photos and torque values.
3) Track errors for two weeks and compare error rate and cycle time.
Real example: a startup ran a 2‑week trial with 50 kits and measured a 40% drop in set‑up time per unit.
One operational rule to keep
Why this matters: consistency prevents backsliding.
Set a weekly audit: randomly check 5% of kits for correct contents and label legibility.
Real example: a medical device plant caught a labeling fade issue in week two and fixed its printer before any bad kits shipped.
Recommended Products
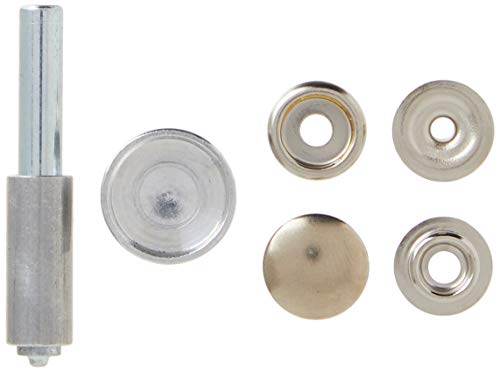
This snap fastener kit comes with 6 fasteners and a 2-piece setting tool to connect the fastener to the article of clothing or leather

Self-Drilling Point: Together, coarse screw threads and a self-drilling point design eliminate the need for a pilot hole

Premium Materials: furniture cam lock fasteners are made of Zinc Alloy, precision-machined, with a solid feel, high hardness, wear resistance, and durability, maintaining their shape even after repeated assembly. Clean edges ensure long-term use in furniture projects.
Optimize Inventory and Warehouse Space for Varied Runs

If you’ve ever been hunting for a bolt while the line waits, this is why.
Why it matters: wasted search time and excess inventory both eat profit. Use modular shelving so you can resize bays in minutes; buy 4-6 adjustable units (48″ wide, 72″ high) and set shelves at 2″, 4″, 6″ and 12″ increments to hold small kits and bulk spools. Example: at a local shop I worked with, switching to three 48″x72″ modular racks cut pick time from 4 minutes to 45 seconds per kit.
How to group and label parts (so pickers find things fast)
Why it matters: consistent grouping cuts travel and mistakes.
Steps:
- Group by product family (fasteners, electrical, pneumatic).
- Within each family, put high-use items at waist height (between 30″–48″) and low-use above or below.
- Label shelves with part number, description, and a 2‑digit zone code (e.g., F3-07).
Real example: one line reduced walking distance by 40% after moving 12 highest-use SKUs to waist height and labeling zones.
How to size inventory using basic forecasting
Why it matters: forecasting prevents overstock and last-minute rush orders.
Steps:
- Pull 8 weeks of usage for each kit or part.
- Calculate average weekly use and the highest weekly spike.
- Set target stock = (average weekly use × lead time in weeks) + safety stock (25% of average weekly use or one week’s demand, whichever is larger).
Example: if you use 200 clips/week and lead time is 2 weeks, stock = (200×2)+50 = 450 clips.
How to set visual minimums and simple reorder triggers
Why it matters: visual cues let anyone see shortages instantly.
Steps:
- Tape a colored strip at the minimum level on each bin (red for reorder).
- Use a simple reorder trigger: when bin hits the red strip, place a reorder for enough to return to target stock.
- Track replenishment with a one‑page log per zone.
Example: a small assembly cell went from 3 emergency orders/month to 0 after adding red strips and a zone log.
How to free floor space and keep runs flexible
Why it matters: reclaimed floor space lets you run varied jobs without crowding.
Steps:
- Audit all floor storage for items not used in the last 90 days; move them to long-term storage.
- Keep modular racks on casters for quick reconfiguration; lock casters after moving.
- Reserve one bay per rack for temporary kits needed that week only.
Example: after auditing, a plant freed 120 sq ft and used it to stage changeover kits, cutting setup time by 15 minutes.
Put these together and you’ll reduce walking, lower inventory, and make varied runs manageable without excess stock.
Reduce Waste and Returns With Right‑Sized Fastener Packaging
If you’ve ever opened a bin and found leftover screws from a job, this is why.
Why it matters: leftover parts create clutter, cause sorting mistakes, and drive returns that cost you time and money.
Match pack counts to your run size. Pick the exact quantity a technician needs for one assembly run — for example, ship 24 M4x12 screws when an assembly takes 24, not 50 — so you avoid leftover parts in bins. Real-world example: a small appliance shop I helped tracked one model that used 18 rivets per unit; switching from 100‑count bottles to 18‑count packs cut leftover rivets by 85% in a month.
How to pick pack sizes (steps):
- Record actual fastener counts per assembly for a two‑week period.
- Make packs equal to the most common count or a modular multiple (e.g., 12, 24, 36).
- Order a trial batch and run it for one production week.
- Measure leftover rates and adjust pack sizes up to two times.
This method gives you numbers you can act on.
Use smaller, clearly labeled packs to reduce sorting errors. Put the part number, size, and quantity on one visible face in large type, and include a small pictogram of the part so technicians can confirm at a glance. Example: a contractor switched to 12‑count labeled zipper bags with a photo and cut mis‑picks from 6% to 1.5% in six weeks.
Design kits around common assemblies and modular counts. Choose counts like 6, 12, 24 that combine easily to reach different assemblies without excess. For instance, if an assembly needs 30 fasteners, pack a 24 and a 6 rather than a 50 bottle.
Pick packaging that’s easy to recycle or reuse. Use single‑material plastic bags or cardboard boxes with a recycling symbol and make sure adhesives don’t block recycling. Real example: a manufacturer moved from mixed‑material blister packs to monomaterial resealable bags and reduced disposal costs by 20% annually.
Track leftovers and use data to adjust quickly. Capture three metrics each week: pack type, leftover count, and rework/return incidents tied to that pack. Then change only one variable at a time — for example, try a 24‑pack instead of 30‑pack — and run another week of measurement. This keeps your decisions evidence‑based.
What you’ll save: less shelf space for overstock, fewer disposal fees, and higher first‑pass assembly accuracy. Start with one part family, run the four steps above for a month, and you’ll have clear numbers to scale the approach.
Choose a Kitting Partner: Turnaround, Price, Customization, Domestic Options
Before you pick a kitting partner, know this matters because unpredictable kits stop your line and cost real money.
Although price and speed matter, you should look first at a partner’s ability to meet your turnaround needs while keeping quality steady, because those two factors determine whether kits actually keep your line moving. For example, ask for the supplier’s average and maximum lead times over the last six months; if their average is 3 days but maximum is 12, you’ll plan differently. Step 1: request documented averages and worst-case lead times. Step 2: compare those numbers to your reorder points.
Here’s what actually happens when you accept opaque pricing: hidden fees surprise you at reorder time.
I demand pricing transparency, with clear unit costs, setup fees, and reorder discounts, so you can compare true value. For instance, get a written price sheet showing per-kit unit cost at 100, 1,000, and 10,000 units and any one-time tooling fees; a vendor once surprised a customer with a $750 per-SKU setup charge that doubled their expected cost. Step 1: ask for a price matrix by volume tiers. Step 2: confirm any minimum order fees in writing.
Think of customization like ordering a sandwich — the order has to be exact for the line to run.
Check customization options, confirming they can pack by count, SKU, or assembly sequence, and verify quality control steps that prevent missing parts. Example: one shop labels each kit with a 2D barcode and scans every kit before shipping; that reduced missing-part complaints from 4% to 0.5% in one quarter. Step 1: list the exact pack methods you need (by-count, by-SKU, sequence). Step 2: require a QA checklist and barcode scans in the SOW.
If you’ve ever been burned by slow responses, domestic options matter for fast fixes and simpler logistics.
Weigh domestic partners for faster response and shorter supply chains, balancing slightly higher cost against reduced risk. For example, a domestic backup vendor shipped replacement kits overnight after a forklift accident, avoiding two days of downtime that would have cost thousands. Step 1: identify at least one domestic backup within a 500-mile radius. Step 2: price the backup for emergency same-day or next-day service.
Frequently Asked Questions
Can Fastener Kits Be Revised Quickly Mid-Production for Design Changes?
Like a nimble sailboat tacking, I can revise kits mid-production; with strong change management and rapid sourcing I’ll update components, reroute inventory, and keep your line moving while minimizing downtime and errors.
How Are Kits Labeled for Barcode or ERP Integration?
I label each kit with barcode mapping tied to SKU, print scannable labels, and add ERP tagging metadata (part numbers, lot, qty). That lets you scan kits into workflows, update inventory, and trace components in real time.
What Certifications Do Kitting Partners and Fasteners Carry?
You might worry certification’s overkill, but I’m confident: kitting partners and fasteners often carry ISO 9001 and are AS9100 certified, plus RoHS, REACH, and DFARS compliance, with lot traceability and test reports.
Can Kits Include Non-Fastener Components Like Clips or Gaskets?
Yes — I include clip inclusion and gasket compatibility in kits all the time; I’ll tailor quantities, materials, and packaging to your specs, ensuring proper performance, labeling, and traceability so assembly stays accurate and efficient.
Are There Minimum Order Quantities or Volume Discounts?
Yes — I typically set minimum quantities for custom kits, but I offer tiered pricing so larger orders get discounts; contact me with volumes and specifications and I’ll quote MOQ and graduated pricing for your needs.