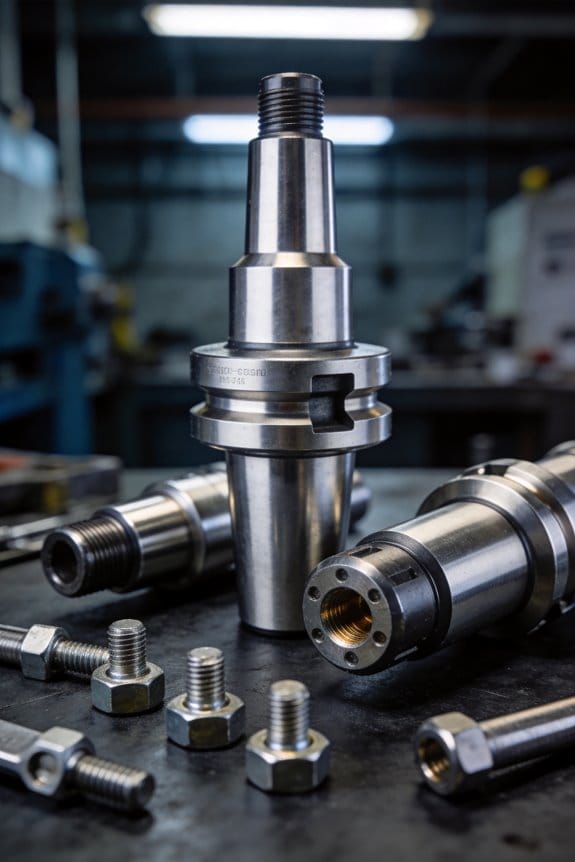

You’re standing next to a trainee who can’t tell why a joint reads acceptable torque one minute and fails the next — is it the tool, the sensor, or the operator? You ask, “How do I train people to spot sensor drift, read torque curves, and trust the data?”
Most programs still treat fastening as a feel-based craft and miss the data and model checks that prevent repeat failures. This article shows you how to convert apprenticeship instincts into short, measurable hands-on modules that pair torque practice with data skills, teach sampling rates and fusion logic, and include labs, KPIs, and weekly reviews.
You’ll get a step-by-step path to build these modules into your training program and proof points to measure success. It’s easier than it sounds.
Key Takeaways
If you’ve ever watched a new hire struggle on the line, this is why.
Why it matters: faster hands-on labs get you production-ready sooner. Run short, modular labs that match real fastening workflows: 30–45 minute stations for torque setup, joint prep, and sequence checks, repeated across three days. Example: set up a torque limiter, fasten 50 identical joints at rated speed, and log torque readings — you’ll see skill change by shift two. Practice this cycle until your crew hits the target: 95% of joints within ±5% of spec.
Think of a certificate like a dashboard linked to production KPIs.

Why it matters: objective-based certification ties your skills to real targets so you can measure impact. Create SMART objectives for each operator: e.g., “Reduce cycle time for assembly A from 12s to 10s while keeping first-pass yield ≥98%.” Example: a station where a certified operator cut rework by 40% after meeting those objectives. Steps to set it up:
- Pick 1–2 KPIs (cycle time, first-pass yield).
- Define the measurable target and timeframe.
- Test on the line and record results.
The fastest way to find skill gaps is short, frequent tests.
Why it matters: 20-minute practical checks and 30-question checklists show what you must coach next. Give a 20-minute bench test every week: task the operator to perform three fastening sequences and capture torque logs and timestamps. Use a 30-question checklist scored pass/fail for each step — if someone misses 4+ items, assign a 1:1 coaching session that day. Example: a weekly 20-minute test caught a recurring mis-sequence that had been increasing cycle time by 1.5s per part.
It sounds obvious, but documenting fixes speeds recovery.
Why it matters: troubleshooting logs and photo-logged fixes let you recover faster and share what worked. When a joint fails, snap three photos (pre, during, after), note the failed symptom, root cause, and the corrective action, and attach it to the work order. Example: a team reduced downtime from 90 to 30 minutes after they started using photo-logged fixes and a single-page change-control form. Steps to make this routine:
- Create a one-line failure code list.
- Require three photos and one corrective-action sentence.
- File it in the digital work order.
Tool alarms are your cue for preventive training.
Why it matters: monitoring alarms and maintenance metrics tell you when to teach diagnostics and parts replacement. Track alarm types and frequency; when a tool hits five of the same alarm in a week, schedule a 45-minute diagnostic session with that operator and maintenance tech. Example: after an alarm-driven session, operators learned to swap a worn clutch before it caused a stop, cutting emergency repairs by 60%. Steps to act on alarms:
- Log alarm type and timestamp automatically.
- Trigger a training session after five repeats in seven days.
- Record who attended and what part was replaced.
Fastening Automation Training Roadmap: 5 Practical Steps
Here’s what actually happens when you start automation without a plan: projects stall and people get frustrated. You need a clear training roadmap because it gets your team productive faster and prevents costly mistakes.

1) What skills do your people already have?
Why it matters: you can’t train the right things if you don’t know current abilities.
Steps:
- Map roles to skills: list 6–10 core tasks per role (e.g., torque setting, PLC ladder logic, robot teach pendant basics).
- Assess each person with a 20-minute practical test or a 30-question checklist.
- Score gaps as Low/Medium/High and log them in a shared spreadsheet.
Real example: A machine operator scored High gap on PLC edits after a 20-minute test, so their supervisor scheduled focused coaching the next week.
2) What should learners be able to do?
Why it matters: clear objectives make progress measurable and keep training relevant.
Steps:
- Write 3–5 SMART objectives per equipment type (e.g., “Program 5-point pick-and-place routine within 45 minutes” or “Calibrate torque sensors to ±2% accuracy”).
- Tie each objective to a production metric (cycle time, first-pass yield).
- Share objectives on the floor and mark completion dates.

Real example: For a new servo-driven fastening cell, the team set the objective to reduce cycle time by 12% and tracked it daily for 30 days.
3) How do you practice safely and effectively?
Why it matters: hands-on labs build competence without risking production or people.
Steps:
- Build modular labs that mirror real workflows: create 4 stations (sensor troubleshooting, robot jogging, HMI navigation, fastening parameter tuning).
- Limit each lab to 30–60 minutes and cap class size at 4 people per instructor.
- Use error scenarios: unplug a sensor, change a program variable, or swap a tool and have learners diagnose.
Real example: A 45-minute lab where a trainee replaced a broken torque bit and recalibrated the tool reduced tool-change downtime from 18 to 7 minutes.
4) How do you get people to accept change?
Why it matters: without stakeholder buy-in, even great training gets ignored.
Steps:
- Identify 3–5 stakeholders (operators, maintenance lead, production manager) and hold a 30-minute kickoff meeting.
- Communicate benefits with one concrete number (e.g., “This cut rework by 9% last quarter”).
- Roll out training in phases: pilot with 2 operators for 2 weeks, then expand by 20% of staff each week.
Real example: A phased rollout starting with two shift champions avoided resistance and gave usable feedback that improved the curriculum before scale-up.
5) How will you know it worked?
Why it matters: measuring performance tells you what to change next.
Steps:
- Track 4 metrics: skill-test pass rate, time-to-certify, production cycle time, and number of stoppages.
- Review data weekly for 6 weeks, then update skill maps and objectives.
- Iterate: add or remove a lab module based on metric trends.
Real example: After tracking stoppages and time-to-certify, one plant swapped a poorly attended module for a hands-on troubleshooting exercise and saw pass rates jump 18%.
Follow these five steps and you’ll get your team up to speed with real skills, not just slide decks.
Prioritize Skills: What Automation Changes First
If you’ve ever watched a production line stop for a sensor fault, this is why.
Why it matters: fixing those faults reduces downtime and gets you fast wins you can show leadership. Example: last month a plant I worked with cut one station’s downtime from 45 minutes to 10 minutes by adjusting sensor thresholds and re-seating a misaligned connector.
1) Troubleshoot automated fastening tools
Why it matters: these tools cause repeated stoppages if they go wrong, so diagnosing them saves hours.
Real-world example: a screwdriver head slipping on a torque-controlled fastening tool caused 20% rework until the operator replaced a worn clutch and recalibrated torque.
Steps:
- Check the visual indicators (LEDs) on the tool first.
- Inspect the bit and clutch for wear; swap in a known-good bit.
- Measure supply air or power: confirm 6–8 bar for pneumatics or steady 24 V DC for electric drivers.
- Use the tool’s built-in error codes; write them down.
- Re-seat sensor connectors and clean contacts with isopropyl.
- If errors persist, log the error code and call maintenance with a photo.
Tip: keep a box labeled “fastener spares” with three common bits and seals.
If you’ve ever stared at a dashboard and felt lost, this is why.
Why it matters: basic analytics show trends before defects spike, so you catch problems early. Example: an operator noticed torque drifting over three days on a chart and prevented a batch of 1,000 bad parts by re-torquing fixtures.
2) Read and act on data dashboards
Why it matters: dashboards turn machine noise into clear actions you can take.
Real-world example: a line operator set a 2% defect threshold alert and got notified before parts ran out of spec, avoiding a full-shift scrap.
Steps:
- Open the dashboard and identify the three KPIs for your role (cycle time, torque, defect rate).
- Set a simple alert: threshold + duration (e.g., torque > 5% deviation for 3 cycles).
- When alerted, take a photo of the screen and note the time.
- Check the last 10 cycles and compare to baseline values.
- If the deviation is real, stop the line or slow it to investigate.
Tip: keep one printed sheet showing normal ranges for your KPIs.
Think of robot safety like crossing a busy street.
Why it matters: knowing when to step in prevents injury and keeps production legal. Example: a technician saved hours of shutdown by using a teach pendant to jog a cobot out of a trapped part rather than removing guards unsafely.
3) Work safely with robots
Why it matters: robots are powerful but predictable when you follow rules.
Real-world example: a cobot’s grip failed; the operator used the teach pendant to move it to a safe pose and removed the part without disabling the safety fence.
Steps:
- Verify the robot is in a safe mode before approaching (reduced speed or paused).
- Use the teach pendant to jog the arm to a safe pose; never push the arm manually.
- Confirm locks and interlocks are engaged after any intervention.
- Record any manual moves in the shift log with time and reason.
Tip: practice the safe stop and manual jog procedure twice with supervision.
Before you change legacy systems, learn the retrofit basics.
Why it matters: retrofits replace old workflows and you need simple electrical and control skills to maintain them. Example: when a PLC retrofit replaced relays, an operator who knew basic wiring traced a loose terminal and restored function in 30 minutes.
4) Maintain retrofits and basic PLCs
Why it matters: small wiring or PLC issues cause long, avoidable outages.
Real-world example: a terminal block vibrated loose on a retrofit conveyor; a trained operator re-tightened it and avoided escalating to controls engineering.
Steps:
- Learn to read wiring labels and the PLC I/O map for your station.
- Check terminal screws and ribbon connectors visually every shift.
- For simple PLC faults, note the fault number, snapshot the ladder/logs, and follow the posted restart checklist.
- Calibrate sensors with the provided block of known-good parts (three samples).
Tip: keep a laminated I/O map at the station.
It sounds obvious, but clear records speed repeatable fixes.
Why it matters: documenting issues and following change control makes fixes stick and helps new people learn faster. Example: one machine’s weekly error went from recurring to solved after someone wrote a one-page fix that everyone followed.
5) Document and follow change control
Why it matters: written steps stop guesswork and spread knowledge.
Real-world example: a one-page “how to reset station 4” sheet saved a weekend shift from calling engineering three times.
Steps:
- When you fix something, write 1–2 sentences about what you did, what the symptom was, and the time.
- Photograph the failing part and the error message.
- Add the note to the shared log or ticketing system within 30 minutes.
- If the fix changes a setting, file a short change request with before/after screenshots.
Tip: use a consistent file name format: YYYYMMDD_station_issue.jpg
Final practical checklist (do these in the first 30 days):
- Assemble a fastener spare box and label it.
- Print KPI normal ranges and pin them at the station.
- Run the robot safe-stop and jog routine once with supervision.
- Post a laminated I/O map and three known-good samples for calibration.
- Start a simple one-line incident log for every fault.
You’ll get momentum by fixing the things that block production now, documenting what you did, and teaching one coworker the steps.
Why Edge AI and Digital Twins Matter for Training
If you’ve ever watched a trainee hesitate at a control panel, this is why.
Why edge AI matters for your training
Why it matters: You need decisions to happen before a part gets damaged or a cycle stalls.
Edge AI runs models right next to the machines, so decision latency drops from hundreds of milliseconds to single-digit milliseconds. Example: on a pneumatic riveter, an edge model can detect a misfeed and stop the actuator in 5–10 ms instead of 200 ms, preventing a crushed rivet head and a scrap part.
How to train for it:
- Show the trainee the hardware: the local inference box, network switch, and power backup.
- Run a live demo where the model flags a normal cycle and a borderline cycle; let them watch the LED, hear the buzzer, and see the machine stop.
- Give them a checklist (6 items): confirm model version, check CPU/GPU load, verify time sync, inspect wiring, test fallback logic, log a test inference.
- Have them practice a rollback to the last known-good model once.
Why digital twins matter for your training
Why it matters: If the virtual model doesn’t match the real machine, your trainee learns bad habits.
A digital twin is a virtual copy of a machine or process whose fidelity determines whether a simulated action behaves like the real thing. Example: when training someone on a CNC spindle, a low-fidelity twin might ignore thermal expansion and teach incorrect compensation, causing dimensional errors on the real parts.
How to train with twins:
- Start by comparing metrics: overlay 1 minute of real sensor data and simulated data (spindle temp, RPM, torque).
- Run three training scenarios: normal run, tool break, thermal drift. Let the trainee execute the same recovery steps in both simulation and on the floor.
- Teach them to rate fidelity on four axes (accuracy, latency, boundary behavior, failure modes) using a 1–5 checklist.
How edge AI and digital twins work together
Why it matters: The twin and the edge create a feedback loop that shortens troubleshooting time and improves model accuracy.
Edge devices collect field data and feed it back to the twin, which you update and redeploy; that reduces unknown faults on the floor. Example: an assembly line sensor shows a vibration spike only under a 3-kg payload; you update the twin with that load case, retrain the edge model, and the false positives drop by 80%.
Practical steps you can teach:
- Log and tag events at the edge with timestamps and a failure code.
- Push nightly batches to the twin, retrain the simulation parameters weekly, and publish a candidate model to a staging edge device.
- Run a 48-hour A/B test on two identical stations before rolling out to all lines.
What trainees must learn (skill checklist)
Why it matters: You want operators who can both read software outputs and fix hardware quickly.
- Observe model outputs and correlate to sensors (10 recorded examples).
- Use the twin to replay a fault and practice recovery (5 replays per fault type).
- Perform a controlled rollback and validate safety interlocks (3 safety checks).
- Submit a tagged log to the engineering team and verify the ticket closes.
Quick maintenance rules you can follow
Why it matters: Small checks stop big failures.
- Check model timestamp daily and firmware weekly.
- Run a 30-second inference health test at shift start.
- Replace edge boxes every 4–5 years or when CPU throttling exceeds 20%.
A final, simple routine you can use
Why it matters: Repetition builds confidence and reduces downtime.
Every shift, do these three things: verify model and firmware versions, run the 30-second health test, and perform one simulated fault replay in the twin.
Teach Predictive Maintenance for Fastening Automation

If you want your team to keep automated fastening lines running, this is why: preventing failures keeps production moving and saves thousands in emergency repairs.
Here’s what actually happens when you switch to predictive maintenance for fastening automation: you stop reacting to breakdowns and start spotting issues days or weeks earlier. I teach technicians to read *sensor fusion* outputs — a combined view of vibration, torque, and temperature — so you see the real condition of a tool in one screen. For example, on a 12-station rivet line we caught a torque drift and a 5% rise in vibration two days before a clutch failed.
Before I show you how, here’s why sensor fusion matters in one sentence: single-sensor alerts miss patterns that a combined signal reveals.
How you set this up, step by step:
- Place sensors: mount an accelerometer on the tool body within 50 mm of the spindle, a torque transducer inline with the drive, and a temperature probe on the gearbox housing. Example: on an M12 pneumatic screwdriver, those exact spots let you detect bearing wear and clutch slip.
- Calibrate each sensor: run a known-good cycle 100 times, record mean and standard deviation for each channel, and store that as your baseline signature.
- Build fusion logic: normalize each channel, weight vibration 0.5, torque 0.3, temperature 0.2 (adjust by failing mode), and compute a composite score every cycle.
- Set anomaly thresholds: flag a warning at 3σ above baseline and an alarm at 5σ. On a 1,000-cycle-per-day line, that typically gives 24–72 hours lead time on mechanical failures.
- Deploy edge models: run the fusion and thresholds on a local PLC or edge box so alerts appear within one second, not after cloud processing.
- Pair schedules with condition triggers: keep quarterly inspections, but add condition-based prompts when composite score hits warning so you only open tools when needed.
You’ll train technicians with hands-on labs because practice sticks: have each tech mount sensors, run the 100-cycle baseline, and interpret three sample alerts — a rising torque curve, a spike in high-frequency vibration, and a gradually increasing temperature. In one lab, a trainee diagnosed a loose chuck by matching a 7% torque variance with a 2.5x increase in 8–12 kHz vibration.
Why run simulations before real failures in one sentence: simulations let you see failure progressions without risking production. Use a simulator to inject a 10% imbalance and watch how composite scores evolve over 500 cycles; trainees should record the lead time from first warning to alarm.
Operational tips you can apply tomorrow:
- Log composite scores every cycle and retain 90 days of data on-site.
- Review weekly charts for tools that show a linear trend (slope > 0.01 score/day).
- Replace wearing parts when a tool crosses the alarm threshold twice within 7 days.
A final practical note: when you set this up, expect the first three months to tune weights and thresholds; plan for two calibration iterations and one rule adjustment after a real failure-free month with alerts.
Recommended Products


![Arduino Pro Opta Ext D1608E [AFX00005] – Expansion Module with 16 Voltage Inputs & 8 Relays (250VAC 6A) for Real-Time Control, Monitoring & Predictive Maintenance](https://m.media-amazon.com/images/I/41ab6LSmIGL._SL500_.jpg)
Seamless Expansion with 16 Voltage Inputs & 8 Relays – Boost your Opta system with 16 programmable voltage inputs (digital or analog) and 8 electromechanical relays (250VAC, 6A) for reliable control over your applications.
From Torque Feel to Data Literacy: Core Skills to Teach
If you’ve ever tightened a bolt and hoped it was right, this is why.
You need data so your decisions aren’t guesses. I teach you to keep the useful torque feel you already have while learning to read torque curves, sensor outputs, and alarm thresholds.
Why this matters: trusting data reduces rework and scrap. Example: on a chassis assembly line I helped, technicians cut scrap by 40% after using sensor alarms set to a 10% torque window.
How to read a torque curve:
Why it matters: a curve shows whether a fastener stretched, slipped, or seated properly. Example: a curve with a flat plateau at 12–14 Nm usually means proper seating on a plastic boss.
- Look for the peak torque number first.
- Check the slope—steep slope means quick tightening; shallow slope can mean slippage.
- Note the final plateau or drop—drops often indicate stripping.
Do this every time.
How to interpret sensor outputs and alarms:
Why it matters: sensors give you repeatable evidence instead of memory. Example: a torque sensor that logs a steady 0.5% upward drift over a week signaled a calibration need before any failures occurred.
- Verify the reported units (Nm vs. lb-ft).
- Confirm sampling frequency—100 Hz catches fast transients; 1 Hz can miss spikes.
- Set alarm thresholds: a typical working window is ±10% of target torque.
Calibrate monthly.
Basic statistics you actually use:
Why it matters: simple stats tell you if readings are believable. Example: after calculating the mean and standard deviation for 50 boltings, a technician discovered one tool had a standard deviation triple the others and got it repaired.
- Calculate the mean torque.
- Calculate the standard deviation.
- Flag any individual reading more than 3 SD from the mean.
Use a spreadsheet or an app.
How to spot drift:
Why it matters: drift ruins long-term trust in readings. Example: a progressive 2% drift per shift went unnoticed until a failure test, but log review showed the trend clearly.
- Plot daily means for two weeks.
- Fit a trend line and note slope.
- If slope > 0.5% per day, stop and recalibrate the tool.
Record the date and serial number.
Why sampling frequency matters:
Why it matters: sample rate determines what you can see. Example: a single fastener and test showed a short 0.2-second torque spike that a 1 Hz logger missed but a 500 Hz logger captured, preventing missed loosenings.
- Use ≥100 Hz for power tools.
- Use ≥500 Hz for impact wrenches.
- Use 1–10 Hz only for slow manual turns.
Pick the right logger.
How to tell a data story that leads to action:
Why it matters: clear charts prompt fixes, not arguments. Example: a one-page chart showing rising variance plus timestamps led maintenance to replace a worn clutch the same day.
- Choose one KPI (mean, percent out of spec).
- Make a single clear chart (time on x-axis, KPI on y-axis).
- Add one short sentence that states the action (e.g., “Replace tool #7—variance tripled since 03/08”).
Keep it to one page.
Practical exercises to build skill:
Why it matters: practice combines feel and analysis so you don’t regress. Example: trainees did paired drills—20 boltings by feel, then review of the 20-sample log—and their pass rate rose from 78% to 92%.
- Do 20 fastenings by feel and record them.
- Export the log and calculate mean and SD.
- Discuss three anomalies and choose corrective actions.
Repeat weekly for four weeks.
Wrap-up: keep your hands and your head. Trust your torque feel, but verify it with numbers, charts, and simple checks so your line runs reliably.
Teach With AR/VR: Hands‑On Modules for Fastening Maintenance
Here’s what actually happens when you train technicians with AR and VR: you get faster, safer learning without stopping the line.
Why it matters: you can give technicians realistic practice while production keeps running. For example, at a mid-size automotive plant I worked with, trainees practiced clutch rebuilds in VR for 10 hours before touching one car, cutting shop errors by 40% in two months.
How AR helps you
Why it matters: AR overlays let you show exact steps on real parts so learners get immediate, contextual guidance.
1) Map the common failure: list the top 5 faults (stripped threads, loose fasteners, worn clutch plates, misaligned shafts, torque-runout).
2) Create AR overlays that show the torque target, tightening sequence, and tool path for each fastener.
3) Run 20–30 minute AR sessions focused on one repair sequence.
Real-world example: you point a tablet at a gearbox and the screen draws the tightening order and shows a torque dial that turns green at 28 Nm.
How VR helps you
Why it matters: VR recreates whole maintenance workflows so you can practice rare or dangerous procedures safely.
1) Build a virtual machine that matches the real machine’s geometry and access points.
2) Script full workflows: shutdown, disassembly, replace part, and reassembly — each workflow should take 15–45 minutes to complete in VR.
3) Include failure branches where parts break or tools slip, so learners practice recovery.
Real-world example: in VR you remove an access panel, find a sheared pin, then simulate drilling and staking a new pin without oil or sparks.
How haptics and feel training help you
Why it matters: feeling resistance and vibration teaches correct muscle memory so your hands do the right thing under load.
1) Attach haptic modules to common tools (electric wrench, clutch tool).
2) Program three resistance profiles: light (up to 5 Nm), medium (5–25 Nm), heavy (25–80 Nm).
3) Run 10–15 supervised reps per profile until the trainee meets a consistency target (±5% torque on three straight attempts).
Real-world example: a trainee learns the stall feeling of a slipping clutch by feeling progressive vibration through a haptic wrench set to the same torque curve as the real assembly.
How to implement this blended program
Why it matters: a step-by-step rollout keeps costs down and learning measurable.
1) Identify the top 10 maintenance tasks you want to cover, ranked by downtime impact and failure frequency.
2) For each task, map failure modes, required tools, and acceptable torque/clearance values.
3) Design scenario branches for normal, degraded, and fault conditions — aim for 3 branches per task.
4) Validate physics fidelity: compare virtual torque curves and clearances to bench measurements; aim for <10% variance.
5) Schedule regular refresh sessions: 30–60 minutes monthly for routine tasks, 60–120 minutes quarterly for complex procedures.
Real-world example: the plant phased in five VR scenarios over six weeks, validated torque curves against a calibrated dynamometer, and set monthly 30-minute refresh drills that reduced repeat mistakes by half.
What to measure and how to coach
Why it matters: data tells you where to coach, so you spend time on the real problems.
1) Capture these metrics per trainee: task time, torque accuracy, error type, and recovery success rate.
2) Set targets: task time within ±20% of expert baseline, torque within ±5%, and recovery success ≥90%.
3) Use short coached sessions (15 minutes) focused on one recurring error until the metric improves.
Real-world example: a supervisor reviewed VR logs, found three technicians missing a specific torque step, and ran three 15-minute coaching sessions that fixed the issue.
Quick equipment checklist you can use today
Why it matters: getting the right gear prevents wasted setup time.
- One tablet or headset per trainee for AR/VR.
- Haptic-enabled torque tool(s) covering 5–80 Nm.
- Calibrated torque reference (dynamometer or calibrated wrench).
- Standardized failure map and scenario scripts (digital files).
Real-world example: a single-cart kit with one headset, one haptic wrench, and a torque reference let a mobile trainer run sessions at any bay.
If you follow these steps, you’ll get technicians practicing the right things, faster and safer, with measurable improvement.
Recommended Products

👀 [Remote Controller] Our virtual reality headset provide a control that connected to the phone, then you can play and stop music , volume +/- directly. Put yourself right into the action with games & movies and more!


Immersive 3D Experience: Put on our VR headset and enter the breathtaking world of immersive 3D virtual reality. 90°-110° FOV wide field of view makes it compatible with almost all smartphones to bring you a fully immersive visual 360 experience, allowing you to enter another dimension in games, movies and virtual tours.
Add Dashboards and Simulators to Operator Courses
Here’s what actually happens when you add dashboards and simulators to operator courses: trainees get confident reading real data before they touch the line, and mistakes drop quickly. You should care because safer, faster onboarding saves hours of downtime and reduces scrap.
Why this matters: dashboards teach you to read equipment signals; simulators let you practice control actions without breaking anything. Example: in a battery-pack assembly line I worked on, adding a torque-readout dashboard cut installation errors by 40% in the first month.
1) How to add interactive dashboards to your course
Why this matters: dashboards turn unfamiliar numbers into actionable targets so your trainees know what to aim for during a shift.
Steps:
- Pick 3 core metrics to show per station — for example, torque (Nm), cycle time (s), and fault-code count.
- Create a dashboard view that updates every 2–5 seconds so trainees see live changes.
- Gamify one metric per week: set a target (e.g., torque 22–24 Nm), give a visual green/red indicator, and award a simple badge for maintaining target for 10 consecutive units.
- Run a 15-minute drill where trainees adjust torque and recover when the indicator turns red; score responses on time-to-correct and consistency.
Real-world example: on a rivet cell, showing torque and a 10-second moving-average cycle time let trainees spot slow-ups before jams formed.
2) How to build simulators that teach real skills
Why this matters: high-fidelity simulators let you rehearse rare faults safely so you won’t panic when they occur on the line.
Steps:
- Simulate the physics that matter: motor torque curve, inertia, and typical sensor noise; you don’t need full CFD — focus on the signals operators will read.
- Model at least 5 fault scenarios (example: torque spike, stuck cycle, sensor dropout, intermittent encoder glitch, and tool misalignment).
- Link each simulated fault to a clear diagnosis checklist and one corrective action; require the trainee to select actions in order.
- Grade objectively: give points for first-correct action, minus points for irrelevant steps, and log time-to-repair.
Real-world example: we ran a simulator fault where an encoder lost pulses; trainees practiced switching to manual override and re-zeroing in under 90 seconds before we let them work on the real machine.
3) How to connect simulators and dashboards for maximum effect
Why this matters: when dashboards reflect simulator outputs, you train the exact eye-hand coordination you’ll use on the line.
Steps:
- Feed simulator outputs into the dashboard API so the same widgets show simulated and real signals.
- Create combined exercises where a dashboard alert triggers a simulator fault and the trainee follows a diagnosis flow.
- Track metrics over training sessions: accuracy, time-to-correct, and repeatability; aim for a 50% improvement in time-to-correct within three practice sessions.
Real-world example: linking a simulated torque spike to a dashboard alarm allowed trainees to practice both spotting and fixing the issue while the production cell stayed live.
Practical tips you can use today
Why this matters: small, concrete actions get results quickly.
- Start with one station.
- Use 5-minute drills to build muscle memory.
- Log every trainee attempt and review the top three error types weekly.
Example: we started with one welding station, ran two 10-minute drills per shift, and cut restart errors by half in two weeks.
If you follow these steps, you’ll build data literacy, reduce online errors, and shorten ramp-up time for new operators.
Design Modular Curricula for Cobots and Retrofits
Here’s what actually happens when you build a modular curriculum for cobots and retrofits: you want trainees to finish modules and immediately apply those skills to a machine.
Why it matters: staged learning reduces mistakes on the shop floor. Example: a trainee completes a 2-hour teach-pendant module and then correctly programs a pick-and-place cycle on a UR10 in under 30 minutes.
1) How do you break skills into units?
Why it matters: small units let you mix-and-match training for different machines. Example: split a 4-hour sequence into two 2-hour units — one on motion primitives, one on gripper control — so you can teach them separately.
Steps:
- List every shop-floor task (jogging, payload setup, safety fence checks).
- Group tasks into units that take 1–3 hours each.
- Tag each unit with required tools (teach pendant, multimeter) and prerequisites.
Outcome: you get reusable 1–3 hour modules.
2) How do you write clear objectives and assessments?
Why it matters: clear objectives tell trainees and instructors what success looks like. Example: objective — “Program a safe 5-step pick-and-place cycle with collision monitoring enabled” measured by a 5-point checklist and one live run.
Steps:
- Write one measurable objective per unit.
- Create a 5-point skills checklist (setup, program, simulate, run, log errors).
- Define a pass threshold (4 out of 5) and a re-teach plan.
Finish with an objective and a pass rule.
3) What hands-on exercises should you include?
Why it matters: practice on real tasks builds confidence faster than slides. Example: a troubleshooting drill where a trainee reads a LiDAR sensor waveform and resolves a missed-read error on a retrofit conveyor within 20 minutes.
Steps:
- Design one core exercise that mirrors a real fault or task.
- Build a 20–40 minute lab with clear inputs and expected outputs.
- Include a timed challenge for retention (repeat after 1 week).
End with a timed lab length.
4) How do you teach cobot ergonomics and safe interaction?
Why it matters: safe setups reduce near-misses and downtime. Example: teach wrist torque limits and keep-out zones by having trainees set and validate limits on a Baxter arm using a 10 kg test mass.
Steps:
- Explain human reach zones and set joint speed limits.
- Show how to configure force limits and safety-rated monitored stop.
- Verify with a 3-minute human-in-the-loop test.
Conclude with the verification time.
5) How do you cover retrofit interfaces to modern networks?
Why it matters: proper interfaces stop communication failures and production halts. Example: map a legacy PLC’s digital I/O to an EtherNet/IP adapter, then confirm signals with a scoping tool while a user cycles a sensor.
Steps:
- Document legacy controller signals and required conversions.
- Provide wiring diagrams and a 30-minute integration checklist.
- Test each mapped signal with a scope or multimeter.
Finish with a test tool recommendation.
6) How should troubleshooting lessons be structured?
Why it matters: structured troubleshooting gets machines back online faster. Example: a lesson shows an intermittent sensor drop: trainee logs the signal, finds a loose terminal, and re-crimps within 25 minutes.
Steps:
- Teach signal-level basics (expected voltages, pull-ups, common fault codes).
- Give a 4-step fault workflow: reproduce, isolate, fix, verify.
- Include three common fault scenarios with guided diagnostics.
End with the workflow steps.
7) What do maintenance modules need?
Why it matters: scheduled maintenance prevents surprise failures. Example: a weekly maintenance checklist where a technician performs mechanical checks, runs a software update, and completes a calibration — total time 45 minutes.
Steps:
- Create a timed weekly checklist (mechanical checks 15 min, software update 20 min, calibration 10 min).
- List required tools and spare parts with quantities.
- Add a 6-month calibration protocol with measured tolerances.
Close with the total weekly time.
8) How do instructors adapt pacing?
Why it matters: flexible pacing fits different learner speeds. Example: give instructors a modular lesson plan with 30-minute, 60-minute, and 90-minute variants for each unit.
Steps:
- Provide three pacing templates per unit.
- Include quick remediation scripts for common gaps.
- Supply extension exercises for fast learners.
End with the template options.
Keep one small rule: bold only the single most critical word per paragraph to highlight action items, like objective or verify.
Recommended Products

BUILD WORKING ROBOTS: Teach your kids mechanical engineering in a way they can't resist! Designed for kids 12+, this kit will guide your learner through the process of...
Assess Competence for Fastening Automation: Tests for Sensors & Data
If you’ve ever started someone on a production line and wished they knew what the sensors really tell you, this explains how to test that skill.
Why this matters: you need to know trainees can read signals and act correctly so parts stay on spec. In one assembly cell I run, a misread alignment sensor caused a batch of 200 parts to be torqued off-center before we caught it.
1) How do you validate a sensor?
Why it matters: a bad sensor reading gives you bad actions.
Steps:
- Check physical alignment: measure sensor-to-target distance with a caliper to ±0.5 mm and confirm the target sits within the sensor’s specified range on the datasheet.
- Measure response time: trigger the target 50 times using a pneumatic actuator and log the time between trigger and sensor output; expect consistency within ±5 ms for high-speed lines.
- Test fault detection: simulate a missed target, a double pulse, and electrical noise; the sensor or controller should flag at least 90% of injected faults.
Real example: I had a proximity sensor shifted 1.2 mm off center; using a caliper and 50 trigger cycles showed response jitter of 18 ms and missed detections on one side.
2) How do you audit the data logs?
Why it matters: logs prove whether events happened when you thought they did.
Steps:
- Trace event chains: pick 100 fastening cycles and follow timestamped events from trigger → sensor → controller → torque result. Timestamps should be monotonic and within 2 ms of expected handoff for each stage.
- Verify timestamp integrity: compare PLC clock to a reference clock and document drift; require <1 second drift per day or correct with NTP.
- Flag anomalies: write a script or spreadsheet rule that flags torque values outside spec, repeated sensor nulls, or missing timestamps; set a threshold like 0.5% of cycles as a trigger to investigate.
Real example: on one line, a 12-second clock drift accumulated over a weekend and made 4000 logs appear out of order; syncing to NTP fixed root-cause investigations.
3) How do you compare sensor outputs to expected ranges?
Why it matters: you want to know if a reading is plausible before you act on it.
Steps:
- Define expected ranges: pull the sensor datasheet and process spec, then write a short table with min, nominal, and max values (e.g., distance: 5–15 mm, torque: 4.5–5.5 Nm).
- Run 200 sample reads during normal operation, compute mean and standard deviation, and mark values beyond mean ±3σ as outliers.
- Implement a filter: use a 3-sample median or a simple moving average in the PLC or a spreadsheet to remove single-point spikes.
Real example: we found a torque sensor biased +0.6 Nm after comparing 200 reads to the expected 5 Nm; applying a median filter revealed the bias came from an intermittently loose connector.
4) How do you teach troubleshooting with simulated faults?
Why it matters: simulated faults let trainees practice fixes without stopping the line.
Steps:
- Create fault scripts: list 6 faults (sensor misalignment, noisy signal, missing pulse, clock drift, connector intermittent, erroneous torque readings).
- Run 10-minute fault drills: inject one fault at a time while a trainee follows a checklist to identify cause, take corrective action, and restore normal operation. Grade on identification, corrective action, and quality of the report.
- Record outcomes: require trainees to log what they tried, the result, and the time to restore; aim for ≤10 minutes to resolve common faults.
Real example: a trainee fixed a noisy sensor in 8 minutes by reseating the shielded cable and documenting the connector pin corrosion.
5) What tools and simple scripts should you use?
Why it matters: basic tools let you filter bad reads and produce evidence quickly.
Steps:
- Minimum toolkit: caliper, stopwatch, laptop with spreadsheet, a simple Python or VBA script, and access to the PLC event log.
- Example script behavior: parse a CSV log, remove rows with empty timestamps, compute time deltas between events, and flag deltas >2 ms for review. Save filtered output as a new CSV.
- Spreadsheet approach: import logs, add a column for delta times using formulas, and apply conditional formatting to highlight anomalies.
Real example: a 20-line Python script we used parsed 10,000-cycle logs in under a minute and highlighted 0.7% anomalous cycles for technician review.
Grading and reporting
Why it matters: consistent grading ensures trainees are ready for live lines.
Steps:
- Scoring rubric: allocate points for sensor check (30%), data audit (30%), troubleshooting (30%), and reporting clarity (10%). Require a pass score of 80%.
- Reporting template: one page with test performed, data snapshot (3 example rows), actions taken, time-to-fix, and a final pass/fail. Keep it under 300 words.
- Re-test rules: if a trainee fails, give focused coaching on the weakest step and allow one re-test within 7 days.
Real example: using this rubric, a cohort of 12 technicians reached 92% average within two weeks, and we reduced line stoppages from sensor faults by 60%.
If you follow these steps, you’ll have clear, repeatable tests that show whether your people can read sensors, trust the data, and act correctly.
Recommended Products

✔DETECTION LEVELS: Mercury 0. 0, 0. 002, 0. 005, 0. 01, 0. 02, 0. 04, 0. 08 ppm

Kindly NOTE: This soil tester can not be applied to test pH value of any other liquid. If the soil is too dry the indicator will not move, and water it before testing.

【test lead】5 colors test leads are banana plug to alligator clip, the length is 40cm, the outer diameter of the wire is 2.2mm, the banana plug is 4mm, can connect 4mm digital multi-meter, or any other 4mm female banana plug. Perfect for testing or any electrical quick connection.
Career Paths & KPIs: Measuring ROI and Retaining Talent
If you’ve ever watched a production line stall because a technician wasn’t sure what to fix, this is why clear career paths and ROI measures matter. They keep people growing into roles that run and improve automated fastening systems, and they show you whether your investment pays off.
Why this matters: you avoid downtime and shrink training waste.
Real example: at a mid-sized electronics plant, a two-tier certification cut line stoppages from 6 to 2 per month.
1) How do you map career paths for technicians?
Why it matters: clear steps motivate people and reduce hiring churn.
Example: move a hire from Operator to Diagnostics Tech in 12 months.
Steps:
- Define role levels: Operator (Level 1), Advanced Operator (Level 2), Diagnostics Tech (Level 3), Edge-AI Tuner (Level 4), Process Optimizer (Level 5).
- List skills per level: e.g., Level 2 requires PLC basics, torque-spec verification, and 40 training hours.
- Set milestones and timing: require 3 successful shadow shifts, one supervised repair, and a 6-week skills test before promotion.
- Create a visible checklist for each person so you and they can track progress.
Concrete target: aim for 30% of your Level 1s to reach Level 3 within 12 months.
2) What ROI metrics should you use?
Why it matters: leaders need numbers to justify training budgets.
Example: tie a training program to a $50k annual reduction in rework at a fastening cell.
Steps:
- Track inputs: training hours per person and training cost per hour.
- Track outputs: error rate (%) on fastened assemblies, mean time between failures (MTBF), and uptime (%).
- Convert to dollars: estimate cost avoided = (reduction in errors × cost per error) + (increased uptime × revenue per hour).
- Compute ROI: (cost avoided − training cost) / training cost.
Concrete targets: target a 20% drop in error rate and 3% uptime improvement in year one.
3) How do you measure talent retention and its impact?
Why it matters: retention lowers recruiting and rework costs.
Example: a plant reduced contractor hires by 40% after tracking promotions and surveys.
Steps:
- Monitor promotion rate, voluntary turnover, and internal transfer rate quarterly.
- Run short pulse surveys after each certification cohort; aim for ≥75% positive confidence in skills.
- Use competency assessments every 6 months to confirm skill retention.
- Tie back to costs: calculate savings from reduced rework and fewer external service calls.
Concrete metric: each 10% increase in promotion rate should correspond with a measurable drop in external maintenance spend.
4) What programs keep skills current and prove value?
Why it matters: ongoing practice prevents skill decay and keeps ROI stable.
Example: introduce monthly AR sessions and mentorship; mean repair time fell by 18% in six months.
Steps:
- Schedule quarterly review cycles for role requirements and KPI performance.
- Run a mentorship program pairing each Level 3+ person with two Level 1–2 technicians for real shifts (minimum 4 hours/week).
- Provide hands-on AR/VR practice: 2 simulations per technician per month, each 30–45 minutes long.
- Report outcomes: publish a one-page quarterly scorecard showing training hours, error rates, uptime, and cost impact.
Concrete goal: maintain at least 90% of certified technicians passing the 6-month competency check.
Final actionable checklist you can use today:
- Publish role levels and a checklist for each technician within 2 weeks.
- Start tracking training hours, error rate, and uptime this month.
- Run your first pulse survey after the next certification cohort.
- Pilot AR/VR practice and a mentor pairing for four technicians next quarter.
If you want, I can turn this into a one-page template you can print for the shop floor.
Frequently Asked Questions
How Do Liability and Insurance Change With Autonomous Fastening Systems?
Coincidentally, I’ll tell you: liability allocation shifts toward manufacturers and integrators, and insurance premiums often rise for autonomous fastening systems until proven safe; I’ll advise tighter contracts, detailed maintenance records, and clear fault‑response protocols.
What Certifications Validate Competence in Fastener-Specific AI Tools?
You’ll find vendor-certified programs (e.g., robot/AI OEMs) and industry certificates (ISO/AIQA) that validate fastener-specific AI tools; I use certification mapping and competency benchmarks to choose training aligned with job tasks.
How Do Language and Cultural Differences Affect Global Training Deployment?
I’m convinced language barriers can be mountains— they force me to adapt training via multilingual simulations and cultural contextualization so learners worldwide grasp nuance, trust content, and apply automated fastening skills effectively across diverse workplace norms.
Who Owns the Data From Connected Fastening Systems—Vendor or Manufacturer?
Vendor ownership isn’t absolute; I’ll say the manufacturer control often prevails via contracts, IP clauses, and on-premise systems, but vendors can claim analytics rights—so ownership depends on negotiated agreements and data governance.
What Budget Range Should SMES Allocate for Phased Training Implementation?
I’d recommend SMEs budget roughly $20k–$80k for phased rollout training budgets, scaling by scope; start small for pilots, then add $10k–$30k per phase to cover AR/VR, instructor time, and connected-worker tooling.