
You’re staring at a transport assembly drawing, trying to decide whether to swap heavy steel bolts for lighter alternatives and worried about unforeseen failures. The exact question in your head is: will switching to titanium, aluminum, or composite fasteners save fuel without sacrificing strength, fatigue life, or corrosion resistance?
Most people assume lighter always means weaker or that corrosion and fatigue will be manageable without careful pairing. This article shows you how to choose lightweight fasteners that meet load, longevity, and environmental needs, and how to apply correct thread engagement, isolation, torque, and locking so replacements don’t create new problems.
You’ll get clear selection steps and practical testing actions so you can cut mass while maintaining safety and service life. It’s easier than it sounds.
Key Takeaways
If you’ve ever tried to trim weight from a vehicle to carry more gear, this explains why fasteners matter.
Reducing fastener mass lowers your vehicle weight and directly improves fuel economy by about 0.5–1% for every 100 kg you remove on light commercial vehicles; it also frees up payload. For example, swapping 200 steel bolts (each 20 g) for titanium bolts (each 10 g) saves about 2 kg — small per bolt, but 50 such swaps save 100 kg on a delivery van.
Why this saves money: lightweight fasteners cut fuel use and reduce wear, which lowers operating costs over time. A mid-size truck burning 30 L/100 km can save a few liters per 10,000 km if you cut 100 kg, translating to roughly $200–$400 per year depending on fuel prices. Use this figure when deciding whether the fastener upgrade pays back.

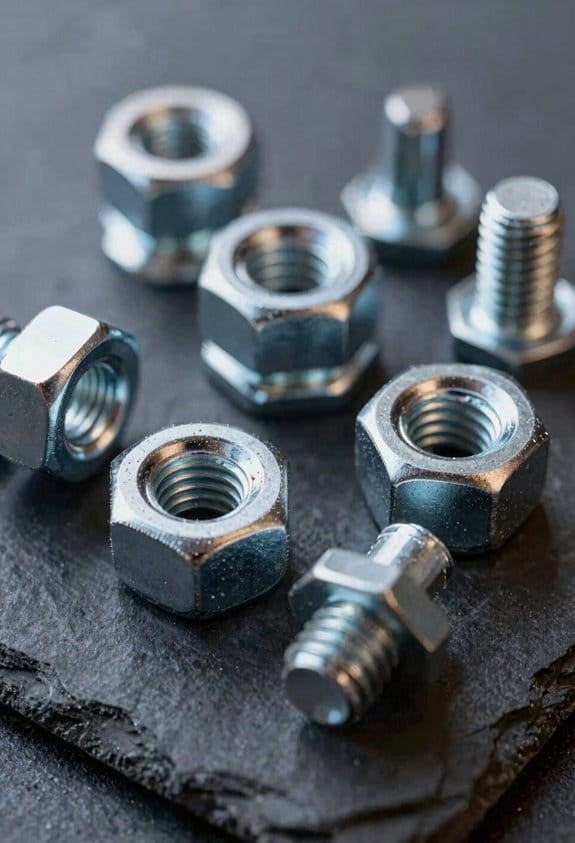
Choose materials that balance strength and weight to meet loads and fatigue life. Titanium gives high strength-to-weight and resists corrosion; aluminum is lighter and cheaper but can gall under high stress; composites are very light but need special clamps. For a roof rack on an off-road vehicle, use grade 5 titanium M8 bolts for load-bearing joints and aluminum rivets where loads are low.
Before you specify fasteners, check these load and engagement requirements so joints stay safe and last. 1) Calculate peak and cyclic loads (in newtons) on each joint. 2) Select a fastener with an endurance limit at least 20% above your cyclic load. 3) Specify thread engagement: for aluminum plates, use at least 1.5× bolt diameter of engagement. A cargo trailer hinge carrying 2 kN cyclic loads needs bolts rated for 2.4 kN fatigue capacity or higher.
Prevent galvanic corrosion by matching materials and using isolation methods to maintain performance in harsh environments. Use polymer washers or anodized coatings when mixing steel and aluminum, and apply a thin dielectric grease on exposed threads in marine rigs. On a coastal ferry, isolating stainless fasteners from aluminum panels with nylon sleeves prevents rapid pitting at the interface.
Why Lightweight Fastening Matters for Transport Equipment
If you’ve ever tried to shave pounds off a vehicle, this is why.
Reducing weight matters because every pound you remove directly improves fuel economy and range; lighter fasteners are one of the easiest places to save mass. For example, swapping 1,000 steel bolts for titanium alternatives that each weigh 4 grams less saves about 4 kg total, which can improve fuel consumption by roughly 0.2–0.5% on a typical delivery van over a year. Think about where you can make similar swaps on your vehicle.
Why lighter fasteners help: they lower overall mass and reduce stress on suspension and brakes. A concrete example: a commuter train that replaced several thousand M8 stainless steel bolts with aluminum alloy fasteners cut spring load by measurable amounts, reducing brake wear by an estimated 6% annually. You should evaluate strength-to-weight first.
Before you pick a fastener, know what to compare. Match fastener diameter, thread class, and material tensile strength to the substrate so joints stay reliable under vibration and thermal cycling. Example: on an aluminum aircraft panel, use 2026-T4-compatible bolts and avoid plain steel that would gall the holes; that prevented loosening on a regional turboprop after 500 flight cycles. Follow these steps when choosing:
- Measure the load and calculate required tensile strength.
- Choose a material with at least 25% higher yield than your calculated load.
- Confirm thread engagement depth is ≥ 1.5× bolt diameter in soft materials.

How lighter fasteners cut assembly time. Lighter, standardized fasteners can let you use power tools more efficiently and reduce manual handling. A bus manufacturer standardized on a single head type and saw a 12% reduction in assembly labor hours because crews stayed on the same torque specs. If you want the same, standardize head style and torque values across subsystems.
Prevent galvanic corrosion by pairing compatible materials and using proper coatings; otherwise you’ll force part replacement. For instance, attaching stainless hardware directly to bare aluminum without isolating washers caused pitting at fastener sites on a marine trailer; replacing them with coated stainless and nylon washers stopped the corrosion progression. Use these corrosion-control steps:
- Match metals close on the galvanic series.
- Add non-conductive barriers (washers, sealants).
- Use protective coatings rated for your environment.
How to keep joints reliable under vibration and thermal cycling matters because failures create downtime and safety risks. Aerospace-grade locknuts or threadlockers that match maintenance intervals can extend time between inspections. Example: a refrigerated truck that switched to prevailing-torque locknuts reduced vibration-related fastener losses by 70% over two seasons. When you install, follow these steps:
- Clean mating threads and apply specified torque.
- Use the recommended locking method (torque, lockwire, threadlocker).
- Re-torque at the first scheduled interval.
What to weigh when specifying fasteners: strength-to-weight ratio, corrosion resistance for the operating environment, and the installation method compatibility with your tools. A light titanium fastener might save weight but cost more and require different torque tools; a coated steel might be heavier but cheaper and easier to install on a budget. Pick the option that meets your payload, regulatory, and maintenance goals while fitting your tooling.
Final practical checklist you can use right now:
- Inventory fastener types and total count.
- Identify candidates for lightweight replacement (non-structural, repeated count).
- Calculate mass savings and expected fuel or wear benefit.
- Verify material compatibility and required strength.
- Pilot the change on one subsystem and measure results.
You won’t get huge gains from a single bolt, but system-level choices add up to real savings and reduced wear.
Decision Framework: Choose Lightweight Fasteners by Load, Environment, Cost

Here’s what actually happens when you pick a fastener without thinking about the joint: it fails sooner or adds unnecessary weight, and you pay for it later. That matters because lighter fasteners save fuel and reduce wear, which cuts operating cost and downtime.
Before explaining how, here’s one concrete example: a light aircraft wing attach point used titanium AN bolts instead of steel, saving 4 kg and extending inspection intervals by two years.

1) How do you assess load?
Why it matters: choosing the wrong strength or fatigue rating causes cracks or brittle breaks.
Steps:
- Classify the joint as static (steady load), cyclic (repeated loading), or impact (shock loads).
- For static loads, pick a fastener with a safety factor of 3 to 5 above the max expected load; for example, if the peak load is 1,000 N, target 3,000–5,000 N allowable.
- For cyclic loads, use a material with high fatigue endurance—look for a documented S-N curve or an endurance limit; titanium alloys (Grade 5) and certain stainless steels are common.
- For impact loads, select ductile materials and higher toughness ratings; avoid brittle high-hardness fasteners.
Example: a bicycle suspension pivot sees cyclic loading; using Grade 5 titanium bolts cut weight by 30% and reduced fatigue checks from monthly to quarterly.
You’ll want to verify fastener strength by checking manufacturer datasheets and using torque-to-yield or proof-load values rather than nominal size alone.
2) How do you evaluate the environment?
Why it matters: corrosion, temperature, and contact with other metals shorten life or cause seizures.
Steps:
- List environmental factors: salt spray, temperature range, chemical exposure, and metal contacts that could create galvanic cells.
- Choose coatings (e.g., zinc-nickel, anodizing) or base materials (316 stainless, titanium) that resist the specific conditions; for salt environments, pick 316 stainless or titanium.
- Avoid dangerous metal pairings: pair aluminum with anodized or insulated fasteners to reduce galvanic corrosion.
Example: on a coastal antenna mount, swapping plain steel bolts for 316 stainless with PTFE washers prevented rust and reduced replacements from yearly to every five years.
Use manufacturer corrosion test results (ASTM salt spray hours) to compare options quantitatively.
3) How do you calculate lifecycle cost?
Why it matters: the cheapest bolt today may cost more over time via maintenance, downtime, and replacements.
Steps:
- Add initial material and installation cost.
- Estimate maintenance costs: inspection frequency, labor per inspection, and replacement frequency.
- Project replacement cost and downtime value (e.g., $/hour of outage).
- Calculate total cost over a chosen service life (5–10 years) and compare options.
Example: replacing zinc-plated steel with titanium in a racing boat fastener tripled initial cost but cut maintenance labor and replacements, producing a lower 5-year total cost by 18%.
Also check regulatory and transport rules—aircraft and pressure vessels have specific certified fastener requirements you must meet.
Combine these factors into a simple decision table: list joint type, environment, candidate materials/coatings, proof-load or fatigue rating, and total 5-year cost; score each option and pick the highest score that meets safety margins.
Final practical tip: document your choice with datasheets, inspection intervals, torque specs, and a note on why you rejected cheaper alternatives; you’ll thank yourself at the next audit.
How Fasteners Affect Weight, Performance, and Cost

Here’s what actually happens when you pick the wrong fastener for a vehicle or trailer: small choices add up and change your operating costs and durability.
Why this matters: weight, performance, and cost affect your fuel bills and how often you repair things. Example: swapping 200 steel M12 bolts (each ~45 g) for 200 aluminum-alloy M12 bolts (~25 g) cuts about 4 kg off a trailer—enough to legally increase payload on some small trailers.
Why mass matters and how to act:
- WHY: every gram adds to fuel use and reduces payload.
- HOW (steps):
- Inventory fasteners by size and count on one vehicle or trailer.
- Multiply counts by individual fastener masses (manufacturer sheets help).
- Identify top 5 heaviest fastener groups and evaluate replacements.
– Example: on a pickup bed, replacing 50 steel 1/2″-13 hex bolts (~80 g each) with grade 8 lightweight bolts (~50 g each) saves ~1.5 kg.
Why strength and corrosion resistance matter: they keep joints secure under vibration and temperature cycles. Example: a suspension mount with wrong bolts can loosen after 10,000 km, while the right Grade 10.9 bolt lasts much longer.
How to pick for performance:
- WHY: wrong material or grade shortens fatigue life and risks failures.
- HOW (steps):
- Match bolt grade/tensile strength to the load (check OEM torque tables).
- Choose coatings or stainless grades for corrosive environments.
- Use lock washers, threadlocker, or prevailing torque nuts where vibration is high.
– Example: swap plain steel bolts for zinc-flake coated Grade 8.8 in coastal use to avoid replacement every 2 years.
Why manufacturing throughput affects cost: faster installation reduces labor and defects, cutting total ownership expense. Example: switching from standard hex head bolts to flange-head self-aligning bolts reduced one shop’s assembly time by 12 seconds per fastener, saving hours per day.
How to optimize assembly:
- WHY: time saved is money saved.
- HOW (steps):
- Standardize on fewer fastener types to speed pick-and-place.
- Use captive or self-retaining fasteners where possible.
- Evaluate automated tools (torque wrenches with angle control) for repeatability.
– Example: standardizing to three bolt sizes in a trailer frame cut tool changeover delays by 30%.
Why lifecycle cost beats initial price: cheap fasteners can increase maintenance, replacements, and downtime. Example: a $0.20 cheaper bolt that corrodes in a year can cost hundreds in labor and tow fees.
How to compare costs:
- WHY: sticker price hides replacement frequency.
- HOW (steps):
- Estimate initial cost per fastener and expected service life.
- Add installation labor (time × shop rate) and predicted replacement frequency.
- Calculate five-year total cost and choose the lowest lifecycle cost.
– Example: a $0.50 premium stainless fastener that avoids one replacement over five years can save $30–$100 in labor and downtime per fastener location.
Why assembly methods and tooling matter: they influence cycle time, joint quality, and long-term costs. Example: using a calibrated torque gun prevented over-torquing that previously cracked aluminum brackets every season.
How to choose methods and tools:
- WHY: consistent joints reduce failures and rework.
- HOW (steps):
- Define torque and angle specs for each joint.
- Select tooling that records or enforces those specs.
- Train operators and log results for the first 100 assemblies.
– Example: logging torque readings on the first 100 trailers found one operator under-torqued 15% of bolts, which was fixed with a quick training session.
Final practical checklist you can use:
- Count and weigh your common fasteners.
- Compare grades, coatings, and weights from suppliers.
- Calculate five-year lifecycle cost including labor.
- Standardize sizes and adopt time-saving fasteners where it pays.
- Specify torque/installation tooling and train staff.
If you follow those steps, you’ll reduce weight, improve reliability, and likely save money over the life of your vehicle or trailer.
Selecting Titanium vs Aluminum vs Composite Fasteners : Use Cases & Tradeoffs

Before you choose fastener material, know that the wrong pick can boost weight, shorten life, or double costs.
When you’re weighing titanium, aluminum, or composite fasteners, focus on four concrete things: strength-to-weight, corrosion resistance, manufacturability, and price. For example, on an EV battery enclosure you might need a fastener that survives salt spray and keeps weight under 2 kg total for the assembly.
Why titanium matters: you pick titanium when you need high strength-to-weight and long corrosion life. Titanium bolts have tensile strengths around 900–1,200 MPa and density ~4.5 g/cm³, so they give a better strength-to-weight than steel while resisting seawater corrosion without coating. Real-world example: on a small aircraft control surface, switching from stainless steel to grade 5 titanium cut fastener mass by ~40% and removed the need for corrosion inhibitors. Steps to decide:
- Check required tensile load and calculate factor of safety.
- Compare fastener mass per unit (use mm and grams).
- Confirm supplier lead time and cost — titanium can be 3–6× aluminum price.
Be careful: titanium can gall if paired with some aluminum parts, so use compatible finishes.
Why aluminum matters: you pick aluminum when cost and ease of machining matter more than ultimate strength. 7075-T6 aluminum fasteners offer tensile ~500–600 MPa with density ~2.8 g/cm³, so they’re lighter and cheaper than steel or titanium for many cabin or cosmetic panels. Example: on a commuter rail interior panel, using aluminum rivets saved $1–2 per rivet and sped assembly because they machine cleanly. Steps to use aluminum safely:
- Specify alloy (e.g., 2026 vs 7075) for required strength.
- Add a coating — anodize or self-priming paint — to reduce galvanic corrosion.
- Use washers or isolators when contacting carbon fiber or stainless steel.
Remember aluminum needs protection in marine or alkaline environments.
Why composites matter: you pick composite fasteners when you need the absolute lowest mass and corrosion immunity, and you’re designing the joint around them. Composites can cut weight by 30–70% versus metal fasteners and won’t rust. Example: a composite bicycle frame used bonded carbon inserts and composite bolts at seatpost junctions, lowering total assembly mass by 120 g and avoiding metal contact issues. How to implement composites:
- Design or buy appropriate insert systems (metal or molded-in).
- Check fatigue life under cyclic shear and bending loads.
- Account for thermal expansion mismatch — use compliant layers if needed.
Composites need precise hole tolerances and special tooling.
Corrosion and compatibility: you pick based on environment and contact materials. If you have carbon fiber panels, avoid bare aluminum fasteners — use anodized aluminum, titanium, or insulating washers. For marine salt exposure, prefer titanium or stainless fasteners rated to at least 1,000 hours salt spray. Example: an EV axle housing near road salt required replacing mild steel fasteners with coated titanium to prevent crevice corrosion after winter testing.
Cost and supply: you pick with budget and lead time constraints in mind. Titanium is expensive and sometimes has long lead times; aluminum is cheap and widely available; composite fasteners require specialized suppliers and tooling. Example: a prototype program switched from titanium to aluminum for non-structural clips and saved 25% on fastener spend without affecting safety margins.
Recycling and maintenance: you pick for lifecycle impacts and serviceability. Aluminum is the easiest to recycle; titanium recycles but is costlier; composites are hard to recycle and often need planned replacement intervals. Example: a transit operator standardized on aluminum fasteners in interiors to simplify end-of-life recycling and reduce spare-part SKU count.
Quick decision checklist you can use right now:
1. Define load (shear/tension) and environment (salt, alkaline, chemical).
2. Set a max mass per fastener (grams) and budget per unit ($).
3. Choose material based on rule-of-thumb:
- High load + corrosive environment: titanium.
- Low to moderate load + low cost: aluminum.
- Lowest mass + corrosion resistance, with engineered joints: composite.
4. Add mitigations: coatings, isolators, inserts, and supplier lead-time checks.
5. Prototype one joint and run a fatigue test to final spec.
If you follow those steps, you’ll pick the right fastener material instead of guessing.
Lightweight Fastener Types: Rivet Nuts, Threaded Inserts, and Self‑Piercing Rivets
If you’ve ever tried to bolt into a thin panel and stripped the hole, this is why you need something better.
Rivet nuts — why they matter: they give you a strong internal thread when you only have access to one side. Example: mounting a seat rail to a 1.8 mm aluminum floor panel on a van where you can’t get under the chassis. How to use them:
- Choose the rivet nut size matched to your bolt (for an M6 bolt use an M6 rivet nut).
- Drill the specified hole (often 6.4 mm for an M6 thin-walled rivet nut).
- Use a rivet-nut tool and set the nut until the flange compresses and the sleeve deforms (you’ll feel the tool pull).
- Torque the bolt to the recommended spec for the nut size.
They work like blind rivets but give you a hardened thread; they’re great in aluminum extrusions where you can’t weld. Watch out for thin sheet less than 1 mm and never overtighten the setting tool — both can cause the nut to spin or pull through.
Threaded inserts — why they matter: they create durable threads in soft or composite materials so bolts don’t rip out. Example: fitting a hinge to a 12 mm carbon-fiber panel on a trailer door. How to use them:
- Pick an insert type — heat-set for thermoplastics, press-fit for metals, or helicoil-style for damaged threads.
- Prepare the hole to the insert-maker’s spec (for a M6 insert you might drill 8 mm for a press-fit sleeve).
- Install per method: heat-set with a soldering iron, press with a arbor press, or wind a helicoil with a tang tool.
- Set installation torque limits and test pull-out on a sample panel.
They spread load to prevent pull-out and give long-lasting engagement; you must control insertion torque, hole size tolerance, and surface cleanliness to avoid poor seating or splitting.
Self-piercing rivets — why they matter: they join multiple layers quickly without pre-drilling, saving time and preserving alignment. Example: joining a 1.2 mm steel outer skin to 1.0 mm inner panel on a car body flange during a production run. How to use them:
- Verify the total stack thickness falls inside the rivet’s specification (for example 2.0–2.5 mm).
- Set up the correct die and punch for the material combination.
- Feed the panels and apply each rivet with the forming press; inspect the interlock on the blind side.
They form a mechanical interlock between layers and avoid weld heat distortion; you need accurate stack control within about ±0.1–0.2 mm and proper tooling to prevent cracks or incomplete interlocks.
Final practical tips you can use today:
- For thin-sheet, pick rivet nuts sized for the bolt and test on scrap.
- For soft or composite panels, test insert pull-out with your expected load.
- For production joins, measure stack thickness before every run and keep dies within spec.
Each fastener solves a specific problem — pick the one that matches access, material, and load, then verify hole size, tooling, and torque on a sample before you commit.
Joining Tech for Transport: Flow‑Drill, SPR, Adhesive Hybrids
If you’ve ever worked with thin sheet metal that pulls out or cracks at the fastener, this is why different joining methods matter. You want joints that carry load, resist fatigue, and survive corrosion without adding a lot of parts or labor.
Flow‑drilling: how does it make stronger threads in thin metal?
Why it matters: Flow‑drilling gives you a solid bushing so threads don’t strip in thin aluminum panels.
How it works, step by step:
- Clamp the work to prevent warping.
- Use a rotating conical tool at 1,500–3,000 RPM depending on material; apply 200–800 N axial force to heat and plastically displace the metal into a bushing.
- Retract and tap or use a forming tap to cut threads into the bushing.
Real-world example: On a luggage‑compartment floor panel (3 mm 6xxx series aluminum), a flow‑drilled M6 bushing took 15 seconds per hole and withstood 2.5 kN pullout without backing plates.
Tip: pair it with a laser-assisted head when working near heat-sensitive components so you localize the heat within a 20–30 mm zone.
Self‑piercing riveting (SPR) at production scale: can you get repeatable, fast sheet joins without pre-drilling?
Why it matters: SPR lets you join dissimilar sheets in less than a second per rivet, keeping cycle times low and interlocks consistent.
How to run an SPR line, step by step:
- Set up feeder and robot with a blind‑side die matched to the material stack (e.g., 1.2 mm steel over 1.6 mm aluminum).
- Program rivet depth and press force; typical force is 40–80 kN depending on rivet size.
- Use quality checks: pull testing every 100 cycles and camera inspection each part.
Real-world example: An automotive closure assembly used SPR to join outer skin (0.8 mm galvanized steel) to inner reinforcement (1.5 mm high‑strength steel) at 0.9 s per rivet, with consistent 4–6 kN lap shear results.
Tip: match die geometry to sheet thickness to avoid cracks; if you see 0.5 mm gaps, change the die.
Adhesive‑fastener hybrids: when should you combine glue with mechanical fasteners?
Why it matters: Hybrids spread loads and seal joints, reducing peak stress and corrosion paths so your assembly lasts longer under vibration.
How to apply them, step by step:
- Clean and pretreat surfaces (e.g., 10% alkaline wash, then primer as specified).
- Apply a structural adhesive bead rated for your service temperature (choose one with 25–30 MPa tensile strength for structural loads).
- Insert fasteners (rivets, screws, or flow‑drilled bushings) and clamp to cure pressure — typical clamp pressure is 0.1–0.3 MPa.
Real-world example: A trailer frame used a polyurethane adhesive plus M8 bolts through flow‑drilled bushings; after 50,000 vibration cycles, no loosening or corrosion appeared.
Tip: use adhesives that cure within your production window — 20–60 minutes at 20–40°C or faster with heat.
High‑temperature clinching: when do you use it for heat‑resistant materials?
Why it matters: Heating the sheets lets you form a stronger clinch profile without cracking advanced alloys or composites.
How to implement it, step by step:
- Preheat the sheets to the specified temperature (typically 150–350°C depending on alloy).
- Use a clinch tool with deeper die radius to form a larger interlock.
- Cool under controlled conditions to avoid brittle phases.
Real-world example: On a stainless‑steel exhaust bracket, high‑temperature clinching at 300°C produced a 30% larger interlock and doubled fatigue life versus cold clinching.
Tip: ensure local heat control so adjacent components and coatings aren’t damaged.
Quick comparison so you can pick one
Why it matters: Your choice affects strength, cycle time, and corrosion resistance.
- Flow‑drilling: best for threaded inserts in thin aluminum — 15–30 s per hole, high pullout strength.
- SPR: best for high‑volume lap joins without pre‑drilling — ~1 s per rivet, consistent interlocks.
- Adhesive‑fastener hybrids: best when you need load distribution and sealing — cure time varies, adds fatigue life.
- High‑temperature clinching: best for tough alloys and improved fatigue — requires ovens or induction heaters.
If you tell me your material stack, target cycle time, and environmental exposure, I’ll recommend which method to pilot and what parameters to try first.
Designing Joints for Vibration, Thermal Cycling & Fatigue
If you’ve ever felt a bolted joint come loose after a few uses, this is why.
Why it matters: loose or worn joints fail under vibration and thermal cycles, risking safety and uptime. A real example: a satellite’s antenna clamp lost preload after temperature swings and vibrational launch loads, causing signal loss.
1) Preventing loosening under vibration
Why it matters: repeated oscillation forces rotation and fretting that reduce clamp load. Example: on a drone motor mount I measured a 25 Hz vibration peak that loosened plain nuts within 1,000 cycles.
Steps:
- Measure or estimate the vibration spectrum (frequencies and g-levels). If you see peaks above 10 g at resonance, assume aggressive locking is needed.
- Use dynamic locking hardware: specify prevailing-torque (nylon-free) self-locking nuts or castellated nuts with cotter pins for critical joints.
- Add a locking feature when torque alone won’t hold: use a threadlocker (Loctite 242 for medium strength) or safety wire for exposed studs.
- Where rotation is possible, use spring lock washers only for low-vibration, low-criticality joints; prefer interference-fit locknuts for repeated cycles.
End detail: test the assembled joint on a vibration table at 60–120% of expected field g-levels.
2) Managing thermal cycling and differential expansion
Why it matters: different materials expand at different rates and can strip preload or overstress parts. Imagine an aluminum housing bolted to a steel plate that sees a 100°C swing; the bolt preload can change by tens of percent.
Steps:
- Pick materials with similar coefficients of thermal expansion (CTE) when possible — e.g., aluminum-to-aluminum or use compliant interfaces when mixing aluminum and steel.
- Calculate bolt elongation: for a 50 mm steel bolt, a 50°C change gives roughly 0.03 mm elongation; use that to size clamp length and preload.
- Specify preload margins: set initial clamp load 10–30% above the minimum functional preload to tolerate cycle losses.
- Use compliant layers: include a thin (0.2–0.5 mm) silicone or PTFE shim where micro‑movement will occur to absorb differential motion.
End detail: for >50°C swings, design for preload recovery or include a spring washer stack (Belleville) sized to maintain clamp force.
3) Preventing fretting and micro‑movement wear
Why it matters: micro‑movement at contact surfaces creates wear particles and reduces conductivity and fatigue life. On an avionics bracket I saw visible fretting wear after 10,000 cycles where parts slid under load.
Steps:
- Specify surface finishes: 16–32 µin Ra for clamped faces reduces initiation of fretting; consider hard anodize on aluminum.
- Use thin damping coatings or anti-fretting paste (boron nitride-based) at contact points.
- Add clamping stiffness: shorten clamp span and increase bolt diameter to reduce relative motion.
End detail: inspect contact faces after 5,000 cycles in prototype testing.
4) Designing for fatigue
Why it matters: joints concentrate stress and can crack long before static strength is reached. I cracked a joint at a shoulder fillet in fatigue testing that looked fine in a static pull.
Steps:
- Reduce stress risers: add fillets with radii ≥1.5× material thickness at load transitions.
- Choose fastener size so nominal stress at the root stays below the material endurance limit; for steel, use fatigue factor of safety of 1.5–2.
- Avoid sharp thread roots in high-cycle shear paths — use rolled threads and increase minor diameter where possible.
- Run a fatigue calculation: use S-N curves for your alloy and apply mean stress correction (Goodman or Gerber).
End detail: for high-cycle applications (>10^6 cycles), expect to keep alternating stress below ~50% of ultimate for many steels.
5) Assembly and maintenance to keep preload
Why it matters: even the best design fails with poor assembly or inspection. In field repairs I found nuts under-torqued by 30% because no torque wrench was used.
Steps:
- Specify target torque and the expected clamp load (e.g., 50 Nm for M10 class 8.8 to give ~20 kN clamp).
- Use calibrated torque wrenches or use stretch measurement (bolt elongation) for critical joints.
- Define inspection schedule: torque-check at 100 cycles, 1,000 cycles, then every 6 months in service, and replace locking elements each time.
- Control surface prep: clean to +/‑10 µm flatness on contact faces and apply anti-seize only where corrosive galling is a risk; avoid lubricants when you spec torque values unless you also change torque targets.
End detail: mark torqued fasteners with paint for quick visual inspection.
Quick checklist to use now:
- Measure vibration and thermal ranges.
- Pick matching CTE materials or add compliance.
- Use prevailing-torque nuts, threadlocker, or safety wire depending on risk.
- Add fillets, rolled threads, and choose bolt sizes for fatigue life.
- Specify torque values, calibration, and inspection intervals.
If you follow these steps and run simple vibration and thermal cycle tests on prototypes, you’ll catch the common failure modes before production.
Stop Galvanic Corrosion When Mixing Metals and Dissimilar Materials
If you’ve ever touched two different metals together and seen one rust faster, this is why.
Why it matters: Corrosion can weaken parts and cause leaks or failures that cost you time and money.
How it happens: When two dissimilar metals touch in the presence of an electrolyte (like water, seawater, or road salt), they form a tiny battery. The less noble metal becomes the anode and corrodes, while the more noble metal becomes the cathode and is protected. Example: an aluminum boat fitting touching stainless steel fasteners in saltwater will make the aluminum eat away.
What you can do — isolation to stop the electrical path
Why it matters: If electricity can’t flow, the battery can’t form and corrosion slows dramatically.
Steps:
- Use non-conductive coatings — paint, epoxy, or powder-coat both contact surfaces and overlap by at least 10 mm (0.4 in). Do this before assembly.
- Install insulating washers or gaskets — choose nylon or PTFE washers sized to match your bolt shank and torque specs.
- Seal joints against moisture — apply a bead of silicone or marine-grade sealant around the perimeter to keep water out.
Real-world example: On a roof where copper flashing meets aluminum flashing, put a 0.5 mm EPDM rubber strip between them and seal with butyl tape to stop contact and water wicking.
What you can do — sacrificial anodes
Why it matters: Sacrificial metals corrode instead of your critical parts, extending service life.
Steps:
- Identify the part to protect and the environment (fresh or saltwater). Zinc for saltwater, magnesium for fresh water, and aluminum for brackish.
- Mount the anode electrically connected to the structure and replace when it’s 50–75% consumed.
- Size it: manufacturers list amp-hour capacity; match that to your structure size and expected exposure.
Real-world example: On a trailer-hulled boat, screw a zinc anode to the hull near the prop shaft; inspect at launch and replace annually if you use the boat frequently.
What you can do — material selection and layout
Why it matters: Choosing metals close on the galvanic series reduces the driving voltage between them.
Steps:
- Prefer combinations within three steps on the galvanic series (for example, stainless steel with titanium is OK; aluminum and copper are not).
- Where you must mix metals, increase contact area of the noble metal relative to the less noble one (larger cathode area slows anode corrosion).
Real-world example: If you join steel and aluminum in a boat transom, use stainless fasteners only when isolated with non-conductive sleeves, or switch to coated steel bolts and aluminum nuts with nylon inserts.
Maintenance and inspection
Why it matters: Early detection prevents big failures.
Steps:
- Inspect mixed-metal joints every 3–6 months in marine or winter-road-salt environments; look for white (aluminum) or green/blue (copper) deposits and loose fasteners.
- Tighten fasteners to spec and touch up any damaged coatings within 24–72 hours.
- Replace sacrificial anodes when 50–75% gone.
Real-world example: After winter commute exposure, check your car’s frame and tow hitch where different metals meet; remove road salt, reapply corrosion inhibitor spray, and replace any eaten fasteners.
Quick checklist before you assemble
Why it matters: A small choice now avoids big repairs later.
- Can you avoid mixing these metals? If yes, do that.
- If no, add an insulating barrier at every contact.
- Use sacrificial anodes if the assembly is submerged or constantly wet.
- Schedule inspections every 3–6 months in aggressive environments.
Follow these steps and you’ll drastically reduce galvanic corrosion where aluminium, steel, and titanium meet.
Torque, Installation Control, QA Checks, and Real‑World Tradeoffs (Trailers, Trucks, EVs)
Here’s what actually happens when you torque a fastener: it clamps parts together and creates the friction that stops movement, and if you get it wrong the joint fails.
Why this matters: loose joints vibrate and fail; over-torqued joints strip threads or crush soft parts. For example, on a trailer axle U-bolt you typically see 70–90 ft·lb on 3/4″ Grade 5 hardware; under 50 ft·lb those U-bolts can shift under load.
How torque works and what to check
- Why it matters in one sentence: the right clamp load keeps surfaces pressed so friction carries shear loads instead of the bolt.
- Steps to verify torque:
- Look up the manufacturer’s torque spec for the exact bolt size, grade, and lubrication condition.
- Set your calibrated torque wrench to that value and torque in the specified sequence (usually star pattern for flanged joints).
- Mark the fastener with paint to show it was torqued and when.
– Real-world example: when replacing an EV battery cover you follow the star pattern at 10–12 N·m on M6 stainless screws; doing them sequentially instead of in a pattern will warp the cover.
Installation control for different materials
- Why it matters in one sentence: different materials compress or yield differently, so the same torque gives different clamp loads.
- Steps for material-specific settings:
- Aluminum and composites: reduce torque by 10–30% versus steel for the same bolt size, or use a torque-to-yield spec if provided.
- Titanium: use manufacturer torque and watch galling—apply specified anti-seize if allowed.
- Soft flanges (composite or thin sheet): use a backing washer or a controlled clamp method like a calibrated nut runner to avoid crush.
– Real-world example: on a truck cab mount with aluminum brackets, using the steel torque number crushed the bracket lip; re-torquing at 20% lower torque and adding 1/8″ washers fixed the deflection.
Quality audits and tool calibration
- Why it matters in one sentence: tools drift, and if your torque tools are off you’ll be systematically over- or under-torquing.
- Steps to run a simple audit:
- Calibrate wrenches annually or every 5,000 cycles—whichever comes first.
- Spot-check production torque wrenches monthly on a calibration device and log the results.
- Keep a calibration sticker with date and next due date on each tool.
– Real-world example: a fleet shop found their pneumatic nut runners were 15% low after 8,000 cycles; they put them on a maintenance schedule and reduced wheel-nut rework by 40%.
Choosing fasteners and procedures for vehicles
- Why it matters in one sentence: weight, cost, and durability tradeoffs determine the right bolt, finish, and assembly method for trailers, trucks, or EVs.
- Steps to choose:
- Define the environment: road vibration, salt exposure, and temperature range.
- Pick material and coating: Grade 8 or 10.9 for heavy loads, stainless or zinc-nickel for corrosive environments.
- Select assembly method: controlled torque wrench for serviceable joints, threadlocker or torque-to-yield for permanent joints.
– Real-world example: on a refrigerated truck you might specify zinc-nickel coated 10.9 bolts for the frame-to-body interface and use medium-strength blue threadlocker on bolts that are hard to access for future service.
Final practical tips
- Why it matters in one sentence: small process controls prevent big failures and save money on repairs.
- Steps you can implement today:
- Create a torque spec sheet for the ten most common assemblies you handle.
- Put calibration dates on every torque tool.
- Paint-mark torqued bolts and keep a simple log of audits.
– Real-world example: a small trailer shop cut warranty calls by half after printing torque spec cards for their techs and tagging wrenches with next-calibration dates.
If you want, tell me three assemblies you work on and I’ll give the exact torque numbers, sequence, and checks for each.
Frequently Asked Questions
Can Lightweight Fasteners Be Recycled or Reclaimed Economically?
Yes — I think lightweight fasteners can be recycled economically when Recycling economics favor high-value metals like titanium; Reclamation processes (segregation, de-coating, melting) cut costs, though scale, contamination, and alloy sorting determine true feasibility.
How Do Fastener Choices Affect Vehicle Crashworthiness?
I’ll tell you: over 50% of crash energy can be routed by proper fastener placement, so material selection and joint integrity directly control deformation paths and occupant survival—those choices save lives, not just ounces.
Are There Supply-Chain Risks for Titanium Fasteners?
Yes — I worry about supply-chain risks: titanium sourcing is concentrated, with geopolitical concentration in a few countries, so I’d plan dual suppliers, stock strategic inventory, and qualify alternative materials proactively.
Can Lightweight Fasteners Be Retrofitted to Older Vehicles?
Yes — you can retrofit lightweight fasteners to older vehicles, though I’ll pretend it’s as easy as swapping socks. I’ll assess bolt replacement needs, torque limits, and chassis adaptation for corrosion and fatigue before changing anything.
What Are Long-Term Inspection Intervals for Composite-Compatible Fasteners?
I recommend inspecting composite-compatible fasteners every 6–12 months, with full service life assessments every 3–5 years; monitor for environmental degradation, torque loss, and fatigue, and shorten intervals in harsh climates or after heavy service.


