You just watched a prototype EV body panel get rejected for weak joints and wondered why adhesives and welding seemed to fail where the parts look fine. Your question is: how can we join thin aluminum and composite parts reliably without heat that causes distortion or delamination? Most teams assume welding or structural adhesives are the only durable options, overlooking mechanical fastening nuances that protect mixed-material assemblies.
This article shows which riveting methods actually prevent galvanic corrosion, maintain strength, and let you assemble from one side, and it explains how tool choice and digital controls cut rework and log quality. You’ll finish knowing which rivet type and tool mix yields consistent preload, mobility, and production throughput. It’s simpler than it looks.
Key Takeaways
If you’ve ever put together something with mismatched parts, this is why rivets are showing up in EVs more.
Why it matters: joining dissimilar materials without heat prevents damage to batteries and lightweight panels. For example, when an EV maker bolts an aluminum roof to a steel frame, using rivets avoids warping that welding would cause to thin panels under 2 mm.
1) How rivets protect mixed-material joints
Why it matters: heat from welding can change metal properties and ruin composites. Use blind, self‑piercing, or solid rivets when you have aluminum, steel, and composites in the same spot.

Example: a battery enclosure made of aluminum joined to a carbon-fiber brace used self‑piercing rivets so the carbon fibers didn’t delaminate.
Steps:
- Select the rivet type for the materials (self‑piercing for aluminum-to-aluminum/steel, blind for closed sections).
- Match grip range to combined thickness within ±0.5 mm.
- Test with 10 sample rivets and inspect for gaps or crushing.
Here’s what actually happens when you need to keep thin panels flat.
Why it matters: welding thin panels (<2 mm) causes distortion that hurts crash performance and fit. For a thin door inner panel, using rivets keeps dimensions within a couple tenths of a millimeter.
Example: an EV door inner sheet (1.2 mm) fastened with structural rivets showed no measurable buckling after assembly.
Steps:
- Measure panel thickness to 0.1 mm.
- Choose rivets rated for that thickness and for expected loads.
- Use a controlled preload tool and verify with a torque or pull test.
Think of hard‑to‑reach assembly like plumbing behind a wall.

Why it matters: some EV cavities can’t be welded or mechanically fastened from both sides. Blind and sealed rivets let you join those areas and protect against moisture.
Example: a battery pack seam sealed with blind rivets and an elastomer washer kept humidity below 3% in environmental testing.
Steps:
- Pick blind sealed rivets with an IP-rated washer.
- Install with a battery or pneumatic setting tool that reaches the spot.
- Perform a leak check on 5 random units per batch.
The difference between unpredictable and repairable structures comes down to the fastener design.
Why it matters: mechanical fasteners give predictable fatigue life and let you repair targeted spots without cutting and rewelding panels. Mark service fasteners so technicians know which to remove.
Example: structural floor rivets were color‑coded; technicians replaced only the damaged rivets after a localized impact, restoring fatigue life to spec.
Steps:
- Use structural rivets for load paths and mark service fasteners with paint or tags.
- Track rivet type and location in the repair manual.
- Replace fasteners with the exact specified type and torque.

Before you pick tools, remember repeatable preload and mobility drive production speed.
Why it matters: electric, battery, and pneumatic riveting tools deliver consistent preload and let you work around conveyors and robots. Choose a tool that hits the specified blind shear strength every time.
Example: swapping pneumatic rivet guns for battery-powered units increased line throughput by 12% while keeping preload variance under 5%.
Steps:
- Specify the required preload or shear strength in N or kN.
- Trial three tool types on your parts and measure repeatability across 50 cycles.
- Standardize the tool that meets the spec and allows the operator or robot to reach the joint.
Final practical tip: always run a 10-piece validation batch that checks fit, preload, and environmental sealing before approving a rivet process for full production.
Why Do EV Makers Choose Riveting vs Welding?
If you’ve ever wondered why some EV makers rivet instead of weld, here’s the short reason: rivets join different materials without heat, so your parts keep their strength.
Why material compatibility matters
Why it matters: heat from welding can warp or weaken thin, lightweight panels, which affects fit and crash performance.
Example: on a battery pack with an aluminum tray and composite cover, rivets join the two without melting either surface, so the cover stays flat and the tray keeps stiffness.
How this helps you:
- Use rivets when joining aluminum to composites or mixed stacks.
- For thin panels under 2 mm, prefer mechanical fastening to avoid thermal distortion.
- Choose blind rivets (pop rivets) for hard-to-reach spots, and solid rivets where you need higher shear strength.
How rivets control stiffness and reparability
Why it matters: controlling stiffness changes how panels share loads and how easy repairs are.
Example: a motor housing repaired after a minor collision can be unpinned at specific rivet rows, letting a body shop replace only the damaged section rather than the whole assembly.
Steps to apply this:
- Design the joint with staggered rivet spacing of 20–30 mm for visible panels to balance stiffness and flexibility.
- Use structural rivets (e.g., Hi-Lok or Huck) where you need predictable preload and fatigue life.
- Mark service rivets with a contrasting paint dot for quick identification during repairs.
Why rivets give predictable fatigue life
Why it matters: consistent preload and installation lead to repeatable fatigue performance, so you know how a part will hold up over time.
Example: on a high-volume door assembly, calibrated pneumatic rivet tools install 1,200–1,800 rivets per hour with the same clamp force, producing doors that open and close reliably for hundreds of thousands of cycles.
How to get that repeatability:
- Calibrate rivet tools daily to set the preload range.
- Use quality-control sampling: inspect every 100th rivet with a pull test.
- Track tool cycles and replace wear parts every 50,000 installs.
When production speed and thermal risk matter
Why it matters: you want fast assembly without introducing heat that can alter tight tolerances or damage batteries.
Example: battery module assembly lines use battery-powered or pneumatic rivet guns to attach cooling plates in under 10 seconds per joint, avoiding heat that could affect battery seals.
Practical choices for your line:
- For high-volume runs, invest in battery or pneumatic rivet tools rated for 1,500+ installs per hour.
- Use robotic riveters for repetitive, high-precision spots and manual guns for final-fit areas.
- Monitor cycle time per rivet and aim for sub-12-second installs on automated cells.
Quick comparison to welding
Why it matters: welding can be appropriate, but only when you have compatible metals and can control heat.
Example: spot welding steel chassis rails is fast and strong, but the same method on aluminum panels can cause distortion that ruins alignment.
When to weld:
- Use welding on similar steels where heat sinking and fixturing control distortion.
- Use riveting when you have mixed materials, thin gauges under 2 mm, or need disassembly.
If you want a take-away you can act on today: inspect your joints and pick rivets when joining dissimilar materials, thin panels, or when repairability and predictable fatigue matter—use calibrated tools and defined rivet spacing of about 20–30 mm for most body panels.
Recommended Products

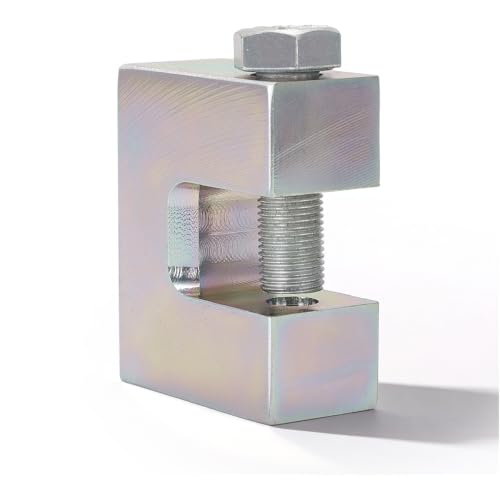
Made of 304 stainless steel: The internal locking wire drawing rivets are constructed from 304 stainless steel, effectively addressing rust and corrosion concerns. The surface undergoes a whitewashing and polishing process for enhanced durability.

Made of 304 stainless steel: The internal locking wire drawing rivets are constructed from 304 stainless steel, effectively addressing rust and corrosion concerns. The surface undergoes a whitewashing and polishing process for enhanced durability.

【High-Quality Materials】 Our pop rivets are made of premium aluminum and steel, ensuring great performance in any environment. They are corrosion and acid-resistant, so you don't have to worry about rusting or breaking.
How Self‑Piercing and Blind Rivets Handle Mixed Materials

If you’ve ever joined aluminum to composite or steel to aluminum, this is why: those mixed-material joints can corrode, delaminate, or weaken if you use heat or the wrong fastener.
Self‑piercing rivets (SPR) and blind rivets solve those problems without melting materials. For example, on an EV door outer panel (aluminum) bonded to an inner composite brace, using SPR avoids heat that would damage the composite core.
How self‑piercing rivets work and when to use them
Why it matters: SPRs give strong, fatigue-resistant structural joints without welding or adhesives, so your panels stay aligned and resist vibration.
1) What they do and how they form the joint:
- A driven rivet pierces the top sheet and flares into the bottom sheet, displacing metal to form a mechanical lock.
- Use a rivet length that leaves 0.5–1.0 mm of mandrel protrusion after forming for most 1–3 mm stackups.
- Typical example: joining a 1.2 mm aluminum outer skin to a 2.5 mm steel inner member on a hatch—SPR creates a solid, load-bearing lap without welding.
2) Practical tips:
- Match rivet material to avoid galvanic corrosion: use aluminum rivets for aluminum-to-composite, and coated steel or stainless for aluminum-to-steel interfaces depending on exposure.
- Set force and die geometry per rivet maker’s chart—don’t guess.
- Test with a 10–20 piece sample run, check pull-out and cross-sectional cuts.
How blind rivets work and when to use them
Why it matters: Blind rivets let you fasten when you only have access to one side, so you can assemble interior trim or sealed enclosures without dismantling the whole structure.
1) What they do and how they grip:
- Blind rivets expand or collapse on the blind side to clamp softer substrates, and you can use sleeves, washers, or bonded inserts to protect composites.
- Example: attaching an aluminum bracket to a carbon-fiber inner panel where you can’t reach the back—use a closed-end blind rivet with a composite-compatible washer.
2) Practical tips:
- Choose rivet style: multi‑grip for variable gaps, structural blind bolts for load zones, and sealed/closed-end for moisture protection.
- Use backing plates or polymer sleeves when you join to delicate composites; specify sleeve outer diameter equal to the hole to prevent crushing.
- Run a 30-cycle fatigue test for any interior structural application.
Corrosion control and material matching
Why it matters: Dissimilar metals in contact with moisture will corrode, ruining the joint and adjacent structure.
1) Practical steps:
- Match or isolate metals: use the same alloy family when possible, or put a 25–75 µm non-conductive coating (paint, epoxy primer) between parts.
- Use sacrificial sealants: apply a 1–2 mm bead of silicone or epoxy around the hole for exposed seams.
- Example: for steel rivets into aluminum panels on an EV underbody, specify zinc-nickel coating on the steel and a 0.05 mm polymer washer to interrupt the cell.
Testing before production
Why it matters: Real joints rarely behave exactly like theory—testing prevents field failures.
Steps to test:
1) Make 10–20 sample joints with the specified rivet, hole size, and tool settings.
2) Do a pull/torque test and a 30–100 cycle fatigue test depending on expected loads.
3) Inspect cross-sections for voids, cracks, or delamination; measure corrosion after 500 hours salt spray if exposure is likely.
Quick checklist before you start production
Why it matters: A short checklist prevents costly rework.
1) Confirm material pair and corrosion plan.
2) Select rivet type, size, and coating from supplier charts.
3) Set and record tool force and die.
4) Produce and test 10–20 samples and run the specified mechanical and corrosion tests.
Follow these concrete steps, and you’ll avoid the usual failures when joining mixed materials without heat.
Recommended Products
Fitment: For 1/2-Inch impact wrench, 3/4"(19mm) socket
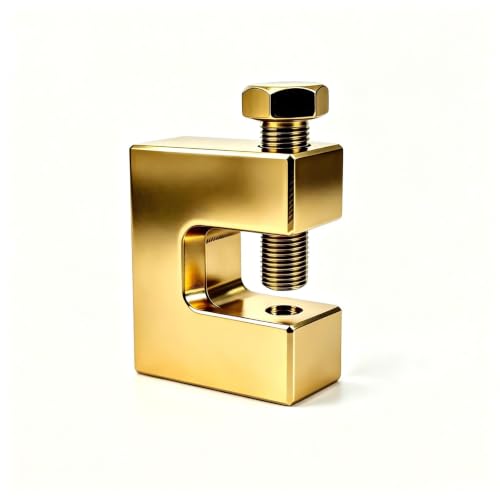
UPGRADED MAGNETIC HOLDING POWER Features an advanced Grade 8 hex bolt (1/2"-20) with an enhanced magnetic tip and deep center recess. This upgraded mechanics design firmly grips the replacement self-piercing rivet in place, completely eliminating frustrating rivet drops and ensuring precise, straight alignment even in tight wheel wells, quarter panels, or door gaps.

Self-Piercing Rivets also known as SPR - Self Piercing rivets made to be used on most SPR Rivet Guns originally designed for aluminum repairs. The rivets also work on steel repairs, designed for Ford F-150 repairs as well as many OEM repairs like BMW, Audi, Jaguar, Land Rover, Mercedes Benz and more foreign and domestic vehicles. Aluminum and steel bonding applications also. Rivet Installation can be performed with a number of SPR guns on the market.
Which Rivet Tools: Pneumatic, Battery, or Electric: Fit Your EV Line?

If you’ve ever stood at an assembly line wondering which rivet tool to buy, this will make your choice simpler.
Pneumatic tools — why they matter: they handle long runs without overheating and keep cycle times tight. Use them when your line already has compressed-air infrastructure and you need high throughput. Example: on a roof-assembly station that sets 800 blind rivets per hour, a pneumatic riveter running at 0.9–1.2 seconds per pull keeps pace without battery swaps. Steps to evaluate:
- Check your shop air: confirm 80–100 psi and 10–20 scfm per tool at peak.
- Match pull force: pick a tool rated for the rivet mandrel shear strength (typically 1.5–3 kN for common EV structural rivets).
- Plan maintenance: schedule daily lubrication and monthly seal checks.
Battery tools — why they matter: they free you from hoses so operators can reach awkward spots and reduce trip hazards. Use them when stations move or when you need flexible tooling across multiple lines. Example: an interior trim team moving between car bodies uses a 18V battery riveter that runs 600–700 cycles per charge with a 2–3 second cycle time. Steps to evaluate:
- Check duty cycle: choose a battery spec that covers your shift (e.g., 2,000 cycles per 8‑hour shift if high use).
- Buy spare batteries: keep at least two spares per tool for continuous work.
- Consider ergonomics: pick models under 3.5 kg to limit operator fatigue.
Electric (corded/servo) tools — why they matter: they deliver precise, repeatable preload and are easiest to integrate with line controls for data capture. Use them where consistent clamp force and monitoring matter, like critical structural joints. Example: a servo riveter tied to PLC feedback applies a controlled 1.8 kN clamp and logs each cycle’s peak force for traceability. Steps to evaluate:
- Define control needs: pick an electric tool with analog or digital I/O compatible with your PLC.
- Specify repeatability: aim for ±3% preload variation if joint fatigue life is critical.
- Budget for integration: include cabling and encoder or force-sensor costs in your capital plan.
How to choose overall — why it matters: matching tool family to your layout, cycle needs, and quality goals saves money and downtime. Quick checklist:
- If you have stable, high-throughput lines with air: choose pneumatic.
- If mobility and flexible stations matter: choose battery, and plan battery spares.
- If preload repeatability and line integration matter: choose electric with PLC I/O.
Final practical tip: run a two-week pilot with one tool type on a representative station, log cycle time, battery or air consumption, and joint pull tests, then scale based on measured data.
Recommended Products

No Battery/Charger:Fits Makita 18V batteries (BL1850B, BL1840B, etc.). Purchase matching batteries separately in our Heimerdinger store.

Gift for Dad: Surprise him with a tool he’ll actually use and love. Ergonomic handle fits naturally in your hand—gentle on joints, even during long jobs. Perfect for Father’s Day, Thanksgiving, Christmas, birthdays, and all holidays
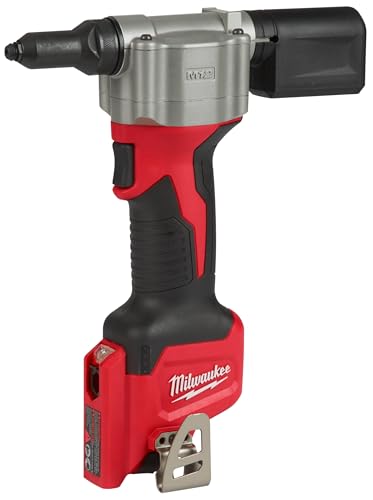
features & benefits: pulls 3/32", 1/8", 5/32", 3/16" rivets 450 1/8" steel rivets per charge 0
What Digital Controls and Brushless Motors Add to Consistency and Speed

Here’s what actually happens when you switch to digital controls and brushless motors on an EV rivet line: you get measurable, adjustable performance instead of guesswork, and that makes your quality and speed predictable.
Why this matters: measurable force and speed let you stop rework before it happens. For example, on a 200-rivet battery pack subassembly run, digital readouts show if preload is off by 10% so you can fix the setting between shifts.
How digital controls help you, step by step:
- Read and set targets — you see preload (in newtons) and cycle time (ms) on-screen, so you can set a rivet preload to, say, 1500 N and a cycle time of 600 ms.
- Monitor tolerances — set upper/lower limits and get an alarm when a rivet falls outside ±5% of target.
- Log failures — each out-of-spec rivet is time-stamped and tied to operator ID for traceability.
Concrete example: on an aluminum housing line, an operator corrected a tool after three out-of-tolerance events over 30 minutes by adjusting preload from 1400 N to 1500 N, cutting scrap by 70%.
Brushless motors give you steadier torque and less downtime. They run cooler, so you can sustain higher duty cycles — for example, move from a 30-minute continuous run with brush motors to a 2-hour run with brushless before a cooldown, depending on ambient temp and tool cooling.
How brushless motors help you, step by step:
- Maintain torque — torque drop is under 5% over long cycles versus 15–25% with brushed motors.
- Reduce maintenance — no brushes to replace; plan maintenance every 6–12 months instead of every 1–3 months.
- Improve uptime — fewer tool swaps mean higher throughput; expect a 10–20% increase in effective line time in many setups.
Concrete example: a mixed-material chassis line went from swapping tools twice per shift to once per shift, saving 45 minutes of downtime daily.
Put digital controls and brushless motors together and you get two things: consistent rivet swells and actionable data. You can program the tool to stop after N bad rivets, preventing a bad batch from progressing, and you can export logs to your QC system for SPC charts.
Practical checklist to apply this on your line:
- Define targets — choose preload (N), cycle time (ms), and acceptable variance (%).
- Configure alerts — set alarms and automatic stops for >X out-of-spec rivets (common X = 3).
- Train operators — show them how to read the screen and respond to alarms in a 15–30 minute session.
- Schedule maintenance — adopt a brushless-friendly plan (inspect every 6 months).
- Review data weekly — look for trends by shift and operator; adjust targets if a process change requires it.
Concrete example: after following this checklist, a small EV subassembly line halved rework rates within two weeks and increased rivets installed per hour from 1,800 to 2,150.
One practical tip: when you set limits, start wide (±10%) for a week to collect baseline data, then tighten to ±5% once you understand natural variation.
Recommended Products

BRUSHLESS MOTOR delivers up to 2,100 lbf of pulling force for fastening rivets, including those made of stainless steel

BRUSHLESS MOTOR delivers up to 2,100 lbf of pulling force for fastening rivets, including those made of stainless steel

BRUSHLESS MOTOR delivers up to 4,500 lbf of pulling force for fastening rivets, including those made of stainless steel
Regional Adoption: China, Europe, and the US – Implications for Sourcing

If you’ve ever decided where to buy industrial tools, this is why.
How should you weigh regional adoption when sourcing riveting tools for EV production?
Why it matters: choosing the wrong region can add weeks to lead time or thousands to cost per line.
China: scale gives low unit prices, but quality varies.
- Example: a Shenzhen vendor will quote a 20% lower price than a German supplier for the same model, but one in ten test units may need recalibration.
- Steps to handle China:
- Audit 5 supplier sites (factory tour, QC records, sample run).
- Require a 3-month warranty and on-site training for first-line technicians.
- Specify acceptance tests (cycle count, torque curve) and reject beyond ±5% tolerance.
Takeaway: you can save 15–30% on tool cost, but plan for testing and warranty logistics.
Before you source from Europe, you need to know what changes.
Why it matters: transit predictability and higher manufacturing standards reduce downtime risk.
Europe: predictable logistics and higher spec vendors with brushless motors and digital controls.
- Example: a Lyon-based supplier delivered repaired spares within 48 hours to a plant in Germany during a production surge.
- Steps to handle Europe:
- Price transit time as a metric (use days, not weeks).
- Require IEC-compliant safety and a parts availability SLA (48–72 hours).
- Budget ~10–15% premium for advanced features like brushless drives and integrated diagnostics.
Takeaway: you pay more, but you cut replacement lead time to days.
Think of US sourcing like choosing between cost predictability and tariff risk.
Why it matters: tariffs and duties can swing total landed cost unexpectedly.
US: tariffs and nearshoring options matter; model duties into landed cost.
- Example: a Michigan plant avoided a 10% duty by qualifying a US-assembled variant and saved $120k annually.
- Steps to handle US:
- Run landed-cost scenarios with duties at 0%, 5%, and 10%.
- Evaluate nearshoring partners within a 1,500-mile radius to cut lead times and duty exposure.
- Include HTS codes and broker fees in your RFQ template.
Takeaway: always include a tariff line in cost comparisons.
How does supplier consolidation affect availability and innovation?
Why it matters: consolidation changes spare parts access and support models.
Consolidation: bigger vendors give integrated support; niche specialists deliver unique features.
- Example: a consolidated vendor provided a single-phone-number service contract covering tools and software updates, letting a plant roll a line back in 72 hours after failure.
- Steps to balance suppliers:
- Qualify at least two large vendors for coverage and two small specialists for innovation.
- Negotiate spare part stock policies (onsite spares for 30 days minimum).
- Include an IP and software update clause if tools have embedded controls.
Takeaway: mix scale for reliability with specialists for capability.
Practical checklist you can use right now.
Why it matters: a checklist turns vague sourcing into action.
– Example: use this on your next RFQ and you’ll get comparable bids fast.
Steps:
- Build RFQ with price, lead time (days), HTS code, warranty, SLA for spares (hours/days), and acceptance test specs.
- Run landed-cost scenarios for China, Europe, and US (include duties, freight, and 30-day spare holdings).
- Audit or request third-party inspection for at least one supplier per region.
- Qualify 2 large vendors + 2 specialists and document response times.
- Update your procurement playbook with these results and re-run annually.
Takeaway: follow these steps and you’ll reduce surprise costs and downtime.
Cost, Throughput, and Maintenance: Switching to Rivet‑Based Production
Here’s what actually happens when you switch an assembly line from welding or adhesives to rivet-based joins: your cost structure, throughput, and maintenance plan all change in concrete, predictable ways.
Why this matters: you want lower per-part cost and faster cycles without surprising downtime. In one EV body shop I visited, switching to self‑piercing rivets cut per‑joint consumable cost by about $0.15 and trimmed 20% off cycle time on a 300‑part assembly, saving roughly $9,000 a month.
Cost: expect immediate, measurable savings.
– Why it matters: lower recurring expenses free up budget for other upgrades.
Example: a midsize plant replaced two 100‑kW welders and their gas with battery rivet tools and saved ~40% on energy bills for that cell.
1) Consumables — rivets cost less. Buy in bulk: a box of 10,000 rivets often runs under $200 versus hundreds for specialty adhesives per equivalent joint.
2) Energy — rivet guns use 200–1,000 W intermittently; welders draw tens of kilowatts continuously and ovens need kilowatts for curing, so expect 30–60% lower power use per station.
3) Secondary operations — you’ll cut adhesive handling, solvent disposal, and oven maintenance costs. Plan to reallocate that budget to rivet inventory and spare tool batteries.
Throughput: you’ll usually speed up lines and reduce rework.
– Why it matters: shorter cycle times increase output and reduce labor per unit.
Example: an electronics enclosure line moved from spot welding to electric blind rivets and cut install time from 18 seconds to 9 seconds per joint, doubling throughput on that operation.
1) Cycle-time gains — blind and self‑piercing rivet systems install in 2–10 seconds per joint, often faster than welding plus inspection or adhesive cure time.
2) Repeatability — use tooling fixtures and digital feeders to keep placement variance under ±0.5 mm, lowering rework.
3) Plan for pattern changes — if you have mixed joints (rivet + weld), map the new sequence so rivet stations don’t bottleneck.
Maintenance: scheduling becomes simpler and more predictable.
– Why it matters: predictable maintenance reduces unplanned downtime and makes planning shifts easier.
Example: a plant replaced pneumatic rivet guns with battery systems that required a battery swap every 8 hours, allowing maintenance teams to schedule one 30‑minute swap per shift instead of ad‑hoc repairs.
1) Routine tasks — set intervals: filter change every 1,000 hours (pneumatic), battery swap every shift (battery tools), and a full service every 3 months.
2) Calibration and wear parts — plan tool calibration and nozzle replacement every 2,000–4,000 cycles to keep preload consistent.
3) Digital checks — use torque/preload feedback on riveters; log deviations over 2% and trigger immediate inspection.
Practical setup steps you should follow.
– Why it matters: small upfront steps prevent quality problems later.
Example: when retrofitting an EV body line, one team followed these steps and cut structural rework to zero in the first 500 vehicles.
1) Audit joints: list every joint type and target preload or shear spec.
2) Select rivet type: blind for single‑side access, self‑piercing for mixed materials; document rivet size and grip range.
3) Tooling plan: assign one tool per operator plus two spares for every 10 tools.
4) Maintenance schedule: write down filter, nozzle, battery, and calibration intervals and put them into the CMMS.
5) Training: give operators 4 hours of hands‑on training and a one‑page checklist for common fault codes.
Quick checklist to avoid structural defects in mixed‑material EV bodies.
- Why it matters: inconsistent preload causes fatigue and alignment failures.
- Example: a plant discovered a 7% preload drop after 6 weeks because they skipped nozzle swaps; they fixed it by enforcing the checklist below.
1) Calibrate tools every 2,000 cycles.
2) Replace nozzles every 4,000 cycles or when you see burrs.
3) Log preload readings each shift; flag >2% drift.
4) Keep rivet inventory labeled by lot and perform incoming visual checks for coating or dimensional defects.
If you want, I can convert this into a one‑page SOP for your shop floor with specific numbers tailored to your parts per hour and joint counts.
Recommended Products
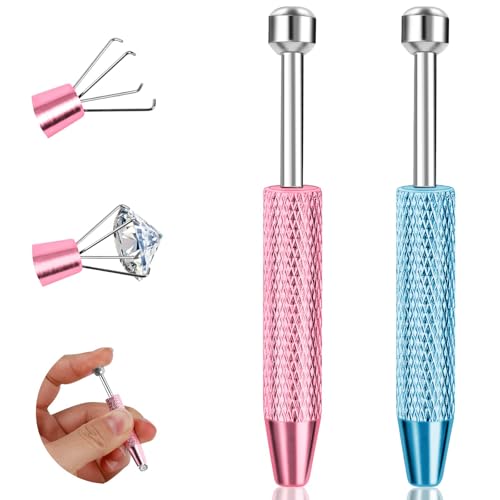
【4 CLAWS GRIP DESIGN】Piercing ball grabber tool designed with 4 claws holder, it can be securely to grasp tiny things and delicate jewelry pieces, like piercing balls, studs, and other small parts. Piercing grabber tool perfect for handling small parts during piercing changes.

Self-Piercing (SPR) Boron Steel Rivets - Ideal for Aluminum Repairs

【3-5 SECOND RAPID EXTRACTION】 Extract self-piercing rivets in approximately 3 to 5 seconds. This tool operates significantly faster than the 10 to 15 minutes required by traditional hydraulic alternatives, directly increasing workshop productivity and workflow efficiency.
Frequently Asked Questions
Are There Special Training Requirements for Workers Using Advanced Rivet Tools?
Yes — I learned both operator certification and ergonomics training are required; practical tool calibration, safety drills, and digital-feedback interpretation contrast with hands-on riveting skills, ensuring precision, consistency, reduced strain, and compliance on modern assembly lines.
How Do Rivet Suppliers Ensure Traceability and Certification?
I make certain supplier traceability through serialized batch records, RFID tags and digital logs, and I schedule certification audits, maintain ISO/AS records, material certificates and third‑party test reports, plus real‑time QA dashboards for continuous compliance.
What Environmental Impacts Do Rivet Materials and Tools Have?
I’d say rivet materials and tools affect material sourcing, energy use and lifecycle emissions through mining, alloying, manufacturing, transport, tool power (battery versus pneumatic), maintenance and end‑of‑life recycling, all shaping overall environmental footprint.
Can Existing Assembly Robots Be Retrofitted for Riveting Operations?
Absolutely — I’d say it’s almost miraculous: retrofit feasibility’s real, but you’ve gotta respect payload limits, tooling interfaces, control upgrades and accuracy tuning; I’ll help assess your robot, parts, and budget to make it happen.
How Do Warranty and Service Contracts for Rivet Tools Typically Work?
I’ll say warranties usually offer a warranty duration of 12–36 months covering defects, while service levels define response times, preventive maintenance, and spare parts; extended contracts add on-site support, calibration, and tiered SLAs.