You’ve just pulled apart a saltwater-damaged assembly and wondered why the rivets and nearby metal failed so quickly.
You’re asking whether a different fastener could stop pitting, crevice corrosion, and frequent rework in marine or washdown environments.
Most people assume any stainless or plated fastener will do, then are surprised by accelerated corrosion and fatigue failure.
This article shows which stainless alloys (including why 316 with molybdenum matters), how to choose tooling and installation force, and practical sealing and inspection steps to extend service life.
You’ll get clear selection and installation actions that cut replacements and maintenance.
It’s easier than it looks.
Key Takeaways
If you’ve ever worked on a boat, this is why stainless rivets matter. Why it matters: they keep joints from failing in salt spray and chemical environments so you won’t be doing constant repairs.

– Use 316 stainless when you expect salt spray or harsh chemicals; it resists pitting and crevice corrosion much better than 304.
Example: a small aluminum swim platform fastened with 316 rivets lasted three summers with no visible pitting while nearby 304 hardware showed white corrosion.
Before explaining how to pick and install them, you need to know their mechanical advantage. Why it matters: stronger rivets mean fewer cracked skins and tighter joints under load.
– 316 stainless rivets typically have higher tensile and shear strength than similar-sized aluminum rivets; for example, a 4.8 mm (3/16″) 316 blind rivet can carry noticeably more shear load than an aluminum one.
Example: replacing aluminum rivets on a dinghy ramp with 316s stopped the repeated loosening caused by people stepping on it.
Here’s what actually happens when you use stainless rivets in service. Why it matters: they last longer and save you time and money on maintenance.
– Expect a longer service life in marine, chemical, and food‑service settings; that translates to fewer touch-ups and lower lifetime cost compared with softer materials.

Example: a commercial kitchen’s stainless‑riveted panels survived daily hot-water washdowns for years with only routine inspections.
Think of cleanliness like a surface finish you can measure. Why it matters: smooth, polished rivets reduce bacterial harborage and make washdowns work better.
– Choose polished 316 rivets and aim for a surface roughness below 0.8 Ra where hygiene is critical; that helps meet common washdown standards.
Example: a food‑service prep table using polished 316 fasteners rinsed clean in under 30 seconds during inspection.
You don’t need expensive testing gear if you follow simple isolation steps. Why it matters: proper installation prevents galvanic corrosion so the joint stays strong.
Steps to avoid galvanic problems:
- Identify dissimilar metals and plan isolation materials (e.g., nylon or PTFE washers, acrylic coatings).
- Use the correct rivet length so the mandrel fully seats and the shop head forms properly.
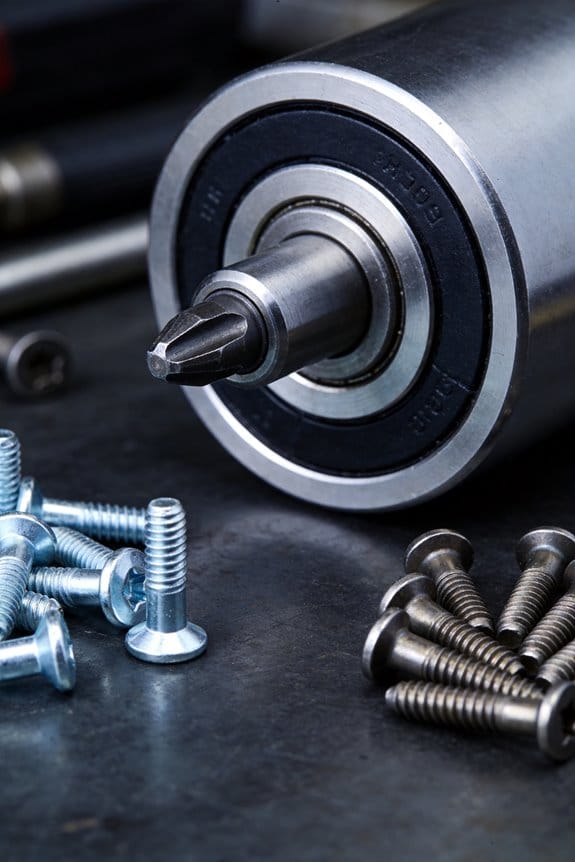
- Install with the right tool and mandrel for 316 rivets—use a rivet gun rated for stainless or a pneumatic unit with the correct nosepiece.
- Inspect the joint for tightness and electrical continuity if required.
– Example: on a steel hull with aluminum fittings, installers used PTFE washers and 316 rivets, then tested continuity; no galvanic current was detected after six months.

Final practical tips:
- Always match the rivet grade to the environment—choose 316 for salt and aggressive chemicals.
- If you can’t replace the mating metal, isolate it.
- Buy rivets and tools sized to your panel thickness and expected load; a simple thickness chart saves mistakes.
If you follow these concrete steps, you’ll avoid most common failures and keep your assemblies working longer.
When to Choose Stainless Rivets (Quick Decision Guide)
If you’ve ever worked on something that rusted after one winter, this is why.
You should pick stainless rivets when you need fasteners that last without rusting, because grade 316 stainless resists salt, acids, and constant moisture far better than aluminum or plain steel. Example: a boat boarding ladder left in salt spray will still have tight joints after three seasons if you use 316 stainless rivets instead of aluminum ones.
Why it matters: corrosion ruins joints and makes maintenance expensive. Before you decide, check corrosion test data for the specific environment; look for pitting resistance numbers or ASTM/ISO test results that match your conditions. Example: if your project faces regular salt spray, find an ASTM B117 salt fog test report showing low pitting after 1,000 hours.
How to choose and install stainless rivets:
- Match the alloy — use 316 for marine or chemical exposure, 304 for less harsh wet environments.
- Size properly — pick a rivet diameter at least 1.5× the thickness of the thicker sheet you’re joining; measure both sheets and add 1–2 mm for clearance.
- Choose the right tool — use a rivet gun rated for stainless; stainless needs about 20–40% more setting force than aluminum.
- Set torque/force — aim for the manufacturer’s recommended pull force; if unknown, test on scrap and confirm the tail flares without cracking.
- Inspect installed rivets — look for uniform heads and no hairline cracks; check every 100–200 hours in harsh service.
Example for step 2: joining 2 mm and 3 mm plates means choose a rivet whose grip range covers 3–6 mm and a diameter like 4 mm for shear strength.
Be aware of trade-offs: stainless rivets are harder to deform, so you may need heavier tools and slightly slower install times, but you’ll cut maintenance intervals and part replacement. Example: a seaside sign assembly took twice as long to rivet with stainless, but it required zero replacements in five years.
Final quick checklist:
- Environment: salt or chemicals? Use 316.
- Measure: thickness + 1–2 mm clearance.
- Tool: rivet gun rated for stainless (20–40% extra force).
- Test: set one on scrap and inspect for proper flare and no cracks.
If you want, tell me the materials and environment and I’ll recommend a rivet size and grip range.
Recommended Products

Materials:Made of premium stainless steel, our pop rivets offer excellent corrosion and acid resistance, ensuring durability in any environment.

Rivet Set: Our silver blind rivet set contains 340 aluminum blind rivets (8 different sizes) and 340 silver washers (3 different sizes) for a wide range of uses. This blind rivet set includes 1/8-inch, 5/32-inch, and 3/16-inch blind rivets with corresponding washers to ensure precise installation.

Complete and Organized Kit: This comprehensive set features 9 sizes of SAE rivets and 3 sizes of stainless steel washers, all conveniently housed in a labeled plastic box
Rivet Construction: Preventing Rust and Water Ingress

Here’s what actually happens when you install stainless rivets: if you get the alloy, mandrel fit, and sealing right, the joint stays dry and rust-free.
Why this matters: water trapped at a fastener quickly causes corrosion that spreads to surrounding metal.
Alloy selection — which stainless to pick?
Pick a grade with at least 12–13% chromium; that forms a passive film that blocks rust. Use these common options:
- 304 stainless — good for general indoor use and wet outdoor locations; think patio brackets near a grill.
- 316 stainless — contains molybdenum and resists chloride attack, so use it within 50–100 yards of the ocean or on boats.
Real-world example: on a coastal deck I replaced 304 screws with 316 rivets and saw no pitting after two winters.
Steps:
- Choose 316 for marine or salt-spray exposure.
- Use 304 for dry or mildly wet environments.
- Avoid mixed-metal contact with aluminum unless you isolate with a washer.
Mandrel design — how the mandrel prevents crevices
Why this matters: a loose mandrel leaves gaps where moisture collects and capillary action pulls water in.
Use a full-bodied mandrel that expands the rivet shank uniformly and creates a tight clamp.
Real-world example: a contractor swapped to full-bodied blind rivets on a gutter splice and stopped leaking at the seam.
Steps:
- Measure hole tolerance: hole diameter should be rivet diameter + 0.1–0.2 mm for a snug fit.
- Select a mandrel length that sets flush without over-compressing the materials.
- Test one rivet and check for visible gaps and movement.
Sealing features and sealant techniques — how to keep water out
Why this matters: mechanical clamping plus a proper seal stops capillary flow and prevents rust under the head.
Use washers or bonded-seal rivets, plus a silicone or polyurethane sealant that bonds to metal and washer materials.
Real-world example: on an aluminum window frame I used a bonded-seal rivet plus marine-grade polyurethane and eliminated leaks during heavy rain.
Steps:
- Clean surfaces with solvent and dry them.
- Apply a 1.5–2 mm bead of polyurethane or silicone around the hole face before seating the rivet.
- Use a bonded-seal rivet or add a neoprene washer sized to the rivet head and compress it when setting.
- Wipe excess sealant within 5–10 minutes to avoid ugly skinning.
Head profile choices — which head to use and why
Why this matters: head shape changes contact area and how well sealants adhere.
- Countersunk heads sit flush and need a precise countersink angle (usually 82°); use a gasket or beveled washer to maintain seal.
- Flange or dome heads spread load and give more surface area for a washer or sealant.
Real-world example: on a metal sign I used flange-headed rivets with flat EPDM washers and saw no edge leaks after a year.
Steps:
- Match head profile to your sealing method: use flange heads with washers, countersunk with matching beveled washers.
- Check compression: after setting, washer thickness should be reduced by about 10–20% for a proper seal.
Final checklist you can use on the job
- Choose 304 or 316 based on exposure.
- Verify hole tolerance: rivet +0.1–0.2 mm.
- Use full-bodied mandrels that expand cleanly.
- Clean, apply 1.5–2 mm sealant bead, and use washers or bonded-seal rivets.
- Match head profile to washer or sealant.
A practical test: set one rivet, spray with water, and inspect for moisture after 24 hours.
Grade 316: Why It’s Used in Marine and Salt-Spray Environments

If you’ve ever left metal gear on a boat and seen tiny pits form, this is why.
Why it matters: choosing the right stainless prevents fast, hidden failures in salty conditions. Grade 316 stainless steel contains molybdenum plus higher chromium, and that mix creates a thin, passive film on the surface that slows rust and resists chloride-driven pitting and crevice corrosion much better than 304. For example, a docking cleat made from 316 will show far fewer pits after a season at a marina than one made from 304.
How this helps you in practice:
- Use 316 rivets when parts are regularly exposed to seawater or salt spray — the molybdenum improves chloride tolerance so rivets resist localized attack.
- Replace 304 fasteners with 316 on any gear within a few meters of the waterline to cut corrosion failures. A set of 316 rivets on a small skiff’s transom will typically last multiple seasons longer than 304 rivets.
- Inspect suspect joints every 6 months; 316 will still need checks, but you’ll see fewer tight crevice corrosion spots and less material loss.
Concrete outcome: with 316 rivets you get fewer failures, longer service life, and lower maintenance costs for boats, offshore gear, and coastal structures. For instance, offshore handrails that switched to 316 fasteners reduced localized corrosion incidents by a noticeable margin during routine inspections.
Stainless Rivets: Strength and Temperature Limits

Before you pick a stainless rivet, you need to know what its strength and temperature limits mean for your job.
Why this matters: if you mismatch rivet grade, your joint can fail under load or after a few cycles. Stainless rivets carry loads by tensile and shear strength, so match the rivet to the forces you’ll see. For example, use Grade 316 when you’re fastening a 5 mm stainless-steel bracket that will carry a 500 N static load; Grade 316 typically has higher tensile strength than 304 and is a reliable choice for light structural work. If you’re fastening something that sees repeated knocks, specify a higher-strength rivet or increase rivet diameter by one size.
Temperature affects how tough the metal stays, and that matters because a brittle rivet can crack during service. Most stainless rivets function between about -30°C and +150°C, so don’t use standard rivets continuously above 150°C. For instance, if you’re attaching insulation near a furnace flange that runs at 200°C, choose a rivet rated for at least 250°C or use a different fastener material.
Thermal cycling causes expansion and contraction, which loosens joints over time, so design for movement. Example: a metal roof panel that heats to 60°C by day and cools to -10°C at night will expand and shrink; use slightly longer shank length, spaced rivets every 150–200 mm, and include a spring or washer if possible. Steps:
- Measure expected temperature swing.
- Select a rivet material and size with a compatible expansion coefficient.
- Allow 0.5–1 mm clearance in holes for movement when needed.
Fatigue limits tell you how many load cycles a rivet can take before cracking, and that matters if your assembly vibrates. Say you build a portable ladder that will see thousands of cycles of loading and unloading; test or specify rivets with known fatigue performance or increase the number of rivets per joint. Steps:
- Estimate cycle count and load amplitude.
- Choose a rivet grade with published fatigue data or add redundancy.
- Inspect joints after a set number of cycles (for example, every 1,000 cycles).
Practical checklist for selecting stainless rivets:
- Calculate tensile and shear loads and add a safety factor of 2–3.
- Pick a rivet grade (316 for higher strength and corrosion resistance).
- Confirm operating temperature range and choose a rivet rated above your max service temperature by ≥25°C.
- Account for thermal cycling by sizing holes and spacing rivets to allow movement.
- Consider fatigue: increase rivet count or choose a higher-grade rivet for vibrating joints.
- Inspect periodically—check for looseness or cracks after the first 100–500 service cycles.
A final concrete tip: when in doubt between rivet sizes, go one diameter up rather than one grade up for static loads, and increase grade for dynamic or high-temperature service.
Typical Applications: Marine, Oil & Gas, Chemical, and Food

Before you choose rivets for different environments, you need to know why the environment changes what will fail first.
I often specify stainless rivets for marine work because salt spray and chlorides cause pitting that eats ordinary steel in months, not years. For example, on a small fiberglass boat I helped refit, Grade 316 rivets at the hatch held without corrosion after three seasons where painted steel fasteners had flaked away. Use 316 stainless for exterior hull fittings and 410 or 430 only for non‑exposed interior parts.
If you’ve ever worked near electronics, this is why non‑magnetic fasteners matter. Marine electronics housings need rivets that won’t disturb sensors or magnetometers, so you should pick austenitic stainless (300 series) or aluminum rivets; a real case: replacing magnetic steel rivets on a chartplotter box with 316 studs stopped erratic compass readings immediately. Pick non‑magnetic alloys for any enclosure housing sensors.
The difference between oil-and-gas and chemical plant conditions comes down to stress type. Oil and gas rigs impose high dynamic loads and exposure to hydrocarbons and H2S, so you should use rivets rated for dynamic shear and with H2S resistance—typically duplex stainless or specially qualified fasteners that meet NACE MR0175. On an offshore platform I inspected, using duplex rivets on pipe saddles reduced cracking around joints that had failed with 304 rivets.
If you’ve ever had a stainless fastener pit in a municipal chemical plant, this is why you must match alloy to media. Chemical plants often expose fasteners to acids and crevice corrosion; choose Grade 316 or higher and avoid less alloyed grades in vapor‑filled crevices. In one plant, switching to 316 bolts and rivets in pump skids prevented monthly maintenance replacements that had been required before.
Before you install rivets in food or pharmaceutical equipment, you need to know sanitation cycles will stress finishes. Food environments get repeated hot-water washdowns and steam, plus aggressive alkaline detergents; pick 316 stainless with a smooth surface finish (Ra < 0.8 µm) and no crevices, so residues can't accumulate. On a dairy line I serviced, rivets with polished heads and 316 alloy passed sanitary inspection where rough zinc‑plated rivets failed.
How to pick the right rivet for each industry — quick steps:
- Identify the environment and dominant stress (salt spray, H2S, acids, washdown).
- Match alloy: aluminum for light, non-corrosive exposure; 300‑series stainless for non‑magnetic and general corrosion; 316 for chlorides and food; duplex for H2S and high dynamic loading.
- Specify surface finish: mechanical polish or passivation for food, mill finish for concealed structural parts.
- Check standards: ask for material certs that reference ASTM or NACE where applicable.
- Test a sample assembly for 6–12 weeks in simulated service before full retrofit.
You want long life and safer installations, so choose the right alloy, finish, and test one assembly first.
Recommended Products

Premium 304 Stainless Steel – Long-Lasting Rust Resistance Made from 304 stainless steel, these rivets offer superior corrosion resistance compared to standard aluminum or galvanized rivets. Ideal for both indoor and outdoor use, including automotive, marine, and patio furniture applications. High tensile strength ensures a secure, long-lasting hold that won’t loosen over time.

SET OF 6 PAIRS - Package includes 6 pairs of stud earrings in 6 sizes, 3mm/4mm/5mm/6mm/7mm/8mm. Gauge Size: 20G =0.8mm, pin size: 10 mm. The butterfly buckle add extra protection for you.

Complete and Organized Kit: This comprehensive set features 7 sizes of SAE steel rivets, all conveniently housed in a labeled plastic box
Stainless vs Aluminum vs Steel Rivets: Performance and Cost
If you’ve ever struggled choosing rivets, this is why. You want the right metal so your joint doesn’t fail or rust out quickly.
Why this matters: picking the wrong rivet wastes time and money and can cause parts to loosen or corrode. Example: a boat deck panel fastened with plain steel rivets can start rusting at the seam within months of salty spray.
Stainless vs aluminum vs steel — which holds better?
- Why this matters: strength determines whether the joint will stay tight under load.
- Stainless: high tensile strength—typical 300-series stainless blind rivets have tensile strengths around 70–85 ksi (480–585 MPa). Use them when you expect heavy loads or salt/chemical exposure. Example: attaching a stanchion base on a sailboat where the joint sees both pull and spray.
- Aluminum: much lighter and usually around 20–35 ksi (140–240 MPa) tensile strength. Choose aluminum rivets when weight matters and loads are low, like fastening interior trim on a light aircraft.
- Steel: strong (40–90 ksi depending on alloy) but rusts unless plated or stainless. Use steel rivets for structural, non-corrosive applications where weight isn’t an issue, such as factory fixtures in a dry workshop.
Which is lightest and how much difference will you feel?
- Why this matters: extra weight adds up over many fasteners and affects balance or fuel efficiency.
- Aluminum is lightest — roughly one-third the weight of steel for the same volume. Example: swapping 100 steel rivets for aluminum can shave several hundred grams from a drone frame.
- Stainless is heavier than aluminum but gives a better strength-to-weight trade than plain steel.
How heat and thermal expansion affect your joint
- Why this matters: mismatched expansion can loosen joints or crack materials.
- Aluminum conducts heat well (~205 W/m·K) and expands more (about 23 x10^-6 /°C). Use aluminum rivets where thermal transfer is needed, like attaching a heat sink to a panel.
- Steel is lower conductivity (~50 W/m·K) and less expansion (~12 x10^-6 /°C). Stainless is lowest conductivity (~15 W/m·K) and has similar expansion to steel, which can cause differential movement against aluminum parts.
Corrosion and longevity — what to expect
- Why this matters: a corroded rivet can stain or weaken the joint.
- Stainless resists corrosion in salt and chemical exposures; choose 316 stainless for marine use. Example: replacing cabin hardware on a seaside restaurant with 316 rivets keeps them looking good for years.
- Aluminum corrodes in some environments (pitting in salty conditions) but won’t produce red rust; it forms a white oxide. Use aluminum with protective coatings if near salt.
- Plain carbon steel will rust quickly if exposed; hot-dip galvanizing or zinc plating can extend life for outdoor, non-marine use.
Cost considerations — upfront vs lifetime
- Why this matters: your budget and maintenance schedule determine real cost.
- Stainless costs the most upfront but often lasts longest, reducing replacement labor. Example: spending 30–50% more on stainless rivets for a marina sign can avoid annual replacements.
- Aluminum rivets are cheapest and save weight, suitable when you plan periodic replacement.
- Steel is the least expensive per unit but factor in coating or future corrosion repairs when calculating total cost.
Quick decision guide — steps to pick the right rivet
Why this matters: a simple checklist gets you the correct rivet without guessing.
1. List the loads (shear/tension) and estimate max force in pounds or newtons.
2. Note the environment (marine, chemical, dry interior).
3. Choose material:
- If high corrosion resistance and strength are required → use stainless (316 for marine).
- If weight is critical and loads are light → use aluminum.
- If strength is needed in a dry setting and cost is primary → use steel (consider plating).
4. Match rivet diameter and shear rating to your load with a 2x safety factor.
5. If dissimilar metals meet, add an insulating washer or coating to prevent galvanic corrosion.
One concrete example to wrap up: for mounting a metal roof panel on a seaside shed, use 3/16″ 316 stainless blind rivets spaced per panel manufacturer specs; they’ll resist salt spray and keep panels tight for years.
If you want, tell me the part sizes, environment, and loads and I’ll recommend a specific rivet size and alloy.
Recommended Products

【High-Quality Materials】 Our pop rivets are made of premium Stainless Steel, ensuring great performance in any environment. They are corrosion and acid-resistant, so you don't have to worry about rusting or breaking.

Materials: Made of premium stainless steel, our pop rivets offer excellent corrosion and acid resistance, ensuring durability in any environment.

Materials:Made of premium stainless steel, our pop rivets offer excellent corrosion and acid resistance, ensuring durability in any environment.
Installation Trade-Offs: Tooling, Force, and Expected Lifespan
Before you install stainless rivets, you need to know that the installation gear and effort matter more than with aluminum or mild steel.
Stainless needs higher setting torque and force, so you’ll have to pick tools rated for the load and mandrel size. For example, use a pneumatic rivet gun rated for at least 3,000 N of pull force when setting 4.8 mm (3/16″) stainless blind rivets in 3 mm steel panels. If your tool is underpowered you’ll get incomplete clinches and lower joint strength.
Why this matters: an imperfect clinch can halve shear strength on a lap joint. I once saw a repair on a trailer where underpowered hand tools left loose rivets; the hitch bracket shifted after 2,000 km.
1) Check tool specs:
- Match mandrel diameter and material to the rivet (e.g., 4.8 mm stainless mandrel with a 4.8 mm rivet).
- Confirm rated pull/load: choose a gun or press with at least 20–30% higher rating than the rivet’s setting force.
- Try a test pull on scrap metal to confirm a clean break and full setting.
Expect to apply greater force during setting, which increases operator fatigue and maintenance. A battery or hand riveter that handles aluminum fasteners may work slowly or fail on stainless; switch to a powered pneumatic or hydraulic tool for production work. Short sentence.
How often you’ll replace rivets depends on environment and installation quality: properly set stainless rivets can last decades in salty or humid conditions and reduce replacement frequency compared with aluminum. For a seaside deck, stainless rivets commonly last 15–25 years versus 5–10 years for aluminum.
Steps to reduce operator fatigue and equipment wear:
- Use a powered riveter with ergonomic grips.
- Position work to avoid awkward reaches—use fixtures if possible.
- Maintain tools: lubricate moving parts every 1000 cycles and check jaws for wear monthly.
- Test set 5 rivets on scrap each shift to verify consistent clinch height.
A final practical note: budget more upfront. Buy a tool rated 20–30% above expected loads and plan for routine maintenance; you’ll save time and replacements over the long run.
Recommended Products

Professional Pneumatic Rivet Gun: with 5 nosepieces 1/4-inch(6.4mm), 3/16-inch(4.8mm), 5/32-inch(4mm), 1/8-inch(3.2mm), 3/32-inch(2.4mm), making it ideal for applications ranging from garage tasks to industrial repairs - One nosepiece is pre-installed

SELF-LOCKING GUN HEAD:Comes with 3 gun heads of different sizes: 1/4 , 5/16 , 3/8 .The head has a self-locking function that allows you to quickly assemble and disassemble the mandrels without tools,improve work efficiency, convenient and fast

Powerful Air Hydraulic Riveter : This heavy duty air rivet gun features an air-hydraulic drive system that delivers up to 3924 LBF (1780 KGF) pulling force, making riveting faster and more labor-saving. Designed for long service life and consistent performance in demanding applications. Includes the following nosepieces: 1/4-inch(6.4 mm), 3/16-inch(4.8 mm), 5/32-inch(4 mm), 1/8-inch(3.2 mm), 3/32-inch(2.4 mm),3 nose pieces are screwed onto the base.50 PCS aluminum pop rivet 3/32*1/4" ,1/8*3/8",5/32*1/2" 3/16*3/4" 1/4*5/8" each 10 pcs
Environmental and Lifecycle Drawbacks to Factor Into Specs
Before you specify stainless rivets, you need to know how their lifecycle affects your project and budget.
Why it matters: lifecycle impacts change permits, costs, and long-term disposal planning in measurable ways. For example, a 1,000‑unit rooftop fastener run for a 50‑year building may add several tons of embodied CO2 compared with aluminum fasteners, which can affect your project’s carbon budget.
1) Quantify embodied energy and emissions
Why it matters: you can make cost and carbon tradeoffs with real numbers.
Steps:
- Ask suppliers for cradle‑to‑gate CO2e per kilogram; stainless is often 6–10 kg CO2e/kg versus 1–3 kg CO2e/kg for aluminum.
- Multiply by the total weight of rivets in your bill of materials to get project‑level CO2e.
- Include processing energy for fabrication if you’re machining or welding, adding roughly 10–20% to the supplier number.
Real example: a 200 kg rivet order at 8 kg CO2e/kg equals 1,600 kg CO2e, and fabrication could push that to ~1,920 kg CO2e.
2) Watch hazardous byproducts and permitting
Why it matters: chromium mining and some stainless processes create wastes that trigger permits and contractor controls.
Steps:
- Request Material Safety Data Sheets (MSDS) and ask whether the alloy contains >10% chromium by weight.
- If it does, confirm with your environmental consultant whether local permits or waste tracking apply; some regions require hazardous waste manifests for chromium-bearing sludges.
- Require contractors to document disposal receipts for any machining swarf or passivation baths.
Real example: a contractor in a coastal city had to pay $2,400 in hazardous waste hauling after a passivation line produced chromium-rich waste, a cost that was avoided by specifying a different surface finish.
3) Plan for end‑of‑life and recycling logistics
Why it matters: stainless resists corrosion but complicates separation, raising disposal costs.
Steps:
- Estimate how much of the rivet mass will enter demolition waste and whether on‑site separation is feasible; separation adds labor (plan 0.5–1 hour per 100 kg).
- Identify recycling facilities that accept mixed stainless and verify their minimum lot size; some require >500 kg shipments.
- Budget for potential landfill diversion charges if recycling isn’t practical, typically $50–$200 per ton extra.
Real example: a 30‑year renovation found stainless rivets embedded in composite panels; crews spent an extra week removing fasteners because mechanical separation was required, increasing labor by 12%.
4) Include maintenance and substitution impacts in specs
Why it matters: durability reduces replacement but may increase upfront environmental and operational costs.
Steps:
- Set expected maintenance intervals (e.g., inspect riveted joints every 5 years, replace if signs of crevice corrosion appear).
- Model life‑cycle cost: compare stainless vs. aluminum over the asset life with at least three inputs — material CO2e, replacement frequency, and end‑of‑life disposal cost.
- Specify acceptable alternative alloys or coatings and require supplier data showing equal corrosion performance for substitution.
Real example: switching from stainless to coated aluminum on a coastal bridge reduced embodied emissions by ~40% in the fasteners and required an inspection twice as often.
Practical spec language you can copy into procurement documents
Why it matters: clear contract language forces suppliers and contractors to provide the data you need.
Steps:
- Require CO2e per kg (cradle‑to‑gate) and MSDS with alloy content.
- Require documented waste handling for chromium‑containing processes and receipts for disposal.
- Require an end‑of‑life plan listing recycling route, minimum lot sizes, and estimated separation labor hours.
Real example: adding these three clauses to a municipal repair contract prevented a surprise $3,000 hazardous‑waste bill during demolition.
If you follow these steps, you’ll balance durability against environmental and budget impacts with measurable data.
Specification Checklist: Choosing the Right Stainless Rivet
Before you pick a stainless rivet, know why it matters: choosing the wrong grade or size can cost you time, money, and cause premature failure.
1) What environment is the rivet for?
Why it matters: corrosion type determines the grade you need.
Example: a salt-spray coastal railing on a marina dock saw 304 fail in two years while 316 lasted over five.
Steps:
- Identify exposure: salt spray, pool chemicals, or indoor humidity.
- If you expect chlorides or seaside exposure, pick Grade 316; for dry indoor uses, Grade 304 is usually fine.
- If you expect acids or solvents, check chemical compatibility charts for 316 before you specify it.
2) What loads and temperatures will the rivet see?
Why it matters: wrong strength or thermal limits cause joint failure.
Example: an exterior steel stair stringer used in winter dropped below −20°C and a soft fastener deformed.
Steps:
- List peak tensile and shear loads in newtons or pounds (e.g., 2,000 N tensile, 1,200 N shear).
- Specify a rivet with at least 1.5× your maximum expected tensile and shear rating.
- For temperatures below −20°C or above 150°C, confirm the rivet’s rated temperature range.
3) Are mandrel and body materials compatible?
Why it matters: dissimilar metals can create galvanic corrosion.
Example: aluminum facade panels attached with stainless rivets corroded at the joint where steel screws were mixed in.
Steps:
- Match or pair metals: use stainless mandrel with stainless body when fastening steel or stainless substrates.
- Avoid pairing stainless rivets with highly anodic metals unless you isolate them.
- If you must pair, specify coatings or insulating washers.
4) Do you need waterproofing?
Why it matters: water ingress causes corrosion and leaks.
Example: a rooftop HVAC chase used standard rivets and leaked around each fastener during heavy rain.
Steps:
- Specify HNBR washers when you need a durable, weatherproof seal.
- Give the washer OD, ID, and hardness (e.g., HNBR, 20 mm OD, 6 mm ID, 70 Shore A).
- Note compression limits for the washer in the spec.
5) Can your tools handle stainless?
Why it matters: stainless is tougher than aluminum and needs more installation force.
Example: a maintenance crew tried to set stainless rivets with an economy tool and had 40% failed pulls.
Steps:
- Calculate total installation force per rivet from the manufacturer’s datasheet.
- Specify a rivet gun with at least that rated pull force plus 20% extra.
- Specify mandrel capture style (closed or open) if debris control matters.
6) What head style, diameter, and grip range do you need?
Why it matters: wrong geometry causes poor clamping or looks bad.
Example: a thin sheet metal sign used dome-head rivets that didn’t compress the layers and looked sloppy.
Steps:
- Choose head style by joint geometry: countersunk for flush, large flange for soft materials.
- Specify diameter (e.g., 4.8 mm) and precise grip range in millimeters (e.g., 3–6 mm).
- Add tolerance limits: max grip +0.5 mm, min grip −0.2 mm.
7) What inspection and replacement criteria will you require?
Why it matters: regular checks catch problems before failure.
Example: a pedestrian bridge had no replacement schedule and rivets that had partially corroded went unnoticed.
Steps:
- Specify visual inspection intervals (e.g., every 12 months) and what to look for: corrosion, looseness, washer compression.
- Define replacement triggers: ≥10% loss of clamping, visible corrosion past surface pitting, or any fractured mandrel.
- List acceptable replacement parts by part number.
Final checklist you can paste into a spec:
- Environment (salt, chemical, indoor) + pick 304 or 316.
- Peak tensile & shear values and 1.5× safety factor.
- Mandrel/body material compatibility or isolation method.
- HNBR washer specs if waterproofing is required.
- Required installation force and tool rating (+20%).
- Head style, diameter, exact grip range, and tolerances.
- Inspection interval and replacement criteria with part numbers.
If you follow those steps, you’ll avoid the common mistakes and end up with a rivet that lasts.
Recommended Products

High-Quality Stainelss Construction:1/8" rivets are made from high-grade 304 Stainless Steel,Stainless Steel Body with Carbon Steel Mandrel,designed with a self-plugging open end,these blind rivets offer lightweight strength and excellent corrosion resistance, durable with no deformation,making them ideal for both indoor and outdoor
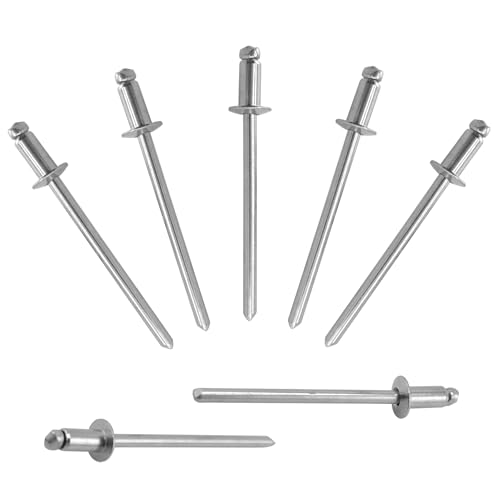
Materials:Made of premium stainless steel, our pop rivets offer excellent corrosion and acid resistance, ensuring durability in any environment.

High-Quality Stainelss Construction:3/16" rivets are made from high-grade 304 Stainless Steel,Stainless Steel Body with Carbon Steel Mandrel,designed with a self-plugging open end,these blind rivets offer lightweight strength and excellent corrosion resistance, durable with no deformation,making them ideal for both indoor and outdoor
Frequently Asked Questions
Are Stainless Rivets Safe for Use Near MRI or Sensitive Electronics?
About 90% of medical facilities prefer non magnetic variants; I’d say yes, stainless rivets can be safe near MRI and sensitive electronics if you choose non magnetic variants and account for eddy current testing to verify compatibility.
Can Stainless Rivets Be Welded or Soldered After Installation?
Yes, they can be welded or soldered after installation; I advise checking weld compatibility for the specific stainless grade and using proper solder procedures, cleaning surfaces, and applying suitable flux and heat control to avoid distortion or contamination.
How Do Stainless Rivets Affect Galvanic Corrosion With Different Metals?
Picture a small island of stainless steel in a sea of metals: I’ll warn you, metal pairing matters—stainless near anodic metals can drive galvanic corrosion per the galvanic series, so I’d isolate or match metals carefully.
Are There Size or Head-Style Limits for High-Pressure Vessel Applications?
Yes — I recommend checking riveting standards: size and head options are limited by vessel pressure ratings, wall thickness, and inspection access. I’ll help select approved diameters, head styles, and certification for safe high-pressure use.
Do Certifications (E.G., FDA, AMS) Exist for These Specific Stainless Rivets?
Yes — I can confirm: material certifications and traceability standards exist for stainless rivets. I’ll guide you through FDA, AMS, and specimen certificates, documentation chains, and mill test reports so you get verifiable compliance.