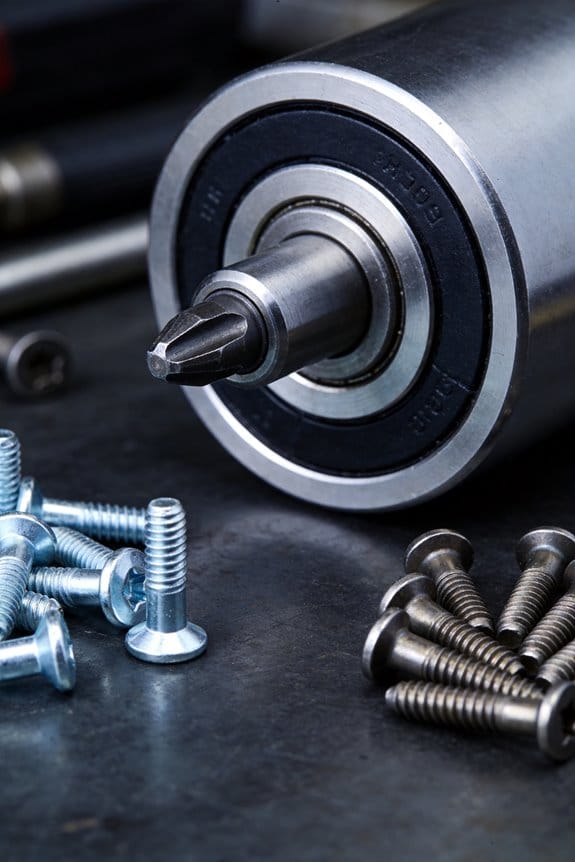
You’re staring at a pile of rivets and a parts list, unsure which alloy will hold your assembly without adding unnecessary weight. You need to know whether to pick aluminum, steel, stainless, titanium, or a specialty metal for a specific strength, corrosion, or thermal requirement.
Most people choose by cost or habit and overlook how material affects long-term strength, corrosion in service, and the tools required to install them. This article will show you which rivet materials meet common performance needs, the trade-offs in strength, weight, corrosion resistance, and installation effort, and the practical safety margins to apply.
You’ll get clear, actionable guidance for picking the right rivet metal. It’s simpler than it looks.
Key Takeaways
If you’ve ever picked a rivet and wondered which metal to choose, this will help you decide quickly.
Why it matters: the rivet material controls how much load your joint can take and how long it lasts. For example, a small aluminum rivet holding a boat’s aluminum deck will fail faster in rough seas than a stainless or titanium rivet would.
1) How does material choice affect strength?

Why it matters: strength determines whether the rivet will shear or pull out under load.
– Steel and titanium give the highest shear and tensile capacity; use them when you need maximum strength.
Example: on a motorcycle frame repair, choose Grade 8 steel or Ti-6Al-4V rivets so the joint handles engine vibration and road shocks.
– Aluminum and copper are weaker but lighter; use them for non-structural panels or where saving weight matters.
Example: aircraft interior panels often use 2026 or 7075 aluminum rivets to save weight while carrying only cabin loads.
2) How does density affect weight?
Why it matters: density affects overall weight of assemblies and fuel efficiency or handling.

– Aluminum (~2.7 g/cm³) and titanium (~4.5 g/cm³) are light compared with steel (~7.8 g/cm³).
Example: swapping steel rivets for aluminum in a baggage rack can save several hundred grams over multiple fasteners.
– If you need a numeric guide, each steel rivet will weigh roughly 2–3× an aluminum one of the same size.
3) How does corrosion resistance affect long-term reliability?
Why it matters: corrosion causes loss of section, loosening, and eventual failure.
– Stainless steels (like 316) and titanium resist saltwater and outdoor corrosion best; pick them for marine or coastal use.
Example: on a boat’s hull fittings, 316 stainless or titanium rivets survive years of spray without pitting.

– Unprotected carbon steel rusts quickly; protect it with coatings or avoid it near dissimilar metals.
Example: a steel rivet in aluminum siding will corrode fast unless you isolate them with a coating or washer.
4) How does temperature performance vary?
Why it matters: temperature changes can weaken the rivet or the joint.
– Aluminum alloys lose strength above roughly 60–150°C depending on alloy; avoid them where ambient or friction temperatures reach that range.
Example: near an exhaust pipe, don’t use 2026 aluminum rivets—choose stainless instead.
– Steel and stainless keep strength up to several hundred °C. Titanium tolerates the highest sustained temperatures of common rivet materials.
5) How do you prevent galvanic corrosion and failures?
Why it matters: dissimilar metals in contact can corrode and fail the joint quickly.
Steps to follow:
- Match metals when possible — use aluminum rivets in aluminum structures, stainless in stainless.
- If you must mix metals, electrically isolate them with a dielectric washer, sealant, or paint.
- Use a safety factor: oversize the rivet by one size or choose a rivet with a rated strength 1.5× the expected load.
Example: when fastening a stainless bracket to an aluminum panel, add a nylon washer and a thin epoxy seal to stop galvanic action.
Quick reference you can use right now:
- For maximum strength: choose steel or titanium rivets.
- For lowest weight: choose aluminum (or titanium if you need both lightness and corrosion resistance).
- For marine or salty environments: choose 316 stainless or titanium.
- For high heat: prefer titanium or high-temperature stainless; avoid aluminum above ~100°C.
That’s the practical rundown; pick the rivet that matches your load, environment, and temperature, and isolate dissimilar metals while using a sensible safety factor.
Quick Decision Guide: Pick the Right Rivet for Your Job
Before you pick a rivet, know why the material matters: it controls strength, weight, and corrosion resistance for your project.
Start by listing your priorities in one sentence: strength, weight, corrosion resistance, or speed of installation. Example: attaching a thin aluminum boat panel needs corrosion resistance and low weight. 1) If you need low weight and fair strength, choose aluminum rivets (grade 1100 or 2026) — they weigh about 2.7 g/cm3 and work well on soft alloys. 2) If you need higher shear/tensile strength, pick steel rivets (mild or stainless 304) — stainless resists seawater. 3) For electrical or dissimilar-metal joints, use copper or a coated rivet to reduce galvanic corrosion.
Before you decide on finish and coatings, know why surface treatment matters: it affects corrosion lifespan and paint adhesion. Example: a painted steel railing on a porch will rust at exposed cut edges without a protective finish. 1) Choose zinc- or hot-dip galvanized finishes for outdoor steel to get years of protection. 2) Use anodized aluminum rivets for painted or powder-coated aluminum panels so colors match and adhesion improves. 3) Consider nylon-coated rivets for light corrosion protection where appearance matters.
Think of head style like shoe choice — it determines load spread and clearance. Why this matters: the head controls whether the rivet sits flush or adds grip. Example: installing cabinet backing where the panel must sit flush to the cabinet face. 1) Use flat (countersunk) heads when you need a flush surface; countersink the hole to the rivet’s angle (usually 82°). 2) Use round or pan heads when you need extra surface area and don’t mind a raised profile. 3) Use large-diameter flange heads for soft materials to reduce pull-through.
If you’re joining to threaded parts, check thread compatibility because a mismatch can strip or fail. Example: attaching a press-in threaded insert into a thin aluminum bracket for a machine guard. 1) Verify the rivet or insert’s thread size and pitch match the mating bolt (e.g., M6 x 1.0 or 1/4″-20). 2) Use steel threaded inserts in soft materials; use stainless if the environment is corrosive.
Before you pick installation method, weigh speed against tool and material limits: faster methods may force a material type or size. Example: using a handheld blind rivet gun on a rooftop HVAC duct where you have limited access. 1) For quick work on thin sheets, use blind rivets (pop rivets) with a compatible gun; pick mandrel style and shear strength based on sheet thickness. 2) For structural work or thicker materials, use solid rivets and a bucking set or hydraulic press — these require two-sided access. 3) For very fast automated assembly, choose rivets rated for the feed system (e.g., setting force and mandrel ejection).
Finally, check hole and grip range because a wrong size ruins the joint. Example: joining two panels totaling 6 mm thickness with a rivet specified 3–5 mm grip will leave a loose joint. 1) Measure total material stack thickness. 2) Select rivet length/grip range that centers in the middle of its rated range (e.g., for 6 mm use a 5–7 mm rivet if available). 3) Match drill size to the rivet manufacturer’s spec (commonly ±0.1 mm tolerance).
Quick checklist you can use on site:
- Priority: list one main need (strength, weight, corrosion).
- Material: pick aluminum, steel, stainless, or copper based on that need.
- Finish: choose galvanized, anodized, or coated for the environment.
- Head: flat for flush, pan/round for surface load, flange for soft materials.
- Threads: match size and pitch when used with bolts or inserts.
- Installation: blind rivet for one-sided access, solid rivet for two-sided structural joints.
- Grip/hole: measure stack thickness and use the rivet’s center range and specified drill size.
You’ll get predictable results if you follow those steps and measure carefully.
Recommended Products

Durable Construction: Crafted with Stainless Steel and Aluminum for long-lasting performance, suitable for both indoor and outdoor use

Complete and Organized Kit: This comprehensive set features 7 sizes of SAE steel rivets and 3 sizes of stainless steel washers, all conveniently housed in a labeled plastic box

Complete and Organized Kit: This comprehensive set features 9 sizes of SAE rivets and 3 sizes of stainless steel washers, all conveniently housed in a labeled plastic box
Rivet Material Trade-Offs: Aluminum, Steel, Stainless, Titanium, Copper/Monel

Before you pick a rivet material, know why it matters: the wrong choice can fail under load, corrode, or add unnecessary weight.
Aluminum — when you need lightness and corrosion resistance
Why it matters: saving weight lets you meet load limits and improves fuel economy on vehicles and drones.
Example: on a backyard-built UAV, switching from steel to 2026 aluminum rivets cut tail assembly weight by 30 grams.
How to use it:
- Choose 2026 or 7075 for higher strength; use 5056 or 6061 if corrosion resistance is your main goal.
- Use rivets sized to give 3–4 times the hole diameter in grip length.
- Avoid high-heat areas above 150°C; aluminum softens and expands.
Aluminum is light and corrosion-resistant, but weaker and expands more with heat.
Steel — when strength and cost are your top priorities
Why it matters: steel rivets carry heavy shear and tensile loads for less money.
Example: on a garage-made trailer hitch, AISI 1018 steel rivets held a heavy bracket under repeated towing stress.
How to use it:
- Pick plain carbon steel for budget builds; pick heat-treated grades (e.g., 4140) for higher loads.
- Coat or galvanize steel when it contacts aluminum or salt air to prevent galvanic corrosion.
- Apply torque limits or use hardened bucking bars to avoid mushrooming.
Steel gives high strength and low cost, but it’s heavier and can corrode when next to dissimilar metals.
Stainless steel — when you want corrosion resistance plus strength
Why it matters: stainless rivets resist rust without extra coatings, so they last in wet environments.
Example: marine railing on a small sailboat used 316 stainless rivets that stayed pristine after two seasons.
How to use it:
- Use 302/304 for general use and 316 for saltwater.
- Expect higher setting force; use a stronger rivet gun or a rivet nut where access is tight.
- Preheat is not needed, but cold-setting is harder—plan for tougher tooling.
Stainless balances strength and corrosion resistance, but costs more and is harder to set.
Titanium — when you need the best strength-to-weight and heat tolerance
Why it matters: titanium keeps parts light while handling high loads and temperatures when aluminum fails.
Example: on a lightweight exhaust bracket for a track car, titanium rivets survived 400°C without deforming.
How to use it:
- Use Ti-6Al-4V rivets for structural work.
- Expect special handling: use carbide or hardened tools and avoid striking with soft hammers.
- Budget for 3–5× the cost of steel rivets.
Titanium gives outstanding strength-to-weight and heat resistance, but needs specialized tools and is costly.
Copper and Monel — when you need conductivity or marine corrosion resistance
Why it matters: these metals carry electrical current and survive seawater better than many others.
Example: a small boat’s grounding strip used Monel rivets to keep electrical continuity and avoid bimetallic corrosion.
How to use it:
- Use copper for electrical joints and Monel in harsh marine fittings.
- Avoid using them where you need high shear strength or tight clamp forces.
- Expect softer deformation—use larger diameters for load-bearing joints.
Copper and Monel offer conductivity and marine resistance, but they’re soft and poor for heavy shear loads.
Quick decision checklist (3 steps)
- Match priority: weight, strength, corrosion, heat, or conductivity.
- Pick material: aluminum for weight, steel for cost/strength, stainless for corrosion+strength, titanium for extreme needs, copper/Monel for electrical/marine.
- Size and tool up: choose correct grip length (3–4× hole diameter), and use the tooling rated for the material.
If you want, tell me your project (material paired, load, environment) and I’ll recommend an exact rivet material and size.
Rivets: Corrosion Resistance and Temperature Limits

Before you choose rivets, you need to know how corrosion affects joint life.
Why it matters: a corroded rivet can fail months or years sooner than you expect. Example: a stainless steel rivet in a boat’s transom lasted five years longer than a plain steel rivet that rusted within two. If you work in moist or salty air, pick metals that resist oxidation.
1) Corrosion resistance — what to pick and why.
- Steel (zinc-plated or plain): cheap but rusts in months in salty air; expect visible rust in 6–12 months on an exposed deck.
- Stainless steel (304, 316): resists rust; 316 is better for saltwater and will last many years without pitting.
- Titanium: extremely corrosion-resistant and light; used on high-end sailboats and will outlast stainless in chloride environments.
- Copper and Monel: good for marine and chemical exposure; Monel resists sulfides and acids.
Real-world example: on a fishing boat, switching to 316 stainless rivets stopped fastener pitting after two seasons.
How to avoid galvanic corrosion (why it matters): when two different metals touch in an electrolyte, one will corrode faster. Example: aluminum hull riveted with stainless steel will corrode the aluminum around the rivet within a year in saltwater.
Steps to prevent galvanic attack:
- Match metals when possible — use the same alloy for rivet and mating parts.
- If you must mix metals, electrically isolate them with plastic washers or sealant.
- Use sacrificial anodes (zinc or aluminum) on structures prone to electrolytic attack.
Before you select materials, you need to know the temperature limits of the rivet material.
Why it matters: temperature affects strength and fatigue life, so a rivet that works at room temperature can fail in heat. Example: an aluminum riveted HVAC duct softened after a summer of attic temperatures above 80°C and showed permanent deformation.
2) Temperature behavior — numbers and expectations.
- Aluminum alloys: start losing significant strength above 60–80°C; they soften and can creep under load. Expect reduced shear strength by ~20–30% at 80°C.
- Steel: maintains strength to roughly 200–300°C for standard grades, but watch for scaling and loss of toughness.
- Titanium: retains strength up to 400–600°C depending on alloy; good for high-temperature frames.
- Stainless steel: many grades stay useful to 300–500°C; some specialty grades go higher.
Real-world example: a turbine housing used titanium rivets because steel fasteners would have softened during repeated 400°C starts.
How to handle thermal cycling (why it matters): repeated heating and cooling causes fatigue and loosening at the joint.
Steps to minimize thermal-cycling damage:
- Use materials with similar thermal expansion coefficients to reduce differential movement.
- Choose rivet types that allow some movement (e.g., blind rivets with appropriate mandrel design).
- Inspect and torque or replace rivets after specified cycles if the service manual requires it.
A few practical checks before you buy rivets:
- Identify the environment (saltwater, chemical exposure, dry indoor, high heat).
- Pick a material grade with proven performance in that environment (e.g., 316 for saltwater, titanium for high heat).
- Prevent galvanic pairs or isolate them.
- Verify temperature ratings: note expected max temperature and peak cycles, then choose a rivet whose datasheet exceeds those values by a safety margin (typically 25–50%).
Real-world example: for a coastal roof repair, I used 316 stainless rivets and sealed each head with a marine polyurethane; after three winters there was no corrosion and no leaks.
If you follow those checks, you’ll pick rivets that last and avoid surprises.
Recommended Products

Premium 304 Stainless Steel – Long-Lasting Rust Resistance Made from 304 stainless steel, these rivets offer superior corrosion resistance compared to standard aluminum or galvanized rivets. Ideal for both indoor and outdoor use, including automotive, marine, and patio furniture applications. High tensile strength ensures a secure, long-lasting hold that won’t loosen over time.

Rivet Set: Our silver blind rivet set contains 340 aluminum blind rivets (8 different sizes) and 340 silver washers (3 different sizes) for a wide range of uses. This blind rivet set includes 1/8-inch, 5/32-inch, and 3/16-inch blind rivets with corresponding washers to ensure precise installation.

SET OF 6 PAIRS - Package includes 6 pairs of stud earrings in 6 sizes, 3mm/4mm/5mm/6mm/7mm/8mm. Gauge Size: 20G =0.8mm, pin size: 10 mm. The butterfly buckle add extra protection for you.
Rivet Strength Metrics and Reliability (Shear, Tensile, Solid vs Blind)

If you’ve ever held two metal plates together and wondered which rivet won’t fail, this is why.
Why it matters: choosing the right rivet affects whether your joint holds under sideways or pulling forces and how long it lasts under repeated stress.
Shear vs tensile strength — what they mean for your joint
Shear strength is how much sideways force a rivet resists before it shears off; tensile strength is how much pulling force it resists before it pulls out or stretches. Pick rivets whose rated shear or tensile capacity exceeds the maximum load by at least 50% for safety in vibrating or structural applications. For example, a 6 mm steel solid rivet can resist roughly 8–12 kN in single-shear, while a comparable blind rivet of similar diameter often resists closer to 3–6 kN, depending on material and mandrel design.
Real-world example: aircraft skin panels
In small aircraft, manufacturers use solid aluminum or steel rivets on skin panels because those rivets give higher shear capacity and stiffer joints; you can actually see less panel flex around each solid rivet. That stiffness reduces fatigue cracks around the hole over thousands of flight hours.
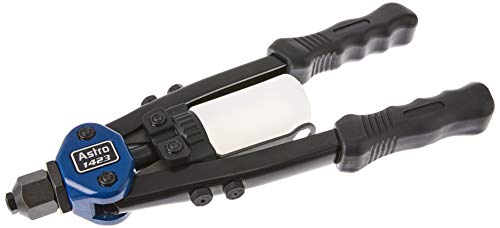
Solid vs blind — trade-offs and when to pick each
Solid rivets:
- Strength: they give higher shear and tensile capacity for the same diameter.
- Stiffness: they make the joint stiffer, which lowers fatigue around the hole.
- Access: they need access to both sides of the joint.
Blind rivets:
- Convenience: you can set them from one side.
- Lower strength: expect roughly half the shear capacity of a comparable solid rivet for many designs.
- Fatigue: they usually show poorer fatigue life under high-cycle vibration.
Real-world example: building a steel stair stringer
If you’re fastening a steel stair stringer where each joint sees fluctuating loads from people walking, use solid steel rivets (or bolts) at primary load paths; that will cut down on joint movement and reduce fatigue cracking near the holes.
How to match rivet choice and material to your needs — steps
Why this matters: following steps keeps you from undersizing rivets and facing early failures.
- Estimate worst-case loads: calculate peak shear and tensile forces on the joint.
- Choose safety factor: use 1.5×–2× for static structural work, 2×–3× for vibrating or safety-critical joints.
- Pick material: use steel or high-strength aluminum where loads are high; use stainless for corrosion resistance but check strength ratings.
- Select rivet type: choose solid rivets for structural and high-cycle fatigue areas; choose blind rivets for hard-to-reach places or non-structural uses.
- Verify hole fit and installation: ensure hole clearance matches rivet spec and that installation tools seat the rivet fully.
Real-world example: fixing a trailer tongue
If you replace rivets on a trailer tongue that sees road vibration, calculate tongue shear loads, pick steel solid rivets with a 2× safety factor, and check that holes are reamed to the correct diameter to avoid loose fit and premature fatigue.
Quick actionable numbers to remember
- Safety factor: 1.5–2× for static, 2–3× for vibration.
- Comparative shear: typical solid rivet ~8–12 kN for 6 mm steel; blind rivet ~3–6 kN for similar size.
- When in doubt, go up one rivet diameter or use steel instead of aluminum.
Follow these steps and numbers, and your joints will last longer under load.
Installation, Tools, and Cost by Rivet Material

Before you pick a rivet, know how the material affects your tools, time, and cost — because those three decide if the job is practical for you.
Aluminum rivets: Why it matters — they save you time and money on tools. Example: attaching a 1/8″ aluminum sheet to a frame for a backyard cart. Tools and steps:
- Use a 3/16″ hand riveter or a 3/16″ pneumatic rivet gun.
- Drill a 1/8″ hole, insert the rivet, and squeeze until the mandrel snaps (about 1–2 seconds per rivet).
- Inspect the shop-flared tail for a 1/16″ to 3/32″ flare.
Aluminum is soft, so tool wear is minimal and rivets set quickly; expect under a minute per fastener on average. Cost: low — typical 1/8″ aluminum blind rivets run $0.03–$0.10 each in small quantities.
Steel and stainless steel rivets: Why it matters — they need more force and protection against corrosion. Example: fastening a steel trailer tongue plate with 3/16″ rivets. Tools and steps:
- Choose a heavy-duty pneumatic riveter rated for at least 2,000–4,000 lbf pull.
- Match rivet shank diameter to hole size (e.g., 3/16″ rivet in 3/16″ hole).
- Run rivets at a steady pace; stainless rivets may take 2–4 seconds each and need firm, consistent pressure.
Steel rivets increase tool load and may require periodic lubrication; stainless takes longer because it resists deformation. Cost: steel is moderate ($0.05–$0.20 each), stainless is higher ($0.20–$0.60 each) and you should add anti-corrosion coatings or sealant where dissimilar metals meet.
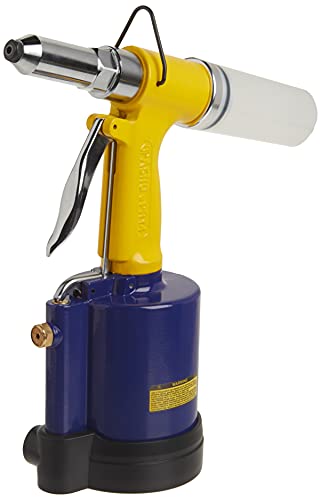
Titanium rivets: Why it matters — they demand specialized gear and add big cost. Example: repairing a small aircraft skin panel with 3/32″ titanium shop rivets. Tools and steps:
- Use a high-force, aviation-grade rivet gun or a hydraulic rivet press capable of the specified installation force (check rivet spec).
- Follow maker torque and squeeze profiles; hand technique matters for each shot.
- Maintain tools after every session: clean pistons, replace worn seals, and check nosepieces.
Titanium is light and strong but tooling and maintenance are intensive; expect rivets to cost $0.50–$2.00 each and tools to be specialty-priced.
Copper and Monel rivets: Why it matters — they’re softer to set but cost more for corrosion or conductivity needs. Example: joining copper busbar plates in an electrical panel with 1/4″ rivets. Tools and steps:
- Use a standard heavy-duty hand or pneumatic riveter sized to the rivet shank.
- Drill or punch a clean hole to exact diameter, place the rivet, and set with steady squeezes (soft materials flare easily in 1–3 seconds).
- Verify electrical continuity or corrosion resistance after installation.
Copper and Monel give easy setting and good conductivity; expect material premium — Monel runs higher than copper and is chosen when saltwater corrosion is a concern. Price range: copper $0.30–$1.00 each, Monel $0.60–$1.50 each.
Quick selection checklist you can use on the job:
- Match rivet strength to application load (shear/tensile).
- Pick a tool rated for the rivet material and size.
- Budget for per-rivet cost plus tool wear and maintenance.
Example: For a 1/8″ aluminum panel on a lawn trailer, use 1/8″ aluminum blind rivets and a 3/16″ hand riveter; you’ll spend under $0.10 per rivet and do each in about a second.
Recommended Products
Includes the following nosepieces: 1/4-inch(6.4mm), 3/16-inch(4.8mm), 5/32-inch(4mm), 1/8-inch(3.2mm), 3/32-inch(2.4mm), 3 Nose pieces are screwed onto the base

Great tools at a great price
Patented structure increases power and leverage when setting POP blind rivets (not for threaded rivet nuts)
Quick Selection Table: Best Rivets for Common Applications
Before you choose rivets, know that the right material and type affect strength, weight, and corrosion resistance.
For lightweight assemblies like aerospace and automotive, use aluminum or titanium rivets because they cut weight and handle vibration differently. Aluminum rivets weigh about one-third of steel, install faster with a blind-rivet gun, and work well on sheet metal—think replacing a dented car body panel with 1/8″ (3.2 mm) aluminum solid rivets spaced 2–3″ (50–75 mm) apart. Titanium gives much higher strength-to-weight for critical parts; example: on a small aircraft skin repair, swap to 3/16″ (4.8 mm) titanium solid rivets where shear strength matters.
For structural steelwork, choose steel solid rivets for maximum shear and tensile strength because your joints carry heavy loads. Example: joining 1/4″ (6 mm) steel plates on a trailer frame, use 1/4″ steel solid rivets heated briefly for installation, then peen the tail to create a durable joint.
For marine or chemical environments, pick stainless steel or Monel for corrosion resistance since salt attacks ordinary steel fast. Stainless is your go-to for boat fittings—use 1/8″ 316 stainless blind or solid rivets on deck hardware—while Monel performs better in extreme saltwater or acidic conditions, like piping clamps near the engine room.
For electrical connections or soft-joint needs, use copper rivets because they conduct electricity and deform for a tight fit, though they’re weaker; example: fastening a braided copper grounding strap, use 3/16″ copper rivets and compress them firmly for conductivity.
Decide between solid and blind rivets based on access and strength because installation constraints change what you can use. Solid rivets give the highest strength but need access to both sides and a bucking bar; blind (pop) rivets install from one side and are faster—use blind rivets (size matched to material thickness) for repairs where you can’t reach the back.
Quick selection checklist — follow these steps:
- Identify load type: shear or tensile.
- Pick material: aluminum for light weight, titanium for high strength-to-weight, steel for heavy loads, stainless/Monel for corrosion, copper for conductivity.
- Choose form: solid for strength (access both sides), blind for single-side installation.
- Match rivet diameter to total material thickness: common rule is rivet length = grip thickness + 1.5× rivet diameter.
- Space rivets based on material: typical 2–3× rivet diameter apart for sheet metal.
If you follow those steps, you’ll pick rivets that match your project requirements and avoid common failures.
Recommended Products

Materials: Made of premium stainless steel, our pop rivets offer excellent corrosion and acid resistance, ensuring durability in any environment.

【High-Quality Materials】 Our pop rivets are made of premium Stainless Steel, ensuring great performance in any environment. They are corrosion and acid-resistant, so you don't have to worry about rusting or breaking.

Materials:Made of premium stainless steel, our pop rivets offer excellent corrosion and acid resistance, ensuring durability in any environment.
Frequently Asked Questions
How Do Rivet Materials Affect Electromagnetic Interference (EMI) Shielding?
Rivets affect EMI shielding by altering conductive continuity and magnetic permeability; I choose stainless or copper for conductivity, steel or titanium for magnetic needs, and I guarantee tight joints so rivets don’t break shielding paths or add permeability.
Can Different Rivet Materials Be Recycled Together Safely?
No, I can’t recommend mixing all rivet materials: recycling compatibility varies and contamination risks arise when alloys mix; I’d separate aluminum, steel/stainless, titanium, and copper/Monel to avoid degraded batches and processing issues.
Do Rivet Materials Influence Paint or Coating Adhesion?
Absolutely — like a Victorian clockmaker, I know rivet material affects paint: surface preparation and coating compatibility matter greatly; aluminum, stainless, copper or steel each bond differently, so I’d tailor pretreatment and primers accordingly.
How Do Galvanic Interactions Change Over Decades in Mixed-Metal Assemblies?
Galvanic progression accelerates as dissimilar metals couple, I’ve seen crevice evolution concentrate salts and oxygen depletion, causing localized corrosion that widens over decades, so coatings, isolation, and sacrificial anodes slow but don’t stop it.
Are There Health or Safety Concerns Handling Specific Rivet Materials (Dust, Fumes)?
Think of rivets as different spices—I’m cautious: lead exposure risks from old or plated parts and beryllium dust from certain alloys demand ventilation, respirators, and hygiene; I avoid inhaling dust and use proper PPE.