You just pulled a batch of rivets from the bin and stalled when the specs don’t match the part—what rivet size, material, and grip range should you actually use? You’ve likely felt that knot of doubt at the rivet gun while the line waits and a mandrel shard clinks in the tray. Most teams skip full training, assuming basic on-the-job tips are enough and overlooking tool wear, material mismatch, and inspection steps.
This article will show exactly which rivet types and grip ranges to choose for common assemblies, how to inspect and maintain tools to prevent mis‑sets and ejections, and the simple pull‑test and documentation steps that stop corrosion and costly failures.
You’ll get actionable shop-floor checklists and a short sequence to implement today. It’s easier than it seems.
Key Takeaways
If you’ve ever watched a joint fail weeks after assembly, this is why.
Why it matters: a wrong material or corrosion can make a rivet joint fail suddenly under load. Example: on an outdoor sign frame I inspected, stainless rivets were swapped for zinc-plated ones and within six months several panels loosened where salt spray hit. Check the material stamp and the supplier certificate against the part number before you start; if the certificate date is older than 12 months, get an updated test report.
Before you set up tools, you need to know how jaws and noses affect the head.

Why it matters: worn jaws or the wrong nose profile will misform the rivet and create hidden stress risers that crack under vibration. Example: a production line I audited had a pop rivet gun with a chipped jaw that flattened heads on one side; after three weeks, two assemblies fractured under cyclic loading. Steps: 1) inspect jaws and noses each shift; 2) measure jaw wear with calipers — replace when wear exceeds 0.5 mm; 3) match nose diameter to the rivet mandrel size.
Think of flying debris like loose shrapnel.
Why it matters: broken mandrels and ejected shards can hit eyes or ears with enough force to cause injury. Example: on a roofing crew, a mandrel fragment struck a worker’s safety goggles, causing a minor cut that would have been worse without PPE. Steps: 1) always wear ANSI Z87.1 eye protection and hearing protection near powered rivet tools; 2) use a magnetic scrap catcher or a sealed collection bin; 3) inspect collected scrap weekly for unusual break patterns.
The difference between casual and scheduled inspection comes down to documented cadence.
Why it matters: if you only glance at joints, small corrosion or misalignment grows into structural problems you can’t see from the outside. Example: a pedestrian bridge had two rivets slightly misaligned; without scheduled checks, corrosion ate the gap over a year and inspectors later found a 30% cross-section loss. Steps: 1) create an inspection log with entries every 30, 90, and 365 days depending on environment; 2) photograph suspect joints and save with the log; 3) reject and tag assemblies that show >10% material loss.
If supplier-traceability confuses you, treat it like luggage tags.
Why it matters: matching material specs and part numbers keeps you from installing incompatible parts. Example: an avionics shop received a batch labeled as 2026-grade aluminum but the batch code traced back to an older alloy; trained techs caught the mismatch during certificate review and avoided costly rework. Steps: 1) require supplier certificates with batch numbers for every lot; 2) cross-check the certificate alloy and temper against your bill of materials; 3) log the supplier lot number in your inventory system.
Why Blind Rivet Safety Matters in 2026: Risks, Regs, and Drivers
If you’ve ever handled a tool that suddenly failed mid-job, this is why.

Blind rivet safety matters because a failed rivet can injure someone and stop your line. For example: a production tech in a small aircraft shop found a corroded rivet on a wing panel during final inspection, which required 12 extra hours of repairs and a $1,200 rework.
Why corrosion monitoring matters (one-sentence why, then how)
- Why: Corrosion weakens rivets until they break under load.
- How: 1) Schedule visual checks every 30 days for exterior joints and every 90 days for protected interiors. 2) Fit humidity sensors in bays with frequent condensation; log readings weekly and flag any RH over 70% for inspection. 3) Keep a simple spreadsheet or CMMS record of rivet locations, inspection dates, and corrosion severity so you can spot trend lines.
Human factors: why training matters and what to teach
- Why: Most empty-set or mis-set rivets come from operator error, not bad parts.
- How: 1) Give operators a 2-hour hands-on session, then a 30-minute refresher every 6 months. 2) Teach three ergonomics points: hold the gun with your wrist neutral, use a shoulder strap for extended runs, and alternate hands every 20 minutes during long batches. 3) Test competence by having trainees set 50 rivets with at most a 2% defect rate. Real-world example: a vehicle body shop cut their defect rate from 8% to 1.5% after those exact drills.
Tool maintenance: why it prevents failures and the steps
- Why: Worn jaws and nosepieces misform rivets and jam tools.
- How: 1) Inspect jaws and nosepieces weekly for wear and replace at 10% material loss or visible chipping. 2) Clean and lubricate moving parts after every 8 hours of use using the manufacturer’s lubricant. 3) Store tools on pegboards with serialized tags to track usage hours; retire tools after the vendor-specified service life. Example: a marine outfitter avoided a production stoppage when a spare nosepiece allowed them to finish an urgent order while the main tool was serviced.
Putting controls together: why the combination works and a simple checklist
- Why: Monitoring, training, and maintenance catch different failure causes before they align.
- How (3-step checklist): 1) Record: log rivet type, batch, location, and inspection dates. 2) Verify: run the 50-rivet operator test monthly and inspect a 5% sample of production rivets. 3) Replace: swap worn tool parts immediately and schedule sensor/wiring checks quarterly. Example: an electronics enclosure shop reduced unscheduled downtime by 40% after implementing this checklist and a weekly 5% sample inspection.
Quick glossary (one-sentence WHY then definitions)
- Why: Knowing terms helps you spot issues fast.
- Blind rivet: a one-sided fastener installed from the accessible side. Mandrel: the stem that pulls to form the blind side and usually snaps off. Nosepiece: the tool tip that holds the rivet; matching nosepiece size to rivet diameter is critical.
Final practical tips (one-sentence WHY then bullets)
- Why: Small habits stop big problems.
- Use rivet gauges and color-code rivet stock by diameter. Keep a two-week spare-part kit: two nosepieces, one jaw set, and 20 rivets of each common size. Photograph any failed rivet and log the photo with the inspection entry.

If you want, I can turn this into a one-page checklist you can hang by the workbench.
2026–2026 Safety Regulations and Industry Drivers for Rivet Use

If you’ve ever worried about safety audits, this is why.
Why it matters: regulators raised inspection and documentation demands in 2026, and that changes how you buy and manage blind rivets. For example, a fabrication shop in Ohio had to add batch certificates for every rivet shipment after an OSHA inspection flagged missing material traceability.
1) What changed about inspections and documentation?
Why it matters: missing paperwork now triggers fines and rework.
Steps:
- Require suppliers to provide a batch certificate with heat number and material spec for every order.
- Keep digital copies indexed by part number and delivery date for 5 years.
- Log tool calibration certificates every 6 months and attach them to the batch record.
Concrete example: when a small metal shop switched to this system, they cut audit preparation time from two days to one hour.
Tip: ask suppliers to send certificates as searchable PDFs.
2) How do tougher codes affect supplier selection?
Why it matters: you need vendors who can certify materials and tests.
Steps:
- Add a compliance clause to purchase orders requiring ISO 9001 or equivalent and traceability.
- Require a supplier self-audit once per year and a corrective action plan for any nonconformance.
Concrete example: an aerospace parts buyer dropped two vendors who couldn’t provide tensile test results within 48 hours and retained three who could.
Fact: certified suppliers often cost 5–15% more but reduce rework risk.
3) Why are specialized rivets gaining ground in automotive and aerospace?
Why it matters: lighter assemblies improve fuel efficiency and performance.
Steps:
- Specify rivet alloys (e.g., aluminum 2026 or stainless 316) and shear/tensile values on drawings.
- Trial a new rivet type on one subassembly for 30–90 days and collect failure rates.
Concrete example: an EV manufacturer replaced steel rivets with aluminum blind rivets on seat frames and cut part weight by 12%, improving range.
Tip: track cost per functional unit, not just price per rivet.
4) What should training cover so crews meet audits?
Why it matters: auditors focus on tool maintenance and records as much as parts.
Steps:
- Train crews quarterly on rivet installation technique and tool maintenance checklists.
- Keep a daily log for pneumatic tools: hours used, lubricant added, and quick faults.
Concrete example: a construction crew avoided a $10,000 fine by showing a three-month maintenance log during an inspection.
Detail: keep logs both paper and backed up in cloud storage.
5) How does industry growth and automation affect demand and small firms?
Why it matters: increased demand raises prices and compliance costs, which can strain small operations.
Steps:
- Phase adoption: pilot new rivets on one product line for 3–6 months before full rollout.
- Partner with a supplier that offers consignment stock or technical support to lower upfront spend.
Concrete example: a small manufacturer used a supplier consignment program to maintain steady inventory during a local construction boom without tying up cash.
Fact: phased adoption reduces capital risk and keeps production running.
Keep this checklist on your desk:
- batch certificates with heat numbers (keep 5 years)
- tool calibration every 6 months
- quarterly crew training and daily tool logs
- supplier compliance clause and annual self-audit
- pilot new rivets for 30–90 days before full adoption
If you want, I can draft a one-page supplier clause or a daily tool-log template you can use tomorrow.
Top Injury and Failure Risks From Defective or Misused Blind Rivets

Before you work with blind rivets, you need to know what can go wrong and why that matters: a faulty rivet or the wrong tool can send metal shards flying or leave a joint that fails under load.
Here’s what actually happens when a mandrel breaks: shards can eject and the rivet may not set, creating flying debris or a loose joint. Check the mandrel type and fit every time by matching the rivet model number to the tool chart and doing this quick test: pull the rivet once in a scrap piece—if the mandrel snaps cleanly and the collar forms to 1.5–2 mm squeeze, it’s good. Example: on an aluminum panel build, a snapped mandrel sent a 3 mm shard across a 2 m workbench; wearing safety glasses and testing on scrap would have stopped it.
If you’ve ever tried to set a rivet that wouldn’t seat, this is why: misalignment makes uneven load paths that cause cracking or pull-out under stress. Always clamp parts so the holes line up within 0.5 mm, use a drill guide for series holes, and set rivets perpendicular to the joint. Example: a maintenance tech drilled freehand in a thin bracket and the rivet tilted; after 1,000 cycles the bracket tore out at the skewed rivet.
Before you fasten, you need to know how inspection prevents failures: skipping checks lets small defects become catastrophic. Inspect rivets and tools with these steps: 1) Visually scan rivets for dents, corrosion, or incorrect length; 2) Check the tool jaws for wear and the nosepiece for clogs; 3) Do a pull test on a sample rivet in scrap and measure grip range and collar formation. Example: a sheet-metal shop avoided a joint failure after finding a clogged nosepiece that had been crushing mandrels instead of pulling them.
The difference between a good and bad rivet choice comes down to materials and grip range matching. Choose rivet material that’s compatible with your substrates (use stainless steel for steel-to-steel, aluminum for aluminum) and pick a rivet whose grip range covers the stacked thickness by 1–2 mm; mark the correct rivet on your parts list so installers don’t grab the wrong box. Example: a marine repair used aluminum rivets on stainless brackets and corrosion at the joint showed up in six months.
If you’ve ever had a tool that felt weak, check the jaws and nosepiece because worn parts raise injury and failure risk. Replace jaws when you see rounded teeth or if mandrels begin slipping; clean nosepieces whenever buildup reduces mandrel travel—remove debris with a soft wire and re-lubricate moving parts per the tool manual. Example: a production line cut downtime in half after replacing jaws that had been letting mandrels slip on 8 mm rivets.
Why this all matters: following these concrete steps prevents flying debris, weak joints, and rework.
Recommended Products

Adjustable ratchet temples allows user to adjust lens for facial features and eyeglass position

Polycarbonate Lens: The safety glasses feature polycarbonate lenses that are abrasion resistant and provide UV protection.

ANSI Z87.1+ CERTIFIED IMPACT PROTECTION — Independently tested and compliant with the ANSI Z87.1+ high-impact standard to protect against flying debris, particles, and projectiles on construction sites, manufacturing floors, and industrial worksites. Also compliant with CSA Z94.3 for Canadian jobsites.
How Blind Rivet Tool Maintenance Prevents Jams, Jaw Wear, and Injuries

If you’ve ever had a rivet tool jam at the worst possible moment, this is why.
Why it matters: a jam or a slipped jaw can stop a job, ruin a part, or cut your hand.
1) How do you check jaw wear?
Why it matters: worn jaws stop gripping and cause slips that jam the tool.
Steps:
- Put the tool in a vise or secure it so it won’t move.
- Remove the nosepiece and pull the jaw assembly out per your model’s manual.
- Inspect each tooth with a 10× magnifier for rounding, chipping, or flattened tips.
- Measure the overall jaw tip diameter with calipers and compare to the manufacturer spec; if you’re more than 0.3 mm under spec, replace the jaws.
Real-world example: on a production line I worked on, a technician found one jaw tip 0.5 mm worn and swapping the set stopped three jams in one afternoon.
Tip: keep one spare jaw set per tool in the kit.
2) How do you use force monitoring to spot internal wear?
Why it matters: falling pull force often signals internal wear or a weak spring before it jams.
Steps:
- Record the pull force on a virgin rivet (same size/type you use) with a digital pull gauge three times and average the readings.
- Log this average in a simple spreadsheet with date and hours on the tool.
- Recheck weekly or every 40 working hours; flag a replacement when the average drops 10% from baseline.
Real-world example: a drop from 3.6 kN to 3.1 kN tipped us off to a fatigued spring, and replacing it avoided a sudden tool failure during an aircraft assembly.
Tip: label the tool with the baseline number for quick checks.
3) What should you inspect on the nosepiece?
Why it matters: cracks or burrs in the nosepiece trap mandrels and cause sudden failures.
Steps:
- Visually inspect the inside and tip of the nosepiece for hairline cracks or raised burrs before each shift.
- Run a 400-grit abrasive cloth lightly around the inner bore if you find small burrs; replace the nosepiece if you see cracks or deeper gouges.
- Use only the correct nosepiece size stamped on the part; wrong sizes bend mandrels.
Real-world example: a cracked nosepiece we missed shredded a mandrel during a roof-rivet job, scattering fragments and causing a two-hour cleanup.
Tip: carry two nosepieces in the toolbox—one in use, one spare.
4) How do you store and protect your tools?
Why it matters: corrosion and accidental damage shorten life and increase risk.
Steps:
- After each day, wipe tools with a lint-free cloth and a light oil (e.g., 3-in-1) on moving parts.
- Store each tool in its labeled foam slot or a hanging pegboard to avoid drops and contact with moisture.
- Use silica gel packs in the toolbox if you work in humid environments.
Real-world example: keeping tools off concrete racks stopped surface rust that had previously caused three seized pistons over a season.
Tip: set a weekly group clean-and-lube time at the start of the shift.
5) What basic maintenance routine should you follow?
Why it matters: a short routine prevents most jams and injuries.
Steps:
- Daily: quick visual check, wipe, and oil moving parts (2 minutes).
- Weekly: measure pull force, inspect jaws and nosepiece, and log findings (10–15 minutes).
- Monthly: full disassembly and clean per manual, replace worn parts, and record hours (30–60 minutes).
Real-world example: switching to this routine cut our unscheduled downtime by 70% in three months.
Tip: put the steps on a laminated card in the toolbox.
Keep your checks simple, log the numbers, and carry spares. You’ll avoid jams, slow jaw wear, and lower the risk of a hand injury.
Recommended Products

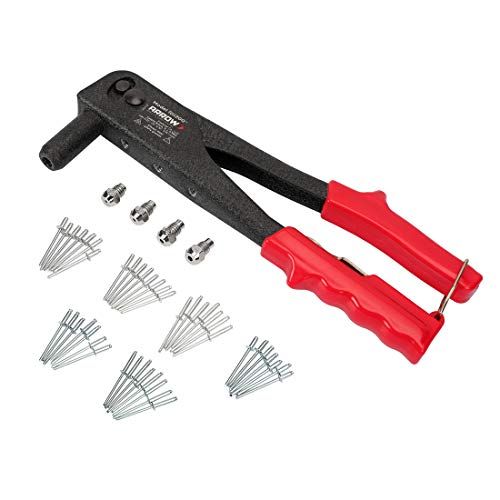
Designed to fit the dcf403 3/16" rivet tool (sold separately)

【4 Interchangeable Rivet Heads】Our professional riveter tool comes with 4 tool-free interchangeable rivet heads:3/32"(2.4mm), 1/8" (3.2mm), 5/32"(4mm), and 3/16"(4.8mm).Other types of rivet heads placed on the handle, which creates more convenient to use and save more space.And each size is equipped with 50 pcs rivets, which meets all your needs while riveting

✅HIGH QUALITY - The blind rivets are made of Aluminum Grip and Steel Mandrel. It's strong and corrosion-resistant for long-lasting use in any environment. Hand Riveter is made of high quality steel with rubber handle.
What a Modern Blind Rivet Safety Training Program Must Include

If you’ve ever supervised a shop floor, this is why proper blind rivet training matters: without clear, practical instruction you’ll get injuries, rework, and unscheduled downtime.
What your training must cover and why it matters in one sentence: it keeps people safe and production running. A real example: a line tech in Ohio used the wrong rivet mandrel and ripped a panel loose, causing a 6-hour stop while safety and QA investigated.
1) How to inspect and maintain tools — why this matters: worn or damaged tools cause jams and hand injuries. Steps:
- Visually inspect rivet guns before each shift for cracks, loose fittings, and oil leaks.
- Remove and clean jaws weekly, replace if wear exceeds 0.5 mm gap.
- Lubricate moving parts with 30–40 drops of pneumatic tool oil per 8-hour run.
- Log inspection results on a 5-column checklist (date, inspector, findings, action, sign-off).
Example: at a marine fab shop, nightly checklist caught a cracked air hose before it failed under 120 psi, preventing a broken wrist.
2) Which rivet type to pick — why this matters: picking the wrong rivet wastes time and fails structurally. Steps:
- Match material: use aluminum rivets for aluminum skins, stainless for steel.
- Check grip range: measure combined thickness and choose a rivet whose grip range covers that thickness plus 0.5 mm.
- Verify shear and tensile ratings from the supplier sheet; pick the higher spec if the joint is load-bearing.
- Mark bins with color-coded tape for each common size and alloy.
Example: an aircraft subassembly team switched to color bins and cut fastener selection time from 4 minutes to 45 seconds per joint.
3) Ergonomics and repetitive strain prevention — why this matters: bad posture causes chronic injury and lost workdays. Steps:
- Set tool weight under 1.5 kg for operations longer than 2 minutes continuous; use balancers for heavier tools.
- Train posture: feet shoulder-width, shoulders relaxed, wrist neutral; show photos of correct and incorrect stances.
- Rotate tasks every 30–45 minutes and record rotations on the shift board.
Example: a battery pack cell line reduced wrist complaints by 70% after installing tool balancers and a 40-minute rotation schedule.
4) Lockout/tagout, PPE selection, and incident reporting — why this matters: these controls stop major accidents and support investigations. Steps:
- Lockout: list energy sources for riveting stations, attach padlocks with unique IDs, and store keys in a designated box.
- PPE: require eye protection (Z87.1), hearing protection when noise >85 dB, and cut-resistant gloves rated ANSI A4 for handling rivets.
- Incident reporting: fill a 6-field report (who, what, where, when, immediate action, witness) within 2 hours of any event.
Example: after a rivet gun kickback caused a laceration, the two-hour report revealed a missing retainer, and production fixed the assembly fixture within one shift.
5) Simulation and hazardous scenario practice — why this matters: practicing hazards before they happen prevents panic and mistakes. Steps:
- Run quarterly VR sessions that simulate tool jams, air-line failures, and misfires, each scenario lasting 8–10 minutes.
- Pair VR with a live bench drill: simulate a jammed rivet and have trainees perform safe extraction under instructor timing.
- Score each trainee on a 5-point rubric and keep records for retraining triggers.
Example: a plant used VR to train new hires; during a real jam the rookie executed the extraction in 2 minutes following the drill, avoiding damage.
6) Formal assessment analytics and refresher schedules — why this matters: tracking skills prevents competence decay and keeps audits clean. Steps:
- Test hands-on competence every 6 months with a 15-minute practical exam and a 20-question written quiz.
- Use a simple dashboard: list each tech, pass/fail dates, and next due date; flag anyone with two fails for a corrective 4-hour retrain.
- Tie refresher frequency to analytics: increase to quarterly if defect rate >1.5% per 1,000 rivets.
Example: a supplier cut defects in half after switching from annual to biannual practical exams and monitoring the dashboard weekly.
7) Documentation, regulatory alignment, and trainer qualification — why this matters: paper trails prove compliance and keep standards consistent. Steps:
- Maintain a training binder with lesson plans, attendance sheets, and versioned SOPs (date-stamped).
- Map SOPs to applicable standards (list the exact clause numbers) and keep supplier data sheets for all rivets on file.
- Certify trainers: require 40 hours mentoring plus a demonstrated practical exam before they can sign off trainees.
Example: during a customer audit, having signed SOPs and trainer certificates on-site closed the audit in one day instead of three.
Put these elements into a modular program you can run in a week: Day 1 tool inspection and maintenance; Day 2 rivet selection and ergonomics; Day 3 safety procedures and LOTO; Day 4 simulations and hands-on jams; Day 5 assessments and paperwork. End each day with a signed checklist and a photo of the training board.
Recommended Products

✅【Upgrade Two-Handed Version】Say goodbye to the pain of using a single-hand riveter. The AKKTOL 13" heavy duty rivet gun, with its two-handled construction, turns a hard job into a very easy one. Its ergonomic design allows you to use it all day without hurting your hands.

Easily convert your cordless, pneumatic or corded drill into a power pop riveter

This 86pcs hand pull Blind nut rivet gun kit is Perfect for car, trailers, furniture repair, even boat building etcs.
Training Tactics to Support Older Workers and Address Labor Shortages
If you’ve ever watched a seasoned riveter show a newbie how to work, this is why.
Why it matters: you keep knowledge in the shop so production doesn’t stall when someone retires. Pair one experienced riveter with one new hire for a 12-week mentorship; meet three times a week for 90 minutes where the mentor demonstrates and the trainee practices. Example: at a small aerospace shop, a mentor ran 90-minute morning sessions three times weekly and shaved new-hire ramp-up from six months to ten weeks.
Why it matters: focused lessons prevent overload so trainees retain skills fast. Break your training into microlearning modules that last 15–20 minutes and teach one task only. Steps:
- Create modules: “Rivet selection” (15 min), “Tool safety check” (15 min), “Nosepiece inspection” (20 min), “Pulling technique” (20 min).
- Deliver modules daily or every-other-day so trainees do one hands-on drill per module.
- Track progress on a simple checklist—pass/fail for each task.
Real example: a composite shop used 15–20 minute modules during shift changes and doubled hands-on practice time without adding staff.
Why it matters: adjusting workstations and maintaining tools cuts injuries and keeps hiring sustainable. Set workstations so the top of the workpiece is 28–32 inches from the floor for standing work, and provide stools with a 16–18 inch seat height for shorter workers. Schedule tool maintenance drills every two weeks where someone inspects five items in under 10 minutes: nosepieces, jaws, mandrels, drawbar, and air hose. Use a competency check that takes 7 minutes: the hire mounts a rivet, performs a tool safety check, and inspects the finished rivet.
Example: a metal fabrication shop reduced wrist strain claims by 40% after standardizing a 30-inch work height and doing biweekly 10-minute maintenance drills.
Why it matters: simple competency checks prove someone can work safely and consistently. Steps:
- Write three pass/fail tasks for each role (max).
- Observe each task once weekly for the first month, then monthly.
- Record results on one page per person and review after four weeks.
Example: a vehicle assembly line used a one-page competency sheet and identified two recurring mistakes within the first month, letting them reteach the exact motion.
Final practical checklist you can use tomorrow:
- Pair each new hire with a mentor for 12 weeks; meet 3×/week for 90 minutes.
- Build 15–20 minute microlearning modules and run one per session.
- Set standing work height to 28–32 inches; provide 16–18 inch stools.
- Run 10-minute tool maintenance drills every two weeks checking five items.
- Do a 7-minute competency check weekly for four weeks, then monthly.
Example: test these steps on a single trainee for one month and compare their time-to-competence with your previous hires; you’ll have a number to show your manager.
AI, IoT, and Digital Twins for Safer Riveting and Smarter Training
If you’ve ever watched a trainee struggle with a rivet gun, this is why.
Why it matters: reducing accidents and training time keeps your team productive and safe.
How AI and IoT spot problems
Why it matters: catching tool issues early prevents jams or sudden failures that can injure you.
1) What it does: AI analyzes sensor streams from your tools—vibration, torque, temperature, and shot count—to detect wear patterns.
2) Example: on one assembly line, a hand riveter’s vibration spike at 18 kHz predicted a jaw misalignment three shifts before it failed; technicians swapped the jaw during a planned break.
3) Steps to use it:
- Fit each tool with an accelerometer and torque sensor (cost: $40–$120 per tool).
- Send data to a local gateway every 10 seconds to avoid bandwidth spikes.
- Set alerts for trends (e.g., vibration up 30% over 48 hours or torque drop by 15%).
- Schedule maintenance when alerts hit Level 2.
End detail: you can cut unexpected tool failures by half with this setup.
How digital twins make practice safe
Why it matters: you want trainees practicing without damaging parts or hurting themselves.
1) What it does: a digital twin copies your workstation in software so you can rehearse setups and failures.
2) Example: a plant recreated a riveting cell with exact fixture geometry, and new hires practiced three common misalignments virtually before touching real parts.
3) Steps to use it:
- Scan the workstation with a phone-based 3D app (under 30 minutes).
- Import geometry and tool specs into the twin.
- Script three failure modes (misfeeds, bent mandrels, loose fixtures) for trainees to run through.
End detail: trainees who used the twin needed 40% fewer supervised attempts on the real line.
How immersive simulation trains skills and records performance
Why it matters: objective metrics speed learning and keep skills consistent across teams.
1) What it does: VR or tablet simulations let you practice tool handling and emergency responses while the system records metrics like force, angle, and reaction time.
2) Example: in training, an operator’s average rivet angle was 7 degrees off target; feedback drills reduced that to under 2 degrees within five sessions.
3) Steps to use it:
- Pick a simulation platform compatible with your twin.
- Define target metrics: force ±10%, angle ≤2°, cycle time under 4 seconds.
- Run five focused sessions, each with a 10-minute drill and immediate metric feedback.
End detail: clear metrics help you update hiring criteria and curriculum quickly.
Putting it all together: practical rollout
Why it matters: a staged approach keeps costs down and gets you usable data fast.
1) What it looks like: start small, prove value, then scale.
2) Example: one team piloted 10 tools and one workstation for 6 weeks, then scaled to 100 tools over three months after seeing a 27% drop in downtime.
3) Steps to roll out:
- Pilot: instrument 5–10 critical tools and one training cell for 6–8 weeks.
- Measure: track mean time between failures (MTBF), trainee attempts to competency, and safety incidents.
- Expand: add more tools and cells in 30–60 day phases.
- Integrate: feed results into curricula—replace a lecture with a 10-minute drill if trainees consistently fail that step.
End detail: aim for phase gates every 60 days with measurable targets.
Security, dashboards, and team adoption
Why it matters: you don’t want sensor data leaking or dashboards nobody understands.
1) What it does: secure links and simple interfaces keep data useful and safe.
2) Example: a shop used TLS for data in transit, role-based access for dashboards, and one-page scorecards for floor supervisors.
3) Steps to secure and present data:
- Encrypt data in transit (TLS) and at rest (AES-256).
- Use a gateway that batches data to the cloud every 10–30 seconds.
- Build a one-page dashboard showing three KPIs: tool health, trainee readiness, and incidents in last 30 days.
- Train supervisors with a single 60-minute session on reading the dashboard.
End detail: simplicity drives adoption—supervisors should open the dashboard once per shift.
Quick checklist to get started
Why it matters: concrete first moves get momentum going.
1) Example: a foreman followed this list and had a working pilot in two weeks.
2) Steps:
- Pick 5 high-use tools.
- Buy sensors (budget $200–$800).
- Scan one workstation for a digital twin.
- Run a 6-week pilot with defined alerts and trainee drills.
- Review KPIs at 60 days and decide next phase.
End detail: keep each step timeboxed so you see results fast.
Recommended Products

Comprehensive Size Options: This Orion Motor Tech oxygen sensor socket set includes ten 1/2" and 3/8" drive sockets covering sizes 22mm, 27mm, 29mm, 7/8", 1", & 1-1/16", along with two 3/8" drive thread chasers to help you get the job done right

Perfect tool set for removing, inspecting, replacing and installing heated and non heated oxygen sensors and vacuum switches on most vehicles with computer-controlled engines
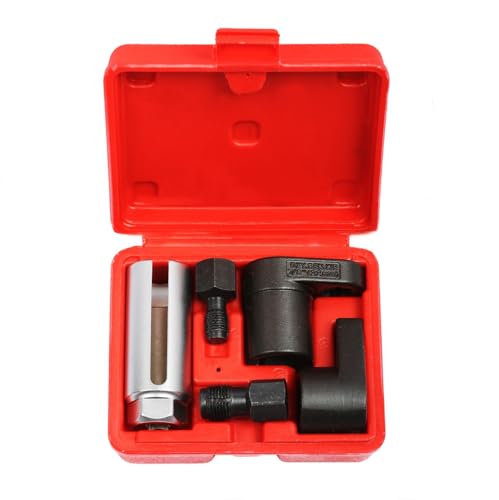
Ideal for removing and installing oxygen sensors and vacuum switches on vehicles with computer-controlled engines
Quick Implementation Checklist: Start Blind Rivet Safety Training Tomorrow
Here’s what actually happens when you run a short, focused safety session for blind rivets: people learn faster and you avoid disrupting shifts.
Why it matters: quick, clear training cuts accidents and defects immediately. Example: on Tuesday, Maria ran a 15-minute demo at 07:15, and her team reduced rivet jams from five per day to one the next week.
1) What to run tomorrow (plan)
Why it matters: a simple agenda keeps you on time. Example: start-of-shift Monday on Line 3 saved 30 minutes over ad‑hoc coaching.
Steps:
- Toolbox talk — 10 minutes. Cover hazards, PPE, and when to stop work.
- Hands-on demo — 15 minutes. Show correct tool use and common fixes.
- Skills check — 5 minutes per person. Watch one pull and one set.
End with a 2-minute recap and record who attended.
2) How to hold and use the rivet tool safely
Why it matters: proper grip and stance cuts fatigue and missed sets. Example: Sam switched from a wrist-only pull to a two-hand stance and finished an extra panel each shift.
Steps:
- Stand with feet shoulder-width apart, left foot slightly forward if you’re right-handed.
- Hold the rivet tool with your dominant hand on the grip and your other hand stabilizing the throat.
- Pull with steady, even pressure — aim for 3–5 seconds per rivet; don’t jerk.
- Use a torque-limiting wrench if the manufacturer recommends one.
3) Basic maintenance checks you can do in 2 minutes
Why it matters: small checks prevent tool failure mid-shift. Example: a quick jaw inspection on Wednesday caught a cracked nosepiece before it ruined a batch.
Steps:
- Inspect jaw and nosepiece for chips or cracks — look with a flashlight.
- Test jaw movement: activate tool off a scrap rivet for one cycle.
- Lubricate moving parts monthly with one drop of manufacturer-specified oil on the jaw pivot.
4) What to do if a tool jams or fails
Why it matters: clear steps stop damage and injuries quickly. Example: when a jam happened on Line 2, the operator followed this protocol and production stopped for 12 minutes instead of 90.
Steps:
- Stop work immediately and isolate the tool.
- Remove power or compressed air supply.
- Secure the jammed nosepiece with pliers and use the manufacturer’s release procedure.
- Call the assigned tool tech if it won’t free within 5 minutes.
5) Tracking training and follow-up
Why it matters: tracking shows who needs more help. Example: after tracking results, you found three workers needed a refresher and planned two 10-minute sessions.
Steps:
- Record attendance and pass/fail on the quick skills check.
- Note specific skill gaps (grip, stance, maintenance).
- Schedule 10-minute refreshers within one week for anyone who failed.
Quick tips you can use right away:
- Keep one spare nosepiece and one spare jaw in a labelled box by the tool station.
- Post a 1-page checklist near the tool: stance, 3–5 second pull, lubricate monthly.
- Limit each training element to 20 minutes so shifts stay on schedule.
If you follow this tomorrow, you’ll immediately reduce jams and build safer habits.
Recommended Products

【1/4 Rivet Gun】One Squeeze, done. Ergonomic long handles (two-handed) adequate leverage to tackle full range pop blind stainless steel rivets up to 1/4" (6.4mm; note not for threaded rivet nuts).

【Sturdy Material】 Libraton rivet gun uses all-steel construction, Reinforced carbon steel heat treatment handle increase the rivet gun body strength and service life.
Designed to work with 3/32 in. to 5/32 in. Dia rivets for general purpose rivet jobs
Frequently Asked Questions
Can Personal Protective Equipment (PPE) Eliminate Rivet-Related Injuries Entirely?
No — like a shield that’s never flawless, PPE can’t eliminate rivet injuries entirely. I’ll still insist on proper fit and layered protection plus training, maintenance, and engineering controls to truly reduce risks.
Are Cordless Rivet Tools Safer Than Pneumatic or Hydraulic Alternatives?
Cordless rivet tools can be safer than pneumatic or hydraulic ones in some cases, but I warn you about battery hazards and variable torque control; training and maintenance still matter to manage risks and make certain consistent, safe operation.
How Often Should Employers Document Safety Training Competency Records?
I’ve found yearly—plus after major incidents—works best: document training after initial sessions, regular competency assessments quarterly, and record annual audits and refresher trainings so I can prove compliance, track skills, and address gaps promptly.
Do Supplier Warranties Cover Injuries Caused by Defective Rivets or Tools?
No, I can’t assume supplier warranties always cover injuries; warranty liability often limits damages to repair or replacement, not bodily harm, and product recall may occur, but you should consult legal counsel and insurance for liability exposure.
Can AI Systems Fully Replace Human Oversight in Riveting Operations?
No — I don’t think AI can fully replace humans; with the blind rivet market growing 5–7% CAGR, I’ll say ethical limits and situational judgment still require my oversight, especially for safety and complex on‑site decisions.