
You lift a new drill and your wrist immediately tilts as it pulls to one side — why does this tool feel unsteady when it should be precise? Or you swap a battery and suddenly your impact driver feels heavier on the nose, so your cuts drift and your hand tires faster. Most people assume heavier tools alone cause fatigue and errors, not the subtle shifts in where the weight sits.
This article shows you simple checks and fixes to find a tool’s center of mass, measure weight changes, and add tiny counterweights or reposition attachments so tools stop twisting your wrist. You’ll reduce fatigue, improve accuracy, and lower injury risk. It’s easier than it sounds.
Key Takeaways
If you’ve ever hauled a heavy tool onto a jobsite, this is why weight and balance matter. Why it matters: wrong numbers can overload your crane or lift equipment and stop the job. For example, if you pick up a 2,500 lb (1,134 kg) pump with its CG 6 ft from the lift point, the effective load at a 10 ft radius can exceed the crane’s chart; you’ll need to check that chart before you hook up.
Heavier or unbalanced tools increase lift and transport loads and require specific actions. Why it matters: failing to act forces heavier rigging and higher-capacity gear. Steps:
- Weigh the tool on a calibrated scale; record the reading to the nearest 1 lb or 0.5 kg.
- Measure the center of gravity (CG) by suspending or using a CG jig and note distance from lift points in inches or millimeters.
- Choose rigging rated above the calculated load at your planned lift radius.
Example: a 3,200 lb gearbox with a CG offset 8 in from the sling point often needs a 25% higher rigging capacity than its marked weight.
Accurate weights and CG checks prevent overloads and mismatched equipment ratings at the lift radius. Why it matters: crane capacity drops quickly as radius increases, and a wrong radius kills margins. Steps:
- Match the measured weight and CG to the crane’s load chart for your exact radius.
- If the chart shows marginal capacity, reduce radius, use a larger crane, or add taglines.

Example: on a 50 ft boom, a 4,000 lb load at 30 ft may be fine, but at 40 ft it can exceed capacity by 20%.
You’ll face regulatory and recordkeeping demands that require calibrated scales and retained certificates. Why it matters: inspectors expect traceable evidence, and you can be fined or shut down without it. Steps:
- Use scales calibrated within the last 12 months and keep the certificate with the lift plan.
- Sample and log at least one weight/CG measurement per unique tool type and retain the record for the project duration.
Example: a site safety inspector asked for the last calibration certificate for the forklift scale; the crew produced the certificate dated six months prior and avoided a stop-work order.
Use safety factors (usually 1.25–1.5) and verified Working Load Limits (WLL) for critical or overhead lifts. Why it matters: the extra margin covers small measurement errors and dynamic forces. Steps:
- Multiply measured weight by your chosen safety factor to get the design load.
- Confirm slings, shackles, and crane WLLs meet or exceed that design load.
Example: a 1,600 lb assembly with a 1.5 factor becomes a 2,400 lb design load; pick rigging rated above 2,400 lb and document it.
Proper balancing and securement minimize tipping, shifting, and on-site adjustments during transport and placement. Why it matters: an unbalanced load shifts, damages gear, and endangers people. Steps:
- Position load so the CG aligns with lift points or add counterweights.
- Use chokers, taglines, and blocking to prevent rotation and movement during lift and transport.
Example: a skid-mounted compressor with a side-heavy CG required a 200 lb counterweight on the opposite end and two taglines during the lift to stop it from swinging.

Final practical checklist (use every time):
- Calibrated scale reading (lb or kg) — attach certificate.
- CG location (inches/mm) from lift points — draw and photo.
- Crane/load chart check for your exact radius.
- Apply safety factor (1.25–1.5) and verify WLLs.
- Plan rigging, counterweights, and taglines; document in the lift plan.
- Keep all records on-site for inspection.
Follow those steps and you’ll avoid overloaded lifts, mismatched gear, and unexpected stop-work orders.
Why Weight and Balance Matter on Job Sites
If you’ve ever seen a forklift tip or a crane pause mid-lift, this is why.
Why it matters: uneven loads make equipment unstable and can injure people or damage materials. For example, on a concrete pour one side of a mixer truck sank into soft ground because the load shifted; a worker had to be treated for a sprained wrist while the crew righted the truck.
How to plan lifts so your machine stays within limits:
- Find every item’s weight. Check nameplates or use a hand scale for tools under 50 lb and a pallet scale for larger bundles. For example, label each pallet with its total weight before it leaves the yard.
- Add a 10% safety margin to the total weight to account for packing and moisture.
- Compare that number to the crane or forklift rated capacity at the lift radius you’ll use; read the chart on the machine, not a memory. If your load is 2,200 lb and the forklift’s chart shows 2,500 lb at 24 inches and 1,800 lb at 36 inches, move it closer or reduce the load.
Why balanced loads affect handling: uneven weight increases strain on mechanisms and can cause sudden shifts that surprise drivers. For example, a pickup bed with all the cargo over the left wheel lifted the back corner during braking, making steering twitchy.
How to balance and secure loads:
- Place heavy items centered over the axle or load-bearing point.
- Put lighter items toward the edges to prevent top-heaviness.
- Use straps rated for the load—match the working load limit to at least your calculated total.
- For transport, use edge protectors and ratchet straps tightened to the strap’s specified torque or tension guideline.

Why you should check before you move: scales and pre-move checks confirm your estimates and prevent surprises. For example, before a crane lift of HVAC units, the crew weighed combined pallets and discovered an extra 400 lb of insulation added on site.
Pre-move checklist (numbered steps):
- Weigh the assembled load or sum item weights and add 10% margin.
- Verify the machine’s capacity at the planned radius and configuration.
- Position the load so the center of gravity is centered or slightly toward the stronger support.
- Secure with rated tie-downs and test for movement by applying a gentle shove.
- Reinspect straps and labels after any adjustment.
Why routine inspections matter: worn parts or missing checks reduce your safety margin. On one job, a fork tine had a 15% loss in rated capacity due to bends; an inspection found it before a heavy lift.
Routine inspection steps:
- Check forks, slings, straps, shackles, and crane hooks for deformation, corrosion, or missing tags.
- Verify machine charts are legible and current.
- Record inspections on a daily checklist and fix or tag out anything failing.
Simple calculations you can do on site:
- Total weight = sum of item weights + 10% margin.
- Required capacity = total weight at your lift radius.
- If Required capacity > machine capacity, reduce load or change equipment.
If you follow these steps—measure, margin, match capacity, center the load, and secure it—you’ll reduce tip-overs, protect people, and keep materials intact.
Weight, Fatigue, and Injury Risk

If you’ve ever picked up a tool that felt heavier than it looked, this is why.
Why it matters: heavier-than-expected loads cause rapid muscle fatigue and raise accident risk in minutes. I once watched a warehouse picker drop a 40 lb box after three repeated lifts because their grip failed—no one was hurt, but they missed a morning of work. Start by checking weights before the shift and balancing cargo so you don’t surprise your team.
Why it matters: fatigue reduces strength and focus, so you’ll want to limit how long someone does the same heavy task. Do this in three clear steps:
- Measure task weight, duration, and frequency (for example: 30 lifts per hour of 25–40 lb boxes).
- Rotate people every 30–60 minutes when tasks include repeated lifts over 20 lb.
- Use mechanical aids for anything over 50 lb.
Example: at a small shop, swapping two packers every 45 minutes cut reported arm fatigue by half.
Why it matters: poor lifting technique causes posture strain that leads to chronic pain and lost days. Train people on safe lifting with specific cues: bend at your knees, keep the load within 10 inches of your body, and avoid twisting; practice these once a week for 15 minutes. For single-person lifts set a hard limit—no more than 50 lb without help— and post that limit where people can see it. I teach a new hire to lift a 30 lb crate correctly in five supervised reps before they work solo.
Why it matters: catching fatigue early prevents mistakes and injuries. Watch for slow movements, short steps, or frequent rubbing of elbows and shoulders; those are early warning signs. Give a 10–15 minute rest break after intense 60-minute bouts, and offer ergonomic tools like padded handles, carts with 300 lb capacity, or lifting straps. In one plant, adding a wheeled cart reduced trips to first aid by 40% in two months.
Why it matters: lowering physical load protects health and keeps productivity steady. Do this checklist weekly:
- Confirm actual weights of common items.
- Balance loads on pallets and shelves.
- Enforce single-person lift limits and rotation schedules.
- Provide mechanical aids and 15-minute weekly lifting practice.
A simple weekly check typically prevents one injury for every 50 workers per year.
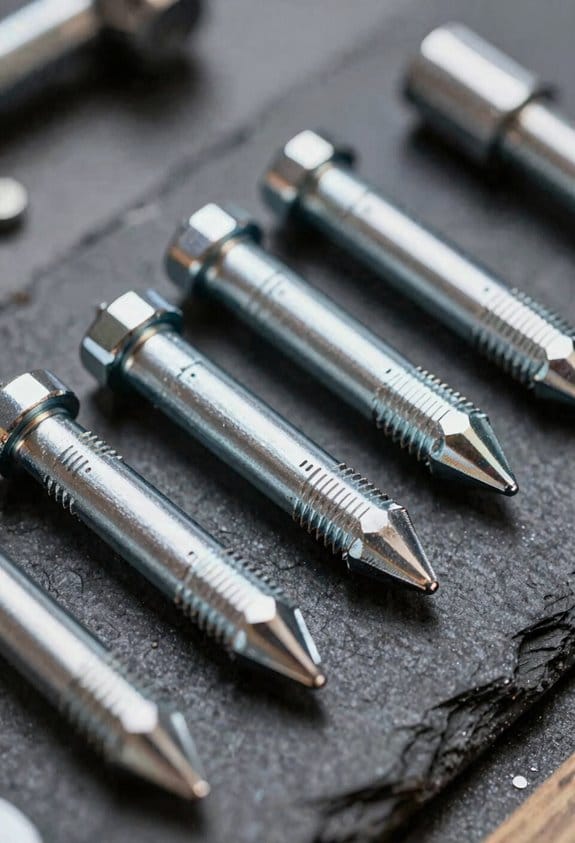
Tool Balance: What It Is and How to Spot Imbalance

If you’ve ever picked up a tool that felt like it wanted to twist out of your hand, this is why.
Why it matters: an imbalanced tool will make you fight the work with your wrist and forearm, which causes fatigue and raises the chance of a strain or mistake. For example, when I used a combo hammer with a heavy head and a lightweight handle, my wrist started aching after 15 minutes and nails went in crooked.
How to check balance — step-by-step:
- Find the center of mass. Lay the tool on a round finger or a narrow strip (about 1–2 cm wide) across its body and see where it stays level; that’s where the weight centers. If the tool tilts more than about 10 degrees from horizontal, it’s noticeably off.
- Hold the tool in a normal working grip at chest height and let your wrist relax; if it rotates toward one end or you need to grip tight to stop rotation, it’s unbalanced. A normal test time is 10–15 seconds.
- Test under load if possible. Run the tool briefly (or simulate motion) for 5–10 seconds to feel for pulling or increased vibration that wasn’t there when it was still.
What to look for (specific signs):
- One end feels heavier by touch or the tool tips when supported near the middle.
- The tool *rotates* in your hand without extra muscle; you should be able to hold it level for 10 seconds.
- It vibrates more on one side during use or makes rubbing/squeaking noises at joints.
Real-world example: a circular saw with a heavier blade guard on one side pulled me to the right after just two cuts; I felt the pull and the cut edge drifted 3–5 mm per pass.
Quick fixes you can try (numbered):
- Reposition attachments or accessories — move a battery pack, clamp, or guard closer to the center by 1–3 cm and re-test.
- Swap parts with an identical tool (blade, bit, battery) to see if the part is the problem; if the imbalance follows the part, replace it.
- Add small counterweights — use adhesive lead tape or a metal shim (5–20 g increments) near the light side until the tool stays level on your finger test.
- Tighten loose components and remove excess material like paint blobs or tape that collects on one side.
Why vibration dampers can mislead you: dampers hide shaking, so a tool that feels steady with the damper engaged may still have a shifted center of mass and will pull if the damper fails or is removed. For example, an angle grinder felt steady with a vibration handle on, but when I removed that handle to change discs the grinder yanked left.
When to stop and get professional help:
- If balance issues persist after swapping parts and adding up to 50 g of counterweight.
- If the tool’s casing or shaft is bent, cracked, or worn — visible deformation means disassembly and repair by a technician.
- If you feel sharp pain in your wrist within 10–15 minutes of use.
Last practical tip: mark the center of mass with a small dot so you can quickly check balance after changing blades or batteries; a simple visual saves time and prevents surprises.
Choosing Tool and Load Weight by Task

Before you match tools and loads, know that getting the weight right keeps you safe and saves time.
Start by deciding what matters most: precision, speed, or endurance. Pick a target weight range for the task—examples:
1) Precision work (electronics soldering, trim sanding): 0.2–1 kg total held weight.
2) Fast work (cutting softwood, driving screws): 1–2.5 kg.
3) Heavy removal (demolition, masonry chipping): 3–8+ kg, usually with mechanical support.
Example: when sanding a cabinet edge for finish, choose a 300–500 g hand sander so you can hold steady for 10–20 minutes.
How to choose tools that match that weight: explain the fit and test it.
WHY: If the tool feels wrong you’ll lose control or tire quickly.
Steps:
1) Check the tool’s balance point by lifting it once at the handle and once at the midpoint; the better option will feel neutral near your hand.
2) Add or remove attachments to hit your target weight range; for example, use a lighter battery for detail work or a heavier battery for long runs.
3) Do a 5-minute low-risk trial performing the exact motion you’ll use, noting fatigue and control every minute.
Example: try a drill with a 1.5 Ah battery for a 7-minute pilot hole run; if your wrist drifts after 3 minutes, swap to a 1.0 Ah battery or a smaller bit.
Match the load to your strength and the task duration.
WHY: A load that matches your strength prevents injury and keeps output steady.
Steps:
1) Estimate how long you’ll be holding or swinging: less than 5 minutes, 5–20 minutes, or longer than 20 minutes.
2) For <5 minutes, you can use heavier loads (up to the demolition range) if the tool has handles or straps.
3) For 5–20 minutes, stay in the midrange (1–2.5 kg) and use a support hand or rest breaks every 7–10 minutes.
4) For >20 minutes, keep loads light (under 1.2 kg) or use mechanical counterbalance.
Example: when stripping paint by hand for 30 minutes, switch to a 750–1,000 g scraper and take a 2-minute break every 8 minutes.
Record what works so you don’t guess next time.
WHY: Writing trial results saves time and keeps consistency.
Steps:
1) Note the tool model, battery or attachment weight, balance point, and how long you worked before fatigue.
2) Keep a one-page checklist for repeat tasks with the ideal weight range and the preferred battery/attachment.
Example: for cabinet sanding, record “Random orbital sander—Makita XU, 350 g with small pad, neutral balance at handle, 12 minutes comfortable.”
Quick handling tips:
- If control is poor, reduce weight by 10–30% or move weight toward the handle.
- If you need momentum, increase weight in 0.5–1 kg steps and add a secondary grip.
- If your wrist rotates under load, use straps or a support rest every 6–8 minutes.
Example: add a forearm strap when using a 4 kg demolition hammer to reduce wrist torque.
Follow these steps, make one short test, and log the results.
Quick On-Site Checks and Fixes for Balance
If you’ve ever felt a tool pull to one side, this is why.
Why it matters: an off-balance tool makes work harder and raises the chance of mistakes or injury in your hands. Example: a grinder that drifts during a cut can gouge metal in under two seconds.
1) Check and secure grips and handles
Why it matters: loose handles let torque shift the tool during use. Example: a drill whose side-handle wiggles will twist in your grip when you hit a knot in wood.
Steps:
- Visually inspect the handle and feel for wiggle with two fingers.
- Tighten mounting screws to 6–8 Nm (if you don’t have a torque wrench, snug until firm and then a quarter-turn).
- Replace any stripped screws with the same thread size (usually M6 or 1/4″-20 on hand tools).
- If the handle is cracked, swap it before use.
2) Swap or reposition worn accessories
Why it matters: worn or uneven attachments shift weight and make the tool tilt. Example: a circular saw with a dented blade will pull and require extra force to follow a straight cut.
Steps:
- Remove the accessory (blade, bit, or pad) and lay it on a flat surface.
- Look for uneven wear, chips, or missing material; measure runout with a dial indicator if you have one (acceptable runout is usually <0.5 mm for blades).
- Rotate, flip, or replace the accessory until the tool rests neutral in your hand for a balance test (hold the tool by its centerline and see if it tilts).
3) Tap-test rotating parts and correct wobble
Why it matters: off-center rotating mass causes vibration and uneven cutting or grinding. Example: a bench grinder wheel that wobbles will chatter and leave ridges in metal.
Steps:
- Run the tool briefly at low speed (wear eye protection).
- Tap the guard or housing lightly with a plastic mallet while running to localize the wobble.
- Stop, loosen the mounting, re-seat the component, and use shims (0.1–0.5 mm shim stock) to center it; retest until wobble is minimal.
4) Inspect and replace vibration damping pads
Why it matters: compressed or damaged pads stop absorbing vibration, increasing fatigue and amplifying small imbalances. Example: a sander with a flattened foam liner transmits buzz to your arm after five minutes.
Steps:
- Peel back access covers and check pads or liners for compression, cracks, or oil saturation.
- Replace pads that are flattened by more than 30% of their original thickness (manufacturers list replacement part numbers).
- When replacing, use the same durometer or specified part to keep damping consistent.
Quick balance check you can do in the field
Why it matters: a simple hold test tells you if further work is needed. Example: after tightening a handle and changing a blade, you can confirm balance in under 30 seconds.
Steps:
- Hold the tool horizontally by its center grip, with the motor off.
- If it tilts more than about 10 degrees to one side, troubleshoot the side it leans toward (handle, accessory, or internal weight).
- Re-check after every fix.
Final practical tip: keep a small kit—replacement screws (M5–M8 and 1/4″-20), 0.1–0.5 mm shim stock, basic pads, and a 6–8 Nm torque wrench or a good-quality driver—so you can fix most balance issues on site.
When to Use Calibrated Scales vs. Quick Estimates
Before you decide whether to use quick estimates or calibrated scales, know that accuracy vs. speed affects safety and compliance.
After you’ve checked handles, accessories, and vibration pads, follow these specific steps so your weight-and-balance work is clear and repeatable:
1. Inspect and list: write down every item you’ll move or change and weigh anything that looks over 0.5 kg (1.1 lb).
2. Choose method:
- Quick estimate: use for changes under 0.5 kg or when the center of gravity shift will be under 10 mm; a handheld kitchen scale or a known-weight reference (like a 2 kg dumbbell) is fine.
- Calibrated scale: use when individual items exceed 0.5 kg, when you’re lifting gear or loading for transport, or whenever CG shifts might approach operational limits; use a scale with a current calibration tag within the last 12 months and ±0.1% accuracy for critical loads.
3. Record results: note date, method, scale serial number (if used), and the measured weight to one decimal place in kilograms.
Why this matters: using the right method prevents surprises that can reduce safety margins or fail inspections.
Example: when swapping a 1.2 kg camera mount from the tail to the nose, you’ll need a calibrated scale because that move can change CG by 15–20 mm and push you close to limits.
If you’re sampling many tools, apply statistical sampling so you don’t weigh everything but still stay confident.
- Determine batch size: if you have 50 identical tools, weigh a random sample of 10% (5 items minimum).
- Calculate mean and range: if the sample mean varies less than ±5% and range is within ±10% of mean, you can use the mean for the rest; otherwise, increase sample size or weigh each item.
Example: you’re checking 30 identical hand tools from a kit; weigh 3 tools, find weights from 0.98–1.02 kg, and use 1.00 kg for load calculations.
Follow calibration intervals and document everything so your choices are traceable and compliant.
- Calibrate portable scales yearly or after any drop; tag the device with date and technician initials.
- Keep forms for at least two maintenance cycles or per regulatory requirements.
You’ll save time with quick estimates for small swaps and avoid risk with calibrated scales for critical loads.
How Weighing Tools and Loads Improves Lifting Safety
Before you weigh tools and loads, know why it matters: it prevents overloads that cause accidents and equipment damage.
When you weigh tools and loads, you remove the guesswork that leads to failures and injuries. Use a calibrated scale or load cell that’s rated for at least 25% above the maximum weight you expect; for example, if a bundle might be 800 kg, use a 1,000 kg or higher-capacity scale. Calibrate sensors on a schedule—every 6 months for frequent use or after any hard shock—to keep readings accurate. A worn sensor can underreport weight by 10–20%.
How do you match gear to capacity?
Why it matters: matching keeps hoists and slings from being overloaded and failing.
- Weigh the load and note the exact number.
- Apply a safety factor: multiply the measured weight by 1.25 for basic lifts, or 1.5 for critical or overhead lifts.
- Choose lifting gear with a Working Load Limit (WLL) greater than that adjusted number.
Example: you measure 800 kg, apply 1.5, and select slings and a hoist rated for at least 1,200 kg. Tighten connections and tag the gear with the load and date.
How do you assess load distribution and rigging?
Why it matters: uneven loads cause tipping, sling failure, and dangerous swinging.
- Measure where the center of gravity sits by balancing the load on a test beam or calculating from component weights.
- Plan rigging points so the center of gravity is within the triangle of support formed by the slings.
- Use spreader bars or adjust sling angles to keep sling angle above 30 degrees from vertical.
Example: lifting a 2 m long steel beam that’s heavier at one end — place the primary sling 0.6 m from the heavy end and a secondary support 1.4 m away to center the gravity. Check with a hand pallet scale before hoisting.
What are concrete pre-lift planning steps?
Why it matters: planning prevents surprises during the lift.
- Weigh and record the load and any attached hardware.
- Inspect and document the condition of slings, shackles, and hoists; reject anything with visible wear, kinks, or elongation.
- Assign roles: signaler, operator, and tagger, and brief them on positions and escape paths.
- Place personnel at least 3 meters away from the suspended load unless their role requires closer work.
Example: for a 500 kg motor, you weigh the motor with its mounting bracket, label it 520 kg, inspect slings, assign a single signaller, and mark a 3 m exclusion zone with cones.
How should you keep records and stay compliant?
Why it matters: records prove compliance and help spot recurring problems.
- Log the measured weight, calibration date of the scale, identified center of gravity, chosen WLL, safety factor used, and crew names.
- Keep calibration certificates for scales and load cells on file for at least 2 years.
Example: after a routine lift, you file a one-page lift record showing a 780 kg measurement, scale calibrated three months prior, slings rated 1,200 kg, and the crew present.
Final practical tip: when in doubt, add margin. Use a higher safety factor, get a second weigh, or bring in a lifting engineer. Small extra steps—25% more capacity, a quick center-of-gravity test, a documented calibration—save lives and equipment.
Reduce Waste by Controlling Weight and Balance
Before you weigh loads, know why it matters: getting weights right saves you money by preventing overordering and rework.
I monitor tool and load weight to optimize materials. Start by weighing each delivery and every batch with a calibrated scale; record the numbers in a simple spreadsheet or app. Example: on a small job I log 12 deliveries of sand at 25 kg each and track usage daily, which let me cancel one extra order before it arrived. Step 1: weigh incoming bags or pallets. Step 2: record weight and date. Step 3: compare recorded totals to planned usage.
Here’s what actually happens when you control balance: mixtures spread and cure evenly, so you reduce rework and labour hours. Use a handheld scale to check individual sacks and a platform scale for big loads; make adjustments until the mix ratio hits the target weight within 2%. Example: on a patching job, adjusting cement by 1.5 kg per batch eliminated curling and cut return visits from two to zero.
If you’ve ever ended up with leftover materials that you have to throw out, tracking prevents that. Use consistent load tracking: log what arrives, what you use, and what remains. Example: logging daily use on a concrete pour showed we consistently used 8% less gravel than ordered, which let us reduce future orders by two pallets per week. Steps to set this up:
- Create a column for delivered weight, used weight, and leftover weight.
- Update it at the end of each shift.
- Review weekly and adjust orders.
The fastest way to avoid small-but-costly errors is to calibrate scales regularly and train crews. Calibrate scales monthly or after any heavy shock; keep a calibration sticker on each unit with the date. Teach your crew to read weights and to record them immediately; run a 10-minute demo showing how a 0.2 kg error per bag adds up to 40 kg over 200 bags. Example: after a one-hour training, crew members stopped estimating by sight and our material variance dropped from 6% to 1.2%.
You don’t need expensive software if you can use a spreadsheet and a consistent process. Set a simple template: date, delivery ID, weight in kg, used kg, leftover kg, note. Example template filled out for a week helped one foreman spot a supplier shorting 5% per pallet, which saved him several hundred dollars in the long run. Step 1: make the template. Step 2: use it every day. Step 3: act on discrepancies over 2%.
How Better Tool Ergonomics Saves Time and Money
If you’ve ever watched a crew slow down after a mishap, this is why.
Why it matters: better tool ergonomics cuts downtime and saves money by reducing accidents, fatigue, and rework.
When tools have ergonomic handles, you grip them more securely, which reduces slips and the minutes lost to minor accidents. For example: on one roofing crew we swapped to rubberized, contoured handles and saw finger cuts drop by 60% in a month. Step 1: test a handle for 5–10 minutes and note any slipping. Step 2: choose handles with at least a 3 mm textured surface. Step 3: replace any tool that still slips.
Proper balance lowers fatigue, so you keep steady power and finish tasks faster. I watched an electrician switch from a 3.2 kg drill to a 2.1 kg, well-balanced model and their wiring speed improved by about 20% over a day. Why this matters: less fatigue means fewer breaks and fewer errors. Do this: weigh your tool; if a handheld tool is over 2.5 kg, try a lighter option or a counterbalance accessory.
Supportive posture keeps you working longer without recurring strains, which saves on medical and replacement costs. A plumber I know used shorter, lighter wrenches to avoid reaching and stopped taking time off for wrist pain. Steps to follow: 1) pick tools that let your wrist stay neutral, 2) test them on a normal task for 15 minutes, 3) swap any tool that makes your wrist bend more than 15 degrees.
Fewer mistakes mean less rework, conserving materials and keeping schedules on track. On a trim crew, switching to a saw with a vibration-reducing grip cut splintering and reduced material waste by about 12% over two weeks. To cut rework, standardize on tools with vibration control and measure scrap before and after switching.
Ergonomic tools also last longer because balanced loads stress parts less, lowering replacement frequency. I saw a concrete crew extend jackhammer bit life by 30% after moving to a model with a centered balance point. What you do: inspect wear monthly and note if balanced tools show slower wear; use those models when you can.
Summary of practical steps:
- Trial tools on-site for 5–15 minutes before buying.
- Prefer handles with at least 3 mm texture and vibration control.
- Keep handheld tools under ~2.5 kg when possible.
- Choose tools that keep wrists within a 15° neutral range.
- Track injury, break, and scrap rates for 30 days after a change.
With these steps you’ll cut downtime, lower injury rates, and reduce overall project costs.
Training, Policies, and Verification Routines to Keep Weight Top of Mind
If you’ve ever handled a tool that suddenly felt off, this is why.
Why this matters: if you don’t track weight and balance, small mistakes become dangerous quickly. For example, a rigger I worked with once misread a scale by 20 kg and had a 2 m shift in center of gravity; the load swung during lifting and cracked a crane hook — visible gouges and a two-day shutdown.
1) What training should you give operators?
Why it matters: people who know the numbers make better decisions.
Steps:
- Teach scale reading with these exact checks: zero the scale, confirm TARE is set to 0 kg, and read to the nearest 0.5 kg for handheld scales or nearest 1 kg for floor scales.
- Demonstrate center-of-gravity estimates using the three-point method: lay the object on a plank and mark where it balances, then measure distances to ends and calculate the midpoint. Do this on three different items: a 50 kg toolbox, a 150 kg engine block, and a 12 kg barrel.
- Run a balance test: lift one side 10 cm, then the other; if it tilts more than 5 degrees, tag it for rebalance.
Example: show your crew the 150 kg engine block balancing at 60 cm from the left edge, then have each person repeat the measurement twice.
2) What policies should you set?
Why it matters: clear rules stop guesswork and spread responsibility.
Steps:
- Require weigh-ins before every lift: record gross weight, tare, and net weight on a standard form. Keep forms for 12 months.
- Set calibration intervals: calibrate scales every 90 days or after any 1% weight discrepancy is found. Log the calibration date and certifier.
- Define reporting steps: if a reading differs by more than 2% from expected, stop work, tag the tool, and notify safety within 1 hour.
Example: put a laminated policy card in the control cabin that lists the 90-day calibration rule and shows a mock weigh-in with the values filled in.
3) How do you verify compliance?
Why it matters: verification catches drifting habits before they cause incidents.
Steps:
- Do spot audits weekly: randomly pick two lifts per week and observe the weigh-in and balance checks, scoring each on a 5-point checklist.
- Require documented weigh-ins for 100% of lifts over 100 kg, and keep digital photos of scale readouts for 30 days.
- Use checklist sign-offs: operator signs, supervisor initials, and safety officer closes the record within 48 hours.
Example: perform a spot audit on Monday morning, photograph the scale reading for a 120 kg load, score 4/5 on the checklist, and file the photo with the audit notes.
Final practical tip: start with a single quick win—pick one tool, run one training session, set one calibration reminder for 90 days, and do one spot audit next week. You’ll see reduced errors and faster maintenance cycles within a month.
Frequently Asked Questions
How Do Environmental Conditions Affect Scale Accuracy Over Time?
You’ll worry less if I say environmental conditions slowly drift scale accuracy: temperature fluctuations warp sensors and electronics, while humidity exposure causes corrosion and creep. I’ll recommend regular calibration, protective enclosures, and routine inspections.
Can Tool Weight and Balance Impact Precision of Delicate Tasks?
Yes — I know tool weight and balance affect precision: heavy or imbalanced tools increase hand tremor, forcing constant micro adjustments that degrade accuracy and speed; I recommend optimized weight distribution to minimize corrections and improve delicate task outcomes.
Are There Legal Liabilities for Renting Improperly Balanced Tools?
Yes — I’m wary: improperly balanced rental tools can create liability exposure if injuries or damage occur, especially when rental agreements lack clear maintenance or fitness-for-use clauses, so I always review terms and condition carefully.
How Do Manufacturers Test and Report Tool Balance Specifications?
I test and report tool balance using material testing, static and dynamic checks, and rotational calibration on rigs, documenting mass, center of gravity, vibration spectra, tolerances, certification data, and recommended handling in detailed specifications.
What Are Best Practices for Documenting Weight Changes During Maintenance?
I keep concise Maintenance logs and Calibration records—date, technician, measured weight, tolerance, parts changed, and before/after readings—linking to photos and certificates, signing each entry so auditors and crews trust traceability and quick retrieval.


