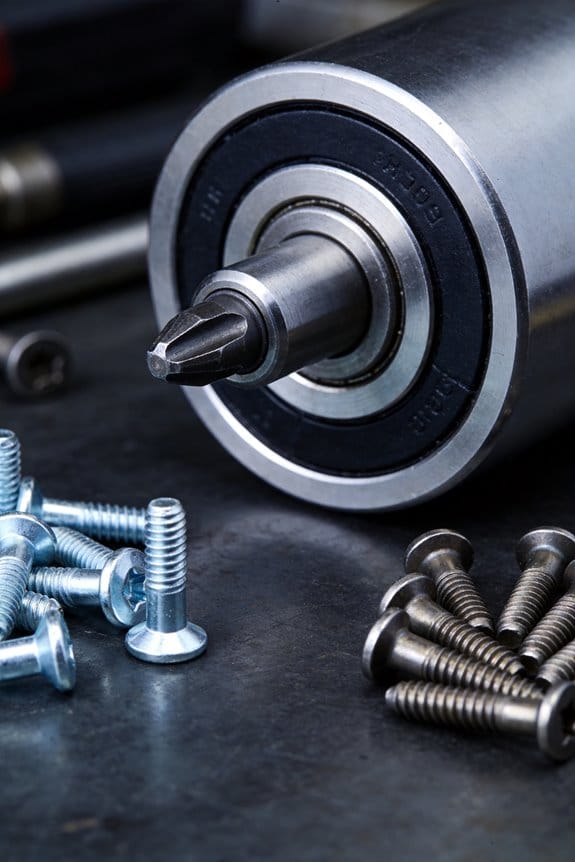
You’ve tightened a rivet on a coastal railing only to watch brown streaks and a loose joint appear within months — why did that fastener fail? Or you’ve seen blistering paint and wondered whether the rivet or the surrounding metal started the corrosion first. Most people pick rivets by appearance or cost and ignore how salt spray, chlorides, and dissimilar metals accelerate failure.
This introduction will show exactly which rivet alloys and styles survive coastal and industrial environments, how to prevent wicking and galvanic attack with specific washers and sealants, and how to size and set rivets so joints stay tight for years. Follow these clear steps and your fastened assemblies will resist corrosion instead of inviting it. It’s simpler than it seems.
Key Takeaways
If you’ve ever worked near the ocean or in a plant, this is why corrosion-resistant rivets matter: they stop fast metal loss that ruins joints and forces repairs. For example, a beachside deck using standard steel rivets developed loose joints within two years after salt spray ate the heads; switching to 316 stainless rivets kept the same joints tight for over a decade.
Why they stop pitting and crevice corrosion: chloride salts attack small gaps and scratches and create tiny pits that grow quickly and break joints. Use 316 stainless or titanium rivets on marine railings where you can actually see salt residues collecting in corner seams after storms.
How to pick the right alloy so you avoid galvanic attack: match metals or pick a compatible alloy. Choose 316 stainless if your panels are stainless or painted steel; choose 5056 aluminum for aluminum sheets; choose titanium when you join dissimilar metals and need excellent corrosion resistance. Example: when you rivet aluminum cladding to a steel frame on a seaside kiosk, use 5056 rivets and add a neoprene washer to prevent direct contact.
How to keep moisture and pollutants out of the joint: use closed-end rivets, rivets with factory-applied coatings, or apply a bead of marine-grade sealant around the head. Step-by-step:
- Clean mating surfaces with solvent and let dry.
- Insert a closed-end stainless rivet.
- Apply a 3–4 mm bead of polyurethane sealant around the head.

A practical example is sealing HVAC duct flanges in a coastal plant; using closed-end rivets plus sealant stopped condensation-driven leaks that had corroded the flanges.
How to maintain mechanical strength under vibration and temperature changes: pick the right diameter and grip, and isolate dissimilar metals with washers. Steps to follow:
- Measure material stack thickness and choose a rivet grip range that centers within that thickness.
- Select diameter so shear stress stays below the rivet alloy’s shear strength—common practice is using 1/8″ (3.2 mm) rivets for light sheet metal and 3/16″ (4.8 mm) for heavier panels.
- Add neoprene or PTFE washers between dissimilar materials.
Example: on a coastal light pole that vibrates in wind, using 3/16″ 316 stainless rivets with PTFE washers prevented loosening and stopped corrosive wear at contact points.
A few quick do’s and don’ts you can use today:
- Do use 316 stainless or titanium in salt-air exposure; use 5056 for aluminum assemblies.
- Do isolate dissimilar metals with washers or suitable coatings.
- Don’t use untreated carbon steel rivets outdoors near salt spray.
- Don’t undersize the rivet; pick a diameter that keeps shear stress below the alloy spec (check supplier data).
Follow these specifics and you’ll cut repair cycles and keep joints working through humidity, salt, and vibration.
Environmental Drivers of Rivet Corrosion
If you’ve ever sat near the coast and watched metal flash under the sun, this is why.
Why it matters: choosing the right rivet stops failures and saves you repair time and money. Coastal salt air and spray create electrolytes that speed metal loss and repeated wetting from tides or storms raises average exposure. For example, a rivet on a boardwalk railing near Monterey Bay will pit noticeably within a year if it’s plain steel and uncoated. Use stainless steel rivets (316 grade) or hot-dip galvanized ones when you expect regular spray, and recoat every 3–5 years.

Why it matters: humidity keeps surfaces wet longer, so corrosion runs faster and mixed metals can eat away at each other. High relative humidity above 70% will keep rivets damp for days after rain, which lets rust and galvanic action proceed. Picture an attic with poor ventilation where a copper roof meets aluminum flashing; the rivets between them will corrode in months unless you isolate the metals. To prevent that, do two things: 1) use the same metal family for rivets and adjacent parts when possible, and 2) add a non-conductive gasket or coating between dissimilar metals.
Why it matters: pollutants form acidic films that attack metal and coatings, accelerating corrosion where you least expect it. In a factory district, airborne sulfur or chloride particles settle on fences and form acids after rain, and within 6–12 months painted rivets can lose adhesion. Clean exposed fasteners with fresh water every 3 months if you’re near industrial sites, and apply a chemical-resistant sealant rated for acids.
Why it matters: temperature swings break seals and let corrosives in, so joints that expand and contract leak. Daily cycles from -10°C to 30°C will fatigue seals and coatings over seasons. Imagine a stadium roof that heats in daytime sun and cools overnight; rivet lines there will see microcracks that let moisture inside. Choose rivets with a flexible backing, use silicone-based sealants around heads, and design for about 1–2 mm of thermal movement in long runs.
Quick Recommendations: Corrosion‑Resistant Rivets for Coastal and Industrial Use

Before you pick rivets for coastal or industrial use, know that wrong hardware lets corrosion ruin your joint fast.
I recommend stainless first because stainless steel gives you chromium-based corrosion resistance, decent strength, and closed-end options that block water. For example, on a boat stanchion you can use 316 stainless closed-end rivets (3/16″ diameter, 1/2″ grip) to stop seawater from wicking into the hole. Use these steps:
- Match rivet diameter to hole: 3/16″ rivet for a 3/16″ hole.
- Choose grip length: thickness of both parts plus up to 1/16″ squeeze.
- Use a pull-type rivet gun rated for 3/16″ stainless.
- Tighten until the mandrel snaps; inspect for a closed end with no gap.
For lighter assemblies, consider aluminum rivets because aluminum resists corrosion and cuts weight, which helps when you’re working on a trailer panel or an awning. Example: on an aluminum fender, use 1/8″ 5056 aluminum rivets (1/8″ diameter, 3/16″ grip) to keep weight down. Steps:
- Confirm base metal is aluminum.
- Choose 5056 alloy for marine use rather than basic 1100.
- Avoid pairing aluminum rivets directly with steel panels unless you add an insulating washer or coating.
- Use a hand riveter sized for 1/8″ fasteners.
If you work in chemical or heavy industrial zones, use stainless or coated steel with sealant because aggressive chemicals and splashes accelerate corrosion. On a chemical plant walkway, for instance, use 316 stainless closed-end or stainless bulbed-rivet (5/32″ diameter, 3/8″ grip) and run a bead of industrial silicone around the head to keep liquids out. Steps:
- Select 316 stainless where chlorides or acids are present.
- Prefer closed-end or bulb-tite styles to prevent fluid entry.
- Apply a compatible sealant (silicone or polysulfide) around the head and under flanges.
- Insulate dissimilar metals with nylon washers or epoxy coatings.

Match rivet and base metals when possible, or insulate dissimilar metals with barriers because galvanic action will otherwise eat the sacrificial metal. Example: when fastening stainless to galvanized steel, place a 0.1″ thick neoprene washer between them. Steps:
- Identify both metals.
- If different, insert non-metallic barrier or use a rivet with a coating rated for that pair.
- Recheck clearances—washers change grip length needs.
Check grip range, diameter, and tool compatibility because the wrong tool or wrong grip ruins the fastener. On a maintenance job with vibration, pick higher-grade rivets since vibration loosens weaker parts. Example: for a vibrating engine mount, use higher-strength stainless or structural aluminum rivets (3/16″ diameter, heavy-duty pull tool). Steps:
- Measure total material stack thickness for grip range.
- Pick diameter based on shear/load tables (3/16″ for moderate loads).
- Verify your rivet tool can pull that diameter and material.
- Use higher-strength grades (look for mill markings or spec sheets).
Quick checklist before you install:
- Material pair: same metal or insulated.
- Rivet type: closed-end for sealing, bulb for thin skins.
- Diameter: 1/8″ for light, 3/16″ for medium load, 1/4″ for heavy.
- Alloy: 316 stainless for marine; 5056 aluminum for marine aluminum.
- Tool: match mandrel and pull force to rivet.
- Seal: silicone or compatible sealant on exposed joints.
If you follow those choices and steps, your riveted joints will resist coastal and industrial corrosion much longer.
Recommended Products

Material - These rivet made of all stainless steel, which is strong, durable, corrosion-resistant, good stress, and suitable for long-term use.

Materials: Featuring an aluminum grip and steel mandrel, these components offer high corrosion resistance, making them ideal for use in any environment.

Closed End (Sealed) Dome Head Pop Rivets - Creates a Watertight Seal
Rivet Materials That Resist Salt, Moisture, and Chemicals

Before you pick a rivet, you need to know which metal will survive salt, moisture, and chemicals because the wrong choice shortens a joint’s life.
Which metal resists saltwater and chemicals best?
Why it matters: A long-lasting joint avoids leaks and repeated repairs.
Stainless steel is your go-to if you want corrosion resistance and decent strength. Use 300-series stainless (like 304) for general marine exposure, and 316 stainless when you expect regular saltwater contact because 316 has added molybdenum that fights pitting. Example: on a small aluminum boat trailer you’ll get better life from 316 stainless rivets near the transom than from 304.
How to use them: pick rivets with diameters matching the hole size (common sizes: 3/32″, 1/8″, 5/32″) and match head style to the part (flat or large-flange for thin sheet). Also match the stainless grade to nearby metals to avoid galvanic problems.
When should you pick aluminum rivets?
Why it matters: You need something lightweight that won’t cause obvious surface rust on aluminum parts.
Aluminum rivets resist corrosion in many marine uses and won’t stain aluminum skins. Choose 6061 or 5056 rivets for boat hulls; avoid plain 1100 if you need strength. Example: on an aluminum dinghy’s deck plates, 5056 blind rivets work well and keep weight down.
How to use them: use aluminum rivets with aluminum sheets only, or isolate them from steel with barriers (see isolation section). For shear-limited joints, keep diameter conservative—use 1/8″ rivets for medium loads, 5/32″ for heavier panels.
When is titanium worth the cost?
Why it matters: Some places demand strength and extreme corrosion resistance so you don’t replace hardware yearly.
Titanium combines high strength with excellent resistance to saltwater and industrial chemicals; it’s what professionals use on long-life builds. Example: on a marine stainless mast where every fastener sees spray and occasional fuel, titanium rivets last decades without corrosion.
How to use them: reserve titanium for critical, high-cost areas like spars, hull fittings, or chemical-exposed joints. Expect to pay several times more than stainless, but plan for multi-decade life.
How do you prevent galvanic corrosion when metals differ?
Why it matters: Galvanic attack can eat a joint fast even when both metals are normally corrosion-resistant.
Step 1: Isolate dissimilar metals with a barrier (use 3M 5200 sealant, nylon washers, or an epoxy paint layer).
Step 2: Ensure contact areas are clean and dry before assembly.
Step 3: If possible, choose a rivet metal that’s between the two base metals on the galvanic series (for example, stainless between steel and aluminum).
Example: when fastening aluminum sheet to mild steel framing, put a 0.062″ nylon washer under the rivet head and a thin epoxy coating on the steel flange.
What mechanical properties and sizes should you check?
Why it matters: Strength mismatch causes mechanical failure even if corrosion isn’t a problem.
Check shear and tensile values printed by the rivet maker and match the grip range to your stack thickness. Example: if your material stack is 0.140″ thick, pick a rivet with a 1/8″ (0.125″) to 3/16″ (0.187″) grip range that centers on 0.140″.
Steps:
- Measure stack thickness to 0.001″ if you can.
- Choose rivet diameter: 3/32″ for light panels, 1/8″ for medium loads, 5/32″ or 3/16″ for heavy loads.
- Confirm shear and tensile ratings meet expected loads (ask supplier for numbers if not listed).
Practical checklist before you install rivets
Why it matters: Skipping checks causes rework and premature failure.
- Confirm metals and pick rivet alloy accordingly.
- Measure stack thickness and choose the right grip range.
- Select diameter and head type.
- Add isolation (washers or sealant) if metals differ.
Example: before riveting a new swim platform to a steel frame, you’d choose 316 stainless rivets, 1/8″ diameter, apply epoxy to the steel flange, and use stainless washers under the head.
Final quick tips
Why it matters: Little choices add up to a durable joint.
- Use 316 stainless in most wet environments unless weight is critical.
- Use aluminum rivets only with aluminum, unless you add isolation.
- Use titanium for critical, long-life, corrosive or chemical-exposed joints.
- Always match grip range and diameter to measured thickness.
Recommended Products

Premium 304 Stainless Steel – Long-Lasting Rust Resistance Made from 304 stainless steel, these rivets offer superior corrosion resistance compared to standard aluminum or galvanized rivets. Ideal for both indoor and outdoor use, including automotive, marine, and patio furniture applications. High tensile strength ensures a secure, long-lasting hold that won’t loosen over time.

Rivet Set: Our silver blind rivet set contains 340 aluminum blind rivets (8 different sizes) and 340 silver washers (3 different sizes) for a wide range of uses. This blind rivet set includes 1/8-inch, 5/32-inch, and 3/16-inch blind rivets with corresponding washers to ensure precise installation.

Complete and Organized Kit: This comprehensive set features 9 sizes of SAE rivets and 3 sizes of stainless steel washers, all conveniently housed in a labeled plastic box
Closed‑End and Coated Rivets for Waterproof, Corrosion‑Resistant Joints

Before you pick rivets for joints that must stay dry and resist corrosion, know why it matters: if water gets in or the surface flakes off, the joint fails and repairs get expensive.
I usually recommend closed‑end rivets plus coated options because they stop two failure modes at once: liquid entry and surface oxidation. For example, I specified stainless steel closed‑end, zinc‑chromate‑coated rivets for an outdoor aluminum canopy last summer and the fasteners showed no rust after two winter seasons.
Why closed‑end rivets? They create a sealed seam so water and air can’t sit inside the hole and start corrosion. Use a closed‑end blind rivet sized to your material thickness: pick the grip range that covers the total stack-up thickness, for instance 3.2–6.4 mm if your skins plus spacer add up to about 4.5 mm. Tighten until the mandrel snaps cleanly and the tail forms a dome; the seam should look flush and dry.
Why coated rivets? The coating slows surface oxidation when salt or chemicals hit the joint. Match coatings to your base metals: use zinc or zinc‑chromate coatings with steel, and chromate‑conversion or specially formulated paints for aluminum. A real example: a boat railing used aluminum rivets with a chromate conversion coating and held up against spray and salt for three seasons with only surface whitening.
How to choose and install — short, exact steps you can follow:
- Measure total stack thickness to 0.1 mm and pick a rivet grip range that centers on that thickness.
- Choose closed‑end blind rivets when you need a sealed joint; pick material compatible with the panels (aluminum rivet for aluminum panels, stainless for mixed steel/aluminum if you can isolate contact).
- Select a coating that pairs with the rivet and substrate (zinc for steel, chromate or epoxy paints for aluminum).
- Verify your rivet tool fits the rivet mandrel size and can deliver the pull force; test on a scrap piece.
- For high‑exposure areas, apply a thin bead of polyurethane or polysulfide sealant around the rivet head after installation and cure per the sealant label.
Installation quality matters more than the brand. If the mandrel doesn’t break cleanly, or the rivet spins, or the head sits crooked, the seal is compromised. For instance, on a recent HVAC duct run, replacing misset rivets cut water penetration immediately.
Quick maintenance tips you can use: inspect annually, touch up coating chips with matching paint within 30 days, and replace any rivets that show through‑hole staining or loose heads.
Recommended Products
Materials: Featuring an aluminum grip and steel mandrel, these components offer high corrosion resistance, making them ideal for use in any environment.
Materials: Featuring an aluminum grip and steel mandrel, these components offer high corrosion resistance, making them ideal for use in any environment.

HIGH QUALITY - Aluminum Grip and Steel Mandrel. This high corrosion resistance makes them the perfect choice for use in any environment.
Match, Specify, and Install Rivets to Prevent Galvanic and Environmental Failure
Before you install rivets, know why matching materials matters: it prevents fast galvanic corrosion that eats joints in salty or humid air.
Match the rivet metal to your base metal whenever you can. If you’re riveting aluminum sheet to an aluminum panel, use an aluminum closed‑end rivet of the same alloy or a compatible series; for example, use 6061‑T6 rivets with 6061 panels. Example: a boat console made of 5052 aluminum failed quickly when steel rivets were used in salt spray — switching to aluminum rivets stopped the streaking in weeks.
1) Choose rivet material:
- Stainless steel: use in marine spray or chemical environments; pick 300 series for general use and 316 for chloride exposure.
- Aluminum: use for light structures where weight matters and you’re joining aluminum parts.
- Titanium: use when you need extreme corrosion resistance and high strength despite higher cost.
Why insulating barriers help: they stop the electrical path that causes galvanic cells.
2) When you can’t match metals, use isolation:
- Apply a thin polymer washer or PTFE tape at contact points.
- Coat the rivet shank with a compatible primer or adhesive before installation.
Example: on a painted aluminum frame joined to a steel bracket, placing a 1 mm neoprene washer under the rivet head prevented rust staining on the paint over six months.
Before you set rivets, verify fit precisely: wrong diameter or grip makes joints fail mechanically or leak.
3) Check fit and strength:
- Measure material stack thickness with calipers and pick a rivet with a grip range that overlaps that thickness by at least 1 mm.
- Choose a diameter that fills the hole snugly: common sizes are 3/32″ (2.4 mm), 1/8″ (3.2 mm), and 5/32″ (4.0 mm).
- For shear loads, prefer larger diameters and higher‑strength alloys; consult the rivet manufacturer’s shear tables.
Why correct installation torque matters: overtightening crushes thin skins and undertightening leaves a loose joint that corrodes inside.
4) Set installation controls:
- Use the manufacturer’s recommended pull force or torque; for example, many 1/8″ blind rivets require 2,000–3,000 N of pull force—check the spec sheet.
- If using a pneumatic or electric rivet gun, set stroke and pressure per the rivet model.
- After installation, measure bulge or mandrel break clearance per the spec to confirm proper swage.
Example: aircraft skin rivets set with too much gun pressure deformed panels; reducing pressure to the spec restored smooth skin and correct clamp.
Seal closed‑end rivets and keep inspecting them; a seal prevents environmental failure and replacement stops spread.
5) Seal and maintain:
- After setting, apply a bead of approved silicone or polysulfide sealant around the head for exterior or marine use—use 2–3 mm bead width.
- Inspect rivets at 6‑month intervals in harsh environments and yearly in mild conditions.
- Replace any rivet showing cracking, gap, head lift, or corrosion on the shank immediately.
If you follow these steps — match materials when possible, isolate when not, check grip and diameter, control installation force, and seal plus inspect — your riveted joints will last far longer in corrosive or wet environments.
Recommended Products

【High-Quality Materials】 Our pop rivets are made of premium aluminum and steel, ensuring great performance in any environment. They are corrosion and acid-resistant, so you don't have to worry about rusting or breaking.

FIT SIZE - 3/16" hole size, head of tri grip rivet is about 3/8", black part is 1", Grip range is 1/6" - 1/2" (4MM-12MM). Rivet tool required for installation (𝒕𝒐𝒐𝒍 𝒏𝒐𝒕 𝒊𝒏𝒄𝒍𝒖𝒅𝒆𝒅).

Create a Watertight Seal with the Closed End(Sealed) Aluminum Rivets!
Frequently Asked Questions
Can Rivet Choice Affect Electrical Grounding or Conductivity in Coastal Installations?
Yes — I’ll investigate: rivet choice can break electrical continuity or provide galvanic isolation, so I’ll pick compatible metals or bonded barriers to guarantee grounding, avoiding dissimilar pairs that induce corrosion and interrupt conductivity.
How Do Rivets Perform Under Alternating Saltwater and Freshwater Exposure?
I’ve seen rivets suffer accelerated galvanic interactions and crevice corrosion with alternating saltwater/freshwater exposure, so I recommend stainless or titanium, closed-end designs, and isolation barriers to prevent localized attack and prolong joint life.
Are There Environmental Disposal Concerns for Coated or Plated Rivets?
About 30% of treated fasteners contain heavy metals, so yes—I’m careful: disposal regulations require proper sorting, and I note recycling challenges due to mixed coatings and substrates, often needing specialist reclamation or hazardous-waste routes.
Can Rivet Selection Influence Paint or Coating Adhesion Over Time?
Yes — I’ll choose rivets for coating compatibility and make certain proper surface preparation; compatible metals and clean, treated rivet surfaces promote long-term adhesion, prevent undercutting or blistering, and maintain protective coatings in harsh environments.
What Inspection Intervals Detect Hidden Corrosion in Closed‑End Rivets?
I recommend routine inspections every 3–6 months, yet annual borescope checks for hidden corrosion; I balance frequent visual reviews with targeted internal inspections so you catch early degradation without overburdening maintenance cycles or missing stealth failures.