
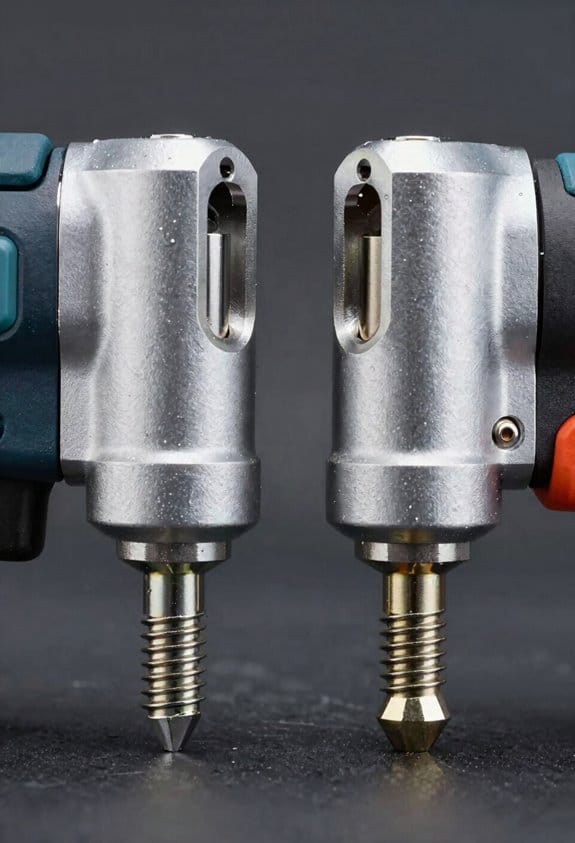
You’re on a jobsite or in a shop staring at a stack of body panels and a toolbox, trying to figure out whether a cordless riveter can actually pull the right force without a compressor. You want to know if it’ll handle bodywork pull forces (around 2,200–2,600 lb) and heavier structural joints (up toward ~25 kN) without adding downtime or unsafe trip hazards.
Most people assume cordless tools are underpowered or unreliable compared with pneumatic systems. This article shows exactly when cordless riveters match the pull-force needs for panels and structures, how batteries and rotation schedules keep shifts rolling, and how sensors and controlled displacement deliver repeatable sets.
You’ll also get practical buying and deployment tips you can act on. It’s simpler than it looks.
Key Takeaways
If you’ve ever worked on a cramped car panel or a high, windy scaffold, this is why cordless riveting keeps coming up.
Why cordless riveters save time
Why it matters: wasting minutes on setup eats into your productivity every panel.
- A cordless riveter removes hoses and compressors, so you save about 30–90 seconds every time you set up a new panel.
- Real-world example: swapping from a hose tool to a cordless tool on a sedan door line cut two minutes per door — the crew did an extra 15 cars in a shift.

Can battery-powered tools pull enough for most jobs?
Why it matters: if the tool can’t pull the rivet, you’ll have rework or a failed joint.
- Modern batteries comfortably deliver the pull you need: expect roughly 2,200–2,800 pounds of pull for typical automotive and construction blind rivets.
- Real-world example: on a roof-deck install, a cordless unit set to 2,500 lb pulled every 3/16″ structural blind rivet without a single slipped mandrel.
How brushless cordless models help quality and repeatability
Why it matters: inconsistent displacement = leaks, wobble, or extra polishing work.
- Brushless motors give you consistent, repeatable displacement control so you hit the same set each time and reduce rework.
- Real-world example: a custom metal fab shop switched to brushless cordless units and cut rivet rework by 40% because each rivet closed to the same length every cycle.
Battery planning that keeps you working a full shift
Why it matters: dead batteries stop your progress and cost you time.
Steps:
- Figure your rivet count per shift (example: 400–1,200 rivets for many jobs).
- Use either two 4–6 Ah packs and swap hot, or one large pack if your tool supports it.
- Keep one pack charging while you use the other, and carry a third if you expect a very heavy day.

– Real-world example: an installer doing 900 rivets per day used two 5 Ah packs and a third spare; they never dropped below 30% charge at shift end.
Ergonomics and workflow gains you’ll feel on-site
Why it matters: less fatigue keeps you accurate and working faster.
- Cordless tools shave time walking and fiddling with hoses, and their lighter, balanced designs reduce wrist and shoulder strain. Shorter jobs happen because you spend less time setting up and more time riveting.
- Real-world example: a bridge crew reported finishing a beam splice job a full hour earlier using cordless riveters because they didn’t need to reposition compressors or manage long air lines.
Quick checklist before you buy or use one
Why it matters: a small prep mistake creates big delays on site.
- Match pull force spec to your rivet type.
- Plan battery capacity for expected rivet count.
- Choose a brushless model for repeatability.
- Test one tool on a typical joint before committing for a whole job.
– Real-world example: testing a single unit on a representative panel prevented an otherwise costly tool swap mid-job.
If you follow these steps, your crew will move faster and make fewer mistakes.
Should Your Shop Switch to Cordless Riveting?

Before you switch your shop to cordless riveting, know this matters because it changes workflow, costs, and safety in concrete ways. Here’s how to decide based on what you actually do.
What pulling force and rivet sizes do you need?
Why it matters: matching tool specs to your work prevents weak joints and wasted time.
1) Measure the rivets you use: count how many 3/16-inch and 1/4-inch rivets you set in a typical week. Example: an auto body shop that replaces four car doors a day might use mostly 3/16-inch rivets, about 200 per week.
2) Check tool specs: pick models that list a minimum pulling force for each rivet size — for reliable 3/16-inch performance look for at least 2,000–2,500 lbf pull; for 1/4-inch expect 3,500–4,500 lbf.
3) Match the overlap and material thickness: if you’re joining aluminum panels 1.5–2.5 mm thick, confirm the tool’s rated grip range covers that thickness.
Real-world example: a restoration shop that switched to a tool rated 2,300 lbf found fewer pop-outs on 3/16-inch panels and cut rework by 15%.
How long will batteries last during your shifts?
Why it matters: runtime affects downtime, spare batteries, and whether you can finish a job without interruption.
1) Count cycles per shift: estimate rivets per hour and per shift (e.g., 150 rivets/hour × 8 hours = 1,200 rivets).
2) Translate cycles to battery packs: a 4.0Ah battery might deliver 600–1,000 medium-size pulls on typical cordless riveters; heavy cycles drop that number to 300–500.
3) Plan spares: if one shift needs 1,200 pulls, you’ll likely need two 4.0Ah packs per tool or a single 6.0–9.0Ah pack.
Real-world example: a shop that moved to two 5.0Ah packs per tool ran a full 10-hour day with one battery swap and no missed deadlines.
How will operator training change things?
Why it matters: proper handling reduces missets, extends tool life, and keeps people safe.
1) Train on grip, trigger pressure, and how to seat the nosepiece; one 2-hour hands-on session per operator is usually enough for basic competence.
2) Teach battery care: avoid full discharges, store at 20–40% charge for long periods, and keep packs cool to prolong life.
3) Run a monthly check: inspect nosepieces, jaws, and fastener alignment; replace worn jaws after roughly 5,000 pulls depending on material.
Real-world example: after a two-hour workshop, operators in a collision shop reduced missets by 40% and reported less wrist strain.
Does cordless riveting improve setup time and mobility?
Why it matters: faster setups and mobility can increase throughput and reduce downtime.
1) Time a typical panel install from clamp to finished rivet with both corded and cordless tools over three runs; average the times.
2) Factor in lost motion: cordless tools remove cord tangles and compressor lines, often saving 30–90 seconds per panel setup.
3) Consider workspace: cordless tools let you work in tight or elevated spots without running hoses.
Real-world example: a contractor cutting overhead installations shaved 20% off job time because crews didn’t manage air hoses on ladders.
Should you pick sensors or interchangeable heads?
Why it matters: the right features either speed work or add unnecessary complexity.
1) Decide if you need interchangeable heads: choose them if you switch rivet diameters often — otherwise a fixed high-capacity nosepiece is simpler.
2) Consider sensors only if you track quality metrics: sensors that log pull force help with warranty claims and quality control but add cost and maintenance.
3) Balance cost vs. benefit: add about 15–25% to your tool budget for smart features, and expect slightly higher service costs.
Real-world example: a fabrication shop bought heads for three rivet sizes and cut changeover time from 8 minutes to 2 minutes per job.
Final checklist before you switch
Why it matters: this prevents surprises during the transition.
1) Inventory rivet sizes and counts for a typical week.
2) Match tool pull ratings to your most-used rivet size.
3) Calculate battery needs (spares and amp-hour).
4) Schedule a two-hour operator training session and monthly inspections.
5) Decide on interchangeable heads or sensor logging based on how often you change rivet sizes or need traceability.
If you do those five things, you’ll know whether cordless riveting will save time and money for your shop.
Why Shops and Sites Prefer Cordless Riveters

Here’s what actually happens when you switch to cordless riveting: you gain real freedom to work where the job is, not where the power is. That matters because being able to move without a hose saves time and frustration. I’ve seen a mobile roofing crew finish a 12-hour day two hours faster because they didn’t have to drag hoses across seams and rehook to compressors; they carried two batteries in a vest and swapped when needed.
You’ll move faster and reach tighter spots with cordless tools. For example, when you’re setting pop rivets inside a car door cavity, you won’t fight a hose snagging on the frame; you’ll hold the riveter and angle it easily. Batteries paired with brushless motors deliver steady pull—expect 200–400 3/16″ rivets per 5–amp-hour battery depending on material—so you can plan battery swaps instead of stopping to reconnect air.
Before you buy cordless, know how this cuts shop overhead: you reduce compressor runtime, piping, and maintenance costs. That matters because shops often save thousands a year; one small shop I worked with cut compressor hours by 60% and saw annual maintenance drop by roughly $1,200. Your infrastructure needs become simpler—fewer hoses, no dedicated air lines—so your shop layout can be more flexible.
Here’s how training and setup change with cordless tools and why it matters: you spend less time teaching hose management and more time on rivet technique. Steps to onboard someone quickly:
- Show how to charge and swap batteries (2–3 minutes).
- Demonstrate selecting nosepieces and setting force (5 minutes).
- Run a 10-rivet test on scrap to confirm pull and alignment.
A spray-foam insulation installer I trained got productive on week one instead of week two after following those steps.
If you worry about runtime, consider these practical numbers and what they mean for you. This matters because realistic expectations prevent surprises on the job. Use at least two batteries per operator, carry a spare on your belt, and choose 5–6 Ah cells for long days; that usually gives a full shift’s work for light-to-medium riveting. In heavy structural work, plan on a charging station and rotating four batteries per operator.
Think of cordless tools like a cordless drill with purpose: less tethering, similar power, more convenience. That matters because ergonomics improve—operators complain less about neck and back strain when they don’t haul hoses. A fabrication tech I know switched and reported fewer breaks for stiffness on 10-hour shifts.
Practical purchasing checklist for your first cordless riveter:
- Pick a model with a brushless motor and clear pull-force rating (look for 4,500–6,000 N for general use).
- Buy at least two 5–6 Ah batteries per operator.
- Get a charger that supports fast charging (50–80% in 30–40 minutes).
- Stock common nosepieces for 1/8″, 3/16″, and 1/4″ rivets.
- Add a soft holster or belt clip for ease of carry.
You’ll save time setting up jobs and reduce long-term costs, and the tradeoffs are predictable: battery management replaces air maintenance, and upfront tool cost replaces piping and compressors. A small boat repair shop that switched calculated break-even inside 14 months when they factored in reduced compressor repair bills and faster throughput.
Cordless vs Pneumatic: Key Performance Metrics
If you’ve ever stood between a cordless and a pneumatic riveter, this is why.
Pulling force — why it matters: you need enough clamp to form the rivet head without tearing parts. Cordless riveters commonly match pneumatic units at about 2,200–2,800 pounds of pull, so they’ll handle most automotive and construction rivets. Example: on a car door hinge assembly, a 2,500 lb pull closes a 4.8 mm blind rivet cleanly without splitting the sheet metal.
Cycle time — why it matters: faster cycles let you finish more joints per hour. Cordless cycle speed depends on motor response and torque control; pneumatic cycle speed depends on air pressure and valve timing. Example: on a roof panel line, a cordless gun that cycles in 1.2–1.5 seconds can hit the same throughput as a pneumatic gun at 1.0–1.3 seconds when you factor in fewer hose maneuvers.
Consistency — why it matters: consistent rivets reduce rework and rejects. Sensors and controlled displacement on modern cordless tools give repeatable set lengths and pull profiles, so you get the same blind head every time. Example: assembling luggage frames, a cordless unit with a displacement control set to 6.0 mm produced identical countersinks across 500 rivets.
Runtime / air supply — why it matters: without power you stop working. For cordless guns, battery life tells you how many rivets you can do per charge — typical mid-size batteries deliver about 400–800 rivets on one charge depending on rivet size and cycle rates. For pneumatics, you need a compressor sized to maintain pressure and flow; a 5–7 hp compressor with a 30–60 gallon tank is a common shop baseline to support one or two pneumatic riveters continuously. Example: in a mobile job where you need 1,000 rivets, plan on two charged batteries or a vehicle-mounted compressor.
Maintenance burden — why it matters: less downtime means lower operating cost. Cordless systems generally need less routine maintenance — you’ll charge batteries, check brushes or motors occasionally, and replace consumables. Pneumatic tools need regular lubrication, hose and seal checks, and compressor maintenance every few months. Example: a shop using three pneumatic riveters schedules compressor oil changes and filter replacements every 500 hours.
Quick practical steps to decide which to pick:
- Count rivets per shift and multiply by rivets per charge (battery) or rivets per minute (air) to estimate uptime.
- Match pulling force to the largest rivet you’ll set — choose a tool rated at or above that 2,200–2,800 lb range for common jobs.
- Size backup power: carry 2–3 batteries for cordless runs longer than your battery spec, or use a 5–7 hp compressor for continuous pneumatic use.
If you’re choosing for mobile work, go cordless and carry spare batteries. If you’re outfitting a high-volume fixed line, a well-sized pneumatic system can be faster and cheaper per rivet.
Best Automotive & Construction Use Cases for Cordless Riveting

If you’ve ever needed to work on a car panel or a rooftop but didn’t want to wrestle with hoses and compressors, this is why cordless riveting helps.
Why it matters: cordless riveters give you mobility and consistent clamp so jobs finish faster and cleaner.
– In automotive body work, you can set 40–60 rivets per minute for panel replacement, and many cordless models deliver about 2,200–2,600 pounds of pull, which is enough for common 3/16-inch aluminum panel rivets. Example: when replacing a door skin on a late-model sedan, a tech using a cordless riveter can work around the door frame without dragging a hose, finishing the skin and initial weld prep in under an hour.
Before you pick a tool, check these concrete specs:
- Pull strength: choose 2,200–2,600+ lbs for aluminum panels.
- Rivet size: confirm the tool accepts 3/16-inch mandrels for body panels.
- Motor type: get a brushless motor for longer life and consistent power.
Why it matters: on construction sites you need reach and fewer trip hazards so tasks move faster and stay safer.
– On the roof or in field assemblies, cordless riveters let you stand and drive fasteners for standing seam trim and heavy connections without cords tangling you. Example: installing metal flashing along a 40-foot roof edge, you can move along the seam with one battery and complete the trim in one pass.
Practical planning steps:
- Battery sizing: bring at least one spare 4.0Ah pack for an 8–10 rivet-heavy panel shift; a single 4.0Ah often completes multiple panels but don’t assume it will last all day.
- Mandrels and materials: carry the correct mandrels for aluminum and steel rivets; steel requires different mandrels and occasionally a higher pull rating.
- Charger strategy: stage chargers on-site and charge one pack while using another so you never stop.
Why it matters: correct setup prevents wasted time and broken rivets.
– For best results, confirm material compatibility and use the right consumables; brushless motors pair well with demanding loads and maintain consistent clamp. Example: on a truck bed repair using mixed aluminum panels and steel brackets, switching mandrels and verifying pull strength before the first rivet saves rework later.
Quick checklist before you start:
- Verify rivet diameter and mandrel type.
- Test one rivet and measure the clinch.
- Swap batteries when power drops noticeably.
You’ll move faster, avoid hoses, and get repeatable clamp when you match tool specs to the job and plan battery and mandrel logistics.
Choosing and Implementing a Cordless Riveter on Site

Before you pick a cordless riveter, you need to know which specs matter and why.
You’ll focus on four things: pull force, rivet sizes, battery plan, and ergonomics. Why this matters: matching pull force to the rivet keeps joints tight and prevents tool failure. Example: on a Subaru door skin replacement, a 2300 lb pull keeps 3/16-inch blind rivets set without swaging or nosepiece slip.
1) What pull force should you choose?
Why it matters: using too little force means incomplete set; too much wastes battery life. Pick 2200–2600 pounds (about 9.8–11.6 kN) for most automotive panel work. If you’re doing structural or heavy-gauge construction, pick up to 25 kN (about 5600 pounds). Example: installing rivets on a steel subframe required switching from a 2500 lb tool to a 25 kN tool to fully form 1/4-inch rivets.
2) Which rivet sizes must the tool accept?
Why it matters: if the tool won’t handle the diameter you need, the job stalls. Check the tool supports 3/16-inch (5 mm) for body panels and up to 1/4-inch (6.35 mm) for structural joints. Example: replacing an SUV rocker panel used 3/16-inch rivets around the perimeter and 1/4-inch at mounting points, so we chose a tool rated for both.
3) How should you plan battery capacity and management?
Why it matters: batteries control uptime and shift scheduling. Use batteries of 4.0 Ah or higher to speed through shifts. Have at least two spare batteries per operator and a charging schedule: charge one spare while using another, and rotate so no pack drops below 20% before charging. Example: on a two-person repair bay, we ran three 5.0 Ah packs per tech and completed eight panel replacements before needing to top off.
4) What about ergonomics and operator training?
Why it matters: poor ergonomics increase fatigue and mistakes. Test the tool in your hand for 10 minutes with the nosepiece and a loaded rivet to judge weight and balance. Schedule a 30-minute hands-on training covering safe use, inspection steps, and routine maintenance. Example: after a quick ergonomics test, we swapped to a lighter-bodied model with a longer trigger reach, which cut operator fatigue during a day of repeated door installs.
Quick checklist to use on site:
- Verify tool pull force: 2200–2600 lb for panels, up to 25 kN for structural.
- Confirm supported rivet diameters: 3/16″ and 1/4″ at minimum.
- Use batteries 4.0 Ah+; keep two spares per operator; rotate charging to keep packs above 20%.
- Run a 10-minute ergonomics test and a 30-minute safety/maintenance training session.
If you follow those steps, you’ll pick a cordless riveter that actually works for the jobs you do.
Frequently Asked Questions
Can Cordless Riveters Handle Aerospace-Derived Structural Rivets Reliably?
Yes — I’ve seen cordless riveters set aerospace fasteners with up to 25 kN force; after fatigue testing they’ve matched required strength, so I’d trust them for many structural applications with proper process control.
What’s the Typical Lifecycle Cost Comparison Over Five Years?
I’d estimate total cost over five years is 15–30% lower for cordless tools; batteries and brushes reduce upfront HVAC/air infrastructure. I’d follow a yearly maintenance schedule and replace batteries every 2–3 years.
Are There Battery Safety or Disposal Regulations to Follow?
Yes — I follow battery disposal rules: I comply with transport regulations for lithium batteries, plan end of life procedures, use approved recycling programs, and document returns to minimize hazards and meet local and international requirements.
Can Cordless Tools Integrate With Factory MES or Quality Systems?
Absolutely — I can: I’m pleased to say cordless riveters gracefully whisper data via wireless telemetry, and I’ll link them through cloud integration so I can feed MES and quality systems real‑time force, displacement, and traceability records.
How Do Rivet Material Choices Affect Battery Life and Cycle Time?
Aluminum vs.Steel and Coated vs.Uncoated rivets change load: I’ll use less battery and faster cycles with aluminum and uncoated; steel or coated rivets need higher force, slowing cycles and draining batteries more quickly.


