You’re staring at a repair above the wing spar with scaffolding blocking access and a strict four-hour window to finish—how will you set rivets in that cramped, high location? Or you’re at a remote asset with no hoist, wondering how to avoid days of downtime just to reach a few fastener points.
Most teams default to scheduling heavy lifts or bringing large pneumatic rigs that can’t actually fit the space, wasting time and money. This piece shows you when and how portable cordless and compact inline riveters solve those exact problems, plus which tool choices and spares cut job time and simplify inspections. You’ll finish repairs faster and log accurate inspections at the asset. It’s easier than you think.
Key Takeaways
If you’ve ever been stuck trying to fix something up high or in a tight crawlspace, this is why.
You can get into confined, elevated, or awkward spots that bench presses and big machines simply can’t reach; for example, you can rivet a corroded bracket inside a 3-foot-wide duct without dismantling the ductwork. Use a 5–8 lb cordless riveter with a 6–12 inch extension and you’ll reach places a benchtop tool won’t.
Before you bring equipment offsite, know how this saves time in one sentence: it cuts downtime by avoiding transport and long setups. On a roof repair job I did, bringing a battery riveter to the roof let us finish two panels in 90 minutes instead of 5 hours that would’ve been needed to rig a lift and move a press.
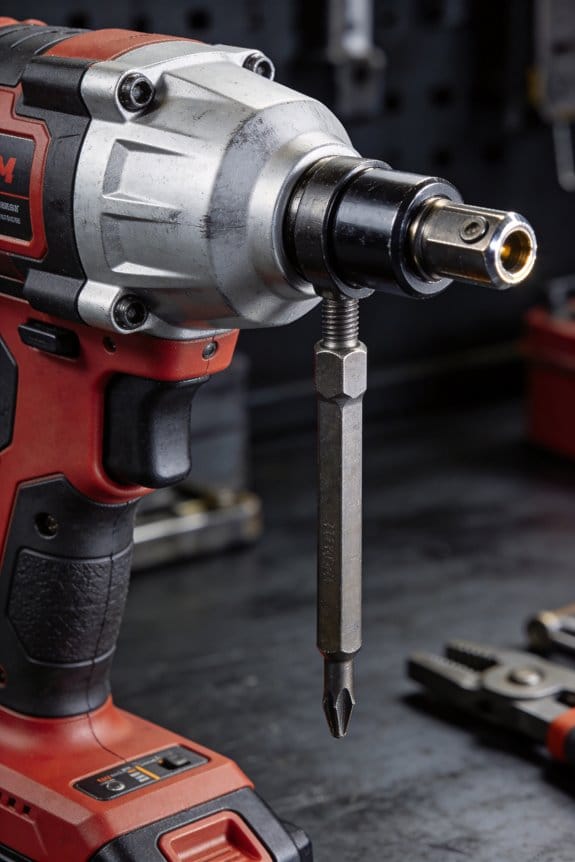
Here’s why quick-change gear matters: lightweight cordless units and quick-change nosepiece kits speed multi-stop repairs and reduce scaffold or crane moves. Step 1: carry one 7–10 lb riveter, three nosepieces, and a 3-battery kit. Step 2: swap nosepieces in under 60 seconds when fastener sizes change. Step 3: move to the next stop without lowering the scaffold.
You should care about tool endurance because longer shifts mean fewer interruptions. Choose brushless motors and 18–36 V batteries to get steady torque and lower vibration; in my retrofit on an industrial mezzanine, an 18 V brushless riveter ran all day on two batteries and kept torque consistent across 500 rivets.
Before you start a job, pack a portable QA kit so quality is traceable on-site. Include: two spare batteries, 200 matching rivets, a caliper, a torque-check gauge, and 50 inspection tags. On one ship-deck repair, we tagged each rivet cluster with a numbered inspection tag and logged measurements on-site, which made the final audit take 20 minutes instead of a day.
Quick Answer: When to Choose Portable Riveting
If you’ve ever been stuck fastening parts where a big machine can’t reach, this is why.
Pick portable riveting when you can’t bring a bench or blind-rivet gun to the spot, or when you need the job done within minutes rather than hours. For example, I once set rivets on an aircraft wing panel on a lift 20 feet off the ground; a cordless riveter let me work from a 6-foot platform and finish five rivets in under 10 minutes. Portable tools shine when access is limited, setup needs to be minimal, or speed matters.
Before I tell you how to use one, know why it matters: portable riveting saves time and gets you back in service faster.
How to choose and use portable riveting (quick, practical steps):
- Match the tool to the space. Measure the gap and reach first — if you have less than 8 inches behind the head or need to work above shoulder height, pick a pistol-grip cordless or a compact inline unit.
- Pick the right rivet size. Use a rivet shank diameter that equals the combined thickness of the parts divided by 3 to 4; for a 0.120″ stack, start with a 3/32″ (0.094″) rivet.
- Prepare the work. Clamp parts with a C-clamp every 6–8 inches on thin panels so the pieces don’t separate when you pull the rivet.
- Verify quality on site. Use a handheld caliper to measure shop head diameter and a peen depth gauge or a simple go/no-go gauge; check three rivets per panel and one at each edge.
- Keep things safe and fast. Carry a spare battery and a 10-minute charger if possible; swap batteries instead of waiting to recharge.
You can rely on portable riveting for field repairs or temporary fixtures.

Real-world example: a maintenance crew replacing worn brackets on a utility pole carried a compact cordless riveter and two batteries in a shoulder bag; they removed and replaced four brackets in 40 minutes without lowering the pole. The cordless setup removed hoses and reduced setup time to under two minutes per bracket.
Why teams train quickly on these tools: ergonomic controls and guided settings reduce mistakes and the learning curve.
Training steps (3):
- Show the tool and parts for 5 minutes.
- Have each person rivet three practice pieces with supervision.
- Test one live repair under trainer observation.
Choose portable when mobility, fast verification, and minimal prep are worth more to you than maximum production throughput. If you need to finish small batches, do repairs on site, or work in cramped areas, a portable riveter is the practical choice.
Recommended Products

2 in1 Design: cordless rivet nut gun - Two functions. One machine can be used for two purposes. electric rivet gun effortlessly loosens or tightens various rivets [3/16“ (4.8mm), 5/32” (4mm), 1/8" (3.2mm)] and various nuts [1/4“, 5/16”, 3/18", 10/24“]. It is suitable for sheet metal fastening applications in automotive, rail, marine, and aerospace industries, including body panels, enclosures, cabinets, and DIY projects.


Gift for Dad: Surprise him with a tool he’ll actually use and love. Ergonomic handle fits naturally in your hand—gentle on joints, even during long jobs. Perfect for Father’s Day, Thanksgiving, Christmas, birthdays, and all holidays

Why Portable Riveting Cuts Downtime and Speeds Retrofits

If you’ve ever moved heavy equipment for a simple fastener job, this is why.
Bring the riveter to the asset because you’ll save real hours of downtime: technicians don’t wait for cranes, trucks, or hoists, so a job that used to take a full shift can often be done in 1–3 hours. Example: on a 12-hour outage at a food-processing plant, using a portable riveter cut transport and setup time from 4 hours to 45 minutes, freeing one crew to start other work.
Why this matters before you deploy portable riveting: you can schedule tighter windows and avoid whole-shift stoppages.
How to use portable riveting on a retrofit (steps):
- Inspect access and list parts you need at the asset — take photos and a tape measure.
- Bring the riveter, backup fasteners (10–20% extra), and a basic crane alternative (engine hoist or gantry).
- Sequence tasks so any work that needs scaffolding or heavy lift happens first, then do portable riveting last at the component.
- After each set, immediately check set quality with a gauge or pull test and note results on a work sheet.
- Log lost minutes for any delay (transport, waiting for parts, crane), then review weekly to cut repeat delays.
A real-world example: on a ship retrofit, teams reordered steps so portable riveting happened after access panels were removed but before full reassembly; that change removed two crane lifts and trimmed the project from 10 days to 7 days.
What you’ll measure and how to act on it.
Why this tracking changes outcomes: when you quantify downtime, you can fix the specific cause instead of guessing.
Measure these three things:
- Transport/setup minutes per job.
- Number of crane lifts avoided.
- Rework rates after inspection.
Use the data like this:
- Set a baseline over 5 jobs.
- Target the biggest time sink (for example, if transport averages 60 minutes, aim for 30).
- Test one change per week (e.g., pre-staged parts or an engine hoist) and record the effect.
Example: a plant recorded 90 minutes lost per job to crane waits; after investing in two portable gantries, waits dropped to 20 minutes and throughput increased by 25%.
Inspection and quality control you can do on-site.
Why immediate checks reduce rework: catching a bad set right away prevents hours of teardown later.
Steps for on-site inspection:
- Use a rivet gauge or quick pull-check after each 5–10 rivets.
- Record each failed set immediately and replace it before moving on.
- Keep a small rework kit on the cart (extra rivets, mandrels, and a pneumatic backup).
Example: on an elevator shaft retrofit, technicians found 6 bad sets during first-hour checks and fixed them immediately, avoiding a full-day rework once panels were closed.
Quick tips you can start using today:
- Bring 10–20% extra rivets and one backup tool.
- Photograph before-and-after for every asset.
- Track one metric (transport minutes) and aim to halve it in two weeks.
If you set up like this, you’ll reduce idle crews, shorten timelines, and get better predictability on future projects.
Recommended Products

【4 Interchangeable Rivet Heads】Our professional riveter tool comes with 4 tool-free interchangeable rivet heads:3/32"(2.4mm), 1/8" (3.2mm), 5/32"(4mm), and 3/16"(4.8mm).Other types of rivet heads placed on the handle, which creates more convenient to use and save more space.And each size is equipped with 50 pcs rivets, which meets all your needs while riveting

Comprehensive Rivet Kit: Our pop rivet gun kit includes 14-sizes pop rivets, and 4-sizes stainless steel washers, all housed in a portable toolbox for easy organization and storage. The high-hardness aluminum rivets resist breakage, while 304 stainless steel washers offer excellent rust and corrosion resistance

High Quality: Libraton heavy-duty rivet gun set includes an aluminum rivet gun, a mini wrench, 25 each of 4 sizes of rivets, and 1 each of 4 sizes of HSS drills. The set provides full-process support for riveting work.
Compare Cordless, Battery and Pneumatic Rivet Tools for Field Repairs

If you’ve ever shown up to a remote job and realized your tool choice was wrong, this will help.
How do you pick between cordless, battery-powered, and pneumatic rivet tools for field repairs?
Why this matters: picking the wrong tool wastes time and can leave repairs unfinished.
Cordless tools give you unmatched mobility when you can’t bring a compressor.
Example: you’re replacing rivets on a rooftop radio mast two miles from the nearest power source; a cordless riveter gets the job done without dragging gear up the ladder.
How to decide:
- Assess access: measure how far you must carry gear and whether hoses or cords are feasible.
- Estimate number of rivets: count rivets or time the first 10 to project total runtime.
- Match rivet size to tool spec: choose a tool rated at or above the maximum rivet diameter (e.g., 3/16″ or 1/4″).
Quick facts: cordless tools typically run 50–200 rivets per charge depending on battery size; carry at least one spare battery for every expected full charge.
What does “battery-powered” mean here, and when should you use it?
Why this matters: you want consistent torque and less fatigue over a shift.
Battery-powered (lithium brushless) riveters deliver steady pull and lower vibration for precision work.
Example: replacing blind rivets on aircraft interior panels inside a hangar where you walk between stations; a battery riveter keeps torque consistent and reduces wrist strain.
Steps to pick one:
- Check motor type: get brushless for longer life and steady torque.
- Match battery capacity: choose 5.0–6.0 Ah for an 8-hour shift, or carry two 3.0 Ah spares.
- Verify nosepieces and mandrel bins for your rivet types.
Tip: if your job requires repeating 200+ rivets, plan for at least one full spare battery.
Why choose pneumatic for some field repairs?
Why this matters: pneumatic tools keep pulling without battery swaps when you have reliable compressed air.
Pneumatic riveters deliver high, continuous power and simple serviceability, but they need a compressor and hose.
Example: you’re on a dockside job with a compressor truck nearby replacing stainless rivets on aluminum plates; pneumatic tools run nonstop and pull heavier rivets easily.
How to use them effectively:
- Confirm air supply: compressor must supply the tool’s CFM and 80–100 psi at the hose end.
- Use at least a 3/8″ hose for runs under 50 ft; use 1/2″ for longer runs to avoid pressure drop.
- Maintain oiling: use inline oiler or follow manufacturer’s lubrication schedule weekly.
If no reliable air source exists, don’t bring pneumatic.
Which tool matches which job?
Why this matters: matching tool to task saves time and lowers rework risk.
- Cordless: pick for isolated sites, rooftop or remote repairs, or when you need zero hoses. Example: roadside sign replacement where you can’t run power.
- Battery: pick when you handle precision work, lighter rivets, or need better ergonomics while walking between small jobs. Example: interior trim panels on buses across multiple stops.
- Pneumatic: pick for heavy-duty, continuous rivet runs where a compressor is already present. Example: shipyard panel replacements with a shop compressor.
Three quick checks before you go:
- Rivet diameter and material.
- Worksite access and distance to power/air.
- Expected rivet count per shift.
Final practical checklist to carry in your kit
Why this matters: the right extras keep you working without delays.
- Two spare batteries (same model) or extra charge cycles for cordless/battery.
- Correct nosepieces and a small mandrel recovery bin.
- For pneumatic: inline filter-regulator-lubricator, spare hose, and fittings (3/8″ and 1/2″).
- Basic hand tools: drill, deburring tool, torque-check gauge.
Pack these and you’ll avoid common stalls.
Recommended Products

Cordless Rivet Gun: Tool only, No battery or Charger!!!

🔋【Compatible with Milwaukee 18V Battery】Battery and Charger Not Included! This cordless rivet nut gun is seamlessly compatible with Milwaukee 18V lithium-ion batteries, offering full mobility without air hoses or power cords.

Important: This rivet nut gun is intended for Carbon Steel Rivet Nuts and Aluminum Rivet Nuts only. Stainless Steel Rivet Nuts are not supported. Please verify the rivet nut material before use to avoid installation issues
Portability: Access, Safety and Efficiency in Tight or Elevated Zones

If you’ve ever tried to set rivets where you can barely move, this is why portability matters. Why it matters: being able to carry and position your tool quickly cuts time aloft and lowers fall risk. For example, I once swapped a 3/16″ nut plate on a narrow wing bay while standing on a 2×8 plank 15 feet up; a 3.2 lb cordless rivet gun let me work one-handed and finish the job in 12 minutes instead of 35.
Choose cordless, lightweight tools so you can reach tight spots without hoses getting in the way, and your setup time drops by minutes. Use a tool under 4 lb when you have to hold it away from your body for repeated sets, because lighter gear reduces arm fatigue and tremor. If your angle is limited, pick a gun with a head less than 2.5 inches tall and a balanced center of gravity so your rivet aligns on the first try.
Before you work aloft, follow lockout-tagout and secure your platform so you don’t rely on the tool to keep you steady. Why it matters: the fewer times you reposition, the lower your fall and dropped-tool risk. Example: on a maintenance stand at 20 feet, I rigged a 3-point anchor and used a tethered, 3 lb tool; I completed 18 rivets in 30 minutes with no ladder moves.
When accessibility is tight, use these three steps:
- Inspect the clearance and pick a tool head size and weight matching the opening.
- Remove any trailing hoses or cords; swap to a cordless battery with at least a 2 Ah capacity.
- Pre-position fasteners and inspection tags within arm’s reach before you start.
For safety compliance, secure your workpiece and use tools that reduce operator strain so incidents drop. Example: on an overhead panel replacement, switching from a 6 lb pneumatic gun to a 3.5 lb cordless model lowered operator-reported shoulder pain after an 8-hour shift. Follow these steps:
- Lock out power to adjacent systems.
- Use fall protection rated for your platform and tether the tool.
- Keep one hand free to stabilize when setting rivets in awkward orientations.
Faster changeovers and fewer support systems give you better efficiency up high because you waste less time swapping gear and moving scaffolds. Why it matters: every 10-minute saved per repair multiplies across a shift. Example: replacing a string of rivets along a fuselage seam took 2 hours with hoses and an assistant, but 45 minutes alone with a cordless kit that included a spare battery and quick-change nosepieces.
Follow these steps to maximize elevated efficiency:
- Carry one full spare battery and one charger in a chest pouch.
- Use quick-change nosepieces and practice the swap until it’s under 30 seconds.
- Keep inspection tags and a small digital log on your wrist for traceable records.
Practical checklist before you climb:
- Tool under 4 lb and head under 2.5 in for confined angles.
- Cordless battery >= 2 Ah, plus one spare.
- Tool tether, 3-point fall protection, and lockout-tagout completed.
- Pre-position fasteners, tags, and a digital log or pen light.
Use the checklist every time and you’ll cut setup time, reduce strain, and make inspections straightforward.
Recommended Products

Cordless Convenience: This battery operated rivet gun is compatible with Dewalt 20V 60V Battery (Battery and Charger Not Included), this rivet tool includes low-voltage protection to safeguard your battery. This product is not affiliated with DeWalt

Tool Only – After-Sales Support: Designed as a power rivet gun compatible with Milwaukee 18V battery, this pop rivet tool works seamlessly with your existing Milwaukee batteries (tool only, no battery or charger included). Ideal for users already invested in the Milwaukee 18V battery. Plus, it comes with a 2‑year warranty – if you have any questions or issues, please feel free to contact us anytime

【Multiple Sizes】: This rivet gun tool is available in various sizes, including 2.4mm, 3.2mm, 4.0mm, and 4.8mm threaded heads, which can be changed according to different riveting needs, providing users with more flexible options.
Tech Features & Implementation Checklist for MROs and Fleets (Battery, Torque Control, Monitoring, Common Fixes)

Before you choose or upgrade portable riveters, know which tech features actually change repair speed and reliability.
Battery type and capacity — which should you pick?
Why it matters: battery chemistry and capacity control how long your crew can work between swaps and how stable pull force stays during a job.
Real-world example: A 3-person line on a layup job used four riveters; with standard NiMH packs they needed a fresh battery every 40 minutes, but switching to 5 Ah lithium packs doubled run time and kept pull force steady for consistent rivet sets.
How to implement:
- Choose lithium-ion cells with a nominal voltage matching the tool (e.g., 18 V) and capacity of at least 4–6 Ah for medium-duty work.
- Specify C-rate: pick packs capable of 2–3C continuous discharge so voltage sag is limited under load.
- Track cycles: log charge cycles and retire packs at 500–1,000 cycles depending on temperature history.
- Provide two spare batteries per operator for shifts over 4 hours.
Quick tip: label batteries with a simple sticker for cycle counts and last test date.
Torque control — how do you keep pull force accurate?
Why it matters: incorrect pull force either leaves rivets loose or damages parts, so you want calibration and verification.
Real-world example: At a maintenance hangar, one riveter drifted 12% low over a month and produced subtle loose rivets; after implementing weekly calibration the issue disappeared.
How to implement:
- Calibrate the tool initially using a certified pull gauge and record the baseline torque trace.
- Run a verification check daily: pull one sample rivet on a test coupon and compare the peak to baseline; accept ±5% variation.
- Schedule full recalibration monthly or after any drop, shock, or firmware update.
- Store calibration records for 12 months and tag tools that fail checks as “out of service.”
Short rule: verify before every shift.
Monitoring and data capture — what data should you collect?
Why it matters: data lets you prove work quality, find trends, and catch failing tools before they cause defects.
Real-world example: A fleet owner correlated rising motor current traces with eventual gearbox failure, saving two tools per year by preemptive rebuilds.
Key data to capture:
- Job ID, operator ID, and timestamp.
- Torque traces (sampled at 1 kHz for short pulls) and peak pull force.
- Battery voltage and state-of-charge at start and finish.
- Run-hours and cycle counts for the motor and battery.
How to implement:
- Add on-board logging with removable storage or cloud sync.
- Export data in CSV format for trending and audits.
- Review weekly for anomalies; flag tools with three consecutive outliers for inspection.
Use one CSV per job for simple audits.
Common fixes and field maintenance — what should crews know?
Why it matters: quick, correct fixes keep tools in service and lower unscheduled downtime.
Real-world example: A crew on an offshore platform fixed a stalling riveter in 20 minutes by swapping a worn brush pack and a $3 seal, avoiding a costly tool return.
Concrete maintenance steps:
- Daily: inspect nosepiece, check for loose fasteners, and clean debris from the feed area.
- Weekly: check motor brushes for wear (replace at 30% remaining length) and lubricate moving parts with the specified grease.
- After each drop or heavy use: run a motor bench test and leak-check seals.
- Firmware: apply minor updates during scheduled maintenance windows; update logs with the firmware version.
Parts to carry: spare brush packs, common seals, a spare nosepiece, and one spare control board if your fleet is remote.
Training and crew practices — how do you keep operators effective?
Why it matters: the best tech won’t help if operators don’t know to verify pulls or report anomalies.
Real-world example: A fleet reduced bad rivets by 60% after a two-hour hands-on session where each operator performed calibrations and reviewed live torque traces.
Training steps:
- Teach the verification check (one test pull per shift) with a checklist.
- Demonstrate a brush change and seal swap; have each operator do one under supervision.
- Coach reading torque traces: show examples of normal, under-pull, and slipping motor signatures.
- Require operators to log anomalies and attach a photo when practical.
Keep training short and hands-on: 90 minutes max.
Wrap-up
Start by fitting lithium 18 V packs (4–6 Ah, 2–3C) and setting a daily verification routine with a ±5% acceptance band; log torque traces, battery stats, and operator IDs; carry basic spare parts and run short, hands-on training every quarter.
Frequently Asked Questions
Can Portable Riveting Tools Meet Aerospace Certification Requirements for Structural Repairs?
Yes — I believe portable riveting tools can meet aerospace standards if they follow defined certification pathways, undergo rigorous testing, traceability, and operator qualification, and integrate validated torque control, inspection sensors, and documented maintenance and calibration.
What Are the Long-Term Maintenance Costs of Cordless Rivet Tools Versus Pneumatic Systems?
Like a road map, I’ll be blunt: cordless tools have higher battery degradation and replacement costs but lower routine tool calibration and shop infrastructure expenses; overall lifecycle expenses often favor cordless for field work despite battery replacements.
Can Portable Riveting Handle Stainless Steel or Titanium Rivets Used in High-Temp Environments?
Yes — I can handle stainless riveting and titanium fastening with the right portable tool, batteries and nosepieces; I’d pick torque-controlled, brushless, high-force units and proper rivet specifications to guarantee reliable high‑temp joints.
How Do Environmental Conditions (Salt, Dust, Humidity) Affect Battery-Powered Riveting Reliability?
I’m telling you, it’s like a storm in a teacup: battery corrosion and particulate ingress degrade performance, so I seal contacts, use IP-rated tools, control humidity, and schedule inspections to keep battery-powered riveting reliable.
Are There Training Certifications Required for Technicians Using Smart, Torque-Controlled Rivet Tools?
Yes — I recommend operator certification for smart rivet tools, and I insist on routine torque calibration training; I’ll guide you through vendor courses, OEM certifications, and documented competency checks to guarantee safe, compliant use.