You’re staring at a stack of panels with access only from one side and wondering how to join them quickly without a second set of hands. The exact question is: how do I make strong, repeatable single‑sided joints when the backside is inaccessible? Most people assume spot welds or threaded fasteners are the only reliable options and overcomplicate the solution.
This piece will show you, step by step, how to pick the right blind rivet type and grip range, size for strength with a 20–30% margin, and use the proper tools and maintenance so every swage is consistent. You’ll learn what materials and threaded variants to choose and how to install them for predictable shear strength. It’s easier than it looks.
Key Takeaways
If you’ve ever tried to fasten panels where you can’t reach the back, this is why blind rivets help. They let you join parts from one side so you don’t have to take equipment apart or build a special fixture; for example, you can attach an aluminum access panel inside a cramped machine cabinet using one hand and a rivet gun. This cuts setup time by minutes per part.
Before you pick a fastening tool, know that blind rivets are quick to set, which lowers labor cost and raises output. Typical cycle times are 1–3 seconds with pneumatic tools and 3–8 seconds with a good hand tool, so on a 60-minute shift you can do hundreds of joints. On a production line, swapping to a pneumatic riveter boosted one small shop’s throughput from 120 to 480 rivets per hour.
The difference between materials and head styles comes down to matching strength and corrosion needs. Choose aluminum rivets for weight savings, steel for higher shear strength, and 316 stainless for saltwater or outdoor use; pick a countersunk head for flush surfaces or a large-flange head when the sheet is soft or thin. For example, use a 4.8 mm aluminum rivet with a large flange on a 1.2 mm soft-plate panel to prevent pull-through.
Here’s what actually happens when you design for predictable shear loads: blind rivets have standard shear ratings you can use directly in calculations. That means you can pick a rivet rated for, say, 1.2 kN shear and design a safety margin (commonly 2x) so your joint handles real-world forces without guessing.

If you need removable or stronger serviceable joints, consider threaded blind rivets and rivet nuts because they accept bolts and hold torque. A field service example: technicians replaced a motor by undoing M6 bolts threaded into rivet nuts installed from one side, so they avoided disassembling the motor mount to reach the backside.
How to choose and use them (quick steps):
- Measure total material thickness and gap.
- Select rivet length = material thickness + mandrel bulge allowance (check manufacturer chart).
- Pick material and head style based on environment and sheet hardness.
- Test one rivet for fit and shear with your tool.
- Install full batch, then inspect 5–10% for proper set and pull-out.
A real-world check: on a boat swim platform repair, one person used 316 stainless blind rivets sized to the composite panels and threaded rivet nuts for the hinge bolts; the result resisted salt spray and removed easily for maintenance.
Should You Use Blind Rivets? Quick Decision Guide
Before you decide on a blind rivet, know why it matters: you’ll save time and avoid inaccessible backside work when you pick the right fastener.
If you don’t have access to both sides of the joint, use blind rivets. Match rivet type to your joint by checking these specifics: material thickness (measure both pieces with calipers), load direction (shear or tension), and vibration exposure. Example: mounting a metal sign to a hollow aluminum post where you can’t reach inside—blind rivets let you secure the sign from the outside only. Measure panel thickness and pick a rivet with a grip range that sits mid-range of the combined thickness.
Why shear and vibration resistance matter: many riveted joints fail sideways, not by pulling out. Blind rivets handle shear well, so prefer them when the load is lateral. Example: attaching a trailer light bracket that gets jolted on rough roads — choose a steel blind rivet rated for shear. Check the rivet’s shear rating (e.g., 800–1,200 lbf for common steel sizes) and use one with at least 20–30% extra capacity over your calculated load.
Before you buy, compare costs because labor and tools vary. Blind rivets often reduce assembly time and let you use inexpensive hand or pneumatic tools. Example: assembling 200 HVAC duct brackets — rivets can cut assembly time per joint from 90 seconds with nuts and bolts to 20 seconds with a rivet gun. Price a small pneumatic rivet gun ($80–$200) versus hand rivets ($15–$30) and factor the per-part rivet price (aluminum rivets ~$0.05–$0.25 each; stainless higher).
If you need threads in thin or hollow panels, use blind rivet nuts to create repeatable threads from the outside. Example: installing a machine guard on a thin sheet-metal panel — install M6 rivet nuts and use M6 bolts for repeatable serviceability. Install steps:
- Drill the specified hole (check rivet nut datasheet).
- Insert the rivet nut and compress with the correct tool.
- Test-thread a screw to confirm fit.
Match materials to environment so you avoid corrosion. Use stainless or aluminum rivets in salt-air conditions and steel with coatings indoors. Example: outdoor marine trim — pick 316 stainless blind rivets to prevent galvanic corrosion. Also check pull-out (tensile) ratings in specs; a rivet’s pull-out might be only a few hundred pounds for thin sheets.
Test a prototype joint before production because real joints differ from calculations. Example: make three sample joints with your chosen rivet size and material, then load them with a hand press or hang known weights to confirm they meet your safety margin (aim for 20–30% over expected loads).
Quick checklist to follow:
- Measure combined thickness with calipers.
- Determine load direction and magnitude.
- Choose rivet type and material (aluminum, steel, stainless).
- Verify shear and pull-out ratings; add 20–30% safety margin.
- Prototype and test three samples.
- Decide on tooling (hand, pneumatic, or battery rivet gun).
One final practical tip: if you expect future disassembly or higher tensile loads, opt for bolts or rivet nuts instead of blind rivets.
One‑Sided Access & Speed vs. Alternatives

If you’ve ever tried joining two metal sheets when you can’t get behind them, this is why.
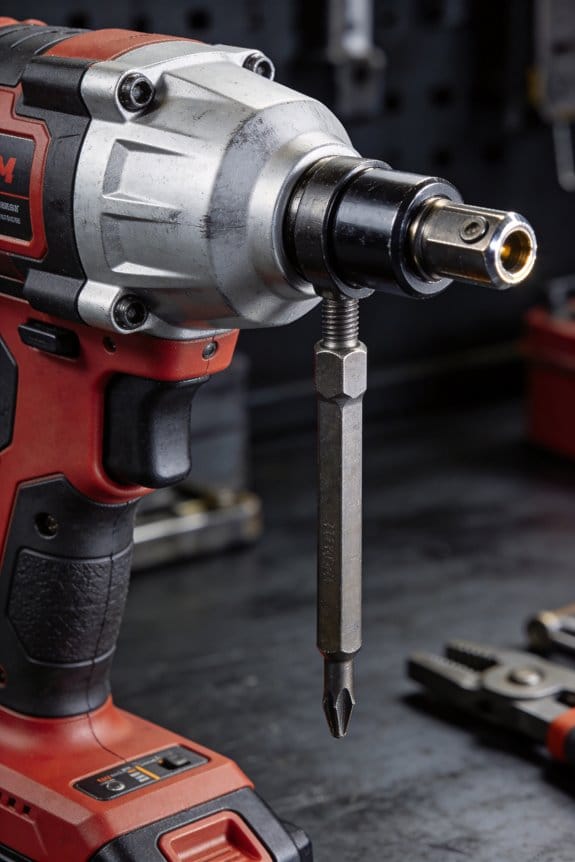
You want a fast, reliable way to hold materials when you only have one side accessible. For example: attaching a metal bracket to a closed electronics chassis where the interior is crowded and you can only reach the outside panel. Blind rivets let you install from the outside with a simple hand tool or pneumatic riveter, so you don’t need someone inside the chassis to hold a nut.

Why blind rivets beat bolts for one-sided work: you save the time and hassle of positioning a nut and threading a bolt. In a production run, that can cut assembly time per part from about 45 seconds with a bolt-and-nut to roughly 10–20 seconds with a pop rivet, depending on tool speed. Try this specific sequence when you switch to blind rivets:
- Drill a hole sized to the rivet’s diameter (for a 4.8 mm rivet use a 4.8 mm drill).
- Insert the rivet through both parts.
- Seat the rivet head flush, then pull the mandrel with a rivet gun until it snaps (usually one firm squeeze with a hand riveter).
- Trim or file any exposed mandrel if needed.
You need to do that because it removes the need for clamping a backing nut, which is especially helpful when assembling large panels alone. A real-world example: on a sheet‑metal HVAC duct, you can fasten a 1 m seam with rivets in under 5 minutes, instead of wrestling nuts behind the seam.
Why rivets compare to welding: you avoid heat and distortion, and you can join dissimilar metals like aluminum to steel without worrying about weldability or burning insulation. A typical spot weld might give higher continuous strength for structural parts, but if your joint will see shear loads and you must avoid warping, choose rivets. Example: mounting an aluminum sign to a steel frame—rivets won’t melt the aluminum or create brittle intermetallics.
Why screws and tapped holes are sometimes worse: screws require pre-tapping or threaded inserts, which adds steps and time. If you need a removable joint, use screws into a captive nut or an insert. Example: assembling a service panel that must be removed monthly—use machine screws into PEM nuts rather than blind rivets.
When to pick rivets for high-volume work: if you need speed, one-sided access, and consistent holding power, blind rivets hit the sweet spot. In a factory line, a pneumatic rivet setter with a cycle time of 1–2 seconds per rivet will dramatically increase throughput versus manual bolting. For heavy structural loads or where disassembly is required, consider bolts or welds instead.
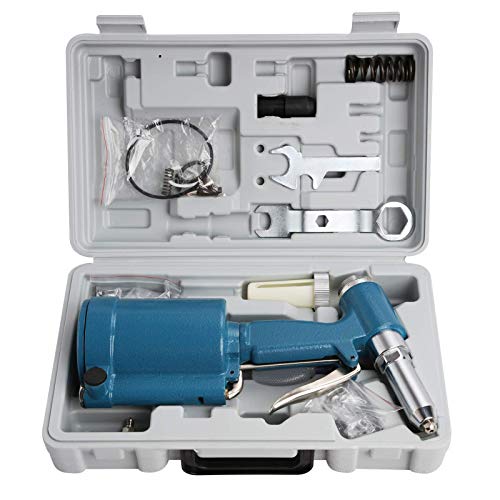
Recommended Products

【4 Interchangeable Rivet Heads】Our professional riveter tool comes with 4 tool-free interchangeable rivet heads:3/32"(2.4mm), 1/8" (3.2mm), 5/32"(4mm), and 3/16"(4.8mm).Other types of rivet heads placed on the handle, which creates more convenient to use and save more space.And each size is equipped with 50 pcs rivets, which meets all your needs while riveting

4 Size Capacity: The Air Rivet Gun Includes 4 Nose pieces: 3/16in, 5/32in, 1/8in, 3/32in.For use with aluminium, steel and stainless steel blind rivets

High Quality: Libraton heavy-duty rivet gun set includes an aluminum rivet gun, a mini wrench, 25 each of 4 sizes of rivets, and 1 each of 4 sizes of HSS drills. The set provides full-process support for riveting work.
Material & Mechanical Advantages: Strength, Corrosion, Threading

If you’ve ever held two thin sheets together and wondered how to make the joint stay, this is why.
Why it matters: choosing the right rivet material and design keeps your joint from pulling apart or corroding. For example, when you fasten aluminum siding to a hollow steel frame on a small trailer, the wrong rivet can fail under road vibration.
Start with tensile and shear ratings so you can match fastener to load. Manufacturers give numbers in pounds or newtons; pick a rivet whose tensile rating exceeds the maximum pull you expect by 25–50%. For instance, if a panel might see 500 lbf of tensile load, choose a rivet rated at least 625–750 lbf. A visual: hold a 300 lb-capacity ratchet strap—three of those together equal about 900 lbf.
1) Material choices and strength.
Why it matters: material controls how much load the rivet carries and how much weight you add to the assembly. Aluminum rivets (e.g., 2026 or 6061) weigh less and resist moderate loads; steel rivets give higher strength but add weight; stainless rivets resist corrosion and work near saltwater. Example: on a boat console, use A4 stainless rivets to avoid rust staining the gelcoat.
2) Corrosion and coatings.
Why it matters: corrosion eats metal and weakens joints over time. If you join aluminum skin to a steel bracket, you’ll get galvanic corrosion unless you act. Practical steps:
- Use matching materials when possible (aluminum with aluminum).
- If dissimilar metals are required, add an insulating washer or apply a non-conductive coating like a thin epoxy or long-life paint.
- Choose plated finishes: zinc-plated for general outdoor use, cadmium or specialty coatings for severe environments, or stainless for seawater.
Real-world example: when you mount a steel bracket to an aluminum panel on a trailer, put a nylon washer between the metals and apply a thin bead of marine sealant.
3) Threaded blind rivets and repeatable clamp.
Why it matters: threaded blind rivets let you add or remove components from a single side with predictable torque. The internal thread gives you a strong anchor in thin or hollow materials and lets you torque to a repeatable clamp force. Steps to use them:
- Drill the hole to the rivet maker’s specified diameter (usually listed on the package).
- Install the rivet with a compatible setting tool until the recommended stem break-off or deformation.
- Thread in your bolt and torque to the specified value for that rivet size (consult the rivet spec; a common M6 blind rivet nut might be torqued to about 5–7 Nm).
Example: installing a rack inside a van using M8 threaded blind rivets lets you remove the rack later without opening the van wall.
Quick notes on installation:
- Measure hole diameter and plate thickness before you buy rivets.
- Match rivet grip range to total material thickness; you want the rivet to fully deform, not sit loose.
- If vibration is present, use lock washers or thread-lock on bolts in threaded rivets.
If you follow these specific checks—pick the right material, control galvanic contact, and follow the rivet’s torque and hole specs—you’ll get stronger, longer-lasting joints.
Recommended Products

Rivet Set: Our silver blind rivet set contains 340 aluminum blind rivets (8 different sizes) and 340 silver washers (3 different sizes) for a wide range of uses. This blind rivet set includes 1/8-inch, 5/32-inch, and 3/16-inch blind rivets with corresponding washers to ensure precise installation.

【High-Quality Materials】 Our pop rivets are made of premium Stainless Steel, ensuring great performance in any environment. They are corrosion and acid-resistant, so you don't have to worry about rusting or breaking.

Materials: Made of premium stainless steel, our pop rivets offer excellent corrosion and acid resistance, ensuring durability in any environment.
High‑Growth Sectors Using Blind Rivets (Automotive, Aerospace, Construction)

If you’ve ever wondered why some fasteners show up everywhere, this is why. Blind rivets matter because they let you join parts quickly when you can only access one side.
Automotive: How do blind rivets speed high-volume vehicle assembly?
Why it matters: You need lightweight, repeatable joints so you can hit daily production targets.
Example: On an EV production line, a worker attaches a door inner panel with one hand while the other steadies the sheet — they use a pneumatic blind rivet gun and finish each joint in about 6–8 seconds.
How to apply them:
- Prep the parts: align and clamp panels, drill a 4.8 mm hole for a standard 5 mm rivet.
- Choose the rivet: pick an aluminum blind rivet for body panels, or a steel rivet for undercarriage parts.
- Install: place the rivet, seat the gun, squeeze until the mandrel snaps — expect consistent pull-out strength and good vibration resistance.
Takeaway: Using the right size and tool cuts assembly time to seconds per joint and reduces rework.
Aerospace: Why are blind rivets used on thin skins and confined spaces?
Why it matters: You must get precise, durable joints where access is limited and weight counts.
Example: On a regional jet fuselage panel, a tech fits a rivet from inside the cabin frame when the exterior skin is glued and held; the blind rivet gives predictable shear strength without needing a bucking bar.
How to apply them:
- Inspect material thickness and corrosion environment; choose a rivet alloy and coating accordingly.
- Match rivet grip range to stack-up; if the skin is 1.2 mm and stringer is 2.0 mm, use a rivet with a 3.2 mm grip range.
- Use a calibrated installation tool and measure swage profile to meet specification.
Takeaway: Proper alloy choice and installation control give consistent shear values for thin aerospace skins.
Construction: When do blind rivets make sense on facades and modular builds?
Why it matters: You want fast, reliable fastening on-site to hit deadlines and lower labor costs.
Example: On a storefront retrofit, a crew replaces metal panels using structural blind rivets; they align three panels, drill a 6 mm hole, and set five rivets across the seam in under 20 minutes.
How to apply them:
- Lay out fastener spacing—common: 150–200 mm on center for facade panels, adjust per engineer specs.
- Pick rivet type: stainless steel for outdoor corrosion resistance; consider sealed or structural rivets where water intrusion is risk.
- Use battery or pneumatic tools and test pull-out on a sample panel before full installation.
Takeaway: Spacing, material choice, and a quick test cut onsite installation time and callbacks.
Each sector uses blind rivets for one clear reason: you get single-side access, fast install times, and consistent joint performance when you choose the right rivet, hole size, and tool.
Recommended Products

Professional Pneumatic Rivet Gun: with 5 nosepieces 1/4-inch(6.4mm), 3/16-inch(4.8mm), 5/32-inch(4mm), 1/8-inch(3.2mm), 3/32-inch(2.4mm), making it ideal for applications ranging from garage tasks to industrial repairs - One nosepiece is pre-installed

Powerful 4000 LBF Pulling Force for High Efficiency: Our Pneumatic Rivet Gun delivers 4000 LBF (1814 KGF) of strong pulling pressure, completing each rivet installation in seconds. This not only saves valuable work time but also significantly reduces operator fatigue, making it ideal for high-volume or long-duration riveting tasks
Air inlet: 1/4" NPT
Selecting Blind Rivets: Types, Materials, and Load Criteria

Before you choose a blind rivet, know this: the wrong rivet fails under load and corrodes in months.
Match rivet type and material to your parts’ thickness, the loads they’ll carry, and the environment so the joint lasts. For example, when joining two 3 mm aluminum panels on an outdoor sign, use aluminum rivets to avoid galvanic corrosion and pick a mandrel strength rated for at least 2 kN shear so wind loads don’t pull the joint apart.
Check rivet head types so the head suits your surface and load distribution. Use a countersunk head for flush finishes on a sheet-metal cover, a flat head for general use, and a large-flange head when you need extra bearing on thin or soft materials. A 6 mm large-flange rivet spreads load over a wider area than a standard 4 mm flat head.
Pick rivet material by matching corrosion resistance and strength to the application. Choose aluminum rivets for lightweight, non-ferrous assemblies; carbon-steel rivets plated with zinc for indoor structural joints where strength matters; and 316 stainless for marine or chemically aggressive environments. Example: a stainless 4.8 × 10 mm rivet lasts years on a boat ladder exposed to salt spray.
Before you check tool options, review load-bearing specs because that determines rivet size and type. Look at shear and tensile ratings—if your joint sees a 1,200 N lateral load, pick a rivet with a shear rating above 1,800 N for a 1.5× safety factor. Also compare tensile rating if the load pulls perpendicular to the shank.
If you’re working with thin or hollow materials, here’s why different fasteners matter: they reduce damage and avoid crushing. Use blind rivet nuts (nutserts) when you need a threaded attachment in thin sheet metal—install an M6 rivet nut for bolts that need to be torqued to around 8–10 Nm. Use structural blind rivets that form a bulbed back when you need higher strength and fatigue resistance in thin or hollow sections.
How to pick in three steps:
- Measure total material thickness in millimeters and add 0.5 mm for paint/finish.
- Choose rivet material to match metals (aluminum to aluminum, stainless to steel) and corrosion exposure.
- Select rivet diameter and head for load: smaller than 4 mm for light panels, 4–6 mm for most assemblies, and 6+ mm for heavy loads; then confirm shear rating ≥ 1.5× expected load.
Real-world example: mounting a 2 mm aluminum cover to a steel frame exposed to rain — you’d use aluminum rivets with a rubber washer to avoid crevice corrosion, choose a 4 mm large-flange head for bearing, and verify the rivet’s shear rating is at least 1,000 N because splash and wind add intermittent loads.
Recommended Products

Complete and Organized Kit: This comprehensive set features 9 sizes of SAE rivets and 3 sizes of stainless steel washers, all conveniently housed in a labeled plastic box

Materials:Made of premium stainless steel, our pop rivets offer excellent corrosion and acid resistance, ensuring durability in any environment.

【304 Stainless Steel Blind Pop Rivets】 Tri-grip design 3x stronger than aluminum. Corrosion-resistant for indoor/outdoor use. Works with all rivet guns.
Installing Blind Rivets: Best Practices & Troubleshooting
If you’ve ever started a rivet and watched it sit crooked, this is why. You want joints that stay tight under vibration and load.
Why this matters: a bad hole or wrong rivet length makes the joint fail, sometimes quickly under stress.
1) Prepare the hole first.
- Step 1: drill a hole 0.5 mm larger than the rivet shank; for a 4.0 mm rivet, use a 4.5 mm drill.
- Step 2: deburr both sides with a countersink or 3 mm file so edges are clean.
Example: when you rivet an aluminum bike rack bracket to a steel tube, a 4.5 mm hole and clean edges prevent the rivet cap from digging in and loosening later.
Why this matters: your rivet has to seat square to form the correct head.
2) Check part alignment and thickness.
- Step 1: stack the parts and clamp them so they can’t move.
- Step 2: measure combined thickness with calipers and pick a rivet whose grip range includes that thickness; for 6 mm total use a 6–8 mm grip rivet.
Example: attaching two 2 mm sheet-metal panels plus a 2 mm spacer gives 6 mm total; choose a rivet rated for 6–8 mm.
Why this matters: wrong grip length leaves an underfilled or over-compressed joint.
3) Insert and set the rivet correctly.
- Step 1: push the rivet fully through the hole until the flange sits flush.
- Step 2: with a manual rivet gun, pull steadily until the mandrel snaps; with hydraulic tools, set pressure to the tool maker’s setting for the rivet size.
Example: when you use a hand riveter on a 4.8 mm stainless rivet, steady pulls avoid jerking that can misform the head.
Why this matters: an uneven pull makes a weak shop head.
4) Inspect the formed shop head.
- Step 1: measure the shop head thickness—aim for 0.8–1.2 times the rivet diameter where specified; for a 4 mm rivet expect roughly 3.2–4.8 mm across the formed head.
- Step 2: confirm full compression and no visible gaps between parts.
Example: after riveting a tailgate latch, a shop head roughly the size of the rivet diameter means good compression.
Why this matters: full compression equals proper clamp force.
5) Maintain and use tools properly.
- Step 1: clean the nosepiece and jaws after each job; remove metal shavings with a brush.
- Step 2: replace jaws every 3–6 months in heavy use, or whenever you see uneven pulls.
Example: a shop that rivets trailer frames replaces jaws monthly because they do hundreds of rivets daily.
Why this matters: worn tooling causes inconsistent pulls and fractured mandrels.
6) Fixing a rivet that pulled through or spins.
- Step 1: drill out the old rivet using a bit the same diameter as the mandrel, then deburr.
- Step 2: if the hole wall is damaged, enlarge the hole by one rivet size (e.g., from 4.5 to 5.5 mm) and use the next rivet diameter up.
- Step 3: reclamp and install the new rivet.
Example: if a rivet spins in a thin steel flange on a gate hinge, drilling out and stepping up to the next rivet size restored a solid joint.
Why this matters: reworking right avoids repeat failures.
Quick troubleshooting checklist (3 items):
- Hole fit: drill +0.5 mm to shank.
- Grip: combined thickness within rivet grip range.
- Tooling: clean nose, replace jaws if pulls vary.
Final tip: keep a small caliper, a set of drills (+0.5 mm), and a spare jaw kit in your rivet kit so you can fix issues on the spot.
Recommended Products

✅HIGH QUALITY - The blind rivets are made of Aluminum Grip and Steel Mandrel. It's strong and corrosion-resistant for long-lasting use in any environment. Hand Riveter is made of high quality steel with rubber handle.

【Sturdy Material】 Libraton rivet gun uses all-steel construction, Reinforced carbon steel heat treatment handle increase the rivet gun body strength and service life.

Tips: If you encounter the problem of plastic riveting tool stuck, please do not worry, just gently separate the two sides of the handle, you can easily loosen the rivet mandrel, before using for the first time, you can apply lubricant on the head of the riveter to reduce friction.
Frequently Asked Questions
How Do Blind Rivets Affect Product Recyclability and End-Of-Life Disassembly?
Like a zipper, I find blind rivets simplify recyclability mapping and modular disassembly by enabling one-sided removal or controlled shearing; I’ll note they can complicate mixed-material separation yet often speed end-of-life processing and component reuse.
Are There Industry Standards Certifying Blind Rivet Performance for Safety-Critical Parts?
Yes — I consult material standards and fatigue ratings like ISO, DIN, NAS, and ASTM when qualifying blind rivets for safety-critical parts; I’ll reference specific specs, test methods, and certification paths tailored to your application.
Can Blind Rivets Be Detected or Inspected Non-Destructively in Finished Assemblies?
Yes — I use nondestructive testing like ultrasonic scans, X‑ray/CT and eddy current for rivet imaging and flaw detection, often complemented by visual inspection or dye penetrant to reliably assess blind rivets without disassembly.
What Are the Long-Term Maintenance Costs Compared to Welded or Bolted Joints?
I reckon long-term maintenance costs for blind rivets are usually lower than welding and similar or slightly less than bolting, thanks to reduced labor costs and lower replacement frequency, though inspections and occasional replacements still matter.
Do Blind Rivets Introduce Electrical Conductivity or Grounding Challenges?
No—blind rivets can affect electrical isolation and grounding integrity, but I mitigate issues by selecting insulated or conductive rivets as needed, using bonding straps, and verifying continuity to guarantee proper grounding or maintained isolation.