You’ve just pulled your first rivet and noticed the blind head barely formed, or it cracked mid-install — now you’re asking why the joint failed. You want to know whether the tool, the rivet, or your setup caused the problem. Most people blame the rivet or operator skill when the real issue is mismatched pull force or improper nosepiece and jaw setup.
This article will show you how pull force works in practical terms, how to set and test the tool, and how to clamp and troubleshoot so every rivet swage is consistent and joints last. You’ll finish knowing exactly what adjustments to make for reliable, repeatable results. It’s easier than it sounds.
Key Takeaways
Here’s what actually happens when you pull a rivet with a cordless gun: the jaws apply a straight-line tensile load to the mandrel, which expands the rivet body and forms the joint.
Why this matters: if the mandrel doesn’t get enough force, the rivet won’t set and the joint will fail.
1) Match tool pull force to rivet needs.
- Step 1: find the rivet manufacturer’s required pull force (e.g., 4,500–6,000 lbf for a 1/4″ aluminum blind rivet).
- Step 2: pick a tool with a rated pull force at least 20–30% higher than that number (so choose a tool rated ~5,400–7,800 lbf for the example).
- Real-world example: when replacing 1/4″ aluminum rivets on a boat hull, I chose a 6,000 lbf gun for 5,000 lbf spec and avoided crushed sleeves.
Use the right accessories and technique for reliable pulls.
Why this matters: the wrong nosepiece, jaw set, battery level, or angle causes weak or inconsistent breaks.
2) Set up the gun correctly.
- Step 1: install the correct nosepiece and matching jaw set for your rivet diameter.
- Step 2: fully charge batteries to 18–20 V and use cells >2.0 Ah; if voltage drops below ~17 V you’ll see weaker pulls.
- Step 3: hold the gun perpendicular to the work surface and apply steady hand pressure.
- Real-world example: while fitting 3/16″ stainless rivets on a metal frame, using the 3/16″ nosepiece and a fresh 18 V, 3.0 Ah battery fixed my inconsistent breaks.
Choose pull mode based on what you control: clamp force or mandrel travel.
Why this matters: the mode changes how the gun behaves on hard plates or deformable sleeves.
3) Pick pull-to-force or pull-to-stroke.
- If you need consistent clamp on hard materials, use pull-to-force.
- If you must control how far the mandrel travels or you want a predictable sleeve deformation, use pull-to-stroke.
- Real-world example: on a machine housing with hard aluminum plates, pull-to-force kept clamp tight; on a thin-walled fuel tank, pull-to-stroke avoided over-compressing the sleeve.
Test, inspect, and recalibrate regularly so mistakes don’t multiply.
Why this matters: settings drift and wear make later rivets suspect.

4) Test and maintenance steps.
- Step 1: run test rivets on scrap of the same materials and thickness.
- Step 2: inspect the formed head and where the mandrel broke; the head should be smooth and the mandrel break point clean.
- Step 3: recheck settings and the jaw wear every 200–500 rivets or immediately after changing rivet type, nosepiece, or battery.
- Real-world example: on a production run of 1,000 panels I checked every 300 rivets and replaced jaws once, preventing a batch of failures.
Keep one practical thing in mind: if you see deformed heads, incomplete breaks, or pull counts changing, stop and troubleshoot.
What Pull Force Is and Why It Matters for Cordless Rivet Guns
Think of pull force like the muscle of a cordless rivet gun: it’s the straight-line force the tool’s jaws apply to the mandrel to expand the rivet body and form a secure joint. You need to know why it matters: if the force is wrong, the rivet won’t deform properly and the joint can fail. For example, when you rivet 1/8″ aluminum blind rivets on an aircraft skin repair, too little force leaves a loose seam and too much can crack the thin alloy.
Pull force is measured in pounds (lb) or kilonewtons (kN); common cordless rivet guns deliver anywhere from about 1,500 lb (6.7 kN) for light work up to 6,000+ lb (26.7+ kN) for heavy industrial rivets. Use the tool spec sheet: match the gun rating to the rivet size and material. If you’re joining 1/8″ steel rivets, aim for the higher end of the gun’s range; if you’re doing soft aluminum sheet with 3/32″ rivets, stay near the lower end.
You’ll feel tactile feedback through the trigger and tool body as the mandrel draws and snaps, which helps confirm a complete set. Before you rely on feel, test one rivet on scrap and visually inspect the formed shop head and the torn mandrel piece. For example, clamp two 0.040″ aluminum sheets, set the gun, pull one test rivet, then check that the blind side forms a 1.5–2× diameter bulb and the mandrel snapped cleanly.
Consistent pull force reduces long-term wear on the tool and on fasteners; inconsistent pulling makes jaws and pistons wear faster. To keep force consistent, do this:
- Clean and lubricate the jaws every 200–500 rivets.
- Inspect mandrel catch and replace jaws after about 10,000 cycles or earlier if you see scoring.
- Use the correct nosepiece and replace it when it gets rounded.
Proper settings prevent incomplete sets or damaged components. If you get a partially set rivet:
- Stop and remove it.
- Measure the remaining mandrel protrusion.
- Replace the rivet and adjust to the next higher force increment on your gun, then retest on scrap.

When choosing a gun, compare the rated pull force to the rivet pull strength you need and add a 20–30% margin for safety. For example, if calculations show you need 3,000 lb to deform a rivet in your assembly, pick a tool rated around 3,600–4,000 lb.
How Cordless Rivet Guns Generate and Control Pull Force

If you’ve ever tried to set a rivet that pulled apart or failed to seat, this is why: the motor and gearing determine whether you get a clean swage or a mangled joint.
Why this matters: if the tool doesn’t generate or control pull properly, the rivet won’t set and your joint will fail.
A battery motor turns into pull through gears and a jaw assembly. The motor spins at several thousand RPM; a typical cordless rivet gun uses a gearbox that reduces speed by about 20:1 to 100:1, which raises torque and lets the tool pull 2,000–6,000 pounds of force depending on the model. Example: on a 3/16″ blind rivet, you might need roughly 900–1,200 lb of pull to form a proper shop head; a 50:1 reduction at the motor gives you that torque without stalling the battery.
How the drive train makes force (step-by-step):
- The battery supplies voltage to the motor; a 18–20 V pack is common.
- The motor shaft drives a planetary or spur gearbox which converts high speed to higher torque.
- The gearbox output pushes a threaded or cammed pull rod linked to the jaw assembly.
- The jaws close on the mandrel and the rod retracts, pulling the mandrel until it snaps.
Real-world example: on a job where you set 200 rivets in aluminum panels, a 20:1 gearbox will pull each rivet in about 0.6–0.8 seconds, whereas a 50:1 gearbox slows that to 1.0–1.2 seconds but feels stronger and leaves cleaner heads.
Jaw mechanics control the gripping and release. Hardened steel jaws clamp the mandrel; their taper and spring preload determine how firmly they hold under tension. If the jaws are worn or you use the wrong nosepiece, the jaws slip and the pull force is wasted. Use the correct jaw set for the mandrel diameter and replace jaws after about 5,000–10,000 pulls in heavy production.
Electronic controls handle force limits and repeatability. Many cordless rivet guns monitor motor current and jaw displacement: current correlates to torque, and displacement tells the tool how far the mandrel moved. The controller can stop the stroke at a preset current threshold or at a percentage of expected mandrel travel (for example, 85% of spec) so you don’t over- or under-pull.
Example: some tools let you set a pull limit of 1,200 lb and a travel limit of 10 mm; the gun will cut power when either limit is reached, preventing snap failures or incomplete swages.
How you get consistent results on the job:
- Select the correct nosepiece and jaw set for the rivet size.
- Use a charged battery—18–20 V at >2.0 Ah for steady performance.
- Seat the nosepiece flush and hold the gun perpendicular to the work.
- Pull the trigger steadily; let the gun stop automatically when it hits the preset limit.
One practical tip: if your rivets are under-formed, try increasing gearbox torque (use a tool with a higher reduction) or verify the tool is set to a higher current/travel cutoff; if the mandrel shatters prematurely, reduce the preset percentage or check for worn jaws.
You can measure pull roughly with a spring scale by using a dummy mandrel and watching where the gun stops—this confirms your current/travel settings match the rivet spec.
Recommended Products
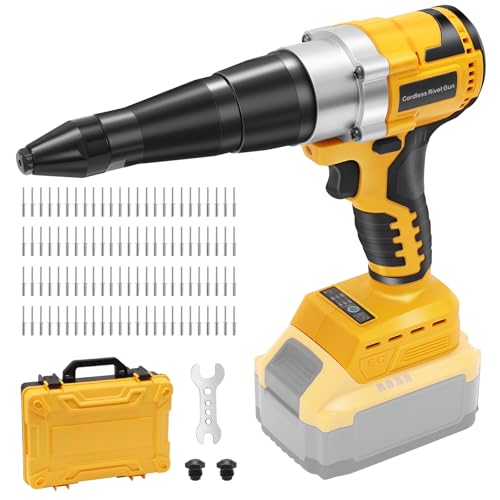
Cordless Rivet Gun: Tool only, No battery or Charge. Kindly note that this cordless rivet gun is compatible exclusively Compatible with Dewalt 20V batteries and is not manufactured by DEWALT. Suitable for use with DCB203, DCB204, DCB205, DCB206. Giving professionals who already own a DeWalt 20V battery the flexibility to use their battery

Gift for Dad: Surprise him with a tool he’ll actually use and love. Ergonomic handle fits naturally in your hand—gentle on joints, even during long jobs. Perfect for Father’s Day, Thanksgiving, Christmas, birthdays, and all holidays
Match Pull Force to Rivet Size and Material (Quick Reference)

Before you start setting rivets, you need to know why matching pull force matters: if you under- or over‑force a rivet you’ll get a weak joint or a snapped tool mandrel.
Here’s what actually happens when you pull a rivet: the mandrel stretches the blind tail until the blind side bulges and forms a head, and the force needed depends on diameter and material. For example, a 3/16″ aluminum rivet in a thin sheet needs far less force than a 3/16″ stainless rivet used in a welded bracket; you’ll feel the difference when the bulge forms and the mandrel breaks.
How to pick the right capacity quickly
Why this matters: choosing the right tool prevents repeated bad sets and broken mandrels.
- Check the rivet diameter and material first. Typical cordless tools handle 1/8″–1/4″ (3.2–6.4 mm).
- Example: If you’re installing 1/8″ aluminum rivets on a window frame, a mid‑range cordless tool is fine.
- Example: A 1/4″ stainless rivet for a trailer floor will need a stronger tool or hydraulic puller.
- Example: When you’re repairing a loose floor panel with oversized holes, choose larger diameter rivets or a higher‑force tool.
Prepare and verify clamping
Why this matters: movement while setting ruins the joint.
- Secure the workpieces with clamps that prevent any movement. Use C‑clamps or squeeze clamps appropriate to the material.
- Example: Clamping an aluminum sign with two parallel C‑clamps keeps the sheets flush while you set 1/8″ rivets.
Match tool setting, then test
Why this matters: testing prevents wasting rivets on bad settings.
1. Set the tool to a conservative force for the rivet spec or the tool’s midpoint if specs aren’t listed.
2. Test on scrap of the same thickness and hole size. Inspect the blind bulge and the mandrel break.
– Example: With 3/16″ blind rivets in a double‑thickness bracket, try the tool’s middle setting on a scrap bracket and look for a clean, round bulge.
3. If the set looks weak (small bulge, loose joint), increase force in small increments and retest until you get consistent heads.
4. If mandrels snap prematurely or the tool strains, reduce force or use a higher‑capacity tool.
Quick checklist before each job
Why this matters: a short checklist stops mistakes on the job.
- Verify rivet diameter and material.
- Check hole tolerance and decide if you need oversize rivets.
- Clamp workpieces firmly.
- Start at conservative force, test on scrap, adjust.
- Look for consistent blind bulge and clean mandrel break.
If you follow those steps, you’ll set strong rivets without guessing.
Recommended Products

Tool Only – After-Sales Support: Designed as a power rivet gun compatible with Milwaukee 18V battery, this pop rivet tool works seamlessly with your existing Milwaukee batteries (tool only, no battery or charger included). Ideal for users already invested in the Milwaukee 18V battery. Plus, it comes with a 2‑year warranty – if you have any questions or issues, please feel free to contact us anytime
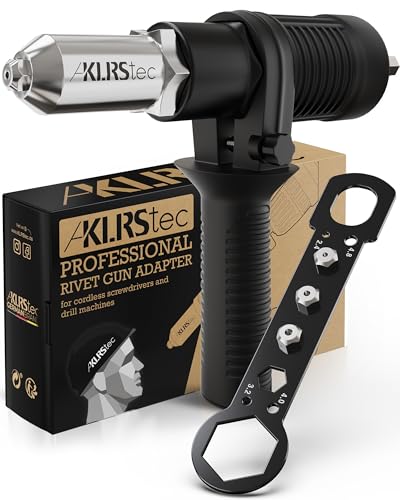
TURN YOUR DRILL INTO A RIVET GUN: This rivet gun adapter for drill converts any cordless drill or screwdriver into a powerful electric riveter in seconds - set pop rivets quickly and reliably without buying an expensive standalone rivet tool

Cordless Convenience: This battery operated rivet gun is compatible with Dewalt 20V 60V Battery (Battery and Charger Not Included), this rivet tool includes low-voltage protection to safeguard your battery. This product is not affiliated with DeWalt
Pull-to-Force vs. Pull-to-Stroke: When and How to Use Each

The difference between pull-to-force and pull-to-stroke comes down to what you control: force or travel.
Why this matters: choosing the wrong mode wastes parts and time. If you’re joining stainless panels on a pressure vessel, a bad choice can mean leaks.
Pull-to-force — when to use it and how
Why it matters: pull-to-force gives you repeatable clamp and clean breaks by stopping at a set force percentage.
Real-world example: when you rivet 1.2 mm stainless sheets on a compressor housing and need consistent clamp without crushing the sleeve.
How to use it:
- Set your target force to the rivet manufacturer’s recommended value (for example, 8–10 kN for many stainless rivets).
- Install the correct nosepiece and confirm the mandrel seating.
- Run a test rivet and watch cycle feedback for a full break at the target force.
- If the mandrel breaks early or you get a partial pull, reduce the force by 5–10% and retest.
- Document the setting and use it for that rivet and material combo.
Tip: perform a break-force check every 200–500 rivets on long runs.
Pull-to-stroke — when to use it and how
Why it matters: pull-to-stroke controls deformation by stopping after a set mandrel travel, which avoids over-collapsing soft sleeves.
Real-world example: when you set aluminum rivets into a soft polymer backing and need a specific sleeve length to fill a gap.
How to use it:
- Measure the required mandrel travel from rivet specs or a sample deformation (for example, 6–8 mm travel).
- Set the stroke limit on your tool to that travel distance.
- Fit the correct nosepiece and perform a sample set, then measure sleeve collapse and gap fill.
- If the sleeve over-fills or under-fills, change the stroke in 0.5 mm increments and retest.
- Record the stroke setting for that rivet/nosepiece/material combination.
Tip: check every time you change nosepieces or rivet diameters.
Cycle feedback and calibration
Why it matters: feedback and calibration confirm each set hit your target, preventing hidden defects.
Real-world example: on a production line fitting panels to an ATV frame, a missed break can hide a weak joint until field failure.
How to use it:
- Use cycle feedback to look for three outcomes: full break, partial pull, or missed break.
- If you see partial pulls, stop and inspect for incorrect nosepiece, wrong rivet, or misalignment.
- Perform stroke calibration whenever you switch rivet types, sizes, or nosepieces:
- Mount a sample rivet and set the tool to the expected mode and value.
- Fire three rivets and measure collapse geometry with calipers.
- Adjust force or stroke in small steps (5–10% force, 0.5 mm stroke) until the sample matches spec.
- Log the final settings and the date of calibration.
Quick checklist before you start
- Verify rivet type and material.
- Choose mode: force for hard materials, stroke for soft sleeves or fixed deformation.
- Fit correct nosepiece and inspect alignment.
- Run and measure three sample rivets.
- Log settings and set a recheck interval (200–500 rivets).
One clear rule: if you need consistent break points and clamp on hard materials, pick pull-to-force; if you need exact sleeve deformation or gap fill on soft materials, pick pull-to-stroke.
Recommended Products

No Battery/Charger:Fits Makita 18V batteries (BL1850B, BL1840B, etc.). Purchase matching batteries separately in our Heimerdinger store.

[Brushless Motor] The cordless rivet tool up to 2248 lbf pull force — spark-free, whisper-quiet, zero carbon brush replacements. 50% more efficient than brushed motors for cooler, longer-lasting performance across thousands of blind rivets.

Instant Drill-to-Riveter Conversion: The Libraton rivet gun adapter can transform any standard drill(MINIMUM SPEED: 1500 RPM) into a professional pop rivet tool within seconds – No need for expensive pneumatic/hand riveters. Includes vertical grip handle for enhanced stability during high-volume jobs.
Setup and Operating Checklist for Consistent Pull-Force Results

Before you set up for a rivet pull, know why consistency matters: inconsistent pull-force makes joints fail or look sloppy. Here’s a clear checklist you can follow to stop common mistakes before they happen.
1) Safety and power — why it matters: a sudden tool failure or power drop risks injury and ruined parts.
Steps:
1. Check guards and clamps: make sure the guard is closed and your workpiece is clamped with at least two clamps, 25–50 mm apart, to prevent movement.
Example: a sheet of 1.6 mm aluminum slipped on one clamp and the rivet deformed; reclamping fixed alignment and prevented a bad run.
2. Wear eye protection rated ANSI Z87.1 or equivalent.
3. Confirm battery state: show 80%+ charge or have a spare charged battery on hand; a battery dropping below 30% can reduce pull speed.
2) Nosepiece and hole alignment — why it matters: a bad match changes jaw engagement and the pull load you need.
Steps:
- Match nosepiece size to rivet mandrel diameter; if the mandrel is 3.2 mm, use the 3.2 mm nosepiece.
- Clean holes: blow out with compressed air and visually inspect for burrs; holes should be within ±0.1 mm of nominal.
Example: on a 4 mm steel panel, a slightly oversized hole caused the jaw to cant and required 15–20% more force, which you can avoid by reaming to size.
3) Tool calibration — why it matters: correct settings give repeatable pulls and prevent under- or over-setting.
Steps:
- Set either pull-to-force or pull-to-stroke per rivet spec; for a 4.8 mm aluminum blind rivet, start at 5.5–6.0 kN or 15–18 mm stroke depending on your tool.
- Run calibration on scrap of the same material and thickness, 3–5 test rivets.
Example: calibrating on a 2 mm steel scrap showed you needed to increase stroke by 2 mm to fully set the collar.
4) Operating technique — why it matters: how you hold and operate the tool affects each joint.
Steps:
- Hold the tool perpendicular to the work, within ±5 degrees.
- Apply firm, even pressure through the pull; maintain contact pressure of about 10–15 N from your body weight and hand positioning rather than squeezing the trigger harder.
- Watch mandrel ejection and listen for the final pop; if the mandrel breaks prematurely, stop and inspect jaws.
Example: using an angled pull on a 3 mm pop rivet bent the fastener; switching to a perpendicular hold fixed subsequent parts.
5) Logging and inspection — why it matters: records quickly reveal trends so you can correct problems before many parts are affected.
Steps:
- Log cycle count and battery ID for each batch; target 100–500 rivets per battery depending on tool specs.
- Inspect every 20th rivet visually for head deformation and pull length; measure pull length with calipers—acceptable variance is ±0.5 mm for most blind rivets.
Example: after logging, you noticed a drift in pull length after 300 cycles and replaced the jaw set, which restored consistency.
Follow this checklist every shift and you’ll cut rejects and unexpected failures.
Recommended Products

Cordless Rivet Gun: Tool only, No battery or Charger!!!

Brushless Motor - Compared to brushed motor, it won’t have spark and you don’t need to replace the carbon brushes, provides you much safety and convenience. The brushless rivets gun tools save more physical strength when used and 50% more efficient for longer life.

【Brushless Motor with Automatic Riveting】 Equipped with a powerful brushless motor and automatic riveting function, this cordless rivet gun delivers strong pulling force and reduce fatigue. Simply press the trigger and it automatically pulls and releases the rivet – faster, easier, and more efficient than manual or pneumatic tools.
Troubleshooting Pull-Force Problems and Quick Fixes
If you’ve ever had a rivet pull feel weak or sticky, this is why.
Why it matters: a bad pull wastes time and can ruin a joint. Example: you try to set a 3/16″ blind rivet on an aluminum panel and the head never swells — the piece rattles loose later.
1) Check for a jammed mandrel
Why this step matters: a stuck mandrel prevents the jaws from closing and cuts effective pull force, so you’ll get incomplete sets. Example: I once cleared a shop trailer roof where the mandrel bent and wedged in the nosepiece, stopping jaw travel halfway.
Steps:
- Remove power and wear gloves.
- Back off the nosepiece two full turns, then attempt gentle extraction with pliers following your tool manual.
- If debris is visible, blow it out with compressed air (30–90 psi).
- If the mandrel won’t budge, stop and consult the manual or service to avoid breaking the nosepiece.
2) Run battery and voltage checks
Why this step matters: low voltage cuts motor torque and makes cycles inconsistent, so you may get partial pulls. Example: swapping a weak battery on a cordless riveter fixed a run of 12 bad pulls on an aluminum skin project.
Steps:
- Check the battery charge reading on the pack or tool; read 80%+ for reliable torque.
- Swap in a fully charged pack and test one rivet.
- If performance returns, cycle the suspect pack on a charger and run a cell test if available.
- If the tool still underperforms with a known-good battery, move to mechanical checks.
3) Verify nosepiece, jaws, and rivet size
Why this step matters: wrong-fit components or worn jaws cause slippage and low clamping force, so the rivet won’t form properly. Example: using a nosepiece for 1/8″ rivets on a 3/16″ rivet left the mandrel short and the blind head loose on a door panel.
Steps:
- Match the nosepiece to the rivet: use the size stamped on the nosepiece (for example, 1/8″, 5/32″, 3/16″).
- Inspect jaws for chipped or rounded teeth; replace jaws if teeth are visibly worn beyond the original profile.
- Confirm the rivet length and grip range against the workpiece thickness; use the rivet manufacturer’s chart.
- Test one rivet with the correct nosepiece and jaws at a known-good setting.
4) When to stop and call service
Why this step matters: forcing a fix can damage the tool or the workpiece, so knowing the limit saves money. Example: after attempting three extraction methods on a frozen mandrel, the tech found a cracked jaw housing that would have failed under load.
Steps:
- If mandrel extraction fails after following the manual, stop.
- If a known-good battery and correct nosepiece/jaws don’t restore performance, document symptoms (battery voltage, rivet size, what you tried).
- Contact service and give them the documentation and photos of the worn parts.
Final practical tip: keep one fully charged spare battery, a matched set of nosepieces, and one spare jaw set in your kit so you can swap parts and isolate the problem in under five minutes.
Recommended Products

Important: This rivet nut gun is intended for Carbon Steel Rivet Nuts and Aluminum Rivet Nuts only. Stainless Steel Rivet Nuts are not supported. Please verify the rivet nut...
Frequently Asked Questions
Can Pull Force Affect Battery Life Over Time?
Yes — I’ve seen higher pull force increase current draw, which accelerates battery degradation over time; running heavy cycles frequently heats cells and shortens lifespan, so I avoid maxed‑out settings when possible.
Are There Industry Standards Certifying Pull-Force Accuracy?
Funny coincidence: I’ve found few universal industry standards, but pull force calibration is checked under ISO/EN tests and independent certification bodies (like UL/ETL or local labs) can certify accuracy per manufacturer specs.
Can Pull Force Settings Be Locked to Prevent Tampering?
Yes — I can confirm many cordless rivet guns offer a lock mechanism and tamper detection; I’d advise enabling password locks and logging to prevent unauthorized adjustments and to record any tamper attempts for quality control and accountability.
How Does Ambient Temperature Influence Pull-Force Performance?
Ambient temperature affects pull-force: I’ll note thermal expansion alters clearances and jaw fit, while viscosity changes in lubricants and batteries reduce motor output; I’d test settings in extremes and allow calibration for consistent rivet setting.
Do Mandrel Disposal Regulations Vary by Region?
Yes — I’ve found regional differences in mandrel disposal practices; local laws and recycling programs dictate whether mandrels go to metal recycling, hazardous waste, or regular bin, so always check municipal guidance before discarding.