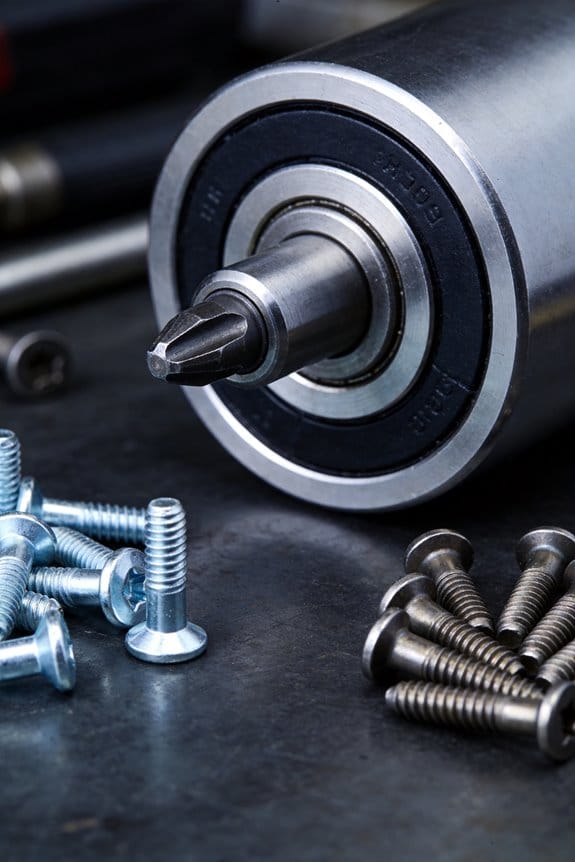
You just inspected a panel of mixed-metal rivets and found one rivet eaten away while the surrounding sheet looks fine — why did only that small piece fail?
You’re asking whether the rivet material, the panel metal, or saltwater exposure is the real culprit. Most people blame general “corrosion” or assume thicker metal alone will fix it, missing the role of dissimilar-metal electrical paths.
This article shows you exactly why small anodic rivets drive fast, localized attack and how to stop it: practical fixes, correct rivet and coating choices, and simple inspection steps that predict and prevent failure.
Read this and you’ll be able to select or retrofit rivets that won’t self-destruct. It’s easier than it looks.
Key Takeaways
If you’ve ever seen a rivet hole where the metal around it looks eaten away, this is why: when two different metals touch and there’s moisture, the less noble metal becomes the anode and corrodes faster.
– Example: a steel rivet in an aluminum panel near the coast will pit within months if wet salt spray gets trapped.

Why this matters: the rivet can fail before the panel does.
What causes fast rivet attack?
- Dissimilar metals plus an electrolyte (water, saltwater, even condensation) form a galvanic cell where the less noble metal corrodes.
- Example: a tiny steel rivet contacting a large aluminum sheet in a boat hull creates a current that targets the rivet.
How area ratio affects corrosion (and what to do about it)
- If the rivet area is small compared with the panel, current density on the rivet rises and you get rapid, focused corrosion.
- Example: one 1/8″ steel rivet in a 1 sq ft aluminum panel concentrates current on that tiny rivet head.
Steps to reduce this:
- Use rivets made from compatible alloys (match metal family).
- If you must mix metals, increase the rivet contact area or use multiple fasteners so current spreads.
- Electrically isolate with non-conductive washers or gaskets like nylon or EPDM.
Why moisture and crevices make it worse
- Salt spray, standing water, and tight crevices trap electrolytes and cause oxygen differences that accelerate corrosion.
- Example: flange overlaps on a coastal roof that hold rainwater will corrode mixed-metal fasteners within a year.
How to prevent it (practical steps)
- Choose the right fastener: use marine-rated materials such as 316 stainless steel or aluminum rivets when near saltwater.
- Isolate dissimilar metals: install nylon washers or coat the mating surfaces with a thin dielectric gasket.
- Coat and seal: apply a primer under the fastener head and a UV-stable sealant over the hole to block water.
- Design for drainage: slope panels, add drain holes, or avoid crevices so water doesn’t pool.
One installation checklist you can follow
- Identify metals in contact.
- If metals differ, pick a compatible rivet alloy (316 SS or matching aluminum).
- Add a non-conductive washer.
- Prime the hole with zinc- or epoxy-based primer.
- Seal the finished joint with a marine sealant.

This sequence cuts galvanic risk and extends service life.
If you’re working in marine or coastal service, assume accelerated attack and pick materials accordingly: 316 stainless or aluminum rivets, plus drainage and sealing, will keep your joints intact for years.
Galvanic Corrosion : Why Mixed‑Metal Rivets Fail
If you’ve ever seen a rusty rivet hole, this is why.
Why it matters: a failing rivet can let a structure separate or leak, creating safety and repair costs.
When you put two different metals together and they touch in wet conditions, an electrochemical reaction starts and the less noble metal becomes the anode and corrodes faster. For example, if you rivet aluminum sheet to a steel bracket and water or salt spray gets in, the aluminum rivet will lose metal ions and thin out while the steel stays relatively protected. You can actually see white, powdery corrosion on aluminum within weeks in coastal salt spray.
How the circuit forms, in plain terms: you need electrical contact and an electrolyte. Moisture, saltwater, or conductive dirt completes the circuit between metals so electrons flow from the anode to the cathode. The anode dissolves into the electrolyte as ions; the cathode does not. One specific case: a steel rivet through a copper plate in a damp attic will show blue-green staining on the copper and pitting of the steel rivet within a season.
How to stop mixed‑metal rivet failure — do this, step by step:
- Match metal nobility when you can. Pick rivets with similar position on the galvanic series — for example, use stainless or aluminum rivets for aluminum panels, and use carbon-steel rivets for carbon-steel parts.
- Isolate metals electrically. Use non-conductive washers, gaskets, or 0.5–1.0 mm thick neoprene or EPDM pads under the rivet head and on the tail side.
- Use protective coatings. Apply a primer and 50–75 µm of paint or a zinc-rich coating on steel surfaces near the joint; also coat the rivet shank before assembly if possible.
- Choose compatible fasteners. For outdoor or marine use, pick fasteners labeled for marine environments (e.g., 316 stainless for saltwater exposure).
- Add sacrificial protection when redesigning. Bolt a small zinc or magnesium anode nearby if you have large exposed areas of a less noble metal.
- Inspect regularly. Check joints every 6 months in aggressive environments (coastal or chemical) and every 12 months in mild environments; look for thinning, pits, discoloration, or loose rivets.

A real-world example: on a small aluminum sailboat I worked on, the factory used mild-steel rivets to hold a galvanized trim strip. After two summers near a marina the rivets had deep pits and the trim was loose; replacing them with 316 stainless rivets plus neoprene washers fixed the leaks and the new rivets looked pristine after another year.
Quick rules of thumb you can use on the spot:
- If metals are adjacent on the galvanic chart, you’re safe.
- If one metal is notably lower (more anodic), isolate it or swap materials.
- In marine or salt-spray exposure, default to 316 stainless or aluminum-to-aluminum fasteners.
Final practical tip: when you replace a rivet, clean both mating surfaces, apply a thin coat of dielectric grease or anti-corrosion paste (e.g., 10–20 µm layer), and torque or set the fastener to the manufacturer’s spec so there’s firm contact without crushing the insulation.
Worst Metal Pairs and Environments for Galvanic Corrosion

If you’ve ever seen two different metals stuck together and one of them fall apart, this is why.
Galvanic corrosion matters because the more active metal will disappear faster when a conductive liquid connects the metals. For example, when a magnesium bracket touches a steel bolt and gets wet with salt spray, the magnesium will corrode quickly and the bolt will stay intact.
Why magnesium and steel are so bad together: magnesium sits very low in the galvanic series, so it becomes a strong anode and dissolves rapidly when electrolyte is present. A real-world example: a magnesium engine mount bolted to a steel chassis on a boat showed deep pits within weeks after repeated saltwater exposure.
Why copper with aluminum causes trouble: aluminum usually acts as the anode in many electrolytes and will pit. Picture a copper pipe clamped to an aluminum support on a seaside balcony; within a year you can get localized pitting at the clamp where moisture collects.
Environments that speed things up: marine/coastal settings, salt spray, constant high humidity, standing water, and polluted urban atmospheres all increase conductivity and accelerate galvanic attack. For instance, a riveted aluminum panel on a ship exposed to salt spray developed dozens of corroded rivet sites after a single wet season.
How to avoid it — practical steps you can take:
- Separate the metals electrically. Use non-conductive washers or sleeves between dissimilar metals.
- Use compatible fasteners: pick stainless steel only when both materials are close in the galvanic series, or use a sacrificial anode like zinc if one metal must protect another.
- Apply coatings: paint or epoxy the contact surfaces and edges, and seal with a waterproof sealant where water might pool.
- Design for drainage: slope joints so water doesn’t collect; add holes for runoff if needed.
Concrete example for rivets: when joining copper to aluminum rivets, do this:
- Fit a nylon sleeve around each rivet shaft.
- Coat both mating surfaces with epoxy primer.
- Tighten to specified torque to avoid gaps where moisture can sit.
If you follow those steps, you’ll stop the galvanic cell from forming and protect the less noble metal.
Recommended Products

1.Precision-Engineered:Please check our size picture carefully before ordering to ensure it meets your size requirements !! These SAE-standard flat washers ensure a perfect fit for bolts and screws. They provide a uniform load-bearing surface to prevent loosening, reduce stress on materials, and enhance joint integrity under vibration or load .

RELENTLESS RUST PROTECTION FOR ANY WEATHER: This self-healing barrier clings and protects metal through rain, seawater, and pressure washing; it won’t drip, wash away, or quit, making it a reliable shield in even the harshest outdoor conditions.

High Resistance to Rust & Corrosion!
How Rivet Area Ratio and Metal Contact Speed Up Corrosion

Here’s what actually happens when you join a small metal piece to a much larger one and moisture gets in: it speeds up corrosion because the electrical current concentrates on the small piece and dissolves it faster.
Why this matters: if you have a small steel rivet in a large aluminum skin, the rivet can fail in months rather than years. In that boat hull example, the steel rivet is the small anode and the aluminum skin is the big cathode; saltwater trapped in the seam becomes the electrolyte and focuses current on the rivet.
How the size difference speeds corrosion
- The smaller anodic area produces a much higher current per unit area than the large cathode, so the anode’s metal atoms dissolve into ions faster.
- Crevices — like the edge gap around a rivet — hold moisture and limit oxygen, which changes the local chemistry and concentrates currents even more.
- Electrons flow easily to the large cathode, so the anodic metal keeps losing material while the cathode stays mostly intact.
Real-world example: on a car body panel joined with a tiny steel spot-weld to a large aluminum bracket, you could see rusted holes at the welds within a few winter seasons because road salt and trapped moisture focus corrosion at those small contact points.
What you can do (practical steps)
- Increase anodic area: replace a single tiny rivet with several larger fasteners so each anode shares the current; aim to at least triple the exposed anode area compared with the original.
- Reduce crevices: apply a bead of marine-grade sealant along the joint and torque fasteners to the manufacturer’s spec so gaps under 0.5 mm are minimized.
- Limit electrical contact: use a thin non-conductive washer or dielectric coating between dissimilar metals; expect coatings to interrupt current immediately.
- Keep the joint dry: add drainage holes or vents and inspect for trapped moisture every 6 months in humid or marine environments.
Practical numbers to guide you: if the anode area is 1/10th of the cathode, current density on the anode can be roughly ten times higher, which can reduce service life by an order of magnitude under the same conditions.
Short checklist before you fasten dissimilar metals
- Are you using dielectric washers? Yes or no.
- Is there a 0.5 mm or smaller gap? Fix it.
- Can you add more anode area? Add fasteners.
- Is the joint exposed to salt or splash? Seal or coat it.
If you follow those steps — increase anode area, stop crevices, break electrical paths, and keep things dry — you’ll slow the focused corrosion that kills small parts in big assemblies.
Choose Compatible Rivets and Base Metals (Quick Selection Rules)

If you’ve ever struggled with rivets that fail too soon, this is why. You want joints that last, not quick fixes that corrode. Example: a dinghy with stainless steel deck plates joined to an aluminium hull will show white powder and pits within months if the metals aren’t chosen right.
Why matching metals on the galvanic series matters
Why it matters: galvanic potential differences drive corrosion and shorten joint life.
Match metals that are within about 0.25 volts of each other on the galvanic series; that’s a practical threshold to keep corrosion slow when parts get wet. For example, 300-series stainless (≈ –0.1 V) paired with 6061-T6 aluminium (≈ –1.6 V) is a bad mismatch; instead, use aluminium rivets or sacrificial zincs. Concrete step: when in doubt, pick rivets with the same or adjacent position on a galvanic chart.
Use the same alloy family when you can
Why it matters: alloys that behave alike age and expand similarly, reducing stress and leak paths.
If you’re fastening aluminium to aluminium, use 5056 or 6061 rivets for 5000/6000 series plates; they match mechanically and electrochemically. Example: attaching a 5052 aluminium panel to a 5056 rivet on a trailer avoids crevice corrosion that you’d see with dissimilar alloys.
Fit rivet size and type to the parts
Why it matters: correct sizing prevents stress concentrations, loose gaps, and moisture traps that accelerate failure.
Steps:
- Measure combined stack thickness to the nearest 0.5 mm.
- Choose a rivet with a grip range that centers on that thickness (allow ~1 mm tolerance).
- Use solid or structural rivets for load-bearing joints; use blind rivets for hard-to-reach spots.
Example: joining two 2.0 mm aluminium sheets (total 4.0 mm) you’d pick a blind rivet with a 4.5–5.0 mm grip range so the mandrel seats properly.
Avoid pairing noble stainless with soft aluminium in wet or salty places
Why it matters: stainless is cathodic and aluminium will corrode fast in marine or high-humidity environments.
Concrete guidance: never use 300-series stainless rivets on external aluminium hulls or decks exposed to salt spray; instead use aluminium rivets or isolating barriers. Example: a saltwater kayak used year-round will pit at every stainless-to-aluminium joint within a season unless you isolate the metals with coatings or non-conductive washers.
Document what you chose and the service environment
Why it matters: future repairs that match your original choices keep joints safe.
Steps:
- Record rivet material, alloy/grade, size, and galvanic-series reference.
- Note the expected environment (freshwater, saltwater, indoor humid) and any coatings used.
Example: write “Al rivet 5056, 4.8 mm grip, used on 6061 hull, salt-spray exposure” in your maintenance log so the next person doesn’t swap in stainless.
Quick checklist before you rivet anything
Why it matters: a short check catches the common mistakes that cause early failures.
Checklist (do all five):
- Verify galvanic potential difference ≤ 0.25 V.
- Prefer same alloy family when practical.
- Confirm rivet grip range matches measured stack thickness.
- Avoid stainless-on-aluminium in wet/salty conditions, or use isolation.
- Log materials and environment for future maintenance.
If you follow these rules you’ll avoid most galvanic surprises.
Recommended Products

Pop Rivets Size: This aluminum blind rivets assortment kit includes 40pcs 1/8" x 1/4", 40pcs 1/8" x 5/16", 30pcs 1/8" x 3/8", 30pcs 1/8" x 1/2", 15pcs 3/16" x 1/4", 15pcs 3/16" x 5/16", 15pcs 3/16" x 1/2" and 15pcs 3/16" x 5/8".

【1000pcs Pop Rivets Set】: This pop rivets assortment kit with washers set includes 14 most used sizes for your various needs. Among, including 50pcs 3/32” x 1/4”, 50pcs 3/32” x 5/16”, 35pcs 1/8” x 1/4”, 40pcs 1/8” x 5/16”, 50pcs 1/8” x 3/8”, 50pcs 1/8” x 1/2”, 45pcs 5/32” x 3/8”, 35pcs 5/32” x 1/2”, 30pcs 3/16” x 5/16”, 30pcs 3/16” x 3/8”, 30pcs 3/16” x 1/2”, 30pcs 3/16” x 5/8”, 15pcs 1/4” x 3/8”, 10pcs 1/4” x 1/2”, total 500 pcs pop rivets. It also comes with 500pcs 5 sizes pop rivets washers.

【High-Quality Materials】 Our pop rivets are made of premium aluminum and steel, ensuring great performance in any environment. They are corrosion and acid-resistant, so you don't have to worry about rusting or breaking.
Rivet Isolation: Effective Coatings, Washers and Gasket Options

If you’ve ever had two different metals start to eat each other where a rivet joins them, this is why.
Why it matters: galvanic corrosion can destroy joints over months, so you want to stop electrical contact and keep moisture out.
1) How to use coatings and why they work
- Why it matters: a proper insulating coating prevents the tiny galvanic current that corrodes the joint.
- Steps:
- Clean the hole and rivet with a solvent (acetone) and a 120–240 grit scuff.
- Apply a polymer or epoxy primer to the hole and the rivet shank; use 2 thin coats totaling about 50–100 µm (2–4 mils).
- Cure per the manufacturer’s time and temperature—typical epoxy cure is 24 hours at room temp or 2 hours at 60°C.
- Real-world example: on an aluminum boat hull, I scuffed the rivet hole, brushed on epoxy, waited 24 hours, then drove the rivet; after two seasons the joint showed no white corrosion.
- Tip: if you need field repairs, use a fast-setting epoxy paste rated for the environment.
2) Which washers and gaskets to pick
- Why it matters: a non-conductive spacer keeps dissimilar metals electrically isolated and seals edges where water pools.
- Steps:
- Match washer inner diameter to the rivet shaft within 0.5 mm so it sits flat.
- Use non-conductive washers made from nylon, PTFE, or fenolic for general duty; thickness 1–3 mm usually works.
- For softer sealing, choose neoprene or fiber gaskets cut to the same OD as the flange and 1–3 mm thick.
- Real-world example: when fastening steel to aluminum on a trailer, I used PTFE washers under each rivet head and neoprene pads on the mating surface; there was no galvanic staining after a year of road salt exposure.
- Warning: don’t use metal washers unless both parts are the same alloy.
3) High-temperature situations: thermal barriers that survive
- Why it matters: at high temperatures ordinary polymers soften and crack, which reopens electrical paths and lets electrolytes in.
- Steps:
- For up to ~200°C, choose silicone pads or mica-based gaskets rated to that temperature.
- For continuous use above 200°C, use mica or ceramic-based insulation with stainless backing.
- Allow for thermal expansion by selecting a slightly thicker gasket (add 0.5–1 mm) so compression during heating doesn’t fracture it.
- Real-world example: on an exhaust clamp where temperatures hit 300°C, mica pads kept the steel-to-aluminum contact insulated and the pads lasted over 18 months.
- Note: inspect high-temp seals every 3 months initially.
4) Inspection and maintenance
- Why it matters: coatings and seals wear, and early replacement prevents fast joint failure.
- Steps:
- Inspect rivets and washers visually every 6 months in mild conditions, every 3 months in corrosive environments.
- Look for flaking, white powder, or any metal-to-metal shine where coating worn through.
- Replace any degraded washers or gaskets and recoat exposed metal immediately.
- Real-world example: on a coastal signpost, quarterly checks found a single worn washer; replacing it and recoating the hole prevented multiple failed rivets.
- Final tip: always keep fastener holes clean and dry before installation; a dry, clean surface gives coatings and gaskets the best chance to work.
Remember to follow product instructions for cure temperatures and service ratings, and when in doubt pick the higher temperature or thicker insulation.
Recommended Products

Quality Material: this aluminum pop rivet washer is made of quality aluminum material, which has a nice corrosion resistance and rust resistance, not easy to break or deform, ensuring a long service life

You don't have to drive miles to hardware store to buy these rivet washers, total 300pcs, excellent quality and reasonable price, isn't it your first choice?

You don't have to drive miles to hardware store to buy these rivet washers, total 250pcs, excellent quality and reasonable price, isn't it your first choice?
Spot Corrosion Early: Field Inspection Checklist for Rivets
If you’ve ever found a few rusty rivets and wondered how fast things could get worse, this checklist helps you catch trouble early.
Why this matters: galvanic corrosion can start under paint and eat metal quietly, so spotting it early saves time and money.
1) Visual inspection — what to look for and how
Why this matters: early visual cues tell you where to probe next.
Steps:
- Stand 2–3 feet from the rivet row and scan for discoloration, white or green deposits, and paint lift.
- Take a photo of each suspicious rivet with your phone and label the photo with the bay number and date.
Example: on an aluminum aircraft wing you’ll spot a green powder around a rivet within weeks of moisture exposure.
2) Edge probing — check for looseness or undercutting
Why this matters: a loose rivet or undercut area means metal loss that visual checks miss.
Steps:
- Use a plastic or wooden toothpick or a blunt screwdriver tip so you don’t damage the coating.
- Probe around the rivet head edge for movement; if the tool slides under the head by more than 1–2 mm, mark it.
Example: a maintenance tech found a rivet with a 3 mm gap on a patio canopy and replaced the panel before the panel failed.
3) Surface mapping — record trends over time
Why this matters: plotting locations shows whether a problem is spreading.
Steps:
- Sketch a simple rivet row map or take a single wide-angle photo that includes reference points.
- Number rivets and note anomalies beside each number (e.g., “#12: green deposit, 2 mm undercut”).
Example: a shipyard crew mapped a 10-meter section and tracked 7 adjacent rivets degrading over two months.
4) Moisture detection — find the electrolyte
Why this matters: moisture is the driver of galvanic cells and tells you where corrosion will accelerate.
Steps:
- Use a handheld moisture meter set to metal mode, or press a clean white cloth against the joint for 30 seconds and check for staining.
- Log readings: moisture meter percentage or “dry/wet” from the wick test, plus location and date.
Example: a condenser box showed 12% moisture on the meter after a rain, matching the rivet line that had fresh white deposits.
Quick routine to follow on visits
Why this matters: a short, repeatable routine makes inspections consistent.
Steps:
- Do the visual scan (1–3 minutes per panel).
- Probe any flagged rivets (2–5 minutes for a small area).
- Update the map and moisture log (1–2 minutes).
Example: a facility inspector completes this loop on a row of 50 rivets in about 10 minutes.
Final practical tips
Why this matters: small habits stop big repairs.
- If you find a rivet with >2 mm undercut or persistent moisture >10%, schedule repair within 2 weeks.
- Keep a simple binder or folder with dated photos and maps so you can compare visits.
- Wear gloves and eye protection when probing.
Follow these steps each visit and you’ll catch galvanic attack before panels need replacement.
Recommended Products

1.Create Or Reinstate Rivet Detail On Your Model.

Aircraft Tool Supply Rivet Removal Tool
Wire Protect: This insulation piercing clips is able to contact with insulated wires without cutting or stripping insulation, protect your wire while testing
Repair and Retrofit: Safe Fixes for Corroded Mixed‑Metal Rivet Joints
Before you start replacing rivets, you need to know why stopping galvanic attack matters: it keeps your structure from losing strength and failing unexpectedly.
If you’re fixing a corroded mixed‑metal rivet joint, follow these steps.
1) Remove damaged rivets: drill out each corroded rivet with a bit 0.5 mm larger than the rivet shank, keeping drill speed low to avoid heat. Example: on an aluminum‑steel lap joint on a small trailer, I removed three rivets per panel with a 5 mm drill and a backing plate to catch the shank.
2) Clean surrounding metal: use a wire brush and then solvent (acetone) to remove debris and oils; finish with a Scotch-Brite pad until you see bright metal.
3) Inspect for metal loss: measure hole diameters with calipers; if any hole is more than 1 mm oversized or the sheet metal thickness has lost >20%, plan a patch or reinforcement.
Why you should isolate dissimilar metals: electrical contact drives the reaction and will keep corroding the weaker metal until you break the circuit.
How to isolate or replace fasteners (step‑by‑step):
1) Match alloys when possible: replace steel rivets on aluminum with stainless 316 rivets only if you also use an insulating sleeve. Example: on a boat transom I switched to 316 rivets plus nylon sleeves because the aluminum was soft and the environment was wet.
2) Use nonconductive sleeves: install nylon or PTFE sleeves sized to the hole so the sleeve’s outer diameter presses against the hole and the rivet shank turns freely; choose sleeves rated for the shear loads you expect.
3) Apply coatings: brush a thin epoxy or polyurethane around the hole (0.2–0.5 mm wet film) before installing the sleeve to seal crevices.
4) Torque or set rivets to spec: follow the rivet manufacturer’s recommended setting force or use a calibrated rivet gun so you get consistent compression.
How to test whether galvanic couples are active: tell you the condition quickly so you choose the right barrier.
1) Use a voltmeter: measure the open‑circuit potential between the two metals in millivolts with a saltwater wetted reference (use a silver/silver‑chloride electrode if you have one); potentials over ~50 mV indicate a risk in marine conditions. Example: on a pier bracket, a 120 mV reading between zinc and aluminum told me to isolate them immediately.
2) Do a surface continuity check: use a low‑ohm meter; readings below 0.1 ohm mean metals are electrically connected and need a dielectric barrier.
Long‑term monitoring you can do yourself: it catches recurrence before failure.
1) Inspect monthly for the first three months, then quarterly: look for moisture traps, paint failure, or new white powder (aluminum corrosion).
2) Re‑measure potentials every six months and after any hard storms.
3) Keep a log with dates, readings, and photos so trends show up.
One final practical tip: if the joint carries critical load and you see any sheet thinning over 20% or holes growing more than 1 mm, plan for a structural patch or replacement rather than just re‑riveting.
Recommended Products

🔧 Multiple Solutions- Includes 18 Sizes Nylon Rivet, Total 180 Pieces. These Are Reliable Replacement for the Original Part That had Missing or Failed Due to Fatigue. ✅...
Frequently Asked Questions
Can Galvanic Corrosion Produce Electrical Hazards in Riveted Assemblies?
Yes — I know you’ll think it’s only structural, but I’ve seen galvanic corrosion cause electrical leakage and stray currents that energize riveted assemblies, creating shock and fire risks unless isolated, insulated, or materials matched promptly.
Do Temperature Cycles Accelerate Galvanic Corrosion Beyond Humidity Effects?
Yes, I think thermal cycling does accelerate galvanic corrosion beyond humidity effects, because repeated expansion and contraction opens crevice expansion, breaks coatings, and renews electrolyte flow, increasing anodic attack at mixed-metal rivets.
Can Protective Paints Hide Active Galvanic Corrosion Under Rivet Heads?
Yes — I’ve seen protective paints hide active galvanic corrosion under rivet heads: coating delamination and a hidden crevice trap electrolytes, so corrosion proceeds unnoticed until failure; I’d inspect and isolate metals rather than rely solely on paint.
Are Stainless Steel Rivets Magnetic if Galvanic Protection Is Present?
Yes — I’ll check with magnetic testing: if stainless rivets have ferritic content they’ll show magnetism even with galvanic protection coatings; fully austenitic stainless won’t, so coatings don’t change inherent ferritic magnetic response.
How Long After Installation Does Galvanic Corrosion Typically Become Detectable?
Typically within months to a few years; I’ll watch for initial signs like white powdering, greenish staining, or pitting. Visual clues include discolored rivet heads, streaks on surrounding metal, and loosening joints indicating progressing corrosion.