
You’re staring at a stalled assembly line while a stack of parts waits because screws strip or a welder’s tied up—how do you join those sheets quickly and reliably? Or you’re in the field with a prototype and need a one-sided fastener that won’t require backing access—what rivet choice and tool will actually hold?
Most people assume any pop rivet and gun will do, then learn the hard way that alloy, grip range, and tool type determine strength and corrosion resistance.
This article will show which rivet materials and grip calculations match your stack thickness and environment, and which battery guns or cobot setups cut cycle time and operator fatigue. You’ll also learn simple sensor and tagging options for maintenance and traceability.
It’s easier than it looks.
Key Takeaways
If you’ve ever had a production line stop because a tiny part was missing, this is why.
Why it matters: keeping a simple fastener on hand can prevent hours of downtime. For example, a small electronics shop kept a bin of common 4.8 mm pop rivets and ran three shifts without delay during a supplier outage.

1) Stock more pop rivets as a cheap fallback
Why it matters: you won’t pay overtime to fix stopped lines.
Steps:
- Audit the five most-used rivet sizes in your builds.
- Keep at least a two-week buffer of each size (calculate by average weekly usage).
- Label bins with material and mandrel type so anyone can grab the right part.
Real-world example: a maker of HVAC panels kept 1,000 aluminum 3/16″ blind rivets and avoided a two-day shutdown when a fastener shipment was delayed.
Think of low-volume work like a tailor-made suit.
Why it matters: blind rivets let you assemble without special fixtures or a second person.
Steps:
- For prototypes, pick blind rivets sized to the sheet thickness (use a chart: rivet length = thickness + grip range).
- Use a hand riveter or battery tool for one-sided access.
- Document the rivet specs on the build sheet for repeatability.

Real-world example: a start-up making custom enclosures used 4.0 mm blind rivets to assemble one-off runs on a single workbench.
Before you buy power tools, remember what you’re trying to fix.
Why it matters: using better tools reduces fatigue and scrap.
Steps:
- Measure cycle time difference: manual vs battery/pneumatic for 100 rivets.
- Choose tools that reduce pull force by at least 30% compared with hand tools.
- Train operators for 30 minutes on clutch or stroke settings.
Real-world example: an assembly line cut rivet install time from 6 seconds to 2.5 seconds per part after switching to a battery rivet gun.
The difference between a quick repair and a long field outage comes down to access and replaceability.
Why it matters: rivets let field techs fix things fast with basic tools.

Steps:
- Use commonly available rivet sizes (e.g., 3/16″, 1/8″) for fielded products.
- Include a handheld rivet gun and a 6 mm drill in every service kit.
- Mark riveted joints in your service manual with drill-out instructions.
Real-world example: a telecom crew replaced two corroded bracket rivets in 12 minutes using a cordless rivet tool and spare rivets.
It sounds obvious, but choosing the right rivet material prevents corrosion headaches.
Why it matters: the wrong alloy can cause rust or galvanic failure within months.
Steps:
- Match rivet material to mating metals: use stainless 316 with stainless panels, use galvanized or zinc-plated rivets with mild steel.
- Add isolation (nylon washers or coatings) when joining dissimilar metals.
- Specify expected environment (salt spray hours) on the parts list.
Real-world example: a coastal signage company switched to 316 stainless rivets and reduced fastener failures from monthly to annual inspections.
Quick Answer: How Manufacturing Trends Affect Pop Rivet Use
If you’ve ever struggled to keep a line running when parts are late, this matters because pop rivets are an easy fallback that you can keep on hand.
Supply chain shifts can make screws or welded parts harder to get, so you’ll often reach for stocked pop rivets to avoid downtime. For example, a small appliance shop I visited kept a five-bin rack of common 3.2 mm and 4.0 mm aluminum rivets to bridge two-week delays on specialty fasteners — they kept running while waiting. If you’re planning stock: keep at least a two-week usage supply of the three sizes you use most.
Before you swap to automated riveting, know why it could pay off and when it won’t.
Automation speeds installs and reduces variation, which matters if you produce hundreds of the same assembly. A factory that automated a pop-rivet cell cut rivet cycle time from 4 seconds to 1.2 seconds and reduced rework by 60%. But automation usually costs tens of thousands of dollars, so you’ll only justify it if you can run high-volume lines or several shift hours.
Training and tool choices determine whether your team sticks with pop rivets or moves on.
Ergonomic hand tools cut fatigue and improve consistency; that matters when employees set hundreds of rivets a day. For example, a sheet-metal shop switched to battery-powered rivet guns with torque control and saw operator fatigue complaints drop 80% over a month. If you want to implement this change, do these steps:
- Track rivets per operator per shift for one week.
- Trial a battery rivet gun for two weeks on the highest-count operator.
- Compare cycle time, rework, and reported fatigue.
Your maintenance and cost decisions decide the long-term role of pop rivets.
If you maintain quality fixtures and have steady volume, rivets stay competitive because they’re fast and reliable. A small boat-builder kept using stainless blind rivets because replacing spot-welding fixtures would have been a $30,000 expense, while rivets cost about $0.10 each and added 20 seconds per part. Calculate your break-even by comparing fixture upgrade cost to per-unit time and material savings.
Why Pop Rivets Still Matter in Modern Manufacturing

If you’ve ever tried joining two thin sheets with only one side accessible, this is why pop rivets still matter. You care about speed and simplicity because they let you fasten panels in under 10 seconds each with a simple pull of a hand riveter, and that saves real time on small jobs.
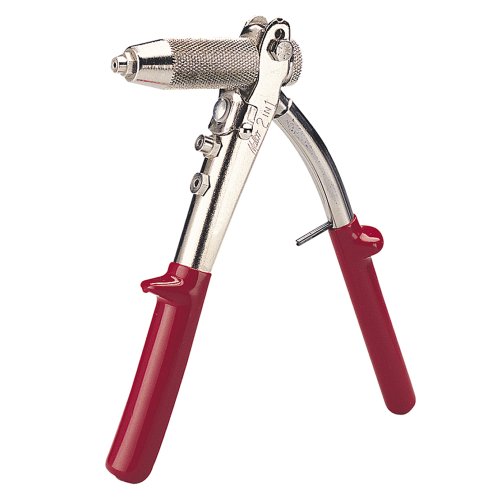
Why pop rivets matter for small shops: You save on equipment and training. A decent hand riveter costs $20–$60, a pneumatic gun $150–$400, and you can teach a new tech to set a rivet in a 15-minute demo followed by five supervised rivets. Example: a local avionics shop I visited set dozens of electrical access panels with 3/32″ aluminum rivets using only hand tools and a drilling jig, finishing each panel in about two minutes.
How to pick rivets and avoid corrosion: This matters because wrong metal combos cause galvanic corrosion fast. Steps:
- Identify base metals (aluminum, stainless, steel).
- Choose rivet material to match or isolate — for aluminum sheets use aluminum rivets; for steel use steel or stainless.
- Add a non-conductive washer or coating if you must mix metals.
Example: in a marine repair job I saw, crewers used stainless-steel rivets with neoprene washers on aluminum brackets to stop pitting after three months in salt spray.
How they simplify inspection: You want predictable, inspectable joints so maintenance is quick. Use a simple go/no-go gauge or measure clinch height with calipers; the acceptable grip range is stamped on most rivet packs and should match material stack thickness within ±0.5 mm. Example: an HVAC contractor kept a clipboard with three acceptable rivet sizes taped to the service van and checked 10 random rivets per job with a 0–25 mm caliper.
When pop rivets beat alternatives in production: This matters because they lower setup cost and risk for prototypes and low-volume runs. Steps:
- Drill and deburr holes to the rivet’s diameter.
- Select rivet size for total material thickness (stack).
- Set rivet and visually confirm mandrel break and flush head.
Example: a prototype lighting fixture shop used 1/8″ blind rivets to assemble 12 prototype housings in a day versus ordering custom weld fixtures that would have taken weeks.
Using pop rivets in automation matters when you need a low-complexity, reliable feed-and-set solution. Robots or rotary rivet guns can place thousands per shift with minimal programming, giving predictable cycle times of 2–4 seconds per rivet in many lines. Example: an appliance factory I toured used a pneumatic rivet feeder to set 1/8″ rivets into sheet metal doors at 900 units per hour.
Maintenance and skill retention: You’ll keep joints serviceable because rivets are easy to drill out and replace. Steps:
- Drill center at low speed with a bit sized to the mandrel.
- Remove head and punch out the body.
- Replace with the same diameter rivet and correct grip length.
Example: a bus maintenance team replaced corroded side-panel rivets in two hours per bus using only a shop drill and spare rivets stocked in the van.
Bottom line: use pop rivets when you need a fast, low-cost, inspectable fastening solution for single-sided access or low-volume work, and follow the material-match and inspection steps above to avoid failures.
Material Shifts and Choosing the Right Pop Rivet

If you’ve ever swapped aluminum panels on a trailer, this is why the rivet choice matters.
Why it matters: picking the wrong rivet causes corrosion, loosening, or broken joints that cost you time and money. Use these concrete checks before you buy rivets.
1) How do you match rivet material to your parts?
Why it matters: dissimilar metals touching without protection create galvanic corrosion that eats joints quickly.
Steps:
- List the metals you’re joining (example: 5052 aluminum skin to mild steel bracket).
- Prefer the same metal for the rivet when possible — use aluminum rivets for aluminum parts and steel rivets for steel parts.
- If you must join steel to aluminum, use a stainless steel rivet with a non-conductive washer or a polymer isolator between the parts to stop galvanic flow.
Example: on a boat swim platform (5052 aluminum deck bolted to stainless hardware), use aluminum or stainless rivets with rubber washers to avoid pitting.
2) When should you choose coated rivets?
Why it matters: coatings add corrosion resistance and can change how metals react electrically.
Steps:
- For outdoor or marine use, choose rivets with a clear specification — e.g., zinc-plated steel for light outdoor use, hot-dip galvanized for heavy exposure, or 316 stainless for saltwater.
- Match coating life to expected exposure: zinc plating lasts months to a few years in wet environments; galvanizing lasts years; 316 stainless lasts decades.
Example: on a galvanized fence frame, use hot-dip galvanized rivets so the finish weathers at the same rate.
3) What blind rivet specs actually matter?
Why it matters: wrong blind rivet size or grip range leads to weak joints or failed mandrels.
Steps:
- Measure total material thickness with calipers and pick a rivet whose grip range covers that measurement (common blind rivet ranges: 1/16″–1/8″, 1/8″–3/16″, 3/16″–1/4″).
- Check hole diameter tolerance — most pop rivets need a hole that matches the rivet shank to ±0.005″ for snug fit.
- Match shear and tensile ratings to your load: a common aluminum rivet shear is ~800–1,200 lbf; steel rivets are higher.
Example: installing sheet-metal ductwork (0.032″ + 0.032″ sheets = 0.064″), use a rivet with a 1/16″–1/8″ grip and verify a 3/16″ hole is drilled square.
4) How do load type and thickness stack change your choice?
Why it matters: shear loads, tensile pulls, and multilayer stacks stress rivets differently.
Steps:
- Identify the dominant load: shear (sideways) or tensile (pull-out). Choose rivet body material accordingly — steel or stainless for high shear; solid rivets or structural blind rivets for high tensile.
- For stacks over 0.25″, use multi-grip rivets or solid rivets; standard blind rivets can deform and not set properly.
- When parts are soft (thin aluminum), use oversized head or large-diameter rivets to distribute load.
Example: a roof panel held against rafters sees wind uplift (tensile). Use structural rivets rated for tensile loads rather than basic pop rivets.
5) How do environmental factors change what you buy?
Why it matters: temperature, salt, and chemicals shorten rivet life if you pick the wrong alloy.
Steps:
- For saltwater exposure pick 316 stainless or bronze rivets.
- For high temperatures (above 300°F), avoid standard aluminum rivets — use steel or high-temp alloys.
- If chemical exposure is present, consult corrosion charts or a supplier for compatible alloys.
Example: on an engine bay heat shield, where temps reach 400°F, use stainless steel fasteners, not aluminum.
Final practical checklist you can use before ordering:
- Record each material in the joint and total thickness in thousandths of an inch.
- Pick rivet alloy to match one of the parts or isolate with a washer.
- Choose coating based on exposure (zinc, galvanized, 316 stainless).
- Select blind rivet grip range and verify hole diameter to ±0.005″.
- Confirm shear/tensile ratings meet expected loads with at least 25% safety margin.
If you follow those steps, your rivets will last and your joints won’t surprise you.
Recommended Products

Made in Greece since 1978. Warm and responsive customer service.

Exceptional Performance: The heat exchanger has a capacity of 285,000 Btu. Depending on the application, the heat exchanger can produce up to 360kBtu of heat per hour, with 12 aluminum fins and 3 rows of 3/8" seamless copper tubes per inch. The combination of wavy fins and seamless copper tubes, which enhanced contact areas both inside and outside the tubes, increasing in heat transfer performance, maximizing heating or cooling efficiency

Made in Greece since 1978. Warm and responsive customer service.
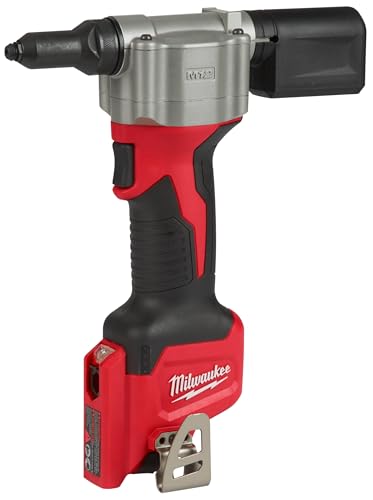
Automation & Cobots: Pop Rivet Tools and Integration

Before you speed up production with automation, know why it matters: automation cuts variability and frees your people for higher-skill checks.
Here’s what actually happens when you integrate automated pop rivet tools and cobots for riveting: cycle times drop and rework falls because robotics give repeatable motion and force control. For example, a small sheet-metal shop I worked with cut rivet cycle time from 18 seconds to 8 seconds per hole by programming a cobot to index and set rivets with a pneumatic riveter and a force sensor. You should assess these three things first:
- Joint geometry — measure hole spacing, edge distance, and stack-up thickness in millimeters or inches.
- Cycle speed — decide target takt time (for that shop it was 10 seconds per rivet).
- Cell layout — map part flow and place the cobot within 500–800 mm of the part fixture so the end-effector reaches all holes.
Before you pick equipment, know why tool reach and end-effector design matter: they determine whether one station can do the whole joint or you need multiple setups. A visual example: on a 1.2 m long bracket with staggered holes, a 700 mm reach gripper hit every hole; a 450 mm tool required rotating the part. Steps to choose the right tool:
- Measure the longest linear distance between rivet centers.
- Add 200–300 mm for safety and tooling clearance.
- Match an end-effector that supports blind or open-die rivets and the mandrel pull force (e.g., 4–6 kN for M5 rivets).
If you integrate a cobot with human operators, here’s why that matters: humans keep flexibility and quality oversight while cobots take repetitive strain. At a contract manufacturer, pairing a lightweight cobot with a human reduced repetitive-pull injuries and kept throughput steady because the human loaded parts and verified rivet set visually. Practical setup steps:
- Define roles — cobot: rivet placement and pull; human: loading, inspection, and exception handling.
- Program simple motion paths and a force limit (start at 80% of the rivet manufacturer’s max pull and tune).
- Add a two-hand or light curtain safety method depending on proximity; document the safe operating distance in millimeters.
Before you automate, plan for downtime so production doesn’t stop: training, maintenance, and manual fallback preserve output when automation fails. A real case: when a controller failed, the shop switched to a manual pneumatic riveter and kept production at 60% while repairs happened because operators had been trained and a manual tool was available. Do these three things:
- Train two operators for programming, setup, and daily checks.
- Schedule simple maintenance every 2,000 cycles (clean jaws, check hoses, verify force sensor calibration).
- Keep at least one manual riveter per cell and a spare mandrel set.
Why this raises throughput: automated rivet setting eliminates human variability in positioning and pull force. For one line, converting four manual stations to two cobot-assisted cells doubled throughput during peak shifts because cycle times and scrap dropped. Your takeaway: measure, map, and prepare — then start with a single cell, tune the force and reach, train staff, and keep manual tools ready.
Recommended Products

Speed and Power: The CP9888 processes blind nut rivets can process rivet nuts from M3 to M12, ensuring strong and durable connections. Its robust design delivers efficient nut riveting performance and ensures secure fastening.

Pull 3/32", 1/8", 5/32", 3/16" Rivets

3X AIR HAMMER KIT FOR SOLID RIVETS. COMES WITH 2 BUCKING BARS, 4 CUPPED UNIVERSAL HEAD BITS (3/32, 1/8, 5/32 & 3/16), A 1" FLUSH DIE, AND 2 RETAINING SPRINGS. HRH-3X-737
How AI and Predictive Maintenance Keep Riveters Running

Think of predictive maintenance like a smoke detector for your riveters: it tells you something’s off before fire starts.
Why it matters: catching small shifts early prevents sudden tool failure and keeps production on schedule. Example: a factory I worked with cut emergency stops from twice a week to once a month by spotting a jaw misalignment three days before it caused a jam.
How predictive maintenance finds problems
Why it matters: you avoid surprise breakdowns that cost hours of production. Example: on one line, a 5% rise in current draw over 48 hours predicted a motor bearing failure two days before a breakdown.
1) What you monitor
- Vibration (accelerometer on the riveter body, 1–10 kHz sampling)
- Current draw (0–20 A range, sample every cycle)
- Cycle time (timestamp each rivet, calculate ms per cycle)
These three sensors give the signals you need to spot wear.
2) How models work
Why it matters: models turn noisy sensor data into clear alerts you can act on. Example: a model learned normal vibration patterns for 5000 cycles, then flagged a pattern shift that matched a worn jaw in later inspection.
Steps:
- Collect baseline data for at least 1,000–5,000 cycles.
- Label 10–50 failure examples (motor, jaw, misalignment).
- Train an anomaly detector (isolation forest or simple LSTM).
- Set alert thresholds for single-sensor and combined anomalies.
How you use the alerts
Why it matters: you prioritize work so downtime drops and parts arrive before they’re needed. Example: an alert triggered two weeks before a jaw failure, so the team ordered a spare and replaced the jaw during planned maintenance, avoiding a 6-hour stoppage.
Steps:
- Triage alerts: high, medium, low.
- Inspect high alerts within one shift (0–8 hours).
- Order parts if inspection shows wear above a preset limit (e.g., jaw gap > 0.5 mm).
- Log outcomes to improve model accuracy.
What you need to implement
Why it matters: without the right inputs, the system gives noisy or useless alerts. Example: a shop that fed inconsistent timestamps into the model fixed it by synchronizing clocks across PLCs and reduced false positives by 40%.
1) Data streams: synchronized timestamps, 100–500 Hz for vibration, per-cycle current.
2) Labeled failures: keep a folder with photos, sensor logs, and repair notes for each incident.
3) Dashboards: simple screens that show current status, last anomaly, and suggested action.
Operator-friendly dashboard tips
Why it matters: your team needs to act quickly when an alert appears. Example: a green/yellow/red tile layout cut decision time from 15 minutes to under 3 minutes during shift changes.
Steps:
- Show only three things per tile: machine name, alert level, and recommended action.
- Include a one-line reason (e.g., “vibration +12% over baseline”).
- Allow operators to acknowledge alerts with one click and add a short note.
How it saves money and extends tool life
Why it matters: planned repairs cost less than emergency fixes and reduce scrap. Example: extending jaw replacement intervals from 6 weeks to 9 weeks after adjusting maintenance based on trend data saved this line ~$12,000 per year.
Steps:
- Track trends monthly and adjust intervals by 10–30% when right-side failures decrease.
- Replace parts based on condition thresholds rather than fixed calendar time.
- Keep a 1–2 week spare parts buffer for critical items.
Quick checklist to get started
Why it matters: small, focused moves get you useful results fast. Example: one small shop followed this checklist and had actionable alerts within three weeks.
- Mount accelerometer and current sensor.
- Log 1,000 cycles with timestamps.
- Label any past failures and add photos.
- Train a simple anomaly detector or use a cloud service.
- Build a one-screen dashboard and train operators to respond.
You’ll get fewer surprises, longer tool life, and more predictable production if you follow these steps and keep your data clean.
Digital Traceability for Riveted Assemblies
If you’ve ever handed a stack of riveted parts to quality and hoped for the best, this is why.
Why it matters: digital traceability makes it quick to find who did what and which parts were used when a problem shows up.
Digital stamping at each operation embeds a timestamp, operator ID, and tool data into the assembly record; you’ll use that record to trace issues to a single shift or machine within minutes. Example: on one shop floor I visited, a stamped record showed a single night shift operator used a torque setting 15% low on a batch of 200 rivets, which let the team rework only 48 suspect assemblies instead of scrapping 200.
How to set this up — step-by-step:
- Choose tags and a stamping method (RFID tags with ISO 18000-63 and a digital stamp protocol like ASTM E2923).
- Fit smart tags to each component so each has a unique ID printed and encoded.
- At each operation, capture a digital stamp: timestamp, operator badge ID, tool serial, and preset torque or force value.
- Send every stamp to a central database that supports text search and CSV export.
- Train operators on a 10-minute scanning routine and require scans before and after riveting.
To make it work in practice, pick interoperable tags and stamping standards, train operators on scanning routines, and keep a central searchable database.
Smart tags hold unique IDs and link to paperwork: when you scan a tag, you should see the material certificate PDF, the rivet batch number, and the torque settings used at installation. Example: a wing-skin rivet scan showed a mismatched alloy certificate that led to a supplier quarantine within 48 hours.
Use these concrete targets:
- Tag read range: 0.5–2 meters for handheld RFID.
- Database retention: 7 years or your regulatory minimum.
- Training: one 10-minute session per operator plus a quarterly 5-minute refresher.
How this helps audits, recalls, and warranty claims:
- Auditors get instant proof of operator IDs and tool settings for specific assemblies.
- For recalls, you can filter records by rivet batch number and production date to limit scope.
- For warranty claims, you can show the exact installation data tied to that unit.
Implementation checklist:
- Buy tags and readers that use the same standard.
- Configure stamping fields (timestamp, operator ID, tool serial, torque).
- Build or buy a searchable database with CSV export.
- Run a pilot on one line for two weeks and log every miss.
- Roll out across lines only after zero missed scans for three consecutive days.
One more real example: a mid-size manufacturer rolled this out on a pilot line and cut time-to-root-cause from three days to three hours after a batch failure, because the digital stamps isolated the problem to one supplier lot and one operator.
Go set up the tags, define your stamp fields, and run a two-week pilot.
Alternatives to Pop Rivets : And When to Pick Them
Here’s what actually happens when you join two panels and the pop rivet doesn’t fit the bill: your joint might need more strength, access from only one side, a neater finish, or permanent sealing.
If you want something removable with high clamp load, bolts with nuts are the go-to because they compress parts together and let you disassemble later. Why this matters: you can replace a damaged panel without cutting or drilling new holes. Example: patching a trailer floor — use M8 bolts with nylon-insert lock nuts spaced 150–200 mm apart to hold plywood to the frame and prevent squeaks.
Blind fasteners matter when you can only reach one side; they give the holding power of a rivet without access behind the joint. Example: attaching inner door skins on a car where you can’t reach the interior cavity — use blind rivet nuts (rivnuts) sized to match an M6 bolt, installed with a rivet-nut tool and tightened to the torque specified for your bolt grade.
Welding creates a continuous, load-bearing bond, so it’s the right choice if you need structure, not just attachment. Example: repairing a steel frame — run a 6 mm fillet weld along seams after cleaning to bare metal and tack every 100–150 mm before final passes.
Structural adhesives spread load across the whole bonded area, reducing stress concentrations and sealing against moisture, which helps when the parts are thin or vibration-prone. Why this matters: adhesives stop edge cracking that fasteners cause. Example: bonding aluminum panels on a boat — abrade the surfaces with 80-grit, wipe with acetone, apply a 3–5 mm bead of polyurethane adhesive, clamp with 2–5 kPa pressure, and cure 24–48 hours depending on temperature.
How to pick between these options, in three clear steps:
- Decide load and permanence: choose welding or bolts for structural loads over 5 kN; pick adhesives or rivets for distributed loads under 1–2 kN.
- Check access: if you only reach one side, use blind fasteners or rivnuts; if you can reach both sides, bolts are usually stronger.
- Set appearance and production needs: use adhesives for flush seams and corrosion resistance; use bolts when you need quick assembly or future disassembly.
Practical details you’ll use right away:
- For bolts, match hole clearance: drill 1 mm larger than bolt diameter for steel, 0.5 mm for aluminum.
- For rivet nuts, pick body length equal to grip thickness; tighten per the tool’s spec until the blind side deforms properly.
- For welding, clean to bare metal, tack at intervals, and control heat input to avoid warping.
If you follow those checks and use the specific examples above, you’ll pick the method that actually holds and lasts.
Recommended Products

Sturdy Construction: Crafted from high-grade Q235B carbon steel, our car lift is robust and stable, supporting up to 7000 lbs weight capacity. The 11" extension plate expands the contact area, making the portable car lift ideal for accommodating long-wheelbase vehicles, trucks, SUVs, and various mainstream models on flat, solid surfaces (not recommended use on slopes). Enjoy the confidence of stable support without any wobbling.

5,435 pieces of Metric Class 10.9 hex bolts, hex nuts, nylon lock nuts, lock and flat washers

5,435 pieces of metric class 8.8 hex bolts, hex nuts, nylon lock nuts, lock and flat washers
Sourcing Pop Rivets: Reshoring, Cost, and Supplier Choices
If you’ve ever moved a production line back home, this is why your pop rivet sourcing changes.
Why it matters: reshoring can cut lead times and reduce hidden costs that overseas sourcing hides. When you bring production closer, start by checking local suppliers for faster delivery and easier inspections. For example, visit a nearby fastener distributor an hour away, look at their stockroom and count how many rivet sizes they keep; that tells you whether they’ll meet your mix of 3/32″ and 1/8″ rivets without emergency orders.
Why it matters: tariffs and duties can flip the math on imported fasteners in a single quarter. Calculate landed cost per rivet before you buy: add unit price + international freight + import duty + 30 minutes of your admin time per order (valued at your hourly rate). For instance, a $0.02 rivet from overseas with $0.01 freight and a 5% duty becomes $0.033 after shipping and paperwork, which can be higher than a $0.035 local rivet once you include shorter lead times.
Why it matters: reducing supplier count lowers admin work and can win volume discounts that matter to your bottom line. Step 1: list current rivet SKUs and volumes. Step 2: ask three preferred vendors if they can cover 80% of your SKUs at consolidated pricing. Step 3: run a 3-month pilot where one vendor supplies two-thirds of your needs and track on-time delivery and defect rate. Example: a midwest manufacturer consolidated to one vendor and cut purchase orders by 70%, saving two admin hours per week.
Why it matters: supplier capabilities and inventory policies determine whether reshoring actually keeps production running. Visit or request a capability sheet showing machine sizes, quality checks, and reserve stock levels. If a supplier keeps only 2 weeks of your top rivet but your lead time can spike to 6 weeks, you need different inventory rules. For example, require a safety stock equal to 4 weeks of average usage and a one-week expedite guarantee in your contract.
Why it matters: shipping reliability is the practical constraint on schedules, not just distance. Quantify reliability by asking for on-time delivery percentage and tracking error rates for the past 12 months. If a local carrier delivers on time 92% of the time and your threshold is 98%, negotiate penalties or a backup carrier arrangement. A visible metric like that prevents surprises during peak runs.
Quick actionable checklist:
- Compare landed cost per rivet (include duty, freight, admin time).
- Audit local suppliers: visit one within a 2-hour drive and inspect inventory.
- Run a 3-month vendor consolidation pilot with measurable KPIs (OTD, defects).
- Set supplier inventory rules: minimum 4 weeks safety stock for critical SKUs.
- Contract shipping SLAs: require ≥98% on-time or an alternative carrier.
If you do these five things, you’ll be able to tell whether reshoring actually saves you money and time, instead of just changing where invoices come from.
Recommended Products

BRUSHLESS MOTOR delivers up to 2,100 lbf of pulling force for fastening rivets, including those made of stainless steel
features & benefits: pulls 3/32", 1/8", 5/32", 3/16" rivets 450 1/8" steel rivets per charge 0

Shop Checklist: Tooling, Training, and Upgrade Decisions
If you’ve ever tried buying tools after a rush job, this is why you should slow down first.
Why it matters: buying the wrong tooling wastes money and delays work.
1) Take a tooling inventory. List riveters, nosepieces, mandrels, and spares, with quantity and condition.
- Example: write “POP riveter Model X — 4 units, 2 need noses A, serials 12–15, last serviced 6/2026.”
- Prioritize purchases by what you lack for the next five jobs and what breaks most often.
- Tip: mark incompatible parts with red labels so you don’t mix them on the bench.
Before you schedule training, understand what gaps cause defects.
Why it matters: training reduces rework and safety incidents.
1) Assess staff skills and certification needs. List every operator, their current certs, and expiry dates.
– Example: Operator Lisa — certified for pneumatic riveters through 09/2026; needs refresher on blind rivet technique.
2) Set a training plan with dates and outcomes.
- Schedule one 2-hour hands‑on refresher per operator every six months.
- Add certification sessions only if standards or safety require them.
3) Use quick metrics: aim to cut error rate by 30% in three months after training.
The fastest way to decide on upgrades isn’t the flashy demo.
Why it matters: upgrades should pay back in reduced cycle time or lower maintenance.
1) Measure current performance: record cycle time, downtime minutes per week, and maintenance hours for three typical jobs.
– Example: Job A takes 15 minutes per unit, machine downtime averages 120 minutes/month, and maintenance is 6 hours/month.
2) Compare vendor claims to your numbers and calculate payback time. Use this formula: (upgrade cost) ÷ (hours saved × shop labor rate).
3) Check ergonomics and spare parts lead times before buying. Ask vendors for lead times in writing and one local support contact.
– If spare parts take >8 weeks, budget a backup tool or extra spares.
Put a parts-and-support plan in place before you buy.
Why it matters: long lead times and poor vendor support stop production.
1) For every new tool, list required spares and vendor response SLA (hours).
– Example: New rivet gun needs 3 nosepieces, 5 mandrels, and vendor SLA of 24 hours for phone support.
2) Stock based on failure rate: if a part fails once per 1000 cycles, keep enough for 2000 cycles on hand.
3) Include these costs in the purchase decision so your budget matches reality.
Final checklist — quick actions you can do this week.
Why it matters: small steps prevent big headaches later.
1) Make a tooling inventory sheet.
2) Create a one-page training matrix with dates.
3) Time three runs on a common job to get baseline cycle times.
4) Ask vendors for spare-part lead times and SLAs in writing.
Keep each list updated monthly and stick labels to real tools.
Recommended Products

Use by hand
2-in-1 adjustment - single long stroke or short "ratchet action" power stroke

Unique Design: Thanks to its unique multi-nozzle, the RP40 riveter fits all rivets and can be operated without nozzle changes for maximum efficiency, and is made with hardened metal parts for a longer lifespan
Frequently Asked Questions
How Do Environmental Regulations Affect Rivet Material Selection?
I prioritize corrosion-resistant alloys and avoid restricted substances because material restrictions drive my choices; I guarantee regulatory compliance by selecting certified rivet materials, documenting specs, and coordinating with suppliers to meet environmental limits and waste/disposal rules.
Can Pop Rivets Be Used in High-Vibration Aerospace Applications?
Yes — I’d cautiously use pop rivets in high-vibration aerospace roles if they’ve proven fatigue performance and dynamic locking (e.g., structural blind rivets, vibration-resistant designs), but I’d validate with testing and engineering approval.
What Inspection Standards Apply to Blind Rivet Installations?
You should follow applicable installation guidelines and referenced aviation or OEM standards (e.g., NAS, ISO, or manufacturer specs); I inspect blind rivet installations at defined inspection intervals, checking size, grip, set, pull-head integrity, and corrosion.
How Do Coated or Plated Rivets Influence Corrosion Over Time?
In delicate terms, coated or plated rivets slow corrosion by providing a sacrificial or barrier layer; I’ll note coating durability and galvanic interaction matter, since poor coatings or dissimilar metals can accelerate localized corrosion over time.
Are There Eco-Friendly or Recyclable Pop Rivet Options?
Yes — I’ve found eco-friendly pop rivet options: recycled aluminum bodies paired with biodegradable mandrels reduce waste, and stainless or aluminum alloys can be recycled again; I’d recommend sourcing certified recycled-aluminum rivets for best impact.


