
You’re staring at a parts list and a stack of panels, trying to decide whether to use aluminum or steel rivets for that load‑bearing joint. You can’t tell if weight savings outweigh shear strength, or whether galvanic corrosion will ruin the assembly in months.
Most people pick by habit or only consider one factor, then regret it when fasteners fail or the build is too heavy. This article will show you how to choose between aluminum, carbon‑steel, and stainless rivets based on actual shear, tensile, and fatigue needs, plus when to favor corrosion resistance and weight savings.
You’ll get clear rules for hole fit, grip range, tooling, and corrosion prevention so you select the right rivet every time. It’s easier than it looks.
Key Takeaways
If you’ve ever wondered which rivet to pick for a project, this will help.
Why it matters: picking the wrong rivet can make your joint fail or add unnecessary weight.
– Steel rivets give about three times the shear strength of common aluminum rivets, so use them when a single rivet may carry heavy loads. Example: on a trailer tongue bracket where one rivet can see 800–1,200 lb of shear, choose steel or stainless.

Why it matters: a few grams add up on vehicles and aircraft.
– Aluminum rivets save roughly 0.5–1 gram each compared with steel, so use them for non-structural panels where every gram counts. Example: installing 200 interior aircraft trim rivets saves about 100–200 grams total if you use aluminum.
Why it matters: fatigue kills joints over time even under moderate loads.
– Use steel or stainless rivets for high-cycle fatigue applications or whenever a rivet will see loads over about 500–1,000 lb per fastener; they resist fatigue cracking much better. Example: securing a forklift mast plate that cycles thousands of times per week should use stainless rivets.
Why it matters: galvanic corrosion can eat metal joints faster than wear.
– In saltwater environments or when joining dissimilar metals, use stainless rivets or aluminum rivets with isolation measures to prevent galvanic corrosion; add a thin non-conductive washer or apply marine-grade sealant between metals. Example: on a boat swim platform attaching aluminum plate to stainless stanchions, put a neoprene washer under each rivet head.
Why it matters: a sloppy hole ruins rivet strength.

Before you drill, do this:
- Mark and drill holes to a snug fit for the rivet shank diameter.
- Deburr both sides with a countersink or file.
- Countersink or chamfer if the rivet requires bearing against a flat surface.
Example: drilling a 4.8 mm (3/16″) hole for a 3.2 mm (1/8″) rivet and deburring both faces reduces stress concentrations and improves shear capacity.
Aluminum vs Steel Rivets: Quick Decision Guide
Before you pick a rivet, know why it matters: choosing the wrong material or prep leads to leaks, rust, or sheared fasteners.
Match material to load and weight. For heavy shear or tensile loads choose steel rivets—hot-dip galvanized or stainless if corrosion is a concern—because steel has about three times the shear strength of common aluminum alloys; for example, use steel rivets on a trailer tongue where loads are high. For light panels, aluminum rivets save weight and still hold well—like on an airplane interior panel where every ounce counts. Step 1: list the expected load (in pounds or newtons). Step 2: choose steel if loads exceed about 500–1000 lb shear for a given rivet size, otherwise use aluminum.
Consider the environment so you avoid corrosion failures. WHY IT MATTERS: dissimilar metals touching in salt air or moisture will corrode quickly. Use a matching or coated finish: choose stainless steel or zinc-coated steel in coastal conditions, and use aluminum rivets only when mating parts are aluminum or protected with sealant; for example, use stainless rivets on a boat railing to prevent pitting. Step 1: identify exposure (dry, humid, salt). Step 2: pick a compatible finish.
Prepare holes correctly because a poor hole ruins the rivet’s grip. WHY IT MATTERS: an oversized or burred hole cuts shear area and shifts loads. Drill or ream holes to the rivet’s nominal shank diameter plus 0–0.005 inches for a snug fit; countersink only to the rivet head spec so the head seats flush. For example, when riveting 1/8″ (3.2 mm) aluminum sheet, use a #30 drill (0.1285″) and deburr both faces with a file or countersink bit. Steps: 1) mark and clamp; 2) drill at low speed with sharp bits; 3) deburr both sides.
Pick the right head profile for appearance and load distribution. WHY IT MATTERS: head shape controls how force spreads and whether the assembly sits flush. Use large-diameter round or pan heads when you want to spread load over soft material, and use countersunk heads when you need a flush surface—like countersinking on a wing skin so airflow is smooth. Step 1: decide if flush surface is required. Step 2: choose head profile per that need.

Think about installation tools because your workflow and speed depend on them. WHY IT MATTERS: the wrong tool slows you and can damage parts. Aluminum rivets usually set quickly with a hand riveter; steel rivets often need a pneumatic or heavy-duty rivet gun. For example, installing 100 blind rivets on an aluminum fence panel with a battery riveter takes minutes, while installing steel structural rivets on a trailer frame is faster with a pneumatic puller. Step 1: estimate rivets count. Step 2: match tool to rivet material and quantity.
Quick checklist before you start so you reduce failures and save time: 1) Confirm load and pick material. 2) Check environment and choose finish. 3) Drill correct hole size and deburr. 4) Select head type for load or flushness. 5) Match tool to rivet type and count. Follow those five checks and you’ll pick the right rivet and avoid common assembly problems.
Recommended Products

Durable Construction: Crafted with Stainless Steel and Aluminum for long-lasting performance, suitable for both indoor and outdoor use

Complete and Organized Kit: This comprehensive set features 7 sizes of SAE steel rivets and 3 sizes of stainless steel washers, all conveniently housed in a labeled plastic box

Complete and Organized Kit: This comprehensive set features 9 sizes of SAE blcks rivets and 3 sizes of stainless steel washers, all conveniently housed in a labeled plastic box
Strength vs Weight: Tradeoffs for Rivet Selection
Think of strength vs weight like choosing tires for a car: you can pick lighter ones for speed or heavier, tougher ones for rough roads.
Why this matters: picking the wrong rivet can make your joint fail or add unnecessary mass that ruins performance. Example: on a small aerobatic airplane, each rivet you swap from steel to aluminum can save about 0.5–1 gram, and those grams add up across hundreds of rivets.
When should you prioritize weight over strength?
Why this matters: lighter rivets help you meet tight mass budgets and improve fuel efficiency or handling. Example: on a 200-kg racing go-kart bodywork, switching 100 rivets from steel to 3 mm aluminum can shave roughly 60–100 g total, helping lap times slightly.
1) Use aluminum rivets when:
- Your allowable added mass per joint is under about 2 grams.
- The joint sees mostly compressive or low shear loads (under ~500 N per rivet).
- You need corrosion resistance or electrical conductivity.
2) How to pick an aluminum rivet:
- Choose 2017-T4 or 5056 for structural skins; use 1100 or 3003 for non-structural panels.
- For a lap joint carrying ~300 N, use a 3–4 mm diameter solid aluminum rivet spaced per your design spec.
- If you expect salt spray, pick 5xxx series alloys or use sealant and sacrificial coating.
When should you prioritize strength over weight?
Why this matters: higher loads demand steel to avoid shear or tensile failure. Example: attaching a suspension bracket on a lightweight vehicle, a steel 4 mm solid rivet might carry 2–3 kN where aluminum would deform.
1) Use steel rivets when:
- Loads per rivet exceed ~800–1,000 N shear or tensile stress approaches alloy limits.
- You need fatigue resistance under cyclic loading.
- Cost and weight are secondary to durability.
2) How to pick a steel rivet:
- Choose plain carbon or alloy steels rated for the load; for high fatigue use heat-treated grades.
- For a shear load of ~2 kN, use a 4–5 mm steel solid rivet with appropriate head style and spacing.
- Apply corrosion protection like galvanizing, plating, or a compatible coating.
How to handle mixed metals and compatibility?
Why this matters: dissimilar metals can corrode and weaken joints over time. Example: a steel rivet in an aluminum fuselage left in a coastal climate will corrode faster and stain the skin.
1) Steps to avoid galvanic corrosion:
- Step 1: Use compatible materials (aluminum with aluminum, stainless with stainless) when possible.
- Step 2: Add a barrier—sealant, paint, or a non-conductive washer—if you must mix metals.
- Step 3: Design for drainage and inspection access to catch corrosion early.
Matching rivet type to load and environment
Why this matters: wrong head style or blind vs. solid choice causes premature failure even if material is right. Example: a large blind rivet in a high-load joint can pull through, while a solid rivet properly bucked holds.
1) Steps to choose rivet form and head:
- Step 1: For structural, load-bearing joints use solid rivets or high-strength blind rivets designed for shear/tension.
- Step 2: Match head geometry to bearing area—large countersunk heads for thin skins, round heads for thicker plates.
- Step 3: Verify spacing: typical rule-of-thumb is 3–6 times rivet diameter for spacing and 2–3 times diameter from edge.
Quick practical checklist before you order rivets
Why this matters: checking these items prevents rework and failures. Example: a maintenance team saved weeks by confirming rivet size, material, and coating before a major skin replacement.
1) Checklist:
- Calculate expected shear and tensile loads per rivet.
- Decide max acceptable added mass per rivet.
- Select material (aluminum vs steel) and alloy grade.
- Choose rivet type (solid, blind) and head style.
- Specify corrosion protection and installation method.
If you follow these concrete steps and use the example numbers as starting points, you’ll make rivet choices that balance strength and weight for your specific project.
Recommended Products

VERSATILE DOME HEAD DESIGN: Fastenere's Pop Rivets features the popular dome head style, providing a sleek, low-profile finish. The heavy duty rivet head is slightly rounded, twice as wide as the pop rivets body diameter, ensuring a clean and polished appearance for your projects.

Large Flange rivets offer a wider bearing surface and are preferred where brittle or soft materials are being assembled to rigid surfaces.

Great Materials:The body and mandrel of Tri-Grip rivets are made of aluminum, all aluminum without steel, durable, corrosion resistant, good stress, can be used for a long time.
Corrosion Comparison: When Aluminum Beats Steel
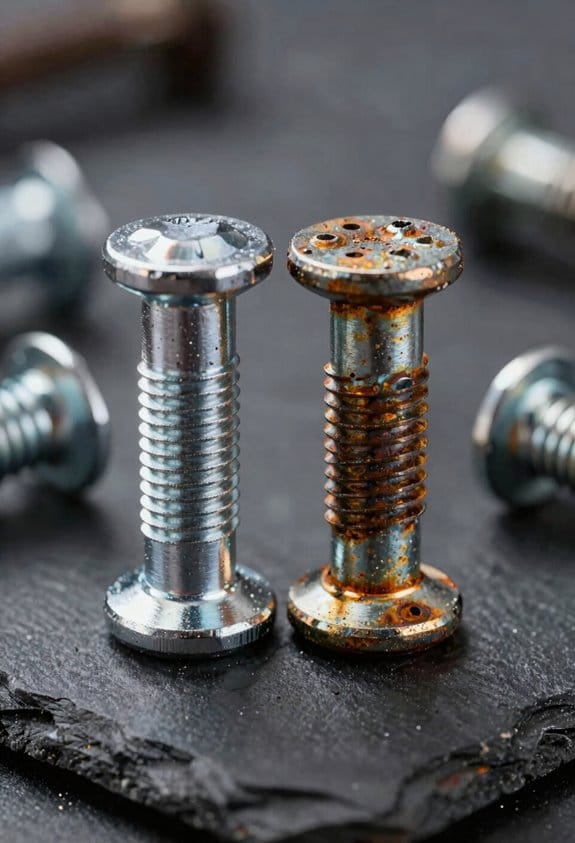
If you’ve ever seen aluminum stay quiet while nearby steel flakes with rust, this is why.
Aluminum matters because its thin oxide layer protects the metal without extra paint or plating. For example: a small aluminum bracket on a saltwater boat will keep its finish for years while an uncoated steel bracket turns reddish-brown in months. You can use aluminum for marine fittings like non-structural cleats or trim where weight and corrosion resistance matter.
Before you pick fasteners, here’s why the oxide matters: the film self-repairs within minutes when scratched, sealing out oxygen and slowing corrosion. Say you’re replacing rivets on a dinghy; choose 3/16″ aluminum rivets and expect them to resist salt spray far better than bare steel. Anodizing increases that protection by adding a thicker, harder surface — typically 5–25 µm for decorative uses and 25–100 µm for extra durability.
Why avoid mixing metals? Galvanic corrosion happens when two dissimilar metals touch in the presence of an electrolyte, and one metal corrodes faster. For instance, if you mount an aluminum trim piece directly to a stainless-steel bracket with no barrier, the aluminum can corrode where the metals contact. To prevent this, do one of the following steps:
- Use a non-conductive barrier like 3M 2216 adhesive tape or rubber washers between the metals.
- Apply a thin coat of epoxy or specialized anti-corrosion grease on the contact surfaces.
- Choose fasteners made of the same metal family, such as aluminum rivets with aluminum panels.
How to choose rivets for wet or salty environments — follow these steps because secure joints reduce maintenance needs:
- Pick aluminum rivets sized to match your material thickness; common sizes are 1/8″ and 3/16″ for light panels.
- Anodize or buy pre-anodized rivets if the joint will see abrasion or heavy splash; aim for at least 25 µm for durability.
- Isolate rivets from dissimilar metals using washers or sealant.
- Inspect joints yearly and replace any rivets that show pitting or looseness.
A practical example: on a small aluminum trailer, replace steel body rivets with 3/16″ anodized aluminum rivets and add nitrile rubber washers where the rivets meet steel brackets; you’ll cut visible corrosion and extend service life by years.
Recommended Products

Materials: Featuring an aluminum grip and steel mandrel, these components offer high corrosion resistance, making them ideal for use in any environment.

ALLCLEAN Solid Aluminum Brazier Head Rivets,Aluminum Boat Rivets,Round/Dome Head Rivet

𝐖𝐚𝐭𝐞𝐫𝐩𝐫𝐨𝐨𝐟 𝐃𝐞𝐬𝐢𝐠𝐧: We provide waterproof O-rings for this aluminum blind rivet to prevent water seepage, ensuring the rivets remain sealed even in wet environments
When Stainless Steel Is the Right Rivet Choice

Before you pick a rivet, know why corrosion and strength matter for your project.
I recommend stainless steel rivets when your joints need to resist salt air and keep holding under stress. For example, if you’re fastening a teak deck cleat on a small sailboat, stainless rivets will stand up to salty spray and weekly washdowns for years. Use them when you need both corrosion resistance and tensile strength.
Why stainless over plain steel or aluminum matters: stainless resists rust in wet conditions and keeps strength at higher temperatures. Imagine the pop rivets on a galley hood over a propane stove; stainless will keep the hood secure after years of heat cycles. You’ll avoid flaky rust and loose joints.
When to choose stainless rivets — quick, concrete rules:
- Choose stainless rivets for marine gear exposed to saltwater, e.g., deck hardware on boats or seaside signposts.
- Pick them for high-heat spots above 300°F (150°C), like near exhausts or stoves.
- Use stainless when failure risks safety—handrails, structural brackets, or fire-safety fixtures.
Stainless costs more and weighs more; that matters if you’re building a drone or a lightweight trailer. A 1/8″ stainless rivet weighs roughly 0.6 grams more than an aluminum one and can be 2–4× the price depending on grade. If weight or budget is your top priority, choose aluminum instead.
How to install stainless rivets and what you’ll need — this is what to do and why it works.
Why it matters: stainless is harder, so tools and technique change.
Steps:
- Drill the hole to the rivet’s specified diameter plus 0.005–0.010″ (0.13–0.25 mm) clearance.
- Deburr the hole on both sides to prevent stress risers.
- Use a heavy-duty rivet gun rated for stainless (look for a 3,000–5,000 lb pull capacity).
- Squeeze firmly until the mandrel snaps; test one rivet and pull it lightly to confirm grip.
A real example: installing standoffs on a stainless-steel boat mast. You’ll use a 3/16″ drill, deburr with a countersink, and a rivet gun that handles 5/32″ and 3/16″ stainless rivets. Tight, clean holes equal long-lasting joints.
Tool tips and maintenance:
- Use hardened drill bits (Cobalt or TiN-coated) for cleaner holes.
- If you’re riveting into stainless sheet, clamp both pieces and back up with wood to avoid buckling.
- Inspect rivets annually in corrosive locations and replace any with cracks or severe galling.
One more concrete note: stainless comes in grades—300 series (304/316) for corrosion resistance; 316 is best for saltwater. Pick 316 for marine work.
If you follow those steps, you’ll get durable, low-maintenance joints that justify the higher cost and weight in corrosive, hot, or safety-critical settings.
Recommended Products

Complete and Organized Kit: This comprehensive set features 9 sizes of SAE rivets and 3 sizes of stainless steel washers, all conveniently housed in a labeled plastic box

Rivet Set: Our silver blind rivet set contains 340 aluminum blind rivets (8 different sizes) and 340 silver washers (3 different sizes) for a wide range of uses. This blind rivet set includes 1/8-inch, 5/32-inch, and 3/16-inch blind rivets with corresponding washers to ensure precise installation.

[About This Product]: This item includes 750 pieces of 304 stainless steel rivet nuts and one rivet nut installation tool set. Since the rivet nuts are made from sturdy 304 stainless steel, the larger sizes (M6) require greater arm strength to complete the riveting process.
Aluminum Benefits: Electrical and Thermal Advantages

If you’ve ever been handed a heavy electrical connector and wondered why it wasn’t aluminum, this is why.
Why it matters: using the right metal affects how well your connection carries current, how much it weighs, and how hot it gets.
Aluminum carries current well for its weight. For example, on an RV shore-power bus where weight matters, swapping copper lugs for properly sized aluminum ones can cut connection mass by about 50% while still handling tens to hundreds of amps if done correctly. Aluminum’s density is about one-third of copper, so an aluminum rivet or lug weighs much less for the same cross-sectional area. Clean the surfaces and tighten to the manufacturer torque (often 20–50 Nm for lugs of common sizes) to keep contact resistance low.
Why it matters: heat buildup kills components, and metals move heat differently.
Aluminum moves heat quickly compared with many nonmetals, so it spreads and dissipates thermal energy from joints. A heatsink made from 6061 aluminum will pull heat away from a power transistor faster than a plastic bracket, lowering junction temperatures by several degrees under the same load. When you mount a hot part, use a flat mating surface, apply thermal compound (0.1–0.2 mm layer), and torque screws to the spec listed in the device manual to get good thermal contact.
Why it matters: corrosion changes electrical resistance over time.
Aluminum forms a thin oxide layer that resists further corrosion but raises contact resistance if you just clamp over it. A common fix is to mechanically abrade the oxide (use 320–400 grit abrasive or a stainless-steel brush), then apply an anti-oxidant compound like Noalox or a similar conductor paste before assembly. Example: on a lawn-tractor battery cable, cleaning the terminal, spreading a pea-sized amount of anti-oxidant, and torquing the clamp to 10–15 Nm keeps the starter drawing below rated resistance for seasons.
Why it matters: dissimilar metals can corrode when wet.
If you join aluminum to copper without precautions, galvanic corrosion can eat the aluminum in salty or moist environments. Use a bimetallic connector (copper-to-aluminum transition lug) or isolate the metals with a thin polymer gasket and seal the joint with silicone or dielectric grease. In a marine bilge, a properly specified transition lug prevents a white powdery corrosion product and keeps continuity for navigation lights.
Practical steps you can follow:
- Prep surfaces: remove oxide with 320–400 grit or a stainless brush.
- Apply anti-oxidant paste generously to the mating area.
- Use the right connector: choose aluminum-rated lugs or bimetallic transitions for copper-to-aluminum joints.
- Torque to spec: follow the lug or equipment manual (typical ranges: 10–50 Nm depending on size).
- Seal exposed joints: use silicone, heat-shrink with adhesive, or dielectric grease for outdoor use.
One more detail: avoid mixing dissimilar metals directly in wet environments unless you use a proper transition part, because voltage-driven corrosion can occur within weeks in marine or salted-road conditions.
If you follow those steps, your aluminum electrical and thermal joints will stay light, conductive, and durable.
Load Types Explained: Shear, Tensile, and Fatigue Effects
Think of shear like scissors cutting through two sheets of metal.
Why it matters: shear determines whether your rivet will slice off when surfaces slide. A common example is an airplane skin panel near a wing root, where panels try to slide past each other under aerodynamic load and the rivets take the shear. When that happens, the failure looks like the rivet head separated cleanly from the shank.
How shear works (concrete):
- The shear force acts parallel to the joined surfaces.
- If the applied shear exceeds the rivet material shear strength, the rivet will shear off.
- To check safety, calculate shear stress = force / rivet shear area (use the cross-sectional area of the shank).
Practical steps you can take:
- Use a rivet with a shank diameter large enough that shear stress stays below about 60% of the material’s shear strength for a safety margin.
- Stagger rivet rows or add a second row to share load.
- For visual inspection, look for a clean break across the shank or flattened heads.
Tensile loads pull along the rivet axis.
Why it matters: tensile loading tells you whether a rivet will be pulled out or elongated under direct pull forces. Picture a bracket holding a hanging sign where wind tries to pull the bolts straight out; the rivets test tensile capacity in that situation. Tensile failure usually shows as necking or the rivet pulling through the sheet.
How tensile works (concrete):
- Tensile force acts along the rivet axis, trying to stretch or pull the rivet through the material.
- Compare applied tensile load to rivet tensile strength and to the bearing strength of the hole in the sheet.
- Calculate tensile stress = axial force / cross-sectional area of the rivet shank.
Practical steps you can take:
- Choose rivets with a tensile strength at least 2–3 times expected peak load, depending on consequences of failure.
- Use larger-diameter rivets or thicker plates to improve bearing capacity.
- Add a washer or backing plate to distribute load and prevent pull-through.
Fatigue comes from repeated cycles of loading and unloading.
Why it matters: even loads well below the material’s static strength will crack a rivet over many cycles; this controls how long your joint lasts. A motorcycle frame that vibrates every mile is a clear visual: the rivets see thousands of cycles and can develop cracks at the rivet head or shank-to-hole edge. Fatigue failure often starts as a small crack and grows slowly until sudden breakage.
How fatigue works (concrete):
- Repeated cyclic stress causes microscopic cracks that grow each cycle.
- Fatigue life depends on stress range, mean stress, and number of cycles.
- Engineers use S–N curves (stress vs. number of cycles) to predict life.
Practical steps you can take:
- If you expect >10^5 cycles, choose a material with higher fatigue endurance — for many applications, steel rivets last far longer than aluminum under vibration.
- Reduce stress concentrations: deburr holes, use proper countersinking, and ensure tight fit to avoid fretting.
- When testing, run samples at expected load amplitude and count cycles to failure to inform safety factors.
Final practical checklist you can use on a project:
- Determine maximum shear and tensile loads (in N or lbf).
- Estimate expected cycle count and vibration levels.
- Select rivet material and diameter that meet shear, tensile, and fatigue margins.
- Add washers or backing plates where bearing or pull-through is likely.
- Inspect periodically for cracks, deformations, or clean shear faces.
If you follow those steps, you’ll pick rivets that last for your specific loads and conditions.
Installation Realities: Tools, Deformation, and Fit
Before you set a rivet, you need to know how tools, deformation, and fit change the result.
Why this matters: if you mismatch rivet material, tool, or hole size, your joint will loosen or fail under load. Example: when attaching a 0.040″ aluminum skin to a 0.063″ aluminum spar on a small airplane, a loose rivet makes a visible gap after a few flights.
Aluminum versus steel rivets — which tool do you need?
Why this matters: the metal decides how much force you’ll need and how tiring the work will be. Example: setting 3/32″ (2.4 mm) aluminum blind rivets on sheet metal with a hand riveter takes one or two squeezes per rivet; doing the same with 3/32″ steel blind rivets can require a heavy pneumatic puller.
1) For aluminum rivets: you can usually use a handheld rivet gun or hand-pull riveter; expect 200–600 lbf per rivet depending on size and alloy.
2) For steel rivets: plan on pneumatic or hydraulic tools that deliver 1,000+ lbf for larger diameters.
3) Ergonomics: alternate hands or use supports every 15–20 minutes when using manual tools to reduce fatigue.
Fit tolerances — what hole size and grip range should you use?
Why this matters: holes and grip range control clamp load and prevent movement that causes wear. Example: fitting a 1/8″ rivet into a 1/8″ hole will be tighter than a +0.005″ hole and keeps a door hinge from wobbling.
1) Hole size: aim for a hole diameter equal to rivet diameter plus 0.003″–0.005″ for aluminum rivets, and +0.005″–0.010″ for steel rivets when drilling into hard substrates.
2) Grip range: choose a rivet whose grip range includes the combined thickness of assembled parts; pick the next size up if your stack is within 0.010″ of the limit.
3) Clearance rule: if the hole is more than +0.015″ oversized, expect reduced shear strength; repair or ream to a proper tolerance.
Creating a proper upset — how to get a tight joint
Why this matters: the upset (the deformed tail) clamps parts and prevents movement that causes cracks. Example: when joining overlapping aluminum panels, a well-formed mushroom head stops water intrusion and keeps the edges flush.
1) Set length: when the rivet is installed, the tail should bulge to 1.5–2 times the original shank diameter for typical blind rivets; measure with calipers.
2) Pressure control: with pneumatic tools, use the tool’s regulator to reach the manufacturer’s recommended 600–1,200 psi range for small to medium rivets.
3) Visual check: the tail should be smooth and concentric; if you see thread-like deformation or a sharp cone, the tool stroke or die is wrong.
Head style and alignment — which head do you pick and why
Why this matters: head style affects bearing area, alignment, and surface damage. Example: using a flat-head rivet on a curved sheet can leave gaps, whereas a raised-head or countersunk rivet matches the profile.
1) Head choice: use countersunk heads for flush surfaces; use low-profile or round heads where bearing area and visual appearance matter.
2) Tooling: match the rivet set or die to the head style to avoid mushrooming or crushing—use the die size stamped on the tool.
3) Damage prevention: place protective pads or a backup plate when setting near thin or painted surfaces to avoid indenting or cracking.
Quick checklist before you start
Why this matters: a short preflight saves rework and broken parts. Example: a mechanic prepping wing skins stops work to re-drill one undersized hole and saves hours of fitting later.
1) Verify rivet type and diameter.
2) Measure stack thickness and confirm rivet grip range.
3) Check hole diameter against the rivet (use +0.003″–0.005″ for aluminum).
4) Pick the correct tool and test one rivet on scrap.
5) Inspect the upset and head seating after the first 3–5 rivets.
Follow these concrete steps and your joints will be predictable and repeatable.
Recommended Products

Easily convert your cordless, pneumatic or corded drill into a power pop riveter

Includes the following nosepieces: 1/4-inch(6.4mm), 3/16-inch(4.8mm), 5/32-inch(4mm), 1/8-inch(3.2mm), 3/32-inch(2.4mm), 3 Nose pieces are screwed onto the base
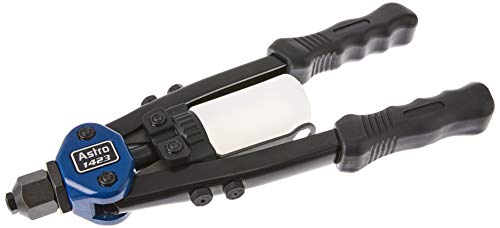
Patented structure increases power and leverage when setting POP blind rivets (not for threaded rivet nuts)
Avoiding Galvanic Corrosion When Mixing Metals
Before you start fastening mixed metals you need to know why it matters: contact between dissimilar metals can form an electrochemical cell that slowly eats a joint from the inside.
If you’ve ever noticed an aluminum panel bolted to a steel frame turning powdery at the contact points, this is why. A common example is an aluminum boat cleat bolted with regular steel bolts to a galvanized post; over a few seasons the aluminum around the bolt will pit and crumble. Use these concrete steps to avoid that.
1) Separate the metals with an insulating barrier.
- Why this helps: blocking electrical contact stops the corrosion cell.
- How to do it: use thin nylon or PTFE washers (0.5–2 mm thick) under the head and nut, or use a short plastic sleeve that fits the fastener shank.
- Example: for a 1/4″ rivet, slip a 1/4″ ID nylon sleeve 10–15 mm long over the shank before setting. This keeps aluminum from touching steel directly.
2) Coat the exposed surfaces so electrolytes can’t reach bare metal.
- Why this helps: coatings prevent the saltwater or moisture that completes the circuit.
- How to do it: apply a conversion coating on aluminum (e.g., Alodine/Chemfilm) and paint or zinc-rich primer on steel; let layers cure per product instructions (usually 24 hours). Use cold-galvanizing spray on steel if hot-dip isn’t feasible.
- Example: on an aluminum door with steel screws, brush on a thin Alodine, wait 10 minutes, then apply two light coats of marine enamel; allow 24 hours cure before assembly.
3) Pick compatible alloys or corrosion-resistant fasteners if you can’t separate.
- Why this helps: smaller electrochemical differences mean slower attack.
- How to do it: choose 316 stainless fasteners for marine or wet environments, or use aluminum alloy fasteners when both parts are aluminum. Avoid plain carbon steel against aluminum in moist conditions.
- Example: in a freshwater boat trailer, swap plain steel rivets for 316 stainless rivets rather than relying on coatings alone.
4) Inspect and maintain the joint periodically.
- Why this helps: coatings scratch and seals fail, so early repair prevents major damage.
- How to do it: every 6 months inspect for white corrosion, flaking paint, or looseness; reapply sealant or replace the fastener if coating is compromised.
- Example: after a winter of road salt exposure, remove and inspect two fasteners on each assembly; replace any with visible pitting or coating loss.
Quick practical tips you can use right now:
- Use a 0.5–2 mm insulating washer under each head and nut. Simple.
- Prefer 316 stainless or matching-alloy rivets in wet environments. Do it.
- Torque fasteners to the manufacturer’s spec so sleeves and washers stay compressed and effective. Follow the spec.
End result: if you separate the metals, use proper coatings or choose compatible fasteners, your joints will resist galvanic corrosion and last far longer.
Cost, Availability, and Lifecycle Maintenance
Before you choose rivet material, you need to know how cost and availability will affect your project.
Why this matters: your choice changes upfront prices maintenance time, and how often parts must be replaced. For example, if you’re restoring a 1960s aluminum boat trailer that sits near saltwater, choosing the wrong rivet can mean replacing fasteners every couple of years.
1) When should you pick aluminum rivets?
Why this matters: aluminum reduces corrosion and weight, which cuts long-term maintenance. Use aluminum when you need light, corrosion-resistant fasteners and the parts meet your load needs.
Steps:
- Check load: aluminum rivets generally handle light-to-moderate shear loads — aim for them on panels, trim, and non-structural brackets rated under a few hundred pounds of static load.
- Inspect environment: choose aluminum for inland or mildly corrosive environments, or anywhere galvanic coupling is controlled.
- Plan inspections: every 12 months in moderate conditions, every 6 months near saltwater.
Real-world example: on a lightweight camper awning, swapping steel for aluminum rivets cut rust inspections from quarterly to yearly and shaved several pounds off the roof.
2) When should you pick steel rivets?
Why this matters: steel gives strength and lower upfront cost, which is useful for heavy-load or budget builds. Use steel when you need higher shear strength or when material supply is limited.
Steps:
- Check load: use steel for structural connections and joints carrying hundreds to thousands of pounds.
- Choose coating: pick zinc-plated for general use, hot-dip galvanized for outdoor exposure, or stainless steel in corrosive environments.
- Schedule maintenance: inspect coated steel every 6 months and stainless steel annually.
Real-world example: for a DIY steel utility trailer, using hot-dip galvanized steel rivets kept costs down and avoided yearly replacements for five years.
3) How to avoid galvanic corrosion when mixing metals?
Why this matters: galvanic corrosion can eat rivets and panels quickly if you mix incompatible metals. If you join aluminum panels to steel brackets, you must break the metal-to-metal contact.
Steps:
- Add insulation: use a thin polymer washer or gasket under each rivet head and tail.
- Seal edges: apply a bead of marine-grade sealant around the joint.
- Monitor: check for white powder (aluminum corrosion) or reddish rust every 6–12 months depending on exposure.
Real-world example: on a mixed-metal signpost, adding nylon washers and silicone sealant prevented pitting where bolts met the aluminum face.
4) How to budget for lifecycle maintenance?
Why this matters: budgeting avoids surprises and keeps your project usable longer. Estimate replacements, coatings, and inspections over the life of the assembly.
Steps:
- Calculate replacement rate: assume steel in harsh environments may need replacing every 2–5 years; aluminum every 5–10 years.
- Add coating costs: budget $1–3 per rivet for specialty coatings or stainless replacements, or $0.10–0.50 per rivet for basic zinc plating.
- Schedule inspections: plan labor at one hour per 50 rivets for visual checks; adjust for travel and access.
Real-world example: a small shop budgeted $200/year for inspection and $500 every five years to replace high-wear steel rivets on a loading ramp.
Final practical checklist:
- Match rivet type to load and environment.
- Insulate mixed metals to stop galvanic corrosion.
- Inspect coated steel more often than aluminum.
- Budget replacements and coatings per the estimates above.
Keep one clear log: write the rivet type, installation date, and next inspection date on the assembly’s maintenance sheet.
Aluminum vs Steel Rivets: Real-World Examples and Troubleshooting
Here’s what actually happens when you choose rivets for different jobs: you trade weight and corrosion resistance for strength and durability, and that choice changes how you maintain the joint.
I specify aluminum rivets on aircraft skin and lightweight panels because they save weight and resist corrosion; you need to watch for fatigue from thermal cycling since repeated heating and cooling can loosen joints over time. Why this matters: a loose skin rivet on a light aircraft can let panels flap and cause cracking at adjacent holes. Example: on a Cessna 172 door skin, swap 3/32″ aluminum blind rivets every 5–7 years if you see 0.5 mm of movement when flexing the panel. Check rivets this way:
- Visually inspect for cracks around the hole.
- Grab the panel edge and apply a 5–10 mm flex.
- Replace any rivet that moves or shows a broken head.
The difference between lightweight panels and heavy frames comes down to required shear and tensile strength, so for heavy machinery and structural frames you’ll usually choose steel rivets for their strength but add protection against corrosion. Why this matters: a failing structural rivet on a conveyor frame can let alignment shift and jam the machine. Example: on a steel conveyor frame, use 1/4″ steel solid rivets with a zinc or cadmium coating, torqued or peened to spec, and inspect annually for rust spots larger than 2 mm. Troubleshooting steps if you see rust or galvanic attack:
- Measure the area with a 1 mm feeler to check for pitting depth.
- If pitting >0.5 mm, remove and re-rivet with insulated sleeves or paint separation.
- Apply a rust inhibitor and recoat the frame after riveting.
If a joint squeaks or loosens, inspect for improper grip range or worn mandrels because those are the most common causes you can fix quickly. Why this matters: a loose blind rivet can shear under vibration in days, not months. Example: a sheet-metal HVAC duct joint using 3/16″ blind rivets that squeaks after a month—likely wrong grip range or a partially snapped mandrel. Steps to fix:
- Measure material stack thickness with calipers.
- Choose a rivet whose grip range covers that thickness (e.g., 2.4–4.8 mm).
- Replace suspect rivets and use a rivet gun at the manufacturer’s recommended PSI (typically 70–90 psi for 3/16″ blind rivets).
- Add vibration damping: use 2–3 mm thick rubber washers under the rivet head or apply a drop of anaerobic thread locker around the shank before setting.
When steel meets aluminum, check for galvanic corrosion because dissimilar metals in moisture will eat the aluminum faster. Why this matters: a bolted or riveted aluminum panel on a steel chassis can go from solid to perforated in a few years in salty environments. Example: marine trailer fenders riveted to a steel frame—inspect annually and look for white powdery corrosion on aluminum next to the steel rivet. Preventive steps:
- Install nylon or PVC sleeves through the hole to electrically isolate metals.
- Coat steel rivets with zinc-rich primer, then paint.
- Recheck coatings every 12 months and replace any rivet with visible corrosion.
If mandrels are worn or you get a high reject rate from your rivet gun, address the tool before blaming the fasteners because a bad tool ruins good rivets fast. Why this matters: worn mandrels or incorrect pressure cause incomplete set and loose joints. Example: a shop setting 500 blind rivets per day where 5–10% are coming loose—often the gun is slipping or the jaws are worn. Troubleshooting steps:
- Verify air pressure at the tool with a gauge; adjust to spec.
- Inspect the gun’s jaws and replace them if they show rounded grooves.
- Run a 20-rivet test batch and measure pull-out strength against spec.
If you want quieter, longer-lasting joints, use specific materials and simple damping techniques because small changes extend service life. Why this matters: vibration kills joints faster than static loads. Example: a rooftop sign subject to wind vibration—use stainless steel rivets with 3 mm neoprene washers under the head and check tightness twice in the first year. Quick checklist:
- Match rivet material to environment.
- Measure stack thickness and pick correct grip range.
- Protect dissimilar metals electrically.
- Maintain tools and inspect annually.
Remember: measure, match, and maintain.
Frequently Asked Questions
Can Rivet Material Affect Radio-Frequency Interference in Assemblies?
Yes — I think rivet material can matter: conductive pathways through rivets affect grounding and electromagnetic shielding, so choosing aluminum or steel (and coatings) changes RF continuity, impedance, and susceptibility to interference in assemblies.
Are There Color-Matching Options for Decorative Rivets?
Like a painter’s palette, yes — I can match decorative rivets using anodized finishes for vibrant aluminum hues or painted coatings on steel for custom colors; I’ll help pick finish, durability, and corrosion considerations that suit your project.
Can Rivets Be Reused After Removal Safely?
You generally shouldn’t reuse rivets; I avoid it because reusable fasteners are rare, and reused rivets compromise structural integrity. If I must, I perform a fatigue assessment and check for hole enlargement, cracks, or deformation first.
What Inspection Methods Detect Hidden Rivet Fatigue?
I’d use ultrasonic testing and eddy current inspection to detect hidden rivet fatigue; I’d also perform visual checks, dye penetrant for surface cracks, and periodic torque or pull tests to confirm fastener integrity and early failure signs.
Do Rivet Suppliers Offer Custom Alloy Formulations?
Yes — about 70% of suppliers can develop custom alloys; I’ll help you evaluate proprietary formulations, balancing strength, corrosion resistance, manufacturability and cost so the chosen rivet alloy matches your application and certification needs.