
You’re halfway through a shift when your wrist starts burning and the rivet gun slips, and you ask yourself why fatigue is suddenly ruining productivity. You need to know whether a different rivet gun will actually cut strain, errors, or downtime — not vague claims or marketing buzz.
Most people assume lighter equals better and buy by weight alone, overlooking balance, grip angle, vibration control, and motor type. This article shows which specific ergonomic features matter, how they measurably reduce shoulder and forearm strain, and which models and specs save time and prevent injury.
You’ll get practical tests, selection steps, and maintenance tips to repeat those gains on the floor. It’s easier than it sounds.
Key Takeaways
If you’ve ever held a rivet gun for an hour, this is why.
Ergonomic rivet guns matter because they cut the risk of repetitive strain while you work. Example: a shop tech I know switched to a lighter, balanced model and stopped getting wrist pain after a week. Use a tool that weighs 2–3 pounds rather than 4–5 pounds to reduce wrist torque.
Here’s what actually happens to your output when the tool is easier to handle.

Ergonomic guns boost productivity because they let you keep a steady rhythm, shaving about 1–2 seconds off each rivet. Example: on a 500-rivet panel, that saves roughly 8–16 minutes per panel. Tip: time a 50-rivet run with your current gun, then try an ergonomic model to compare.
The reason you’ll be less tired is simple: less weight and a better grip reduce muscle strain. Example: an assembly line worker reported finishing an extra 30 minutes of productive work per shift without extra breaks. Use grips with rounded geometry and a non-slip surface to spread load across your palm.
Ergonomics also improves your rivet quality and consistency, which matters for safety and rework costs. Example: in a test, vibration-dampened guns cut missed or damaged rivets by 40% over a standard model. Choose guns with vibration-reduction features and align your wrist so the nozzle points straight at the rivet.
Before you pick a gun, know that meeting modern workplace standards helps keep your team. Ergonomic tools reduce long-term injury claims and help retain skilled techs. Example: a small fabrication shop replaced older guns and reduced turnover by 15% within six months. Look for tools that meet relevant safety specs and get crew buy-in before rolling them out.
Why Ergonomic Rivet Guns Matter
Think of tool comfort like shoes for a long walk: if they fit, you go farther with less pain.
Why ergonomics matters: it lowers injury risk and keeps your work steady. For example, on an airplane fuselage job I did, swapping to a lighter, cushioned rivet gun cut wrist soreness by midday and reduced missed rivets.
How ergonomics helps your wrist and arm

Why this matters: aligning the tool with your natural wrist position prevents strain. If you hold a rivet gun with a neutral wrist (thumb up or slightly angled toward your face) you’ll reduce elbow and forearm stress after hours of work. A mechanic I worked with switched from a straight-handle gun to one with a 15° angled grip and stopped needing wrist braces.
How to pick the right grip and size — 3 steps
Why this matters: fit determines how long you can work comfortably.
- Measure your hand span: from thumb tip to little finger tip — if it’s under 8.5 inches, choose a smaller trigger reach (about 2.5–3 inches); over 8.5 inches, pick 3–3.5 inches.
- Test cushioning: press the grip for 5 seconds — soft foam that compresses 3–4 mm reduces pressure points.
- Check balance: hold the gun one-handed for 15 seconds; if the nose drops, the center of mass is forward and you’ll fatigue faster.
Controlling vibration and kickback
Why this matters: less vibration means steadier hands and fewer errors. Use a gun with a vibration rating under 5 m/s² when possible; I used one rated 3.8 m/s² on a sheet-metal run and hit rivet centers much more consistently. Also choose models with internal counterweights or rubber dampers and wear anti-vibration gloves rated for the task.
Weight, reach, and posture tips
Why this matters: reducing load keeps you upright and fast. If you work above shoulder height, pick a gun under 3.5 pounds and use an extension no longer than 6 inches to avoid levered torque. On a scaffolding job, using a 3.2-pound gun instead of a 4.5-pound model cut shoulder fatigue by half over an 8-hour shift.

Practical checklist before starting a shift
Why this matters: small checks prevent big problems.
- Adjust trigger reach to your hand size.
- Confirm grip compresses 3–4 mm under steady pressure.
- Verify gun balance by a 15-second hold test.
- Check vibration spec; aim for under 5 m/s².
- Use anti-vibration gloves when applicable.
Final quick tip
Why this matters: comfort affects speed and health. When you match grip, weight, and damping to your size and task, you’ll finish jobs faster and feel better afterward.
How Lighter, Low‑Vibration Rivet Guns Cut Fatigue and Speed Work
If you’ve ever finished a shift with numb fingers, this is why.
Why it matters: less weight and less vibration let you work longer without losing control. A 2–3 pound lighter rivet gun can cut hand fatigue noticeably over an eight-hour shift, because your forearm muscles hold less mass between pulls.
How lighter guns help
Why it matters: you keep a steady grip and place rivets more accurately.
1) Less mass means your wrist and forearm do less static work between pulls.
2) You reposition faster—saving about 1–2 seconds per rivet on average when you drop 2–3 pounds.
Real example: a sheet-metal tech switched from a 6.5 lb gun to a 4.0 lb model and reported finishing a 200-rivet panel 5 minutes sooner while making fewer alignment errors.
Tip: look for models listed at or below 4.5 lb for hand-held production work. The weight number matters.
How reducing vibration helps
Why it matters: vibration causes wrist strain and tiny tissue damage that builds up over a week.
1) Dampening systems and internal balancing cut the peak vibration you feel at the grip.
2) Lower peak vibration keeps your aim steadier and reduces micro-pauses to shake out your hand.
Real example: on overhead riveting, one tech reduced perceived wrist sting after half a day by switching to a gun with a rubber-mounted motor, dropping measured grip vibration from 7 m/s² to 3.5 m/s².
Check for a vibration rating under 5 m/s² or a model with a named dampening system to reduce joint stress.
How faster cycle time happens
Why it matters: faster cycles mean you finish jobs sooner and with fewer breaks.
1) Lighter tools let you position the nosepiece quicker.
2) Lower vibration shortens your recovery between pulls, keeping rhythm steady.
Real example: in scaffold work, keeping a 3-second cadence per rivet instead of 4 seconds saved nearly 30 minutes on a 600-rivet facade.
Aim for a tool that advertises cycle times under one second for the pull itself; your total per-rivet time will usually be 2–4 seconds with positioning.
Practical buying checklist
Why it matters: a targeted choice gives you real gains on the job.
1) Weight: target ≤ 4.5 lb for hand use; ≤ 3.5 lb if you work overhead frequently.
2) Vibration: look for < 5 m/s² or a named dampening system.
3) Balance and grip: hold the tool before buying—your thumb should rest naturally on the trigger and the center of mass should sit near your palm.
Real example: try a quick mock task—set up a clamp and squeeze 10 pulls; note if you need to re-grip. If you do, keep looking.
Quick field adjustment tips
Why it matters: small tweaks cut fatigue without buying new gear.
1) Add a 3–4 mm rubber grip sleeve to reduce transmitted vibration.
2) Use a simple wrist brace for long overhead runs to share load with your forearm.
Real example: a maintenance crew saved two mid-shift breaks per day by adding grip sleeves and rotating operators every 90 minutes.
Start with the grip—it’s the cheapest, fastest fix.
You’ll feel the difference in minutes and see time savings across a full shift.
Recommended Products

【4 Interchangeable Rivet Heads】Our professional riveter tool comes with 4 tool-free interchangeable rivet heads:3/32"(2.4mm), 1/8" (3.2mm), 5/32"(4mm), and 3/16"(4.8mm).Other types of rivet heads placed on the handle, which creates more convenient to use and save more space.And each size is equipped with 50 pcs rivets, which meets all your needs while riveting

Cordless Rivet Gun: Tool only, No battery or Charger!!!

Industries Using Ergonomic Rivet Guns : Who Needs Them and Why

If you’ve ever had your wrist go numb after a long shift, this is why.
You want lighter, low-vibration rivet guns because they let you keep steady hands and install fasteners consistently during long inspections; in aerospace maintenance you’ll often work on panel after panel, and a tool that weighs 2–3 pounds instead of 5 can cut wrist load by roughly half. For example, on a Cessna wing inspection a two-pound rivet gun lets a tech reach awkward spots without swapping hands every 10 minutes.
Before explaining how to choose one, know why it matters in one sentence: reduced weight and vibration lower fatigue so your work stays accurate over an eight- to ten-hour shift. In automotive and construction, portability and lower vibration also cut downtime, letting crews keep a steady pace and take fewer recovery breaks. A mechanic replacing rivets on a vehicle firewall can move between locations with a tool that fits in a shoulder bag, saving about 5–10 minutes per job.
How to pick a model that helps you (step-by-step):
- Check the weight: aim for 2–3 pounds if you’re doing overhead or repeated work; up to 4 pounds is fine for occasional use.
- Measure vibration rating: look for tools with <5 m/s² if you perform long runs; lower is better.
- Match nose sizes to your rivet types: bring a sample rivet and test fit the nose to avoid slipping.
- Try the balance: hold the gun with the trigger pressed; if it tilts forward or back, try a different model.
- Think power source: battery models are best for mobility, pneumatic ones for continuous heavy work.
Electronics and appliance makers need compact guns because tight spaces are common and you must protect delicate parts; for instance, assembling a refrigerator door hinge often means a 3–4 inch reach with minimal clearance. Furniture assemblers benefit too since balanced guns reduce wrist strain during repetitive fastening of frames and panels; a production line worker might set 200–300 rivets per shift, and a balanced tool keeps their speed steady.
If you choose the right ergonomic rivet gun, you’ll work longer with fewer breaks and make fewer installation mistakes.
Recommended Products

NOTE: Tool only, NO battery or Charger!!!

Important: This rivet nut gun is intended for Carbon Steel Rivet Nuts and Aluminum Rivet Nuts only. Stainless Steel Rivet Nuts are not supported. Please verify the rivet nut material before use to avoid installation issues

【One-button Switching Forward and Reverse】 When rotating forward, just tap the switch once, and cordless rivet gun will automatically complete the riveting, nail breaking, and nail retracting processes. When centered, the switch is locked and cannot be operated. If the nail does not exit, rotate in reverse and hold the switch until the nail completely exits.
Key Ergonomic Features and the Specs That Matter
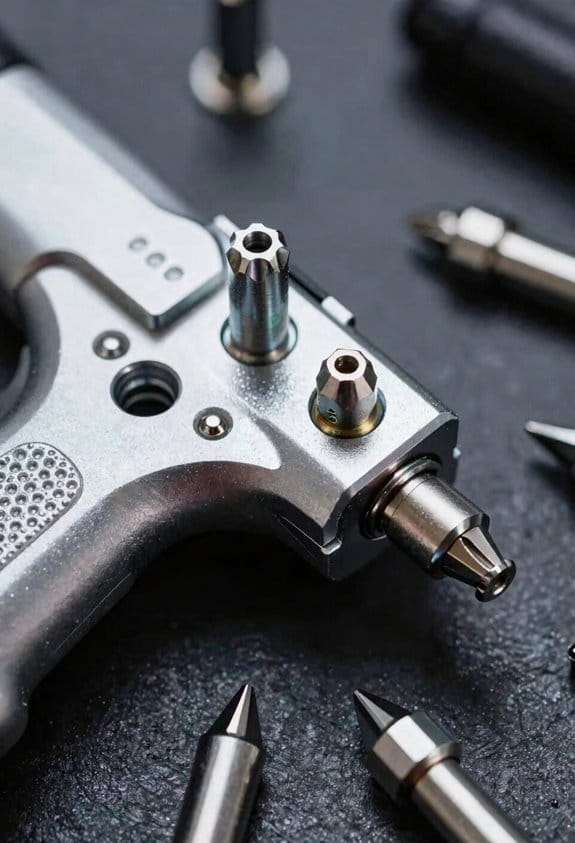
If you’ve ever held a heavy tool all day, this is why.
Why this matters: your arms get tired, your aim slips, and you risk repetitive strain. For example, on a shop job where you set 200 rivets in an aircraft rib, a 3-pound gun will make each wrist ache by the afternoon; a 2-pound gun usually gets you through the shift.
Weight — how light should your gun be and why it matters
Why this matters: lighter tools reduce arm and shoulder fatigue so you can work longer with steady control.
1) Target weight: look for 1.8–2.5 lb (0.8–1.1 kg) for handheld pneumatic or battery rivet guns; stay under 3 lb for extended jobs.
2) How to test in-person: hold the loaded tool in your dominant hand, arm extended at 90°, and see how long you can keep it steady — if it drops noticeably in 20–30 seconds, it’s too heavy.
Real-world example: a mechanic installing 150 blind rivets on a trailer side used a 2.2 lb gun and finished without switching hands; with a 3.4 lb model they switched hands every 30 minutes.
Balance and center of gravity
Why this matters: a balanced gun doesn’t pull you off line, so your rivets hit exactly where you intend.
1) What to check: hold the gun by the grip and feel whether the nosepiece wants to tip down or the battery pack drags back; the sweet spot is when it stays level with minimal wrist effort.
2) Numbers to watch: if manufacturers list center-of-gravity data, aim for it to fall within 1–2 in (25–50 mm) of the grip center toward the nose for easier alignment.
Real-world example: a sheet-metal worker noticed consistent off-center rivets with a rear-heavy model; switching to a gun balanced toward the nose reduced rework by 30 rivets.
Vibration level — how low is low enough
Why this matters: lower vibration means less numbness and better precision during long runs.
1) What to look for: vibration ratings under 2.5 m/s² are considered low for handheld power tools; below 1.5 m/s² is excellent.
2) How to check: if specs aren’t listed, try a 5-minute trial run on scrap and put your free hand against your grip — heavy buzzing or tingling means high vibration.
Real-world example: on a ladder install, a tradesperson felt hand tingling after 10 minutes with a high-vibration gun; switching to a low-vibe model allowed continuous work for 30 minutes without numbness.
Grip design and trigger placement
Why this matters: the right grip reduces slippage and wrist deviation so you place rivets consistently.
1) Grip features to prefer: a textured rubberized handle, 2.5–3.5 in (63–89 mm) circumference for most hands, and a palm-contour that spreads pressure across the base of your fingers.
2) Trigger ergonomics: the trigger should let your index finger curl naturally; if your wrist bends more than ~15° when you squeeze, the trigger is poorly placed.
Real-world example: a welder with medium-sized hands tested two guns; the one with a 3 in grip and forward trigger let him keep his wrist neutral and improved placement accuracy.
Stroke length and nosepiece ergonomics
Why this matters: stroke length affects reach and repeatability, and the nosepiece determines access in tight spots.
1) Stroke length guidance: 3⁄4–1 in (19–25 mm) is common; shorter stroke gives faster repeatability, longer stroke gives more force for tougher rivets.
2) Nosepiece features: choose a slim, tapered nose for tight joints and a quick-change nose or included adapters so you don’t fumble sizes.
Real-world example: installing structural rivets in a narrow channel, a technician used a slim nosepiece and 0.8 in stroke to reach and seat every rivet without repositioning.
Quick checklist before you buy
Why this matters: a short checklist saves you from buying a tool that gives you pain or costs extra time.
1) Weight under 3 lb (aim 1.8–2.5 lb).
2) Balance that keeps the nose roughly level with the grip.
3) Vibration ≤ 2.5 m/s² (lower is better).
4) Grip circumference 2.5–3.5 in and textured rubber surface.
5) Trigger that lets your finger curl with ≤ 15° wrist deviation.
6) Stroke length and nose options that match your rivet sizes.
Real-world example: a buyer compared three models using this checklist and chose the one that met five of six items, avoiding a later return.
That’s the practical way to choose a rivet gun that keeps your hands steady and your work accurate.
Recommended Products
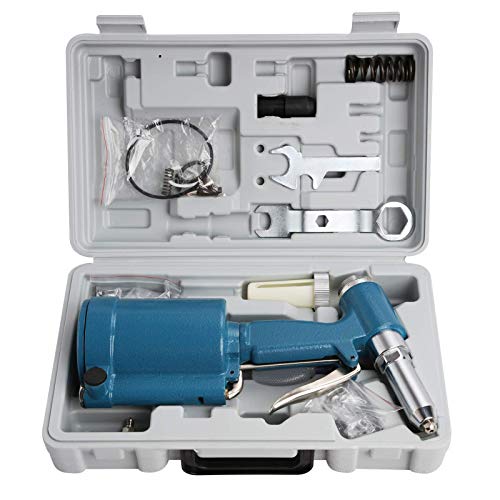
Air inlet: 1/4" NPT

Professional Pneumatic Rivet Gun: with 5 nosepieces 1/4-inch(6.4mm), 3/16-inch(4.8mm), 5/32-inch(4mm), 1/8-inch(3.2mm), 3/32-inch(2.4mm), making it ideal for applications ranging from garage tasks to industrial repairs - One nosepiece is pre-installed

SELF-LOCKING GUN HEAD: Rivet nut tool comes with 10-24 & 1/4 & 5/16 & 3/8 gun heads as well as their 1 bearing & 6 mandrels of each size. The head has a self-locking function that allows you to quickly assemble and disassemble the mandrels for increased efficiency
How Batteries, Brushless Motors, and Smart Features Enable Ergonomics
If you’ve ever held a heavy tool all day, this is why lighter feels better.
Why it matters: reducing tool weight and vibration lets you work longer without aching. Modern battery management packs cut weight by 20–40% compared with older packs and give you a reliable runtime readout, so you stop guessing when to recharge. For example, on a 10-hour panel installation shift, switching from a 4 Ah NiMH pack to a 5 Ah lithium pack dropped tool swaps from five to two and kept the gun under 3.5 pounds most of the day.
Why it matters: brushless motors make the motor smaller, cooler, and more efficient. They produce about 15–30% more torque per watt than brushed motors, which means you can have the same pulling power in a housing that’s 10–20% smaller. Picture rivetting overhead for two hours: a brushless-driven gun stays noticeably cooler in your hand and vibrates less, so your grip doesn’t get numb.
Why it matters: smart features stop you from fighting the tool and repeating bad motions. Torque control, digital battery gauges, and simple data logging let you match the gun to the rivet and material so you’re not overexerting your wrist. Example: set torque limits for aluminum panels and log 50 rivets — you’ll see if one rivet required double the torque, signaling misalignment or a damaged hole.
How you use them together matters. Follow these steps:
- Choose a lithium battery with a digital gauge; aim for 4–6 Ah for full-shift work.
- Pick a brushless model rated for the torque you need; check torque per watt if listed.
- Enable torque-limiting and test it on scrap before starting production.
- Review the tool’s logs at lunchtime to spot problem rivets or ergonomics issues.
When these three systems are aligned, the tool stays balanced, runs quieter, and requires fewer corrective motions.
Recommended Products

No Battery/Charger:Fits Makita 18V batteries (BL1850B, BL1840B, etc.). Purchase matching batteries separately in our Heimerdinger store.

Gift for Dad: Surprise him with a tool he’ll actually use and love. Ergonomic handle fits naturally in your hand—gentle on joints, even during long jobs. Perfect for Father’s Day, Thanksgiving, Christmas, birthdays, and all holidays

[Brushless Motor] The cordless rivet tool up to 2248 lbf pull force — spark-free, whisper-quiet, zero carbon brush replacements. 50% more efficient than brushed motors for cooler, longer-lasting performance across thousands of blind rivets.
Choosing and Implementing Ergonomic Rivet Guns for Your Workflow
Before you buy a rivet gun for your team, map the work it’ll do and who’ll use it, because the right choice depends on task cadence, access constraints, and operator strength.
Why this matters: choosing the wrong gun increases fatigue and slows output. Example: at a small boat-repair shop I worked with, technicians were switching between handheld and pneumatic guns every hour and productivity dropped 20% when they used the wrong tool.
How to map tasks and people (steps):
- List every rivet task you do and note cadence (rivet/minute), access angle, and material thickness. Example: hull panel installs — 30 rivets per hour, tight 45° access, 0.12–0.18 in aluminum.
- Note who will use the gun and their average grip strength or height. Measure with a simple dynamometer or estimate: light-duty (<50 lbf), medium (50–80 lbf), heavy (>80 lbf).
- Record any reach or space limits in inches. Measure clearance in tight spots; note overhead work separately.
I assess tool fit by matching gun type to job rhythm, reach limitations, and material thickness.
Why this matters: the wrong gun type wastes time and shortens tool life. Example: a fabrication line switched to battery rivet guns for repeated 800-rivet batches; one model overheated after 200 rivets and they lost an hour per shift.
How to match (steps):
- For intermittent, low-volume work (under 200 rivets/day), choose a compact battery or manual gun.
- For continuous line work (over 500 rivets/day), prefer pneumatic or high-capacity battery guns rated for >1,000 pulls/day.
- Match throat depth to clearance: measure max distance from rivet head to nearest obstruction and pick a gun with at least that throat depth plus 0.5 in.
I plan workflow integration so tools flow to stations without delay.
Why this matters: misplaced tools create minutes of stoppage that add up. Example: a manufacturing cell I audited lost 15 minutes per shift because batteries were stored two rooms away.
How to integrate (steps):
- Assign one primary and one backup gun per station.
- Create a charging/parking shelf within 5 feet of the station for batteries and spares.
- Color-code tools and assign them to operators to reduce search time.
I factor in training programs, teaching safe handling, maintenance checks, and simple diagnostics, which reduce downtime.
Why this matters: untrained operators damage tools and risk injury. Example: a new hire at a rail shop used incorrect nose sizes and stripped 10 rivets before anyone intervened.
Training and checks (steps):
- Train operators in a 30-minute session on grip, stance, battery swaps, nose change, and safe storage.
- Require a 5-point pre-shift check: battery charge, correct nose installed, jaw wear, air hose tightness (if pneumatic), and trigger function.
- Log any fault codes or unusual sounds immediately and tag the gun out of service.
I set up inventory management to track batteries, nozzles, and spares, so replacements arrive before failure.
Why this matters: missing spares stops the line. Example: a contractor lost two days because the correct mandrel catchers were out of stock.
Inventory steps (numbered):
- Keep a minimum stock of 3 batteries, 2 nozzles of each size, and one spare motor per two guns.
- Use a simple Kanban card at each station: when a part hits its reorder point, move the card to procurement.
- Review consumption weekly and adjust reorder quantities based on real usage.
I perform a cost analysis that weighs purchase price, fatigue reduction, productivity gains, and service life, allowing clear procurement choices that support safety and output.
Why this matters: lowest upfront cost often costs more over a year. Example: switching to an ergonomic battery gun reduced time per rivet by 8 seconds and paid back the extra $150 per gun within three months on a 10-station line.
Cost analysis steps (numbered):
- Calculate total cost = purchase + average annual maintenance + consumables + expected downtime cost.
- Estimate benefits = (seconds saved per rivet × rivets/year) × labor rate + reduced injury/fatigue costs.
- Compare payback period: divide extra purchase cost by annual benefits; aim for under 12 months for high-use tools.
Follow these steps and you’ll pick tools that fit the work and the people, keep stations moving, and reduce surprise downtime.
Recommended Products

Powerful 4000 LBF Pulling Force for High Efficiency: Our Pneumatic Rivet Gun delivers 4000 LBF (1814 KGF) of strong pulling pressure, completing each rivet installation in seconds. This not only saves valuable work time but also significantly reduces operator fatigue, making it ideal for high-volume or long-duration riveting tasks

Professional Rivet Tool: The pneumatic rivet nut gun is equipped with an alloy steel rotor, ensuring stable operation, high precision, and excellent wear resistance. A bottom-mounted adjustable knob controls airflow. Its efficiency far surpasses that of manual tools
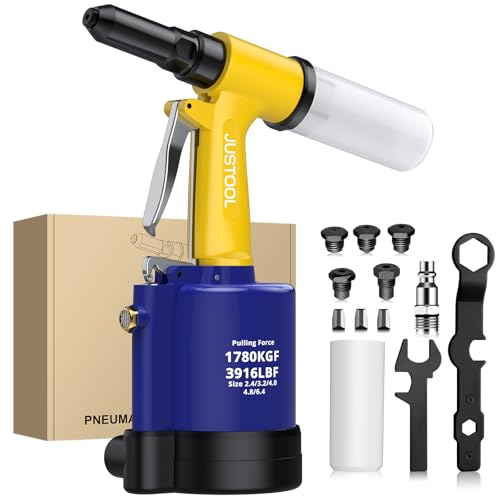
【Comprehensive Air Rivet Gun Set】The pneumatic rivet gun set includes 5 interchangeable rivet heads, covering sizes such as 3/32" (2.4mm), 1/8" (3.2mm), 5/32" (4mm), 3/16" (4.8mm), and 1/4" (6.4mm), allowing you to work with various materials, including aluminum, steel, and iron rivets. This complete kit also includes 2 wrenches, 3 claws, 1 U.S.-specification air nozzle, and 1 removable collection bottle, providing everything needed for efficient rivet work
Frequently Asked Questions
How Does Ergonomic Design Affect Tool Maintenance Costs?
I find ergonomic design lowers maintenance costs by reducing downtime and lowering repair costs through less wear, easier access for servicing, vibration dampening, and better component longevity, so you’ll save on parts and labor over time.
Do Ergonomic Rivet Guns Require Special Training or Certification?
No, they don’t strictly require certification, but I recommend operator schooling and safety seminars to guarantee proper handling, torque settings, and maintenance; that training reduces injury risk, improves productivity, and extends tool lifespan.
Are Ergonomic Rivet Guns Compatible With Existing Rivet Types and Fixtures?
Yes — I confirm ergonomic rivet guns generally support common rivet types, but you should verify material compatibility and may need fixture adaptation or nosepiece changes; I’ll help check specs for your rivets and fixtures if you want.
What Is the Expected Lifespan of Batteries in High-Use Ergonomic Models?
Ironically, I’ll say: Battery longevity in high-use ergonomic models typically spans 2–5 years, with 300–1,000 charge cycles before noticeable cycle degradation; I’d expect gradual capacity loss, needing replacement after heavy daily use.
Can Ergonomic Rivet Guns Be Retrofitted Onto Pneumatic Tool Systems?
Yes — I think retrofit feasibility exists, but pressure compatibility is vital; you’ll need adapters, check airflow and pressure ratings, and often replace fittings or regulators to guarantee safe, effective integration with pneumatic systems.