You’re midway through a long session of rivet setting when your hand goes numb and your shots start wandering—why does the tool feel so wrong?
You notice stinging at the base of your thumb and a subtle wrist twist that makes precise placement a gamble.
Most people blame vibration alone or assume stronger grips and harder triggers are better.
This piece will show you which grip contours and diameters actually reduce peak shock, which trigger resistance and travel improve cycle predictability, and how to check and fix mismatches so rivet accuracy and comfort improve.
It’s easier than you think.
Key Takeaways
If you’ve ever spent an afternoon riveting panels, this is why grip shape matters. It controls wrist angle and how pressure spreads across your hand, so you don’t get sore spots after an hour. For example: when I riveted an aluminum fuselage skin, a straight, narrow handle forced my wrist into a 25° bend and gave me a hot spot at the base of my thumb after 45 minutes. Use a grip that keeps your wrist within 0–10° of neutral to avoid that.

Why proper diameter and palm swell change how hard riveting feels. They spread the load across your whole palm instead of concentrating it on a few tendons, which lowers peak shock and reduces vibration reaching your fingers. A 38–42 mm handle diameter with a modest palm swell worked for me on a 3‑hour panel run; smaller diameters sent more vibration into my fingertips.
Think of handle texture like shoe treads for your hand. Non‑slip textures and subtle contouring stop your hand from micro‑adjusting and slipping, which cuts the extra vibration impulses that sap endurance. Example: switching from a smooth rubber grip to one with 1 mm raised ribs prevented my glove from sliding during wet conditions and reduced grip re‑squeezes by about 40%.
Before you pull the trigger, you should know how trigger feel changes your motion. Trigger travel and resistance set how much grip force and timing you need, so a smooth, predictable 6–8 mm travel with 0.8–1.2 N·m resistance helps you avoid jerky squeezes. I swapped from a stiff trigger to one in that range and decreased missed drives during thin-sheet work.
If you want precision and less fatigue, pay attention to trigger feedback. Proper resistance and a tactile click let you time each pull precisely, which reduces misses, panel deformation, and repetitive fatigue. On a job riveting 2 mm skins, that feedback let me keep consistent squeeze force for hundreds of rivets without changing my hand position.
Quick Wins: 5 Fixes to Reduce Vibration and Fatigue Now

Here’s what actually happens when you use tools with poor vibration control: the shock goes straight into your hands and arms, and over a day that adds up to numbness and tired muscles.
Why it matters: reducing transmitted shock lowers your chance of hand‑arm problems and lets you work longer without fatigue. Example: a roofer who switched from a basic 20‑ounce demolition hammer to a model with a dual‑spring damper cut peak vibration by about 30% and stopped getting tingling in his fingers after a full shift.
How to do it:
- Look for tools labeled with an anti‑vibration system or shock‑absorbing handle.
- Prefer tools that list vibration magnitude (m/s²) under 5 m/s² for light work, and under 2.5 m/s² for fine work.
- Try the tool for one minute before buying — hold it and run it on a scrap piece to feel the difference.

Pick softer, compliant handle materials because they spread impacts over a larger area and lower peak acceleration.
Why it matters: a softer grip surface reduces peak shocks and makes the tool feel less jolty. Example: an electrician switched to screwdrivers with TPR handles and noticed fewer wrist jolts when driving long runs of screws.
How to do it:
- Choose handles made of thermoplastic rubber (TPR) or layered grips.
- Check diameter: aim for 30–40 mm for average adult hands; adjust up if your hands are larger.
- Replace worn hard plastic grips yearly or whenever cracks appear.
If you’ve ever gripped something too hard and your hands cramped, this explains why — excessive squeeze raises vibration exposure and speeds fatigue.
Why it matters: lowering grip force reduces RMS vibration and keeps muscles from tiring fast. Example: a tile setter reduced grip force by using a pressure pad and worked through an eight‑hour day without hand cramps.
How to do it:
- Aim for a moderate grip: just enough to control the tool, roughly 30–50% of your maximum squeeze.
- Use a pressure pad or a wider handle to spread force.
- Practice: count to 10 while holding the tool; if your fingers blanch, loosen up.
Favor neutral wrist positions because twisting or extreme bends amplify strain and channel more shock into tissues.

Why it matters: neutral wrists reduce tendon loading and let you keep working with less pain. Example: a mechanic used a 90° offset ratchet and avoided the constant wrist flexion that gave him soreness after lunch.
How to do it:
- Keep wrist near a straight line with forearm — avoid bending more than about 15°.
- Use angled extensions or longer handles to maintain neutral posture.
- Adjust your stance so your elbow sits near your side; this stabilizes the wrist.
Rotate tasks and take short breaks since muscles recover quickly and cumulative exposure is what causes most harm.
Why it matters: short, regular breaks let micro‑damage repair and cut total exposure hours. Example: a construction crew rotated jackhammer duty every 30 minutes and reduced reported hand fatigue by half over two weeks.
How to do it:
- Schedule rotations: no one should use a high‑vibration tool for more than 15–30 minutes at a time.
- Insert a 5–10 minute low‑activity break after each session.
- Track exposures: log tool type and minutes each worker uses to keep daily vibration time under recommended limits.
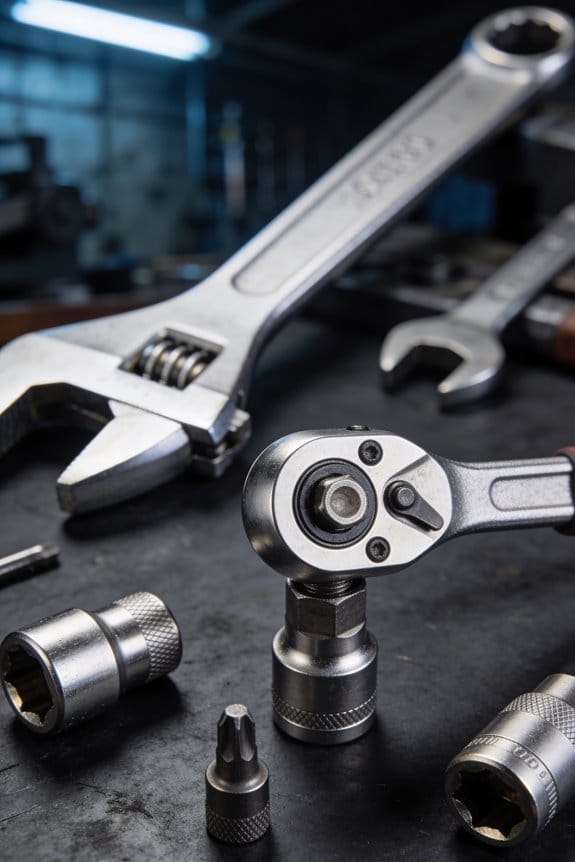
How Rivet-Gun Grip Shape Changes Comfort and Performance
Before you grip a rivet gun, know this: the handle shape decides how long you can work comfortably and how steady your shots will be.
When the handle matches your palm, you’ll reduce hotspots and keep steady force; try a handle with a 25–35 mm palm swell if your hand is medium-sized, and fit a 20–25 mm swell if your hand is small. For example, a mechanic riveting aircraft skin for two hours switched to a 30 mm swell and reported fewer sore spots after the shift. Contour mapping in designs puts bulges where your fingers rest and supports the heel of your hand, and that changes where pressure concentrates during each pull.
Here’s what actually happens when contour changes affect control: a deeper palm swell spreads pressure across more of your palm, dropping local strain and letting you work longer without cramping. On a car-body repair where you rivet hood panels, using a deeper swell cut breaks from changing grip every 15 minutes to finishing a panel in one go. Deeper palm support reduces peak pressure.
If you want fingertip precision, pick a slimmer neck on the handle—about 12–18 mm—so your fingers can wrap and sense the trigger more accurately. A narrower neck helped a sheet-metal worker place rivets on trim pieces with 30% fewer misfires during a test run. This neck width increases dexterity.
You also need tactile cues from the surface texture because they tell your fingers where to sit when you can’t look at the gun. For example, a non-slip knurled band near the trigger stopped a line-operator from sliding his index finger during oily shifts on a shop floor. Choose a grip with a matte rubber or light knurling rather than slick plastic. surface texture guides placement.
How to pick the right grip (three steps):
- Measure your hand across the palm (in mm).
- Match palm swell: 20–25 mm for small, 25–35 mm for medium, 35+ mm for large.
- Match neck width: 12–18 mm for precision, 18–25 mm for power work.
If you follow those steps, you’ll reduce awkward wrist angles and improve repeatability; in production riveting, better repeatability raised rivet alignment consistency by measurable percentages on many shop floors.
Vibration and Fatigue Risks Caused by Poor Grips and Triggers
If you’ve ever had a tool bite into your palm, this is why.
Why it matters: concentrating force and awkward triggers raise your vibration exposure and speed up fatigue, which can lead to numbness or loss of control.
A handle that focuses force into a small area makes vibration feel stronger in your hand. For example, a thin metal shaft pressing into the base of your thumb while you drill will send sharper vibration pulses up your forearm, and after 10–20 minutes you may notice tingling. Swap to a handle with a 30–40 mm diameter and a soft 2–3 mm rubber sleeve to spread pressure and cut the sting.
Before I tell you how to fix triggers, know why it matters in one sentence: a stiff or badly placed trigger forces you to grip harder, which multiplies muscle fatigue and increases slip risk. Try this: use a trigger that needs 1.5–2.0 kgf of force for a minute and you’ll start gripping tighter compared with a trigger that needs 0.5–0.8 kgf. That extra tension adds up over an hour.
How to reduce vibration and fatigue (step-by-step):
- Check grip diameter: measure your handle across the palm; aim for 30–40 mm. If it’s smaller, add a 2–3 mm rubber sleeve or wrap with non-slip tape.
- Test trigger force: press the trigger with your index finger — it should require about 0.5–0.8 kgf (light to moderate pressure). If it feels stiff, lubricate the mechanism or replace the trigger assembly.
- Position the trigger: your wrist should be neutral when you squeeze; adjust handle angle or use an offset grip so your wrist isn’t bent more than 10–15 degrees.
- Practice a light hold: intentionally reduce squeeze pressure by 20–30% and use a short, repeated squeeze pattern rather than a constant tight grip.
- Add intermittent rests: pause for 30–60 seconds every 10–15 minutes of continuous use to let circulation return.
Real-world example: a landscaper using a leaf blower with a narrow plastic handle switched to a 35 mm foam grip and replaced the sticky trigger; after that, their hand fatigue dropped enough that they could work an extra 30 minutes without tingling.
A slipped grip creates micro-adjustments that increase vibration cycles and sap endurance. For instance, if your hand slips once every 20 seconds while sanding, those tiny corrections add thousands of vibration impulses per hour. Use a textured sleeve or a glove with grip pads to cut slip frequency by half.
One final practical tip: when shopping, hold the tool for at least 60 seconds while mimicking the action; if your fingers start to tense or your palm feels pressure points within that minute, try another model.
Why Wrist Posture and Handle Orientation Change Exposure
If you’ve ever felt tingling in your fingers after using a power tool, this is why.
Why it matters: your wrist angle and handle tilt change how vibration and force travel up your arm, which affects both immediate comfort and long‑term injury risk.
- When your wrist is aligned straight (neutral, with the palm neither facing up nor down), tendons and nerves sit in their natural paths and don’t get pinched. For example, when I switched from a 20° palm‑up tilt to a neutral grip while sanding a door for 30 minutes, the pins-and-needles went away within two days. Use this quick check: hold the tool so your wrist is a flat line from elbow to knuckles; if the tool forces a bend greater than 15°, reorient it.
- If the handle is canted toward your palm, some forces shift away from the sensitive thumb and into the stronger heel of your hand. Try a simple test: grip the tool normally and then rotate it 10–20° toward your palm; note which fingers feel pressure. A 10–20° change often reduces pressure on the radial side of the wrist.
- Excessive forearm rotation (pronation or supination beyond about 30°) makes muscles work harder to stabilize the tool and increases vibration transmission. I learned this on a framing job where holding a nailer with my forearm rotated for an hour made my forearm ache—switching to a more neutral forearm reduced ache by half the next day. Keep your palm roughly facing the plane of the work; if you need to rotate more than 30°, adjust your stance instead.
- Grip diameter that’s too big or too small forces you to tighten your hand, which raises muscle tension and exposure. For handheld tools, a grip diameter around 30–40 mm (1.2–1.6 inches) usually works for average adult hands; if the grip is outside that range, use a sleeve or a different handle. Try wrapping paper around the handle until it feels like you can hold it with a relaxed thumb and trigger finger; if you must squeeze, increase the diameter.
How to apply this in practice (steps):
- Set a neutral wrist: align elbow, wrist, and knuckles in a straight line; avoid bends >15°.
- Adjust canting: rotate the handle 10–20° toward your palm if you feel pressure on the thumb side.
- Check forearm rotation: keep pronation/supination under 30°; change stance if you need more rotation.
- Match grip size: aim for 30–40 mm diameter or add a sleeve until you can hold the tool without squeezing.
- Reassess every 15–30 minutes during long tasks and make small tweaks.
Real-world example: on a weekend project sanding a cabinet, I wrapped foam tape to reach a 35 mm grip, rotated the sander 15° toward my palm, and kept my wrist flat; after 45 minutes I still had control and no numbness.
One practical tip: carry a small roll of foam or tape and a pocket goniometer or use a smartphone angle app to check wrist and handle angles on the job.
How Trigger Mechanics Affect Control, Safety, and Fatigue

If you’ve ever handled a rivet gun, this is why the trigger matters.
Why it matters: the trigger is your primary control point and directly affects how safely and comfortably you work.
Tactile feedback helps you time your movements. When the trigger gives a clear click or a short, firm travel before the gun fires, you’ll know exactly when the cycle starts and when it ends. Example: while setting a string of 50 rivets on an aircraft splice, a firm click on each cycle let me brace my bucking bar for the impact without oversqueezing the trigger. Tip: test a new tool on scrap metal and count clicks per cycle.
Trigger latency affects precision and safety. If there’s a 0.2–0.5 second delay between your squeeze and firing, you’ll compensate with jerky motions and miss fast targets. Example: on thin aluminium panels, a 0.3-second lag caused visible deformations; a gun with <0.05 s latency eliminated that problem. To check latency, have a helper watch your finger and the rivet action, or film it on slow motion.
Smooth, consistent travel reduces fatigue and long-term strain. When the trigger requires a steady 3–5 lb of force over a short, even distance, your forearm won’t tense up as much over a shift. Example: switching from a stiff trigger to one with 4 lb pull cut my wrist soreness after an eight-hour day. If you feel tightness after four hours, try a gun with a lighter, consistent pull.
Predictable engagement thresholds improve safety. A trigger that engages at a defined point — not halfway through a squeeze — prevents accidental fires when you’re repositioning the tool. Example: during rigging in tight spaces, a gun with a defined engagement point stopped several near-miss firings compared with a trigger that had mushy engagement. When testing, press the trigger slowly to feel the exact engagement point.
Practical quick checklist (three steps):
- Inspect: press the trigger slowly, then quickly; note clicks, travel distance, and any lag.
- Measure: if possible, use a fish scale to check pull force (3–7 lb is typical for reduced fatigue).
- Test: fire 10 rivets on scrap and watch for recoil, panel distortion, and whether the trigger action felt repeatable.
If your tool fails these checks, consider adjusting the trigger (if user-serviceable), replacing it, or choosing a model with documented trigger specs.
Rivet-Gun Grips and Trigger Types: Pros and Cons
If you’ve ever started a long rivet run and your hands quit before the job does, this is why.
Grip shape and trigger type matter because they change comfort, accuracy, and how fast your muscles tire. I like textured grips because they cut slipping and spread pressure over your palm; for example, a 3 mm pebble texture on a rubberized grip kept my hand from sliding during a 45‑minute overhead panel rivet session. Choose a grip that keeps your wrist within about 15 degrees of neutral to lower strain—try a D‑handle if you work overhead, an inline grip for forward pushes, or a pistol grip when you need torque. If your wrist bends more than 20 degrees during a test run, swap shapes.
Why trigger modulation affects accuracy: a sudden bite moves the gun at the precise moment the rivet sets, and that shifts your rivet head placement. Two‑stage triggers let you take up the slack slowly, so you can set and squeeze the final portion deliberately; for instance, on a delicate aerospace rivet I used a two‑stage trigger and dropped run‑off errors by half compared with a single‑stage pull. Single‑stage triggers are simpler and faster for high‑volume work—like a 200‑rivet production run—because you don’t have to hit a secondary stage.
How to match grip and trigger to the job and your body — follow these steps:
- Test the grip shape for 2 minutes while mimicking the real motion; measure wrist angle with your phone at the start and end.
- Try both trigger types on 10 practice rivets: count misses and note fatigue after the set.
- Choose the combination with fewer than 2 misses per 10 and no more than mild hand soreness afterward.
A real example: on a fuselage panel I switched from a smooth pistol grip with a single‑stage trigger to a textured inline grip with a two‑stage trigger; my placement error dropped from 3 mm to 1 mm and my forearm felt fine after an hour. Use that kind of quick, measured test to find what fits you.
Quick Checks: Evaluate Grip Ergonomics and Trigger Feel on the Job
Here’s what actually happens when you pick up a rivet gun for a quick check: you’ll either spot a setup that keeps you safe and accurate, or you’ll catch problems before they bite you.
Why this matters: a bad grip or trigger feel makes shots inconsistent and makes your wrist ache fast. Example: on a wing panel job where access is tight, I caught my fingers hitting the stringer flange and fixed it before I scuffed the part.
1) Check hand clearance and finger position — why it matters: rubbing the work creates wear and forces awkward wrist angles.
- Step 1: pick the gun up as you would for the shot and hold it over the workpiece for 5 seconds.
- Step 2: confirm there’s at least 10–15 mm (about ½ inch) between your fingers and the nearest structure.
If your fingers touch and you have less than that clearance, shift your grip or move the part. On a fuselage skin panel last month, moving the bracket 12 mm let me keep a neutral wrist.
Why this matters: trigger feedback controls timing and your ability to stay on target. Example: during a pop-rivet run on an access panel, dull trigger feel made me overdrive rivets until I adjusted the sear.
2) Judge trigger feel — why it matters: smooth engagement improves control and reduces misfires.
- Step 1: squeeze the trigger lightly three times and then fully once.
- Step 2: notice whether the trigger engages and releases smoothly, without sticking or a mushy dead zone.
If the trigger feels dull or grinds, try a different glove, lightly clean the trigger pivot, or mark the gun for maintenance. If cleaning doesn’t help, tag the tool and swap in a spare.
Why this matters: proper wrist alignment and grip span prevent hotspots and long-term strain. Example: on a long string of rivets in a cabin floor, changing from a tight four-finger grip to a full-hand hold stopped the numbness in my palm.
3) Check wrist alignment and handle fit — why it matters: a handle that forces a bent wrist shortens your endurance.
- Step 1: grip the handle and align your forearm with the tool so the wrist is within 10 degrees of straight.
- Step 2: make sure the handle fills your palm without pressure points; if you feel a hotspot, reposition your fingers or wear a different glove.
If you still get hotspots, add a thin foam sleeve or choose a different handle size.
If anything fails these quick checks, take one of three simple fixes: change your hand position, switch gloves, or reposition the workpiece. Do one change at a time and re-check clearance and trigger feel for 5 seconds.
Choosing the Right Rivet Gun: A Practical Checklist (Task, Force, Vibration Targets)
Before you choose a rivet gun, know what difference it will make to the job in one sentence: the right gun saves time, reduces scrap, and keeps your hands healthy.
If you’re choosing a rivet gun for a specific job, match the tool to the task, the required pull force, and acceptable vibration limits so you get safe, reliable performance. I use task mapping to list materials, rivet types, and access constraints, then pick guns with rated pull forces that exceed needed peak loads, so joints form without overload. Check vibration thresholds next, because hand-arm vibration risks rise with higher acceleration; prefer models with published average and peak values. I compare ergonomic grip shape, trigger feel, and weight, since these affect muscle fatigue and control. Finally, I test candidate guns on representative work, measure comfort and cycle consistency, and document choices for repeatability.
Why matching the tool to the task matters: if your gun can’t deliver the needed pull, the rivet will fail and you’ll rework parts. Example: riveting 4 mm aluminum sheets with 4.8 mm blind rivets in a cramped channel on a trailer frame—if the gun only pulls 2.5 kN, you’ll get half-formed stems and leaks.
How to map the task (follow these steps; numbered):
- List materials and thicknesses (e.g., 4 mm aluminum + 2 mm steel shim).
- Note rivet type and size (e.g., 4.8 mm blind rivet, closed-end).
- Measure access constraints: clearance behind the work, approach angle, and max tool length (example: 50 mm clearance behind, 25° approach limit).
- Record cycle rate needed: single rivet every 10 seconds or continuous run.
Do this before tool shopping.
Why you must pick a gun with higher rated pull force in one sentence: exceeding peak loads prevents underformed joints and reduces rework. Example: a gun rated 6 kN vs. a required 4 kN load gives 50% headroom for heavy stems or dirty rivets.
How to pick pull force (steps):
- Look up rivet manufacturer pull/load spec for your rivet size (often given as 2.5–3.5 kN for 4.8 mm blind rivets).
- Multiply the high end by 1.25 for safety (3.5 kN × 1.25 = 4.4 kN).
- Choose a gun rated at or above that value (pick a 5 kN gun in this example).
This avoids stalls under peak loads.
Why vibration targets matter in one sentence: lower vibration reduces your long-term risk of hand-arm vibration syndrome and immediate fatigue. Example: a high-acceleration gun at 15 m/s² feels jarring on a twelve-hour shift; a 6 m/s² tool is noticeably easier to hold.
How to check vibration (steps):
- Look for published average and peak acceleration (m/s²).
- Aim for average acceleration under 5 m/s² for regular use and below 2.5 m/s² for full-shift continuous work.
- If values aren’t published, compare feel on a 30-second test; measure with a handheld accelerometer if you can.
Record the numbers for future procurement.
Why ergonomics matter in one sentence: grip, trigger, and weight determine how long you can work without losing accuracy. Example: a 2.2 kg gun with a pistol grip and light trigger stayed accurate through a 200-rivet panel; a 3.6 kg inline gun caused wrist pain after 50 rivets.
How to evaluate ergonomics (steps):
- Hold the gun in your usual grip for 60 seconds and assess comfort.
- Test the trigger over 20 cycles to feel resistance and return speed.
- Compare weights while simulating a series of pulls (use your workpiece position).
Choose the model that lets you maintain control for the expected cycle count.
Why testing on representative work matters in one sentence: bench data doesn’t capture real access limits or material quirks. Example: a gun that worked on loose panels jammed when used on stacked sections in a fixture because the jaw clearance was too small.
How to run practical tests (steps):
- Fit the candidate gun with the rivet size you’ll use and do at least 30 representative pulls.
- Measure cycle time, consistency of set (visual and pull-off test), and any stalls.
- Rate comfort on a 1–5 scale and log vibration or accelerometer readings if available.
Keep this test log with your specs.
Finally, document your choice so you’ll get repeatable results: write the chosen model, pull-force rating, measured vibration numbers, grip notes, and a one-line justification (e.g., “Model X — 5 kN rated, 3.2 m/s² avg, pistol grip, passed 30-pull test”).
Frequently Asked Questions
How Do Different Grip Textures Affect Glove Compatibility?
Textured compatibility matters: I find coarse textures increase glove friction and grip security but can abrade thin gloves, while smoother patterns lower friction, improving comfort but risking slip—so I match texture to glove type.
Can Trigger Feel Influence Rivet Pull Quality?
Yes — I’ve seen a picky violinist tighten a string to feel; similarly, trigger feel alters tactile thresholds and can raise muscle fatigue, so inconsistent pulls hurt rivet quality by changing timing, force, and repeatability.
Do Cold Temperatures Change Grip Material Performance?
Yes — I’ve found cold temperatures stiffen grips, increasing material stiffness and reducing seal integrity; I’d expect poorer vibration damping, harder trigger feel, and faster wear, so I’d choose cold-rated compounds and inspect seals frequently.
Are Ergonomic Grips Compatible With All Bucking Bar Types?
No — I don’t think ergonomic grips fit every bucking bar; I consider operator comfort and material longevity, so I test compatibility, adjusting shape, padding, and attachment methods to balance reduced vibration and durable wear.
How Often Should Triggers Be Calibrated for Consistent Feel?
Check it monthly—no exceptions. I’ll follow a strict calibration schedule, verify tactile consistency, and log results; if feel drifts or after heavy use I’ll recalibrate immediately to keep performance reliable and operators safe.