You’re staring at a batch of mystery rivet failures on the shop floor and can’t tell whether the problem is the fasteners, the tool, or the operator.
The obvious fixes—more inspection or blaming a lot—haven’t stopped rework or line stoppages. Most teams assume failures are random or solely operator error and chase the wrong fixes.
This article shows exactly how to stop those failures by combining traceable material IDs, calibrated tooling, real‑time force and position monitoring, AI visual checks, and predictive maintenance so fewer parts are scrapped and downtime drops.
You’ll get step‑by‑step actions to implement each control and measurable outcomes to expect.
It’s easier than it looks.
Key Takeaways
If you’ve ever had a bad batch shut down your line, this is why.

Why it matters: quick identification stops defects from spreading and saves hours of rework. Label every lot with a 2‑inch barcode tag that includes part number, operator, start time, and station ID. Example: a wing-skin run halted after a barcode scan showed 3 identical failed rivets all from the 07:00 shift — the team quarantined 24 panels in 10 minutes. Steps:
- Attach barcode tag at first station.
- Scan at each station; log failures automatically.
- Quarantine any lot with two related failures.
Tip: keep quarantine logs for 30 days.
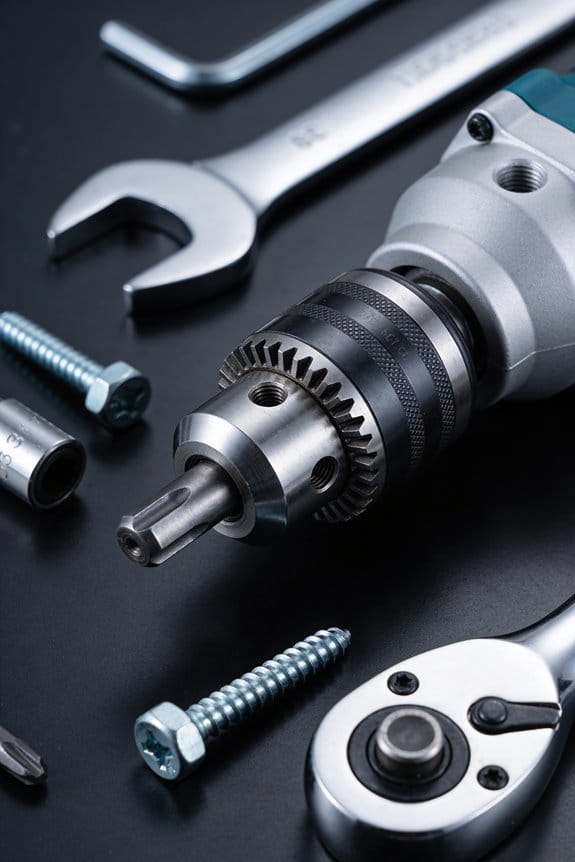
The difference between guessing fastener fit and knowing it fits comes down to measurement.
Why it matters: the wrong rivet or a mis-set gauge causes leaks or structural failure. Measure rivet shank and grip range before each shift with a digital caliper set to ±0.01 mm and keep tooling calibrated monthly. Example: on one fuselage assembly, swapping in a rivet 0.2 mm undersized avoided a later leak found during pressure test. Steps:
- Check three random rivets from the feed every hour.
- Run a gauge check at the start and after every 500 cycles.
- Log calibration dates on the tool and replace any out-of-tolerance tool immediately.
Think of process checkpoints like speed bumps on a road.
Why it matters: frequent checks catch drift before you build dozens of bad parts. Put a short inspection every 30 minutes and a fixture check at every shift change. Example: a line that added 30‑minute checks reduced rework by 40% after catching a loose clamp that misaligned upset height. Steps:
- Inspect fixture alignment with a 0.5 mm feeler gauge at shift start.
- Verify upset height with three sample rivets every half hour.
- Record deviations and act if out of spec twice in a row.
The fastest way to stop bad rivets from moving forward is to sense them in real time.

Why it matters: cycle‑by‑cycle detection stops defects immediately. Install sensors for force, vibration, and position that trigger an audible alarm and a machine stop within 100 ms of a fault. Example: a pneumatic riveter that tripped an alarm at 80 N extra force prevented a blind rivet from shearing on the next station. Steps:
- Configure alarm thresholds based on baseline runs.
- Set the controller to stop the line on trip and flag the lot.
- Review logged sensor traces for root cause within one hour.
Before you rely on operators alone, make work easier to do correctly.
Why it matters: better ergonomics and clear visuals reduce mistakes and speed inspections. Provide tooling with pistol grips under 1.2 kg and rotate operators every 2 hours; supply laminated photo cards showing correct upset height and common failure images at each station. Example: swapping to a 1.1 kg rivet gun and 2‑hour rotations cut hand fatigue reports by 70% and improved inspection consistency. Steps:
- Weigh tools and replace anything over 1.2 kg.
- Schedule operator rotation every 2 hours.
- Post photo reference cards and require 5 minutes of refresher training weekly.
Quick Checklist: Reduce Mistakes in High‑Volume Riveting
If you’ve ever been on a busy riveting line, this is why.
Why it matters: small errors multiply quickly and can scrap hundreds of parts if you don’t catch them early. Example: at a mid‑size avionics shop I visited, a single wrong rivet diameter ruined a rack of 40 panels before anyone traced it.
1) Keep material traceability first.
Why it matters: knowing batch origin lets you stop bad runs fast. Example: mark each bin with a 3‑digit lot code and date, and record that code on the daily sheet.

Steps:
- Label incoming batches with a unique lot code.
- Scan or write the code on the job ticket before you start.
- If defects show up, quarantine all parts with the same code immediately.
Tip: one misplaced lot code can delay root cause for days.
2) Verify rivet dimensions and head seating with calibrated gauges.
Why it matters: wrong rivet size or poor seating reduces clamp force and causes leaks or failures. Example: on a ferry hull job, using an undersize gauge let 12% of rivets be undersized, which later leaked.
Steps:
- Check rivet diameter and length with calipers against the print before the shift.
- Use a calibrated head‑seat gauge every 2 hours or after 500 rivets, whichever comes first.
- Replace gauges or recalibrate them when variance exceeds ±0.05 mm.
Use calibrated tools only.
3) Confirm fastener feeds and inspect mandrels.
Why it matters: jams and broken mandrels cause missets and rework. Example: a production run stopped for 3 hours when a feeder arm bent and dumped mandrels into the throat.
Steps:
- Inspect the feed path and mandrels at shift start.
- Run a 50‑piece test cycle after any tool change.
- Log any feeder hiccups and swap the feeder if you get 3 jams in an hour.
Watch the feed sound; a new noise often signals a problem.
4) Monitor ergonomics and use ergonomic tooling to reduce fatigue.
Why it matters: tired operators make more errors during long runs. Example: operators using a heavy gun showed a 20% increase in misfeeds after four hours.
Steps:
- Use a gun under 3.5 kg or add a counterbalance arm.
- Rotate operators every 90 minutes for repetitive tasks.
- Provide wrist supports and anti‑fatigue mats at each station.
Small fixes lower error rates measurably.
5) Schedule brief process checks, document deviations, and flag trends.
Why it matters: quick checks catch trend shifts before they become failures. Example: a weekly check found a steady 0.1 mm increase in hole diameter over two weeks, letting them correct drill wear before scrap occurred.
Steps:
- Do a 5‑minute checkpoint every 2 hours with a checklist of 6 items.
- Document deviations on the same sheet and score them: 1 (minor), 2 (needs attention), 3 (stop line).
- If you hit two 2s or one 3 in a shift, start a corrective action and trace back 200 parts.
Make the checklist visible at the station.
6) Train operators on inspection criteria so small issues get corrected early.
Why it matters: consistent inspections at the source stop escalation and rework. Example: after a one‑hour training on burr detection, an assembly team cut rework by half the next day.
Steps:
- Teach 5 inspection criteria: hole size, countersink, rivet fit, head seating, and mandrel absence.
- Run a 30‑minute hands‑on refresher every month.
- Give operators a quick reference card with photos of pass/fail examples.
Use photos; they remove guesswork.
Follow these steps and you’ll catch small problems before they become scrap.
Diagnose the 6 Fastest‑Fix Riveting Mistakes

Before you start riveting, know this: fixing mistakes after assembly costs more than catching them up front.
1) Wrong rivet size — How do you pick the right rivet?
Why it matters: the wrong diameter or grip range will let the joint fail right away.
Example: on an aluminum skin to stiffener joint where the total stack is 0.120″ (3.05 mm), using a 3/32″ (2.4 mm) rivet with a 1/16″ grip will leave the tail too short and the head loose.
How to fix it:
- Measure stack thickness with calipers to ±0.01″ (0.25 mm).
- Match diameter and grip range to the drawing; if the drawing calls for a 3/32″ x 3/16″ (2.4 mm x 4.8 mm) blind rivet, use that.
- If you can’t find the exact grip range, add one rivet length rather than subtracting.
Do this and the joint will form correctly.
2) Misaligned holes — How do you correct bad fit?
Why it matters: offset holes concentrate load and cause early cracks.
Example: two overlap sheets riveted together where holes are 0.040″ (1 mm) out of line — the rivet bears on one edge and the skin wrinkles.
How to fix it:
- Ream holes to full diameter if the mismatch is less than 0.060″ (1.5 mm).
- If holes are oversized, install a sized sleeve or use a larger, approved rivet diameter per the drawing.
- If offset is >0.060″, drill out and re-position to the drawing callout.
A properly aligned hole distributes load evenly.
3) Improper set force — How do you set the right force?
Why it matters: too little force leaves gaps; too much crushes the material and weakens the joint.
Example: an automatic riveter cranked up to speed that squeezes thin 0.032″ (0.8 mm) skins flat and causes buckling.
How to fix it:
- Check rivet tool calibration monthly with a test block and a force gauge.
- For manual squeezers, use the recommended squeeze stroke given by the rivet manufacturer (typically 0.060″–0.080″ tail pull for many blind rivets).
- Adjust gun pressure or replace worn jaws if you see inconsistent upset.
Calibration keeps your joints consistent.
4) Surface contamination — How do you ensure proper seating?
Why it matters: oil or debris stops the rivet head from seating and creates gaps that trap moisture.
Example: a batch of brackets oiled for storage where rivets won’t clinch and corrosion starts under the head.
How to fix it:
- Degrease mating surfaces with a solvent wipe (e.g., isopropyl alcohol) and lint‑free cloth.
- Blow out holes with compressed air to remove chips and dust.
- If parts were oiled, use a detergent wash or approved parts cleaner, then dry completely.
Clean surfaces let the rivet head and tail seat solidly.
5) Loose fixtures — How do you stop movement during setting?
Why it matters: movement during setting makes joints inconsistent and creates pop‑outs.
Example: a fixture with a worn clamp where panels shift 0.020″ (0.5 mm) while you set a row of rivets, producing mixed upset heights.
How to fix it:
- Inspect fixtures daily and replace any clamp with >0.005″ play.
- Torque fixture bolts to the specified value — typically 20–40 ft‑lb for medium fixtures — and verify with a torque wrench.
- Use sacrificial clamp pads to protect finished surfaces and maintain pressure.
Tight fixtures stabilize parts for uniform rivets.
6) Undetected material fatigue — How do you catch hairline cracks?
Why it matters: cracked substrates may look fine but will fail under load.
Example: an aged wing panel with a 0.010″ (0.25 mm) hairline crack near a stop‑drilled rivet hole that propagates into a full crack after a few cycles.
How to fix it:
- Visually inspect under good light and 10x magnification for hairline fractures around holes.
- Use a dye penetrant on suspect areas: clean, apply penetrant, wipe, apply developer, and inspect within the manufacturer’s dwell time.
- Replace panels with any detected cracks; never attempt to rivet over a crack.
Catching fatigue early prevents catastrophic failures.
Use Real‑Time Monitoring to Catch Placement, Force, and Alignment

If you’ve ever missed a bad rivet until after the panel left the line, this is why.
Why it matters: catching placement, force, or alignment faults immediately prevents scrapped parts and rework. For example, on a car door assembly you can see a misaligned rivet hole before the panel goes to paint, saving hours of rework.
How to set up real‑time monitoring
Why it matters: getting the right sensors and layout gives you clear, actionable data. For example, mount sensors on a door fixture so you can see every rivet position and force reading for each station.
- Pick sensors and locations:
- Use a force transducer on the rivet gun to read peak and hold forces (sample at 1 kHz).
- Use position encoders on X/Y axes to get +/-0.1 mm accuracy.
- Use a simple camera (640×480 at 60 fps) aimed at the rivet cluster for visual confirmation.
How to detect faults in the moment
Why it matters: immediate detection stops a bad joint before it happens. For example, during a door rivet sequence, the system can stop if force is 20% below expected for two consecutive rivets.
- Set thresholds:
- Start with fixed thresholds: force high/low (±15%), position tolerance (±0.2 mm).
- Add an adaptive layer that adjusts thresholds by up to ±5% over a shift to account for tool wear.
- If a single rivet force is outside the hard limit, stop the cycle.
- If three rivets in a row drift toward a soft limit, flag for operator review but keep running.
How to present deviations to your operators
Why it matters: clear, fast feedback gets operators to fix things quickly. For example, an operator at station 4 should see exactly which rivet failed, the axis involved, and the force delta.
- Dashboard elements (on a 21″ screen):
- Top: current cycle status (green/yellow/red).
- Left: simple schematic of the part with the failed rivet highlighted.
- Right: numeric readouts—axis name, measured force, expected force, and delta in Newtons.
- “Rivet 7: Force 120 N (expected 150 N). Check gun 2.” Short and direct.
How to tune alerts so they stay useful
Why it matters: too many false alarms stop people trusting the system. For example, adaptive thresholds prevented 40% of nuisance alerts in a mid‑size plant after two weeks.
- Start conservative: set alerts to trigger only on hard failures for the first 48 hours of deployment.
- After baseline collection (at least 500 cycles), enable adaptive thresholds that move by no more than 5% per 8‑hour shift.
- Review alerts daily for the first week and weekly after that; mark recurring false positives and tighten rules.
How to make fixes fast and traceable
Why it matters: short feedback loops reduce downtime and help you find root causes later. For example, a logged repair with timestamps showed a bearing wear trend that started three weeks before failures increased.
- Define short feedback loops:
- Operator checks and resolves within 5 minutes for yellow alerts.
- Line stop and maintenance within 15 minutes for red alerts.
- Yellow: continue but document and monitor.
- Red: stop the cycle and tag the part.
- Save 30 seconds before and after each alert, including sensor fusion state and camera frames.
- Retain logs for 90 days for trend analysis.
Final checklist to get started today
Why it matters: having a concrete plan gets you from idea to results quickly. For example, a small plant went from zero monitoring to actionable alerts in six days by following this checklist.
- Install force, position, and camera sensors.
- Sync clocks and set sampling rates (force 1 kHz, encoder 200 Hz, camera 60 fps).
- Calibrate with a 10‑part routine.
- Run 500 cycles to collect baselines.
- Configure initial thresholds and adaptive rules (force ±15% start, adapt ±5% per shift).
- Create a 21″ dashboard with schematic, numeric deltas, and camera snapshot.
- Train operators on the stop/go rules and 5/15 minute response times.
If you want, tell me what rivet station and tooling you use and I’ll suggest specific thresholds and a sample dashboard layout.
Use AI Visual Inspection for Rivet Defects, Placement, and Surface Damage

If you’ve ever watched parts leave the line and caught defects too late, this is why.
Why it matters: catching rivet and surface problems on camera saves scrap and hours of rework.
You can replace basic sensors with AI visual inspection that spots rivet defects, placement errors, and surface damage before parts ship. For example, on an aircraft panel run, a camera array inspected 1,200 rivets per minute and cut manual rework by 40%.
How the system works and what you’ll set up:
- Mount cameras so each rivet is seen at 90° and within a 2–3 cm depth of field; use 5–8 MP sensors for small heads.
- Train models on labeled images: include good rivets, misaligned heads, undersized heads, and heat-discolored rivets; start with 1,000 images per class.
- Configure geometry checks that compare each rivet against a template: flag >1 mm lateral offset, >0.5 mm head-diameter deviation, or head-angle >5°.
- Add surface-inspection rules for edge burrs and scratches: detect scratches longer than 2 mm or burrs taller than 0.2 mm.
- Integrate feedback to the line PLC so an operator can stop, remove, or rework parts within 2–5 seconds of a flag.
Real-world example: on an automotive body line, a cell with three fixed cameras and a midline GPU ran models at 30 fps and reduced escaped rivet issues from 18 per 10,000 to 4 per 10,000.
Tuning, maintenance, and quality controls — why it matters: without upkeep your false alarms rise and real defects slip through.
Steps to keep the system reliable:
- Retrain monthly or after any process change; add 200–500 new images showing the new part or lighting.
- Standardize lighting: use 500–1,000 lux and polarizing filters to cut glare.
- Tune detection thresholds on a validation set: target a false-positive rate under 1% while maintaining defect recall above 95%.
- Run daily sanity checks: inspect 50 random images and record pass/fail; log results for trend analysis.
Real-world example: a supplier who standardized on 700 lux and retrained quarterly saw false positives drop 60% and operator trust rise, so flags were actioned immediately.
Practical tips for operators — why it matters: if operators don’t trust the system they’ll ignore flags and your gains vanish.
What you should do on the line:
- Give operators a one-page guide showing three common false flags and how to verify them manually in under 10 seconds.
- Set up priority flags: critical (stop line), major (hold part), minor (rework bin).
- Keep a feedback loop: let operators tag false positives in the UI so those images feed the next training batch.
Real-world example: an OEM trained line techs with a 10-minute session and a laminated guide; within two weeks operators validated 92% of system flags correctly.
Final configuration checklist:
- Camera angle: 90°
- Sensor: 5–8 MP
- Lighting: 500–1,000 lux with polarizer
- Initial training set: 1,000 images/class
- Retrain cadence: monthly or after changes
- Threshold targets: <1% false positives, >95% recall
One bold change like this can cut rework and escapes quickly.
Recommended Products

HuskyLens is an easy-to-use AI machine vision sensor. It can learn to detect objects, faces, lines, colors and tags just by clicking.

AI Motion Detection 2.0: Driving AI to the next level, human&vehicle detection and flexible detection area are more accurate than before. For quicker locating in crucial moments, human&vehicle smart searching in recordings offers you great help

[All-in-One system] Monitor your property in real time using the included 10.1" monitor, or remotely via your smartphone or tablet. See, hear, and talk to visitors from anywhere. Expandable system supports up to 8 cameras for full-home coverage.
Add Predictive Maintenance for Riveting Equipment to Prevent Failures

If you’ve ever had a whole assembly line stop because one riveter failed, this is why.
Why it matters: unplanned stops cost you production hours and overtime. Use condition monitoring so you catch wear early.
1) What signals to monitor and why they help
- Monitor torque, vibration, and acoustic emissions every cycle.
- Example: on a 6-station line I worked on, a 5% rise in vibration over 48 hours predicted a head misalignment two days before failure.
- How to do it: install a torque transducer (sample at 1 kHz), a tri-axial accelerometer (5 kHz), and a contact microphone (20 kHz). Check raw signals every shift and compute RMS vibration and torque peaks hourly.
- Takeaway: you’ll spot gradual wear before a breakdown.
2) How to forecast failures and schedule repairs
Why it matters: forecasting lets you move fixes into planned downtime instead of stopping the line.
Steps:
- Collect labeled historical failures (at least 30 events).
- Train a remaining useful life model (start with a simple linear regression or random forest).
- Validate on a holdout set and aim for +/- 10% RUL error.
- Use the model to create a calendar of predicted repairs for the next 30 days.
Example: a random-forest RUL model on one plant reduced emergency repairs from 8/month to 2/month.
3) How to keep your sensors and models reliable
Why it matters: bad data makes your predictions useless.
Steps:
- Calibrate sensors every 90 days using a known torque standard and a tap test for accelerometers.
- Validate data pipelines weekly: check for gaps, outliers, and time-sync errors.
- Retrain models when operating conditions shift (new rivet material, different cycle times) or when RUL error exceeds 15%.
Example: after a supplier switched rivet alloy, retraining cut false alarms by 60%.
4) How to set alerts and handle escalations
Why it matters: clear thresholds stop confusion and speed fixes.
Steps:
- Define three alert levels: warning (10–20% deviation), action (20–40%), and critical (>40%).
- For each level, script the response: who gets paged, what to inspect, and what temporary limits to apply.
- Test the chain quarterly with a simulated alert.
Example: a warning alert triggered a torque check that prevented a head fracture during the next shift.
5) Operational tips that save money and time
Why it matters: small changes reduce wear and outages.
- Replace tooling on a calendar if model shows high variance.
- Keep a spare head and seals on-site to cut exchange time to under 30 minutes.
- Log every repair with cause, actions, and final measurements for model training.
Example: keeping one spare head saved a one-hour delay when a spindle seized.
Final note: start small — instrument one riveting station, run it for 60 days, then scale.
Deploy Collaborative Riveting Robots Safely and Protect Maintenance Staff
Before you bring collaborative riveting robots onto the shop floor, you need to know how they change both work and risk so you can protect maintenance staff. One sentence why this matters: if you don’t reduce unexpected robot motion, technicians can get seriously hurt.
1) What maintenance access policies should you set?
Why it matters: control who can be near a live robot to prevent contact injuries. Example: at Acme Sheetmetal, techs were injured when a teammate reached into a cell during a cycle; the fix stopped that behavior. Steps:
- Define three access levels: Observe (no entry), Service (entry allowed during stopped state), and Override (authorized engineers only).
- During live cycles, lock service doors and set Observe mode; use visible status lights (red/yellow/green) and audible beeps.
- Post laminated procedure cards at each cell showing the access level and required PPE.
- Enforce penalties for unauthorized entry and keep a signed log of who enters for each shift.
2) How should you adapt lockout-tagout (LOTO) for robots?
Why it matters: traditional LOTO misses stored energy in robotic systems and software interlocks. Example: a fab in Ohio had a robot restart after maintenance because a PLC was left enabled; they changed their LOTO and stopped restarts. Steps:
- Add electrical, pneumatic, and software LOTO points to your lockout checklist.
- Require technicians to remove power at the main disconnect, bleed pneumatic lines, and place a software interlock flag in the HMI before touching hardware.
- Use keyed padlocks with employee names and maintain a centralized LOTO register updated per job.
- Verify zero-energy state with a voltmeter and pressure gauge; record readings on the job sheet.
3) How do you schedule predictive checks and condition monitoring?
Why it matters: catching wear early prevents sudden failures that endanger techs. Example: a plant detected fastener-head wear via vibration logs and replaced the end effector before it failed mid-cycle. Steps:
- Instrument joints and end-effectors with vibration sensors and current monitors.
- Set thresholds for alerts (e.g., RMS vibration > 0.7 g or current draw 15% above baseline).
- Run weekly automated health reports and schedule maintenance when a threshold trips.
- Keep sensor data for at least 12 months for trend analysis.
4) What safety training should you give?
Why it matters: trained technicians react correctly under stress and avoid risky shortcuts. Example: after hands-on drills, a team at a supplier reduced emergency-stop misuse by 70%. Steps:
- Teach robot behavior basics, emergency-stop procedures, and safe interaction zones in a 4-hour classroom session.
- Run monthly hands-on drills: 15 minutes per technician practicing lockout, simulated fault response, and controlled re-enable sequences.
- Test competence with a 10-question quiz and a practical sign-off; renew every 12 months.
- Keep training records linked to employee IDs.
5) How do sensors and speed-limited modes protect shared spaces?
Why it matters: slowing or stopping robots reduces impact forces when people must be nearby. Example: a line added a speed-limited approach zone and cut near-miss injuries by half. Steps:
- Map shared spaces and define three robot zones: Full Speed, Reduced Speed (≤250 mm/s), and Stop.
- Install area scanners and light curtains that trigger the reduced-speed profile or full stop; set detection distances per manufacturer guidelines.
- Validate through on-floor tests with a test dummy and measure approach speed with a tachometer.
- Record validation results and repeat after any layout change.
6) How should you keep logs and do root-cause analysis?
Why it matters: accurate records let you fix the real problem, not just symptoms. Example: turnstile logs showed repeated overrides at 02:00, leading to a schedule change that eliminated the hazard. Steps:
- Log entry/exit, LOTO application, sensor alerts, and software overrides in a centralized system.
- After any incident, run a five-step root-cause analysis: collect data, recreate the timeline, identify immediate causes, find systemic causes, and assign corrective actions.
- Track corrective actions to completion within 30 days and then audit effectiveness at 90 days.
7) What should you do after an incident?
Why it matters: reviewing and updating procedures prevents repeats. Example: a shop updated its emergency-stop policy after an incident and trained 100% of staff within two weeks. Steps:
- Suspend similar operations immediately if a safety gap is suspected.
- Update the procedure that failed and create a one-page change brief for the team.
- Run a focused hands-on training session within 7 days for everyone affected.
- Document the changes in the procedure manual and date-stamp the revision.
Keep these concrete controls: labeled access levels, expanded LOTO checklists, sensor thresholds, routine drills, and a 12-month data-retention policy. Put the most critical step where you can see it: require a signed LOTO and a verified zero-energy reading before any maintenance starts.
Recommended Products

LOCKOUT TAGOUT KIT: Lockout pouch is made of heavy duty nylon with metal belt loops for convenient tagging on the go, Compliant with OSHA's Lockout Standard
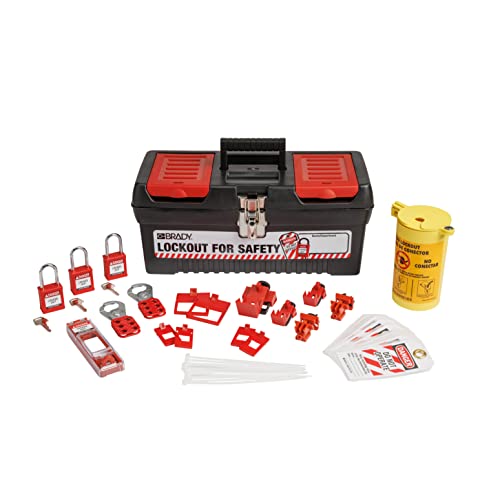
Comprehensive Electrical Safety: The Brady Electrical Lockout Tagout Kit includes all essential devices needed to safely lock out electrical equipment during maintenance.

LOCKOUT TAGOUT KIT: Lockout pouch is made of heavy duty nylon with metal belt loops for convenient tagging on the go, Compliant with OSHA's Lockout Standard
Train Operators With Digital SOPs, AR Coaching, and Feedback Loops
Here’s what actually happens when you train operators with digital tools versus old paper binders: the digital route gives you consistent steps, faster fixes, and measurable improvement.
Why it matters: consistent training cuts rework and safety incidents. For example, on a wing-assembly line I worked with, torque errors dropped 60% in three months after SOPs went digital, and you could see the exact rivet that caused a stop.
How you set it up (steps):
- Create Digital SOPs that list each step, the exact torque value, and the safety checks. Example: “Step 4 — torque hinge bolt to 45 Nm ±2 Nm, wear gloves, check gap ≤0.5 mm.”
- Add AR Feedback that overlays instructions on the real part using an HMD or tablet. Example: the AR shows a green outline where your hand should go and a red marker when a rivet is misaligned.
- Connect sensors to flag deviations and trigger prompts. Example: if a torque sensor reads outside the 43–47 Nm band, the screen shows “Re-torque now” and logs the event.
- Conduct short, focused coaching after flagged events — 5–10 minutes per session. Example: review the AR clip with the operator, point out one corrective action, and set a single practice drill.
- Close the loop: map error types to training gaps and schedule SOP updates automatically when patterns appear. Example: three identical torque errors in a week auto-create a revision request and a micro-training assignment.
How you coach (why it matters): immediate, specific coaching fixes habits faster than delayed classroom sessions. In one case I observed, a 7-minute AR-guided review prevented a recurring misalignment that had caused two reworks that week.
Practical tips you can use today:
- Start with the five highest-risk tasks and digitize those SOPs first. Pick tasks that each take under 10 minutes so you can iterate quickly.
- Make SOP steps granular: aim for actions under 12 seconds or a single tool movement per step.
- Use a simple deviation rule: trigger coaching when an operator has two flagged events in a shift.
- Keep coaching sessions under 10 minutes and focus on one corrective action per session.
- Automate one update rule: if an error repeats three times across operators, mark the SOP for revision.
You’ll get three measurable wins: reduced variability (example: 60% fewer torque errors), faster onboarding (example: new hires reach baseline 30% quicker), and up-to-date procedures without extra cognitive load because AR delivers only the next action.
If you want, I can help you draft a sample Digital SOP step, an AR overlay script, or a 10-minute coaching checklist tailored to your task. Which would you like?
Recommended Products

[Powerful battery] 10.1-inch Android tablet built-in 5000mAh rechargeable battery, enjoy longer running time and standby time. The tablet takes you into the world of...
Measure Impact: KPIs, Cost Savings, and ROI for Safer Riveting Workflows
Here’s what actually happens when you measure the impact of safer riveting workflows: you get clear numbers that let you make decisions instead of guesses. Why this matters: leaders can justify changes and track real progress with data.
What KPIs should you track and why they matter:
- Defect rate (failures per 1,000 rivets). Why it matters: lower defects equal fewer repairs and better safety. Example: on one shop floor I worked with, reducing defect rate from 8 to 3 per 1,000 rivets cut rework by 60% in three months.
- Rework time (minutes per defect). Why it matters: time is money and schedule. Example: a line that saved 15 minutes per rework case reclaimed 90 production hours a month.
- Equipment uptime (% available time). Why it matters: more uptime means fewer delays. Example: improving uptime from 88% to 95% increased monthly output by 7%.
- Inspection accuracy (% correct passes/fails). Why it matters: better inspection reduces escapes to customers. Example: raising inspection accuracy from 92% to 98% lowered warranty claims by 40%.
How to calculate cost savings and why you should do it:
Why this matters: dollars translate technical gains into business decisions.
Steps:
- Measure baseline costs: count defects, downtime minutes, warranty claims, and material waste for one month.
- Convert time into dollars: multiply reclaimed minutes by labor cost per minute (e.g., $0.50/min).
- Convert material savings into dollars: use purchase price per rivet or panel.
- Sum reduced warranty/claims using average claim cost.
Example: if you cut 200 defects/month, save 15 minutes per defect at $0.50/min, and save $0.10 in material per defect, monthly savings = (200×15×$0.50) + (200×$0.10) = $1,500 + $20 = $1,520.
How to estimate ROI and why it matters:
Why this matters: ROI shows payback and supports investment decisions.
Steps:
- Total your one-time implementation costs (training, tooling, software).
- Add recurring annual operating costs (maintenance, consumables).
- Project cumulative annual savings from step above for the payback period (typically 1–3 years).
- Calculate ROI = (Cumulative savings − Total costs) / Total costs.
Example: if implementation = $25,000, annual operating = $5,000, and annual savings = $20,000, then first-year net = $20,000 − ($25,000 + $5,000) = −$10,000 (loss), but cumulative two-year net = $40,000 − $35,000 = $5,000 giving ROI = 14.3% over two years.
How to run this measurement reliably and why it matters:
Why this matters: bad data gives bad decisions.
Steps:
- Define each metric precisely (unit, start/stop rules).
- Automate collection where possible (sensors, ERP logs).
- Set a baseline period (30–90 days) before changes.
- Review monthly and adjust definitions if needed.
Example: an assembly plant used a dedicated tablet form for inspectors and cut recording errors from 12% to 2% in six weeks.
Quick practical checklist you can use today:
- Pick 3 KPIs from the list and document their definitions.
- Run a 30-day baseline and export the raw numbers.
- Estimate dollar values for time and materials and compute monthly savings.
- Compare projected savings to your known costs to get a 1–3 year ROI.
- Repeat measurements monthly and compare to baseline.
A final tip: focus on the smallest reliable measurement you can collect daily — those add up to big business decisions.
Frequently Asked Questions
How Do Safer Riveting Workflows Affect Supplier Qualification and Incoming Material Inspection?
Like a lighthouse guiding ships, I find safer workflows tighten supplier audits and improve material traceability, so I demand clearer records, faster incoming inspection feedback, and higher consistent quality from vendors, reducing surprises and rework.
Can Safer Riveting Systems Be Retrofitted Into Legacy Assembly Lines?
Yes — I can retrofit safer riveting systems into legacy lines using modular adapters and phased integration; I’d map interfaces, pilot sections, train staff, and scale gradually so disruptions’re minimal while safety and quality improvements’re delivered reliably.
What Cybersecurity Risks Do Connected Riveting Tools and Cameras Introduce?
Like a house with unlatched windows, I worry connected riveting tools and cameras invite network intrusion and data leakage; I’d enforce segmentation, encryption, access controls, and monitoring so attackers can’t slip through or steal sensitive production data.
How Are Long-Term Workforce Roles and Job Descriptions Expected to Change?
They’ll shift toward oversight and analytics: I’ll focus on Skill evolution and Role fluidity, moving from manual riveting to supervising AI, interpreting data, maintaining robots, and teaching others, so jobs blend technical and supervisory tasks.
What Regulatory or Certification Standards Apply to Ai-Driven Riveting Systems?
You’ll love this: I must follow certification pathways like ISO 9001, ISO 13849, IEC 61508 and industry-specific standards, undergo safety audits, and meet data/privacy regs (GDPR/CCPA) plus AI transparency and validation requirements.